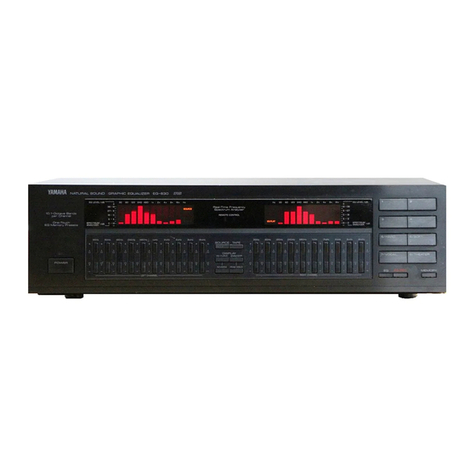
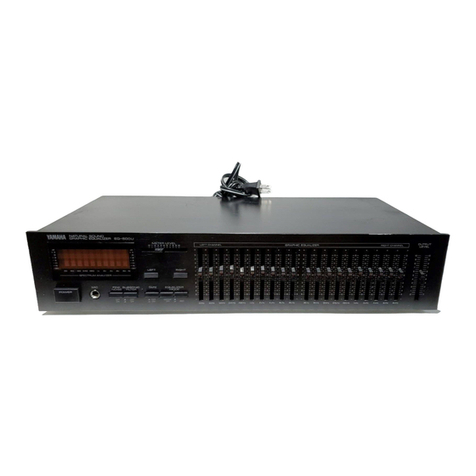
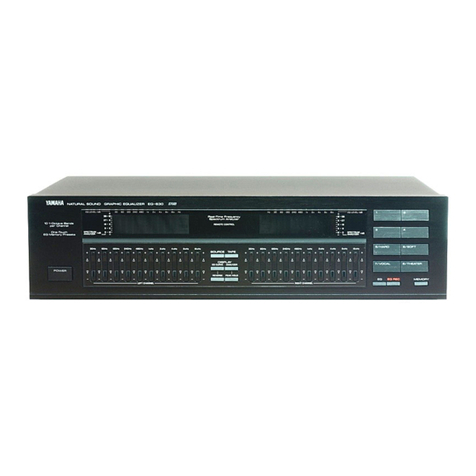
Yamaha EQ-1100 User manual


ENGLISH
•Thankyouforpurchasing the YAMAHAEQ-1100/U
graphicequalizer.
CAUTION:READTHISBEFOREOPERATING
YOUR UNIT.
1. TheEQ-1100/Uisasophisticatedgraphicequalizer.
Toensureproperoperation forthebestpossible
performance, pleaseread thismanualcarefully.
2. Choosetheinstallationlocationofyourunitcarefully.
Avoidplacing itindirect sunlight orclosetoasourceof
heat. Alsoavoidlocationssubjecttovibration and
excessivedust, heat, coldormoisture.Keepitawayfrom
suchsourcesofhumastransformersormotors.
3. Donot install theunitonothercomponent anddonot
placethetelevision set orcolormonitorontheunit.
4. Donotopenthecabinetasthismight result indamage
totheset, orelectricalshock. Ifaforeign object shouldget
intotheset,contactyourdealer.
5. Toprevent lightning damage, pull out thepowercord
during an electricalstorm.
6. When removingthepowerplug fromthewalloutlet,
always pull directlyontheplug; neverpull thecorditself.
7. Donotuseforcewhenusingtheswitches.
8. When movingthesetbesuretofirstpull out thepower
plugandremovecordsconnectedtootherequipment.
9. Donot attempt toclean theunit withchemicalsolvent
asthismightdamagethefinish.Useaclean,drycloth.
10. Besuretoread the"Troubleshooting"sectionfor
adviceon common operating errorsbeforeconcluding
thatyourunitisfaulty.
11. Keepthismanualinasafeplaceforfuturereference.
12. Voltageselector(Generalmodelonly)Thevoltage
selectorswitchon therearpanelofthisunitmustbesetfor
yourlocalmainsvoltagebeforepluggingintheACmain
supply.
WARNING
TOPREVENTFIREORSHOCKHAZARD,DONOT
EXPOSETHISAPPLIANCETO RAINOR
MOISTURE.
CAUTION: TO PREVENTELECTRICSHOCKDO
NOTUSE THIS(POLARIZED)PLUGWITHAN
EXTENSIONCORD,RECEPTACLEOROTHER
OUTLETUNLESS THEBLADES CANBE FULLY
INSERTEDTOPREVENTBLADEEXPOSURE.
SPECIALINSTRUCTIONSFORBRITISH
MODEL
IMPORTANT:
Thewiresinthemainsleadarecoloured in
accordancewiththefollowingcode.
Blue:NEUTRAL
Brown: LIVE
Asthecoloursof thewiresinthemainslead ofthis
apparatusmaynotcorrespondwiththecoloured
markingsidentifyingtheterminalsinyourplug,proceed
asfollows.ThewirewhichiscolouredBLUEmustbe
connectedtotheterminalwhichismarkedwiththe
letterNorcoloured BLACK.Thewirewhichiscoloured
BROWNmustbeconnectedtotheterminalwhichis
markedwiththeletterLorcolouredRED.

CONNECTIONS
(SeeFig.1.)
•Whenconnectingyourequipment,turnthepowerto
eachunitoffandmakesurethatyou havecorrectly
connectedtheLeft(L)andRight(R)channels.
•Fortheamplifierorreceiverconnections,pleasereferto
theamplifierorreceiverowner'smanual.
CONNECTINGAN AMPLIFIEROR
RECEIVER
Check fromtheconnection diagramthat youhavemade
thecorrectconnections.Pleasenotethat inputprocedures
and programsourceselection mayvaryaccording tothe
capabilitiesoftheamplifierorreceiverand the
connectionsbetweenit andthisunit.
• Toconnectanintegratedamplifierorreceiverusing
theACCESSORYjacks(SeeFig.2.):
TheACCESSORYjacksareprovidedon someof
Yamaha'snewest amplifiersandreceivers.
1.Connect theSEND jacksof theACCESSORYjacks to
theLINEINPUTofthisunit.
2.Connect theRECEIVE jacksof theACCESSORYjacks
totheLINEOUTPUTofthisunit.
Theprogramsourceselectedwiththeintegrated
amplifier'sorreceiver'sinput selectorcanbeequalized.
• To connectanintegratedamplifierorreceiver
withoutusingtheACCESSORYjacks (See Fig. 3):
1.Connect theRECOUTjacksof theTAPEjackstothe
LINEINPUTofthisunit.
2.Connect tneTAPEPBjacksoftheTAPEjackstothe
LINEOUTPUTof thisunit.
Thefollowingoperationscan becarriedoutviathe
amplifierorreceiver:
CONNECTINGATAPE DECK
Connectthetapedeck totheTAPE jacks. Connectthe
TAPEPBjackstothetapedeck'sLINEOUTterminal,and
theRECOUTjackstothetapedeck'sLINEINjacks.
FRONTPANELPARTS
AND FUNCTIONS
(See Fig. 4.)
1. POWERswitch
Press thisswitchtoturntheunit ON.Presstheswitch
againtoturntheunitOFF.
NOTE
Evenwhentheequalizerisnotinuse,besurethatthe
powercordisconnectedandthePOWERswitchisset to
ON.
Failuretodo somayresult inno sound ordistorted sound.
2.SPECTRUMANALYZER/EQLEVELdisplay
Thespectraorequalizerlevelsaredisplayed.
Thespectraaredisplayedusing barswhiletheequalizer
levelsaredisplayedusing dots.
WhenamicrophoneisconnectedtotheMICjack,the
spectraofthemicrophoneinputaredisplayed.
3. Channel indicators
During equalizerdisplay:
LEFT: Lightswhentheleft channelisselectedwiththe
channelbutton.
RIGHT: Lightswhentherightchannelisselectedwiththe
channelbutton.
LEFT RIGHT: Thetwolight whentheleftandright
channelsareselectedwiththechannelbutton.
Duringanalyzerdisplay:
LEFT: Lightswhentheleftchannelisselectedwiththe
channelbutton.
RIGHT: Lightswhentherightchannelisselectedwiththe
channelbutton.
LEFT +RIGHT: Light whentheleft and rightchannels
areselectedwiththechannelbutton.
4.PresetNo.indicator
Thepresetmemorynumber(P1toP7)isdisplayed.
5.MEMO indicator
When theMEMORYbuttonispressed, thisindicator
flashesforabout5seconds.
Amp
Program Source
Setting
WithaREC
OUTselector. Selectedwiththe
RECOUT Selector. SettheINPUT
SELECTORto
TAPE.
\ WithaTAPE
MONITOR
switch.
Selected withthe
inputselector. TurntheTAPE
MONITORswitch
ON.

6.InputIndicators
Thesourceselectedbytheinputselectbuttonsis
indicated.
7.EQUALIZERLEVELbuttons
Independent levelcontrolsfortheright, leftorboth
channelsareprovidedforeachofthetenfrequency bands
witha±12dBrangeofequalization.Thesebutton
operationsareeffectiveonlywhentheEQ buttonissetto
ONevenduringthedisplaychanges.
• 30 Hzband
Decreasing thisleveleliminatesverylowfrequency
rumble,orcompensatesawarpeddisc.
Increasingthislevelemphasizestheverylowfrequencies.
• 60 Hzband
Decreasing thislevelreducesAClinehumandthelower
tone.
Increasingthislevelemphasizelowtones,suchaspipe
organ,drums,bass,etc.
• 120 Hzband
Thisrangesupportsthelowerend ofthemusicand
controlsoverall depth.Decreasethisleveltoeliminate
"boomybass"causedbyroomacoustics.
• 240 Hzband
Thisisthemiddle-to-lowertonerange,butit hasan effect
on theoverallsound. Mainly,therichnessof thestringscan
becontrolled.Whenstringsareoverlywarmunderactual
listening conditions, decreasethislevel.
• 480 Hzband
Thisrangeisthefoundation of musicincluding both
instrumentsand thehumanvoiceanditcontrolsthe
overall powerof thesound.Asthislevelisincreased,
midrangesound willbecomemoreforward.
• 1kHzband
Thisrangeaffectsthepresenceof themusic(depthof
tone), and isespeciallyeffectivewhenplaying back
vocals.Increasingordecreasingthislevelwillcausethe
vocalstobemore"up front"ormorereserved.
• 2kHzband
Thisisthefrequencyrangewherethehumanearismost
sensitive.Boostingthelevelslightlywilladd brilliance,
crispness,etc. toinstruments.Cuttingthelevelslightly
makesforeasylistening.
• 4kHzband
Thehumanearisalsohighlysensitiveinthisrange. Mainly
effectiveforincreasing/decreasing theharmonics of the
primarytone. Boostingthisrangeabit makesstringsmore
intense.Over-intense, tiresomemusiciseasilylistenedto
whenthelevelisdecreased.
• 8kHzband
High frequencyrange.Strings,horns,etc.will be
emphasizedandthisgivesaslight differenceintoneglaze
and quality. Decreasingthelevelreducesoveremphasized
consonantsinvocalsandobjectionabletapehiss.
Increasingthelevel,ontheotherhand,improvesthe
sharpness ofsuchinstrumentsascymbals.
• 16 kHzband
Super-highfrequencyrange.Thisaffectshighharmonics
ratherthanthefundamentaltonesoftheinstruments
themselves,andhasaneffectonthedelicacyand
atmosphereofthemusic.Boostingthisleveladdsa
delicate,freshsound tocymbals, triangles,etc.
8.Presetmemorybuttons
Thesebuttonsareusedtostoreequalizercurvesinthe
preset memory.Bystoring desired curvesinthememory,
theycanberecalledbypressingthesebuttons.Upto4
equalizercurvescanbestoredinmemory.Inaddition,
three memoriesareprovidedwithstorageofequalizer
curvesthat areoptimizedforVOCAL,FUSIONand DISCO
music.Thesearestoredundermemorybuttons5to7, and
cannot berewrittenbytheuser.Theequalizercurve
obtainedbyautoequalizationisautomaticallystored under
theROOMEQbutton.
9.MEMORYbutton
Tostoretheequalizercurvebeingdisplayed inmemory,
pressthisbutton.Then,whiletheMEMO indicatoris
flashing(forabout 5seconds),pressoneof preset
memorybuttons(1—4).
10. EQ buttonand EQRECbutton
Tostartequalizationofasound,presstheEQbutton so
that theEQ indicatorlights.
Torecordtheequalizedsound,presstheEQ buttonthen,
theEQRECbuttonsothat theEQRECindicatorlights.
11. Inputselectbuttons
Press oneof thesebuttonstoselect thesourcetobe
listened to.
SOURCE: Toplaythesourceconnectedtotheamplifier,
ortorecordontocassettedeck 1or2.
TAPE1: Toplaycassettedeck 1connectedtothe
equalizer,ortodubthesoundtocassettedeck2.
TAPE2: Toplaycassettedeck 2connectedtothe
equalizer,ortodub thesoundtocassettedeck 1.
12. SUBSONICFILTERbuttonandcontrol
Usedtocutoff unnecessarylowfrequency.If theprogram
sourcetobeplayedcontainssuchsuperlowsound,press
theSUBSONICFILTERbuttontoturnthesubsonicfilter
ON. Thefrequency tobecut off canbeadjustedbythe
slidecontrol.
13. Channel buttons
Theseareusedtoselect thechannel(s)subject tothe
equalizerlevelcontrolorspectrumdisplay.
LEFT: Todisplaytheequalizerlevelsorspectrumof the
leftchannelonly.
RIGHT: Todisplaytheequalizerlevelsorspectrumof the
rightchannelonly.
L+R: Todisplaytheequalizerlevelsorspectrumofboth
theleftandrightchannels.Withtheequalizerlevel
display,theleftchannellevelsaredisplayedmore
brightlythantherightchannellevels.Withthespectrum
display,thesumoftheleft and rightspectrais
displayed.
14.DISPLAYmodebuttons
Theseareusedtoselect thedisplaymode.
EQCURVE: Todisplaytheequalizerlevels.
ANALYZER: Todisplaythespectrum.
15. AUTOROOMEQ button
Pressforautoequalization.
Thisbuttonfunctionsonlywhenthesuppliedmicrophone
isconnectedtotheMICjack.

16. PINK NOISE button
Pinknoise,whichisemittedbyabuilt-ingenerator,isa
randomnoisesignalwhichisdistributedatanevenlevelat
allfrequencies,andwhenmonitoredthrough thesupplied
microphone, allowsyou tomeasuretheacousticresponse
characteristicsof thelisteningenvironment. Toemitpink
noise,setthisbuttontoONandpressthechannelbutton
toselectthechanneltowhichpinknoiseisapplied.
17. SUB(subsonicfilter)indicator
LightswhentheSUBSONICFILTERbuttonisON.
18. ROOMEQindicator
LightswhentheROOMEQ buttonisON.
TheindicatorflasheswhentheAUTOROOMEQbuttonis
ON, toindicatetheautoequalizationoperation.
19. EQ/EQ RECindicators
LightrespectivelywhentheEQandEQRECbuttonsare
ON.
However,when theEQ buttonispressed OFFwhilethe
EQand EQ RECbuttonshavebeen ON, theEQ REC
indicatoralsogoesoff.
20.MICjack
Connect thesuppliedmicrophonetothisjacktomeasure
acousticcharacteristicsofthelisteningroomortoperform
autoequalization.Notethatthesuppliedmicrophoneis
notforsoundmixing.
21. REMOTECONTROLsensor
Thesignalfromtheprovidedremotecontroltransmitteris
receivedthrough thiswindow.
REMOTECONTROLTRANSMITTER
(See Fig. 5)
22. Presetmemorykeys
23. EQ ON/OFFkey
24. CHANNELkeys
25. DISPLAYmodekey
26. PINK NOISE key
27.MEMORYkey
28.LEVELUP/DOWNkeys
Afterselecting afrequency withtheremotecontrol
transmitter'sFREQUENCYUP/DOWNkeysorthemain
unit'sEQ LEVELbuttons, adjust thelevelof thefrequency
withthesekeys.
29.FREQUENCYUP/DOWNkeys
Theseareused toselect thefrequencysubject tomanual
adjustment oftheequalizerlevel.Intheequalizerlevel
displaymode,thedotofthelevelselected lightswithhigh
brightnessforabout7seconds.Intheanalyzerdisplay
mode,thelowestbarlightswithhighbrightness forabout
7seconds.
30. AUTOROOMEQ key
REMOTECONTROL TRANSMITTER
Withthesuppliedremotecontroltransmitter, most
operationscanremotelybecarriedoutandthesound
qualitycanbeadjustedatyourlisteningposition.
REMOTECONTROLOPERATIONRANGE
(See Fig. 6.)
Theremotecontroltransmittercanbeusedup toabout23
feet fromyouramplifierand mustbeaimedinitsdirection
forproperoperation.
When thedistanceoftheremotecontrolrangebecomes
short,replacethebatteries.
BATTERYINSTALLATION
(SeeFig.7)
Installthesuppliedbatteriesasshownbelow.
1.Removethebatterycompartment lidinthedirection of
thearrow.
2.Installthesuppliedbatterieswiththecorrect polarities.
3.Slideinthebatterycompartmentliduntilitclicks.
ELECTRETCONDENSERMICROPHONE
(SeeFig.8.)
Anelectretcondensermicrophoneforautoequalizationis
providedwiththisunit. Microphoneinput willbedisplayed
on thespectrumanalyzerwhenthemicrophoneis
connectedtothefront panelMICjack,themicrophone
switchisturnedon,andasignalof levelhigh enough tobe
measuredisoutputthroughthespeakers.*Removethe
batteryfromthemicrophoneif youdo not expect tobe
usingitforsometime.

Changing thebattery(See Fig. 9.)
©Removethecover.
(2)Insertbattery(size"AA", R06),orequivalentmaking
surethat thepositiveandnegativepolesarefacing in
theright direction.
(3)Afterthebatteryhasbeenchangedsnap thelidback
on.
Ifthebatteryrunsdown, thesensitivityofthemicrophone
will decrease. Changethebatteryassoonasit startsto
run down.
BatteryCautions
If thebatteryisreplaced incorrectly, dangerousleakage
orcorrosion mayresult. Beespeciallycarefulof the
followingpoints:
Whenreplaceing:
•Insert thebatterywithcorrect (+)and (-)indications
correctlyintothebatterycompartment.
Rechargeablebatteries:
•Therearetwotypesofbatteries;rechargeableand
nonrechargeable.Checkthecautionslabelon the
batterybeforeuse.
Toavoidaccidents:
•Neverdisassemble,heatorthrowabatteryintoafire.
When disposing,dealwithbatteriesasinflammable
matter.
•Donot short the(+)and (-) terminalsdirectly.
Whenbatteryleakageoccurs:
•Wipeoff theliquidinthebatterycompartmentand
replacethebatterywithnewone.
BEFORE OPERATION
DISPLAYMODES
Thedisplaymodesincludethespectrummodeand
equalizerlevelmode.
• SPECTRUMDISPLAY(LEFT), (RIGHT), (LEFT+
RIGHT)
AUTO-LEVELING FUNCTION
If thespectrumlevelbecomestoo high ortoolowdueto
theinfluenceof theinputsignallevel, theauto-leveling
functionadjuststhespectrumdisplaylevelinthree steps
(0dB,-6dB,-12dB)sothat thespectrumisalwaysatthe
centerofthedisplay.
• WHENINPUTLEVELISHIGH
High
-
brightness displayin
"sectionswherethe left and
rightlevels arethe same.
•
EQUALIZERLEVELDISPLAY(LEFT)OR(RIGHT)
•
EQUALIZERLEVELDISPLAY(LEFTRIGHT)
•
WHENINPUTLEVELISLOW

MEMORYFACILITY
Theunitisprovided withfourusermemoriesthatcan be
rewrittenbytheuser, withthree fixedmemoriesthat
cannot bemodifiedbytheuser,andwithoneauto
equalization memory.
• USERMEMORIES
Memories1to4canstorefoursetsof leftandright
equalizercurves.
• FIXEDMEMORIES
Memories5to7storesthefactory-set equalizercurves
that weredesignedforoptimumreproduction of different
typesofmusic.Eachcurvecan berecalledbyjust
pressingabutton.
(New, user-set equalizercurvescannotbestoredunder
thesebuttons.)
Memory5(VOCAL): Thelevelof2kHzisenhancedby4
dB, thatof4kHzenhanced by2dB, andthatof480 Hz
isattenuatedby4dB.Thisenhancesthevocalsound,
providing acrispsound.
Memory6(FUSION): Thelevelsof60 Hz,120Hz,
4kHz
and 8kHzareslightlyenhancedtomakethesound
sharperand refreshing.
Memory7(DISCO): Thelevelsof 60Hzand 120Hzare
enhancedformorepowerfulbass andbassdrum
sound, whilethelevelsfrom4kHzto16kHzarealso
enhancedforsteadyhightones.
• AUTO EQUALIZATIONMEMORY
InROOMEQmemory, theresult of autoequalization is
storedautomatically.
OPERATIONS
AUTO EQUALIZATION
1.Connect themicrophonesupplied asanaccessoryand
set themicrophone'sswitchtoON.
Placethemicrophonetothepositionandheightwhere
yourearswillbewhenlisteningtoyourstereo.
NOTES
•Useonlytheprovidedmicrophone.
Donotuseanothermicrophone,ortheauto
equalization couldbeincorrect.
•When usingthemicrophone,nevergraspit with
hands. Doing somayproducehumnoise. Always
usethesupplied microphonestand.
2.Set theEQ button toON.
3.PresstheRIGHTorLEFTchannelbutton.
4.Set thePINKNOISEbutton toON.
5.PresstheANALYZERDISPLAY button.
6.Adjusttheamplifier'svolumecontrolsothatthe
spectrumfrom30Hzto16kHzcomestothecenterof
thedisplay.
Theacousticcharacteristicofthelistening roomvaries
largelydepending on thelistening positionandthe
arrangementof furnitureand listeningequipment.
Beforestartingautoequalization, maketheroom's
acousticcharacteristicasflataspossiblebyarranging
thepositionsofthespeakers,furniture,etc.
NOTE
Donotsettheamplifierleveltoo low,orauto
equalization willnotstartorendand,even if it is
performed, theresult isnotalways reliable.
7.PresstheAUTO ROOMEQ button.
TheROOMEQ indicatorwill light, andtheauto
equalizationoperationforthelisteningroom
characteristicfortheleft channelstarts. Aftertheleft
channel,therightchannelisequalized, andthe
equalization operationsarerepeatedupto16timesfor
eachchannel,lastingabout 50seconds.
TheEQbuttonisturnedONautomaticallywhenthe
autoequalization starts.
During autoequalization,allbuttonoperations, except
forthePOWERswitchandAUTOROOMEQbutton,
arenot accepted.
8.When autoequalizationends, theadjustedequalizer
levelisstoredautomaticallyinthememoryofthe
ROOMEQ presetmemorybutton. TheEQbutton
remainsON,otherbuttonsreturntotheconditions
beforetheequalizationoperation, and theROOMEQ
indicatorlightscontinuously.
*Theautoequalization can adjustthelevelsof
frequenciesfrom60Hzto16kHz. (The30 Hzlevelisset
to0dB.)
*Tostop autoequalizationinthemiddleof theoperation,
presstheAUTOROOMEQbutton(toOFF).
CHECKINGAUTO EQUALIZATION
1.Connectthemicrophonesuppliedasan accessoryand
set themicrophone'sswitchtoON.
2.PressthePINKNOISE button.
3.PresstheEQ button toON, then press theROOMEQ
presetmemorybutton.Thefrequency characteristic
afterequalizationwill bedisplayed.
4.PressingtheEQbutton ONandOFFalternatesthe
frequency characteristicsbeforeandafterequalization.
*Afterconfirmation,besuretopressthePINKNOISE
button toOFF.
Normally, theattenuationof highfrequenciesislargerthan
forlowfrequencies,sothecharacteristicafterequalization
tendstoincludeenhancedhigh frequencies. If you find
thatthesoundafterequalization istoobrilliant,manually
attenuatetheequalizerlevelsof2kHzandmore.

MANUALEQUALIZATION
1.Set theEQ CURVE DISPLAY button toON.
Theequalizerlevelswill bedisplayedwithdots.
Ifyouwanttoadjustbasedonyourhearing while
observing thespectrumdisplay, set thedisplaymode
fortheanalyzermodewiththeANALYZERbutton.
2.Pressoneof channelbuttonstoselectthechannel(s)
tobeadjusted.
LEFT:Presstoadjusttheleft channel.RIGHT:
Presstoadjusttheright channel.L+R:Press to
adjusttheleft and rightchannelsimultaneously.
3.Set theEQ button toON.
4.PresstheEQUALIZERLEVELbuttonstoobtainthe
desiredequalizercurve.
HOWTOSTOREEQUALIZERCURVES
INMEMORY
1.Adjust theequalizerlevels.
2.Set theMEMORYbutton toON.
TheMEMOindicatorwillflashforabout5seconds.
3.WhiletheMEMO indicatorisflashing, pressoneof
memorybuttons1to4.
*Whentwoormorelevelsetupsarestoredunderone
presetmemorybutton,onlythelatest setupstoredin
memorywill bestored.
HOWTO RECALL PRESETMEMORY
Pressthepreset memorybuttonof thememorytobe
recalled.
Thepreset No.indicatorlightstoshowthenumberofthe
buttonpressed, andtheequalizercurveinthememorywill
bedisplayed.
IfamemoryisrecalledwhiletheEQbuttonisOFF,the
storedequalizercurvewillbedisplayedbuttheequalizer
effectisnotapplied.
LASTMEMORYFUNCTION
Thebuttonsettingandequalizerlevelsimmediatelybefore
turningthepoweroffarestored.
WhenthePOWERswitchispressed ONagain, thesetting
and levelsbeforepoweroff willberecalled.
MEMORYBACKUP
Thebuttonsettingandequalizerlevelsinthelast memory
and theequalizercurvesstoredinthepresetmemories
arestoredevenwhenthepowercordhasbeen
disconnectedfromtheoutlet, using acapacitorwhich
backsupthesememoriesforat least 2weeks.However,
theequalizercurvesstoredinthefixedmemorieswill not
clearedevenafter2weeks.If thelast memoryand
preset memorieshavebeenclearedafterthepowerhas
beenoff formorethan2weeks,itisnecessarytostore
presetmemoriesagain.
HOWTOSUPERIMPOSE EQUALIZER
CURVES
ThecurvestoredintheROOMEQmemorybutton,which
wasobtainedbyautoequalization,canbesuperimposed
withanothercurvewhichhasbeenstoredinoneofpreset
memorybuttons1to7.
1.PresstheROOMEQ button. The
ROOMEQ indicatorwill light.
2.PresstheROOMEQ buttonagain.
Only"P"ofthepresetmemoryNo.indicatorwillflash.
3.While"P" isflashing,pressoneofpreset memory
buttons1to7thatistobesuperimposed.
HOWTODUBTAPE
1.Select adubbingmodebytheinputselect buttons.
2.Whendubbing equalized sound,press theEQ andEQ
RECbuttons,andsettheequalizerlevelsasdesired.
3.Accordingtothedubbingmodeselected,setoneof the
cassettedecks toplaymodeand theothertorecord
mode.

TROUBLESHOOTING
Beforeassuming thatyouramplifierorreceiverisfaulty,checkbyfollowing troubleshootinglist whichdetailscorrectiveaction whichyoucan takeyourself. Ifthefaultpersists,orisnot;ntioned
in thelist, turnoff anddisconnecttheunit immediately,andget intouchwithyournearest Yamahadealer:
Fault Cause Cure
Powerisnotsuppliedeventhroughthe
Powerswitchisturnedon. •Thepowerplugisnotsecurelypluggedin. •Plugit insecurely.
Nosoundisheard. •Theinputslectorisnotset correctly.
•Thepinplugisnot properlyconnected. •Press thecorrectinputselector.
•Check theconnections.
Thereisno soundfromonespeaker. •Thepinplugisnotproperlyconnected. •Check theconnections.
Sound qualitycannotbeenhanced. •TheEQbuttonisnot pressed. •Press theEQbutton.
Spectrumanalyzerwill notlightup. •Theinputselectorisnotset correctly.
•Thecorrect DISPLAYmodebutton isnot pressed. •Press thecorrectinputselector.
•Press theANALYZERbutton.
Equalizerlevelwill notlight. •ThecorrectDISPLAYmodebuttonisnotpressed. •Press thecorrectDISPLAYmodebutton.
Equalizerlevel ofthedesiredchannel
will notlight. •Thechannelbuttonisnotsetcorrectly. •Press thedesiredchannelbutton.
Nopinknoiseduringautoequalization. •Themicrophoneisnotconnected. •Connect thesuppliedmicrophonetotheMICjack.
SPECIFICATIONS
RatedOutputVoltage
[1kHz,0.1%T.H.D).....................................................7V
RatedOutputVoltage.................................................1V
Max. InputVoltage
(1kHz)...........................................................................7V
Rated InputVoltage....................................................1V
InputImpedance.............................................22 k-ohms
FrequencyResponse ........................... 10 Hz—50 kHz,
-1dB
CenterFrequencies ..................30Hz,60 Hz,120Hz,
240Hz,480Hz,1kHz, 2kHz,
4kHz,8kHz,16kHz,
EqualizerControl Range.......................................±12dB
Signal-to-NoiseRatio (IHFANetwork)
At1Voutput................................ 113d8/2V,107dB/1V
TotalHarmonicDistortion
(20 Hz~20 kHz,1Voutput) ................Less than0.006%
MaximumOutput
(1kHz,T.H.D.0.1%).......................................................7V
SubsonicFilterCutoff
Frequency ................................. 5Hz—30 Hz(Variable)
(12dB/Oct)
MicrophoneInputSensitivity.................................. 0.3 mV
PowerRequirements
Generalmodel ............ 110/120/220/240V,50/60Hz
Europemodel ................................................220V, 50Hz
Australiaand U.K.models.............................. 240V,50Hz
U.S.A.and Canadamodels......................... 120V, 60Hz
PowerConsumption............................ Canadamodel:14W
Except Canadamodel:12W
Dimensions(WxHxD)..................... 435x122x290mm
(17-1/8"x4-13/16"x11-7/16")
Weight.......................................................3.8kg(8lbs.6oz.)
Accessories............................................ Pinplugcords(2)
Electret CondenserMic(1)
Micstand(1)
RemoteControlTransmitterRS-EQ11 (1)
Drybattery, size"AA"(R06)type(3)
*Specificationssubject tochangewithoutnotice.
This manual suits for next models
1
Table of contents
Other Yamaha Stereo Equalizer manuals

Yamaha
Yamaha GE-60 User manual

Yamaha
Yamaha EQ-500U User manual

Yamaha
Yamaha EQ-630 User manual

Yamaha
Yamaha GE-3 User manual

Yamaha
Yamaha GE-3 User manual

Yamaha
Yamaha NE-1 User manual

Yamaha
Yamaha EQ-630RS User manual

Yamaha
Yamaha NE-1 User manual

Yamaha
Yamaha EQ-500U User manual

Yamaha
Yamaha NE-1 User manual

Yamaha
Yamaha GE-60 User manual

Yamaha
Yamaha GQ1031BII User manual

Yamaha
Yamaha YDP2006 User manual

Yamaha
Yamaha EQ-630 User manual

Yamaha
Yamaha Q2031 User manual

Yamaha
Yamaha EQ-630 User manual

Yamaha
Yamaha Q2031A User manual

Yamaha
Yamaha Q2031A User manual

Yamaha
Yamaha Q2031A User manual

Yamaha
Yamaha EQ-550 User manual