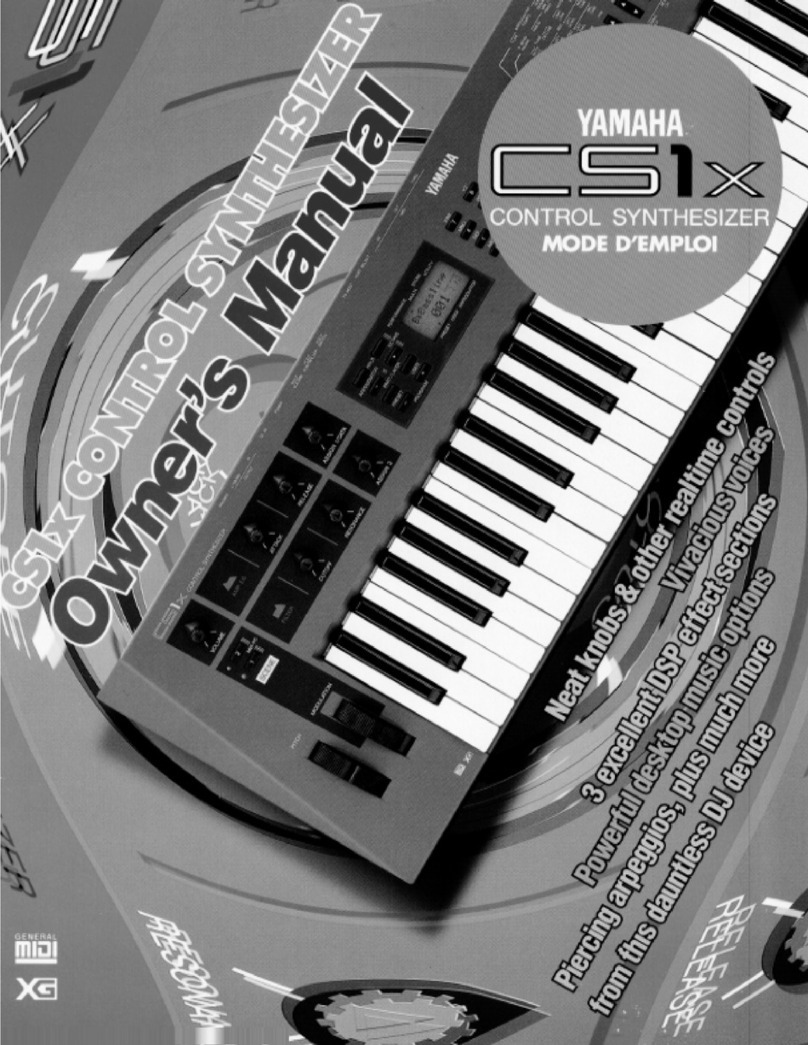
Yamaha CS1X User manual


➤
Foreword
With the CS1x Yamaha have created a multi-faceted entry-
level synth which to an attractive price offers endless possibili-
ties for live performance and music production in general.
YAMAHA EUROPA is aiming to provide users with an exten-
sive range of information regarding the use of the keyboard and
software.
Our thanks go out to
Peter Krischker
and
Matthias Sauer
, the
two
BLUE BOOK
authors who spent 3 months analysing
the CS1x in every detail to give you, the user, all the real-world
application tips, tricks and examples you need to help fully
exploit all the possibilities the CS1x has to offer.
We would also like to thank YAMAHA Corporation Japan/SY
Division for their support in realising the
BLUE BOOK
.
We are convinced that you will approve of this unprecedented
guide, and are looking forward to any comments or suggestions
you may have.
Gert Drögemüller
Product Manager for Synthesizer & Software
YAMAHA EUROPA
➤
About the Authors
Peter Krischker
has worked for YAMAHA EUROPA as
Sound Designer and Synthesizer Specialist for five years. In
conjunction with other programmers he created the CS1x fac-
tory sounds, as well as its demo songs.
Matthias Sauer
has programmed several synthesizer sound
sets for YAMAHA EUROPA, and also writes for a well-known
trade magazine.

➤
About
BLUE BOOK
CS1x
The CS1x brings colour into the current musical landscape.
It‘s simply fun to be inspired by its intelligent Arpeggiator
and fresh sounds, or the brilliant control possibilities of its
knobs and Scenes. We wanted to pass our enthusiasm about
this machine directly onto you. This is how the “
BLUE
BOOK
” came about, a special kind of workbook that will
give you an easy start into using the CS1x and provide an
overview of this innovative synthesizer‘s countless possibili-
ties.
The
BLUE BOOK
isn‘t aiming to be a manual. Rather, it
will describe the most important steps needed to put the
CS1x‘s potential into practice, unlike a manual which is
merely concerned with documenting each and every function
and parameter. The
BLUE BOOK
concept dictates that
you should be able to read through it from beginning to end.
Don‘t be deterred however by the broad subject range cov-
ered in this book; there are many sides to the CS1x. Never-
theless, to give you the quickest start possible, we
recommend you skip straight to the sections of particular
interest to you. If you require more in depth details about any
particular function, you can always look these up in the man-
ual.
Please consider the
BLUE BOOK
as a ‘guide’ to your
practical work. It is possible to learn about the underlying
foundations of CS1x sound and song programming ‘from the
ground up’ so to speak. We have prepared many exercises
and practical examples to help you understand each tech-
nique, function or problem you may encounter.
This practical guide is accompanied by two floppy disks,
each containing various sounds, sequences and other tools.
If you don‘t already know how to transfer these sounds from
your computer to the CS1x, please look at section “
Saving
and managing Performances
” in the introduction.
The “
Tutorial Disk
” contains several files with additional
sound examples, short demos and other MIDI files which we
will reference in the text. A second diskette, “BLUE X-TRA”
contains the User Bank Performances (Factory) and further
factory sounds (“EXTRA Bank”) which can be used to replace
the User Bank. The
BLUE BOOK
Appendix contains a
summary of all these files.
Finally we would like to point you to section “
The little trou-
ble shooter
” at the end of this book. This short checklist
attempts to help with any problems you may encounter. We
hope you have a lot of fun with the
BLUE BOOK
and your
CS1x.
Peter Krischker / Matthias Sauer
Co-ordination, Design, Layout:
Ronald Bias, Hamburg
© YAMAHA EUROPA GmbH
Siemensstr. 22-34, 25462 Rellingen (Germany)
Reprint in whole or in part by express permission only.
CS1XUGBE01YE

Contents
➤
Introduction
❯
First steps –
Listening to the Preset sounds and Demos . . 5
❯
At a glance . . . . . . . . . . . . 5
❯
Sound Organisation . . . . . . . . . 6
❯
Performance Storage and Management . . . 7
➤
Analogue
Workshop
❯
Sound Central – The Oscillator . . . . . . 9
❯
The Filters – Tastebuds for your Ears . . . . 10
❯
Dynamic Helpers – Envelopes . . . . . . 10
❯
Helper Motors – the LFOs. . . . . . . . 12
❯
About the Little Things . . . . . . . . 13
❯
Résumé . . . . . . . . . . . . . 14
➤
Arpeggiator –
A Box full of Tricks for all Occasions
❯
First Steps . . . . . . . . . . . . 16
❯
Sound Rhythm Tricks . . . . . . . . . 16
❯
Fun to the power of 15! . . . . . . . . 17
❯
Effects – used in a different way. . . . . . 18
❯
Hard Chord Work . . . . . . . . . . 18
❯
Keeping in line . . . . . . . . . . . 19
❯
Let‘s Groove!. . . . . . . . . . . . 20
➤
Performance Mode –
Practical Knowledge
❯
Scenes – what are they? . . . . . . . . 21
❯
Day to Day things . . . . . . . . . . 21
❯
Why Scenes? . . . . . . . . . . . 22
❯
The Effects . . . . . . . . . . . . 22
❯
Live Application . . . . . . . . . . . 24
❯
Split Performances . . . . . . . . . . 25
❯
Pulling out all the Stops . . . . . . . . 26
➤
Song Production: An Easy Start
❯
Songs in Performance Mode:
Six steps to success . . . . . . . . . 27
❯
The traditional approach:
Multi settings at the machine . . . . . . 28
➤
Song Production: The Basics
❯
What is “XG”? . . . . . . . . . . . 31
❯
Performance Mode or Multi Mode?. . . . . 31
❯
Where is the Multi Setup? . . . . . . . 32
❯
What is a “MIDI Event”? . . . . . . . . 32
❯
Decisions, decisions: Banks and Programs . . 33
❯
Who is controlling whom? . . . . . . . 34
❯
Everything under control: NPRN and RPN. . . 35
❯
Exclusive: Sys-Ex messages . . . . . . . 37
➤
Song Production:
More Tips and Tricks
❯
Part Mode and Drum Setups. . . . . . . 39
❯
Things worth knowing about the Variation Effect 39
❯
Still more Performances! . . . . . . . . 40
❯
Split Performances – used to great effect. . . 41
❯
Utility mode preparations. . . . . . . . 41
➤
Song Practice:
A View behind the Scenes
❯
Example 1: Sweep Run . . . . . . . . 43
❯
Example 2: “Blue Fuzz” . . . . . . . . 45
❯
Example 3: “Tekk it” . . . . . . . . . 46
➤
Appendix
❯
Summary of “Tutorial Disk” Files . . . . . 47
❯
Overview: “BLUE X-TRA” Disk Files . . . . 47
❯
The little Trouble Shooter. . . . . . . . 49
❯
Index . . . . . . . . . . . . . . 51


5
Introduction
®
Now that you have unpacked your
CS1x, placed it onto a firm surface and
wired up and plugged everything in cor-
rectly, we would like to accompany you
a little during this first contact with your
new synthesizer. Naturally you will want
to listen to the demo songs straight
away to get a feel for the tonal possibili-
ties of the CS1x.
First steps – Listening
to the Preset sounds
and Demos
Press the Performance and Multi keys simultaneously. You
can now hear the first song “FRIDGE”, all the other
sequences will follow automatically. You can of course man-
ually select each of these song examples via the numeric
pad.
A total of
8 demos are available. Although each sequence
is primarily concerned with showing the CS1x in its best
light, the sequences are still quite different: by tradition, the
first four demos (0-3) set out to prove the song production
abilities of the CS1x and it‘s possibilities as a stand-alone
workstation, whilst the remaining songs deal with the CS1x‘s
more outstanding features. Here is a quick description:
Knob Tech (4): Sequences that demonstrate real-time
knob control for Dance & Techno productions.
(programmed by Peter Krischker, YE)
Analuner (5): Synthesizer sounds of the 70‘s and 80‘s. If
you appreciate classic vintage sounds you must take a listen
to this demo.
(programmed by Johannes Waehneldt, YE).
Arp Tech (6): Here you will hear one of the CS1x highlights,
the Arpeggiator. Unusual sequences and likewise sounds.
(programmed by Johannes Waehneldt, YE).
Transit (7): We finish on a few sequences that again de-
monstrate the real-time control and modulation possibilities
of the CS1x.
(programmed by Johannes Waehneldt, YE).
The factory preset sounds chosen for the CS1x clearly
emphasise its synthesizer character. If you are at all unsure
to what uses a particular sound may be applied, let yourself
be guided by the sound‘s category (Sq=Sequencer,
Ba=Bass, Pf=Piano etc. – more about this can be found in
the manual).
Try this out at all cost: The CS1x Arpeggiator already
shines brightly with the first 12 Performances. Press any key
and listen how the Arpeggiator translates the note. To under-
stand this better, switch the Arpeggiator off (key bearing the
same name, to the top left of the LC-Display). Also, try using
the unique Scene switches (just above the two wheels) with
the preset sounds straight away; first press one, than the
other, and finally both simultaneously, and use the Mod
wheel, too. It‘s best to aquaint yourself with the CS1x Con-
trol knobs right from the start. Take particular note of the
different Assign 1/2 settings (=Knob3/6). These will no
doubt give you plenty of ideas for your own sounds.
If you‘re inclined to head straight for the more traditional
piano, organ or string sounds, don‘t panic – here, too the
CS1x is at home. After all, it contains all the GM/XG sounds.
If you have not yet come across these sounds, why not press
the MULTI key. You can now try out the most important XG
voices using the PROGRAM keys (bottom left of the LC-Dis-
play) in your own time. Be advised however that all sounds
initially utilise only a reverb effect.
More conventional sounds, complete with Layer and
effect settings can be found in the Preset bank‘s last few
memories (beginning with P078). By the way, several of the
Blue Book sections will look at the factory sounds in more
depth.
At a glance
Techno and Dance have heralded the comeback of ana-
logue synthesizers more then any other music style. Whilst
trying out some of its Presets you will already have come
across some of the many exemplary analogue type sounds
the CS1x has to offer. Without a doubt, the range of sounds
available is pretty good! It‘s even better however to be able
to shape Performances to get the required result, or program
one from scratch.
Starting out is never easy. That is why we would like to
begin with an easy to understand tutorial which covers the
most important components of the classic synthesizer, the
“A nalogue Workshop”. Let us introduce you to the wonder-
ful world of synthesizer programming with the CS1x. As an
extra special treat, a complete sound bank (“TUTORI-
ALPFM.MID”) with detailed sound examples awaits you
inside. We thought it best to save you from the tedious task
of manually punching in data. You will be able to concentrate
fully on the material at hand and replicate each given exam-
ple directly on your CS1x.
It doesn‘t really matter whether you have already worked
with various analogue synthesizers, or if you have never even
heard of this feature – the integrated CS1x Arpeggiator will
simply knock your socks off: compared to earlier Arpeggia-
tors, the CS1x raises the stakes with complete arrangement
structures, including Filter, Pan position modulation and the
like. Enough to awaken any musician‘s playing instinct.
However, to use this feature effectively you should fully
familiarise yourself with all its possibilities and the required
procedures. The next chapter of the Blue Book will take
you through all the steps you need to consider when using
the Arpeggiator function. That‘s why an intuitive user inter-
face is so important, so that you don‘t get lost in a myriad of
menus. The CS1x is totally deserving of its “Control Synthe-
sizer” title in this respect. Its six controllers add particular
weight to this claim: The Sound Control Knobs can be
assigned to aid performance in many different ways using
the Utility mode (see the chapter about song production
basics, section “Who is controlling Who?”). Worthy of atten-
tion also are the two Scene switches that are used to ‘freeze’
two complete controller positions which can then be ‘mor-
phed’ into each other. You will find useful examples of this in

6
chapter “Performance Mode – Practical Knowledge”, where
we also deal with subjects relevant to ‘live’ musicians. In
short, the entire user interface is praise worthy. For example,
the EDIT key has finally been eliminated; the EDIT mode is
automatically activated the minute you call up any parameter.
Modern synthesizers however have to offer more than
excellent sounds and a high degree of user-friendliness; they
also need to excel as a stand-alone sound source for song
production.
The CS1x dispenses with an “on-board” sequencer.
Instead it rightly concentrates on its multi-timbral abilities,
i.e. the ability to simultaneously control as many sounds as
possible. This is an area in particular where the CS1x has a
lot to offer.
No less than 32 voices are available for all types of song
production. This applies not only to the Multi mode, the Per-
formance mode can be used multi-timbrally, too, and can
therefore also be used for song production. What we are
talking about here is the parallel Multi mode, where a Per-
formance is the foundation on which a further 12 Parts (indi-
vidual sounds or drum kits) can be built – an impressive
‘first’. An alternative to this approach can be found in the
Multi mode, which corresponds to the XG mode, itself an
extension of GM (General MIDI).
If you want to deal with any questions arising from all this,
take a look at chapter “Song Production – The Basics”. It
explains (amongst other things) all about the XG standard,
examines the advantages and disadvantages of the Perfor-
mance and Multi modes in depth, and looks at how song and
Multi settings can be controlled in real-time using Controller
or System Exclusive messages.
If you are eager to get going however and wish to produce
good songs with the minimum of technical fuss, read chap-
ter “Song Production – An Easy Start”.
We recommend you read the chapter following if you
prefer to use the more conventional way of changing Multi
settings at the keyboard. The magic phrase for this alterna-
tive is “Dump Request”, a System Exclusive message that
allows the sequencer to request a dump from the CS1x that
contains all the Multi settings – a very important feature!
Any final hurdles you encounter should be resolved in the
following chapters. These contain many tips and tricks for
song production and many other practical examples.
Now that you are familiar with the contents of the Blue
Book, we would touch upon some global subjects that you
should definitely know about – Performance structure and
management.
Sound Organisation
The CS1x sound structure requires explanation. So let‘s
take a quick look.
The CS1x contains two Performance Banks with 128
memory locations each: the PRESET bank (ROM) and the
USER bank (RAM). The latter can be overwritten with a third
bank, the EXTRA bank (Additions). You can load the EXTRA
bank from the supplied disk as a SMF (“EXTRAPF.MID”) and
then transfer it to the CS1x (see Sound Overview in the
Appendix). If necessary, consult section “Performance Bulk
Dump”.
A Performance is made up of four Layers. You can assign
two entirely different kinds of voices to these:
•XG Voices, which are contained in 44 banks and orga-
nised into 480 Programmes (DATA LIST, pages 6 – 9).
The TG300B Voices offer a special selection of XG
voices (DATA LIST, page 10/11), which in practice how-
ever is mostly irrelevant.
•“Voices for Performances” (DATA LIST, page 12/13);
which from now on will be referred to as M a t erial
Voices.
We should like to elaborate on these “Material Voices”.
All 930 Material Voices – with the exception of the drum
sets – are organised into 12 banks (Pre 0-11). You will see
from the table “Voices for Performances” that each bank is
utilised to different extents. This is because the Material
Voices are the result of the programming of PRESET, USER
and EXTRA Performances. Therefore: the Material Voices are
identical to the Layers of these Performances. Take a look at
this extract from the table below:
Table: Preset Performances, Layers
and Material Voices
Layers 1-4 of the Preset Performances make up Material
Voice Banks Pre 00 to 03. Only bank Pre 00 is fully assigned.
Quite logical really, as each Performance contains at least
one Layer. In contrast, Bank 03 is hardly used at all, as Per-
formances rarely use all 4 Layers.
This principle also applies to the USER Performances:
Here Layers 1 – 4 are banks Pre 04 to 07 respectively. Finally,
the user-loadable EXTRA Performances rely on the Addi-
tions, i.e. banks Pre 08 to 11.
If this is all getting far too theoretical for you, here‘s a little
exercise that you can try.
PERIMENT:
Select Performance P-047 (BA:Bassline) and call up
Parameter Bank and Program, one after another. The display
will show “PRE0” and “Ba:Baslne A#47”. A quick glance to
table “Voice for Performances” confirms that you are dealing
with Material Voice “Pre 00 – PGM 47”. Now select Pro-
grams #48, #49, #50 etc. and compare the display with the
Voice table. Everything clear now?
You have just gained a better insight into the sound struc-
ture of your CS1x, and at the same time learned how differ-
ent Voices are chosen within a Performance. Let‘s take
another step along this route.
PERIMENT:
Let‘s start with the last settings for Performance “Bassline”.
Select any Program from the Voice table. Memorise the Bank
and Program numbers (e.g. “ld:Mini QSA” = Pre 08 + PGM
#40), then input these values by calling up BANK and PRO-
GRAM respectively.
Now select Layer 2 (PART LAYER key / +). Selecting BANK
will show “Bank off” on the display. Let‘s make use of the
DATA knob for a change – after all, you need to step through
all the XG banks before you get to Material Voice banks Pre
00-12. This shows by the way that XG banks can also be
Preset
Performances Layer 1 =
Preset 0 Layer 2 =
Preset 1 Layer 3 =
Preset 2 Layer 4 =
Preset 3
001 Dr:um Trax1 Dr:umTrx1 A
002 Sq:SinArp Sq:SnArp1 A Sq:SnArp1 B
003 Sq:Kirmes Sq:Kirmes A Sq:Kirmes B Sq:Kirmes C
004 Sq:Classic Sq:Classic A Sq:Classic B

7
used for Performance layers. Now try to find a voice that
works with the sound just set for Layer 1. You have just found
the basis for your first sound creation!
The more alert readers among you may have noticed the
mention of bank Pre 12 in the last X-PERIMENT. This little
riddle is easily solved by looking at the DATA LIST on page
14. Here you will find a further 6 Material Voices as drum
kits, which can be found in Performances 128 to 128. These
drum sounds are discussed in detail in section “Techno/
Dance Productions with the CS1x”.
All the Voices shown in the DATA LIST (pages 12 – 14) can
also be used for Multi Parts 5-16 in the Performance mode
(in addition to the XG voices and drum kits). There they can
be selected using Bank/Program changes. More about this in
chapter “Song Production – the Basics”, which also looks at
the somewhat neglected XG Voices in greater detail.
Performance Storage
and Management
You can transfer single Performances or complete Perfor-
mance Banks from the CS1x to any computer, be it a PC,
Atari or MAC, and vice versa with the aid of a Bulk Dump.
This allows you to save this sound data to floppy or hard disk.
The same thing can be achieved with MIDI Data Recorders
(as described in the manual) like. the MDF2. If desired you
can keep an archive of CS1x Performances. If you have little
or no experience in this field, we recommend you read this
section carefully. First we would like to take a look at trans-
ferring all USER Performances and UTILITY settings to
the computer and then back to the CS1x.
PERIMENT:
Call up UTILITY – BULK DUMP and dial-up function “Bulk
Dump All”. The following sequencer settings are required:
MIDI Thru off, SysEx on, a slow tempo (around 80 bpm).
Now start recording, wait for the count-in to finish and then
start the transmission by choosing YES at the CS1x. Stop
the sequencer as soon as it finishes receiving data, and save
the newly recorded track, which now contains a long list of
Sys-Ex blocks, to a floppy or a hard disk.
Transmitting the data back is just as easy. Warning: don‘t
let yourself be irritated by the note about “Bulk Dump
Receive” in the manual (page 42). This function, or one like
it, simply isn‘t available on your CS1x! Data transmission is
instead achieved simply by playing back the recorded
sequencer track. You are not even required to set anything up
on the CS1x. By the way, the display should confirm the
incoming data with a “Receiving” message.
If you want to continue with the X-PERIMENT, load files
TUTORIAL.MID (from the TUTORIAL DISK), CSUSER.MID,
and CSEXTRA.MID (from the “BLUE X-TRA” disk”) and send
the respective banks to the CS1x.
Now that you have transferred various banks to the CS1x,
you may wonder how Performances based on different banks
can be combined. Simple: use the UTILITY function “Bulk
Dump 1 Perf”!
PERIMENT:
Let‘s say you want to copy Performance 001 “Pf Wurlitza”
from the Extra bank to the User bank. First of all send the
Extra bank as described above (“CSEXTRA.MID”) complete
from the sequencer to the CS1x. Select memory location
USER 001. Now call up UTILITY – BULK DUMP – “1 Perf”,
start recording a new sequencer track (set this up as in the
previous X-PERIMENT) and press YES. Follow this by send-
ing the complete USER bank (“CSUSER.MID”) to the CS1x.
Finally, play back the earlier recorded Bulk Dump for the
Extra Performance “Pf. Wurlitza”. The sound is now initially
held in the working memory of the CS1x, and can now be
saved to the USER memory of your choice using STORE.
It should now be clear how single Performances are man-
aged. As a rule of thumb however you will want to transmit
one bank‘s several Performances into another. For this we
would recommend you first send all the required Perfor-
mances separately to the sequencer (1 track per sound!).
Next transfer the target bank; now you can finally transmit
the required Performances back to the CS1x, one by one.
Remember however to STORE each Performance as it
arrives, otherwise each transmitted Performance would
simply overwrite the last held in the temporary work space of
the CS1x. And it goes without saying of course that when
finished you should send your newly created bank com-
pletely to the sequencer using “Bulk Dump All”, and there
save it to floppy or hard disk.

8

9
Analogue
Workshop
Í
The CS1x’s easy to understand tone
generation ability is largely based on
analogue synthesis. The following step-
by-step guide will serve as an introduc-
tion to the analogue building blocks
used in the CS1x.
Our tips and tricks can be applied not only to analogue syn-
thesis, but all kinds of tone generation. Naturally, we can't
cover every possible detail of analogue synthesis.
Before we begin, a quick note about the fundamental dif-
ferences between traditional analogue parameters and those
found on your CS1x. Oscillators on the CS1x, unlike ana-
logue oscillators, consist of complete timbres with filter,
envelope and LFO settings (Material Voices). Therefore, any
parameters that you set are 'offsets values' to the settings
used in a particular sound, in other words the parameters
you set may appear to audibly contradict the displayed
values or Knob positions. As always, let your ears decide.
Please note: although the following text refers to the ana-
logue synthesizers’ classic sound components like VCO, VCA
or VCF, they are of course implemented digitally in the CS1x.
Sound Central –
The Oscillator
The heart of the classic synthesizer is the oscillator, or VCO
(Voltage-Controlled-Oscillator). The oscillator provides the
raw waveforms, which in the CS1x consist of samples with
stable tuning. Usually these samples consist of sawtooth, tri-
angle and square waves, as well as several pulse modulated
waves. The VCO also controls the pitch of its wave. Coarse
tuning is performed in semi-tone steps (Note Shift), fine
tuning in cent steps (Detune), LFO's or envelope generators
are also frequently used to modulate the pitch of the oscilla-
tor. This also applies to the VCA, which is responsible for
amplifying the oscillators' audio outputs so that you may
hear them. The CS1x Volume parameter is the equivalent of
the VCA.
Picture the CS1x's four Layers as four separate VCOs. Each
oscillator’s waveform can be selected using the Bank and
Program Change commands. As the CS1x doesn't provide
for Material Voices with pure synthesizer waveforms, it
would be necessary for you to laboriously create unfiltered
pulse and sawtooth waves… don't worry, we have taken care
of this rather dry and long-winded task: you will find many
variants on the classic synthesizer waveforms in the first
dozen memories of the Performance Tutorial Bank. You
may of course employ any Performances as an Init Voice, as
a reference sound to browse through the Material and XG
voices, or simply to practice on. By the way, if you haven’t
already ‘injected’ your CS1x with our additional sound data
(TUTORPF.MID), you should do so now (see section ’Perfor-
mance Bulk Dumps’). You will not be able to successfully
complete our Analogue Workshop without it.
Lets begin with a simple but immensely useful example: if
you are using two or more oscillators to generate your sound
you should always detune each oscillator a little using the
Detune function. This single parameter can be used to liven
up your sound. To hear this effect for yourself, try altering the
Detune parameters of two CS1x VCOs.
PERIMENT:
Select Performance TP001. Both of this sound’s oscillators
are set to exactly the same frequency, resulting in a some-
what ‘flat’ sound. Now change the first VCOs Detune setting
to a negative value, and the second to a positive one, say -
2,00 and +2,00. Feel free to experiment with other values.
Notice how these contrasting frequencies affect your sound.
Be careful however not to detune just one of the VCOs (for
example 0 and +4,00), as this can ruin the overall tuning of
your sound! The two Detune values should always cancel
each other out when added together. By the way, some Per-
formances (namely TP003 or 005) use this Detune effect
already.
Coarse tuning is another basic tool in the construction of
sounds. The most practical use of coarse detuning involves
transposing a VCO by one or more octaves. When doing this
however, always make sure that the Detune parameter is set
to 0. If the fancy takes you, you may even transpose an oscil-
lator or CS1x Layer by a whole 4 Octaves! With a bit of luck
you can program some impressive sounds using this feature.
Intervals other than octaves may also be used for some spe-
cialised sounds, mostly 4ths or 5ths (5 or 7 semi-tone inter-
vals), major or minor 3rds (3 or 4 semi-tones) aswell as
major or minor 7ths (10 or 11 semi-tones).
AMPLE:
Sounds with transposed oscillators can be found in the
CS1x Preset bank. The Layers of Performance “Sq: RytField”
(P006) for example are tuned to 3rds (Note Shift -12/+04).
Please note: to use this sound in minor harmonies you will
need to adjust the second Layer‘s Note Shift value to +3
(minor 3rd). In contrast, Performances “Sc: TheWerks”
(P022), “Fx: Orient” (P044) and “Ld: E-no” (P064) are down-
wardly transposed by a 4th. 5th layering is just as popular.
Examples here are factory-set sounds “Sq: Strobe” (P009),
“Fx: Morning” (P038), “Ld: Fifths” (P065) and “Ld: Croma”
(P073).
So, now you know how and when to tune the oscillators,
i.e. the CS1x Layers. We all know however that ‘it‘s the
sound that makes the music’, so let‘s look at the VCO wave-
forms in more detail. Just as different synthesizers’ filters all
sound very different, VCOs, too, all have their own distinctive
sound. Some analogue synths even allow smooth step-free
transitions between sawtooth and triangle waves, two wave-
forms per oscillator and other such fun things. The CS1x isn‘t
the odd one out here. It is possible for instance to coax two
Sawtooth Waves with different sound characteristics from
it. The first wave corresponds to the sawtooth waves that
have already proven successful with YAMAHA‘s SY99 and
SY85 synthesizers. New here however is the second, more
transparent sawtooth waveform (TP004). We don‘t wish to
be secretive about this one: the sound is based on a multi-
sample, transposed by an octave via the pitch envelope,
which gives the sound its fresh tonal shade. There won‘t be
many of the dinosaur analogue synths that can serve up such
a brilliant waveform – this wave is particularly recommended
for Dance and Techno tracks. By the way: you will probably
want to use this wave as a starting point for your own ana-
logue sounds, so we have added a second VCO for you and
detuned both oscillators against each other (TP003/005).
Another of analogue synthesis’ strong favourites is the
Square Wave (TP006): this is actually a specific pulse wave-
form with a peak-trough relationship of 50%. To maintain
some oscillation you again have to use two VCOs and slightly
detune them against each other. The square wave however
is more sensitive to this than the sawtooth wave. The best
10
results are obtained with minimal detuning. You may also
need to reduce the second VCO‘s level a little (TP007). To be
honest, though, this really is a matter of personal taste.
Pulse waveforms, unlike periodic square waves, describe
the percentual relationship between the wave’s peeks and
troughs. As a rule of thumb: moving further away from the
consistent square oscillations (50%) results in an ever more
nasal sound. Pulse widths less than 10% are – musically
speaking – less prolific. At worst your waveform will
approach a pin shaped pulse, i.e. the wave is barely audible.
Contained within the wave reservoir are many useful pulse
waves, with wave ratios varying between 25% (TP008) and
10%(TP009). The latter is often used to emulate the sound
of a clavinet.
Another typical tool in analogue synthesis is the oscillator
synchronisation (or oscillator sync), originally devised to
avoid the inevitable drift between two VCOs. This method
opens the doors to the delectable ‘sync sounds’, two exam-
ples of which exist as ROM samples in the CS1x’s memory
(TP010/011).
The VCO Waveforms:
Sawtooth, Square, Pulse
Particular attention should also be paid to the Sine Wave.
This purely electronically generated wave is alone in not
having any harmonics at all, and as such is practically use-
less for subtractive synthesis. Nevertheless, the sine wave
can be found in many a synthesizer’s VCO section, and is
therefore also included in our Tutorial Bank (TP012). Just
how this wave can be used is fully explored in section “Pull-
ing out all the Stops”. Much more common is the Noise Gen-
erator, a further source of sound apart from the VCOs. In the
era of digital synthesis, the poor old noise generator has
taken somewhat of a back seat. Nevertheless, noise genera-
tion still has many interesting applications.
The Filters –
Tastebuds for your Ears
Let’s take a look at subtractive synthesis’ most important
element, the Filter, or VCF (Voltage Controlled Filter). This
sound component removes selected frequencies from your
source material, i.e. the harmonically rich VCO waveforms.
The most common used type of filter is the low-pass filter,
which also helps the CS1x to its characteristic sound. Tech-
nically, the filter removes the upper frequencies selected by
it’s programmable cutoff point, whilst the lower frequencies
beyond this point pass through unaffected. Specifically, the
CS1x filter implementation revolves around a version of a
low-pass filter with a 12db/Oct rolloff. This means that fre-
quencies will be attenuated by 2kHz at 12dB, 4kHz at 24dB,
and so on, and as such is suitable for most applications.
The filter also has a Resonance Parameter, which accen-
tuates the frequencies near the cutoff-point. Resonance has
many applications beyond the typical character it lends to
many synthesizer sounds. Heavy use of resonance, coupled
with the above mentioned noise generator can result in many
attention-grabbing sounds. On the other hand, a gentle dose
of resonance can cleverly be used to ‘thin out’ a sound in a
way not possible by simply reducing its volume. In fact, it is
generally true that increasing the resonance a filtered signal
will make it sound quieter. Pay particular attention to your
sound’s bass region; it’s here where filtering can affect the
perceived ‘stability’ of your sound. Of course you may also
use resonance with the filter wide open. The following exam-
ple will illustrate how and when resonance may be used on
its own like this.
PERIMENT:
Select the harmonically rich choir sound (TP014). In the
context of a rhythm heavy dance arrangement, the choir
sound would benefit from a little more ‘transparency’. But
how? The filter frequency is already optimal, whilst you have
other plans for the effects. The solution here is a little trick:
use the resonance as a kind of ‘pseudo enhancer’, a psycho-
acoustic studio tool used to add high frequencies to ‘dull’
audio signals. Turn up your resonance! You will find your
sound has become ‘fresher’, and will now sit better in your
arrangement. Of course this trick can be used in other situa-
tions, for example to add a glossy sheen to dull bass drums,
tom samples and cymbals.
Exactly how Cutoff and Resonance will affect your sound is
easily revealed – simply play with the CS1x’s equally labelled
Knobs. Both parameters are fundamental in the creation of
sound, and their ability to give shape to sound are immense.
The low-pass filter’s abilities range from the simple ‘darken-
ing’ of a sound right through to fiddly tasks. One of these is
the creation of Formants. This, in simple terms, is the use of
resonance to accentuate a specific frequency range, so that
all partial tones in this region regardless of their fundamental
root frequency are noticeably pronounced. The vowels found
in human language (A-E-I-O-U) rely on characteristic for-
mant areas. To clarify all this, take the sound (TP015). Here
the two VCOs used are filtered differently, the first without
any resonance. The second however uses heavy resonance
to produce typical formants, which can be changed using
varying cutoff settings.
Dynamic Helpers –
Envelopes
All the sound components we have looked at so far have
been ‘static’ in their effect, that is to say that they haven’t
affected a sound differently over time. Enter the Envelope
Generators of the CS1x. Envelope generators control Volume
(AEG), the Filter (FEG) or the Pitch of your sound (PEG). An
envelope follows the traditional ADSR model:Attack con-
trols your sound’s fade-in time, Decay determines the time it
takes to reach the Sustain level, Sustain controls the volume
your sound will settle at whilst holding down a key, and
finally Release sets how long your sound will ring out after
releasing the key. Uniquely, the pitch envelope adds Intensity
and Level parameters to the standard envelope model (PEG
Init, Attack and Release Level) – see section “Performance
Mode”, “Layer Edit3” in the manual.
Lets start with the Filter Envelope. It is responsible for
varying the filter’s cutoff point over time, and, as mentioned
above, crucial in determining the contour of your sound.
More often than not, envelopes with slow fade-out times are
used. This is achieved by dropping the filter’s cutoff point to
the programmed FEG Sustain Level. In our example sound
(TP016) this ‘dropping’ happens quite quickly. This is just
perfect for bass or sequencer sounds, which need to be
‘tight’. As a rule you should pay a lot of attention to your
envelopes – especially within song arrangements. You will
find that the decay times used have to ‘gel’ with the rhythmic
structure of a piece – a tricky piece of engineering, which
sadly is often overlooked. For example, a bass sound that

11
dies away too quickly will not ‘support’ the rest of your
arrangement properly. In extreme cases this will leave ‘holes’
which can effectively kill the groove of your piece. Using an
overly long decay time on the other hand can also cause
problems; it may smear a delicately composed rhythmic line.
As always, a little delicacy is required. As you can see,
aquainting yourself with the properties of envelopes early on
will pay off in the long run, especially as every synthesizer,
including the CS1x, reacts to parameter changes in its own
unique way.
PERIMENT:
Vary the decay time of Performance TP017 to see how
quickly filter frequency really drops. Try setting the FEG
Decay Time parameter initially to +10, then -15, and finally -
35. Important in this also is the envelope’s FEG Sustain
Level. Setting this to its minimum -63 level will result in the
note completely fading out. By the way, this sound has two
Layers, and so you will need to edit both oscillators’ values
simultaneously – this is achieved by holding down the
Octave Shift key (found on the top left above the display)
whilst changing any parameters.
In stark contrast, the next filter sound (TP018) typifies the
classic ‘sweep’ characteristic, i.e. the resonation filter’s fre-
quency rises gradually (Attack Time=+55) and then drops
sharply (Decay Time) to the level set by Sustain Level.
Another variation on this theme is the third envelope type
(TP019). Here the filter frequency drops a little during the ini-
tial stages, and then rises fairly quickly to its maximum value
(FEG Sustain Level=+63). Feel free to explore the properties
of this example’s envelope more fully. You may also try Preset
Performances 047 and 048 for further experimentation.
These will let you compare different decay times for bass
sounds.
Unlike the filter envelope, the Amplitude Envelope Gener-
ator (AEG) affects a sound’s volume level, and is therefore
also called referred to as the Volume Envelope. The scenario
where volume levels stay the same throughout the various
stages is often described as an ‘organ envelope’. The Tutorial
Bank has many examples of this type of sound (e.g. TP001
to TP010). Because of this property, many of the sounds
show the effects of the filter envelope more clearly (e.g.
TP018/019).
PERIMENT:
Using a highly percussive amplitude envelope will give a
majestic filter sweep little time to develop. As an example,
select Performance TP020. Although you can discern the
filter effect with this sound, it is far too short lived. Organ
envelopes are simply invaluable for this type of effect. Try
setting both Layers’ Amplitude Envelope Decay and Sustain
Time to the maximum +63. Now sit back and listen to the
filter as nature had intended!
Organ envelopes aren’t always as useful as in our little
example. It is usually important to be able to finely tune a
sound’s volume level over time; for example most sounds
tend to gradually ‘die away’. A held piano note would even-
tually completely disappear. The CS1x however is no piano;
leave the Sustain Level at a high enough setting, and your
note will ring on and on until you release the key (TP021). In
this particular kingdom a synthesizer rules alone. Therefore
feel free to sculpt your amplitude envelopes any which way
you want.
Occasionally all that’s required is to ‘soften’ a sound’s initial
attack, say with a brass or solo sound. Pad sounds, including
choirs and strings, always use even longer fade-in and fade-
out times (TP023), but wait, it isn’t quite that easy. First of all
it is always important to find the right envelope for the right
job. A good example of the different effect created by fading
out the filter rather than the volume of your sound can be
found in Preset Performances 015 and 016. Of course it is
also good to realise that a sound is the sum of all of its com-
ponents. You can spend hours lovingly sculpting your filter
envelope, but if your low-pass filter’s cutoff setting allows all
of your sound’s frequencies to pass through unhindered,
nothing much will happen. In short, the interplay between
the filter and amplitude envelopes is vital. A few examples.
Filter and
Amplitude Envelopes
AMPLE:
In order for your sound to be affected by specific filter
modulation after the release of a key, your amplitude enve-
lope needs to be longer than your filter envelope. Using a
short release setting for your filter envelope (Release Time=-
63) will generate a ‘tearing’ effect, typically used for E-
pianos, harpsichords or acoustic guitar sounds. A slight
increase in release time can produce a simple ‘echo effect’
(TP024). Such tricks can also be applied to a sound’s attack
time. For instance, a sound’s ‘hard’ edge caused by a fast-
attacking filter envelope can successfully be softened by
decreasing its amplitude attack time a little, without the
‘brightness’ loss you would get when applied to the filter
envelope. Remember, these two envelopes work as a team.
Let’s finally take a look at the Pitch Envelope. Unlike the
FEG and AEG, this envelope is predominantly used for spe-
cialist applications, and as such is rarely found on analogue
synthesizers. Despite this, the PEG has many more uses than
you may at first suspect. To prove it, a number of examples…
first a little practise to get you fully aquainted with this par-
ticular envelope.
PERIMENT:
Call up Performance TP026. We’re aiming to ‘drift’ the first
oscillator gradually away from VCO2 (whose pitch stays con-
stant). Apply the following settings to the Pitch Envelope
(Layer1): our sound is supposed to drop after a predeter-
mined time (PEG Atk Tm=+56) by a quarter note (PEG Atk
Lv=-27), and then casually restore its pitch (PEG Dcy
Tm=+30). When releasing the key our sound shall then jump
upwards (PEG Rel Tm=-63) by another quarter note (PEG Rel
Lv=+27). If you want to hear your sound ‘howl’ rather than
jump, try setting PEG Rel Time to +40. By the way, if every-
thing went as planned your sound should resemble Perfor-
mance TP027 – try it!
All this illustrates nicely how siren-type effects can be pro-
duced without the aid of the more obvious LFO. More often
than not though the pitch envelope is used in the attack
phase of the sound, particularly when imitating acoustic
instruments. Pretty obvious when you think about it; the
pitch of such instruments is still volatile during the plucking
of a string or the initial blowing of a flute or trombone. Use
of this subtle effect can also give synthesizers a more natural
sound.

12
AMPLE:
Obvious examples are brass sounds (TP028). Here the ini-
tial ‘tearing’ at the sound’s pitch delivers the right feel. Ide-
ally this change in pitch should be as inconspicuous as
possible, but there is of course a time and place for drastic
pitch envelope surgery to produce those classic ‘pitch warp’
effects, like sound TP029. Tip: when using two VCOs, try
setting the first oscillator’s PEG to a positive value, and the
second oscillators PEG to a negative one – after all, variety is
the spice of life!
Have you ever attempted to program certain drum sounds
or special effects using synthesizer waveforms? Or how
about using the pitch envelope to transpose a multi-sample?
Let’s take a look at some examples.
AMPLE:
Take a boring sinewave and combine it with a simple PEG
envelope, and hey presto – instant E-toms (TP030)! Another
popular trick when using sample ROM synthesizers is the
transposition of entire multi-samples – using the pitch enve-
lope!
Transposing a Layer up or down this way by 12
semitones can completely change the basic character of a
sound. Transposing down can lure Mellotron-like sounds
from your CS1x – for an example try the string sound TP031,
which can be enhanced still further by the use of filters or the
effects. Shifting this sound’s pitch upward however will pro-
duce a harmonically richer tone (TP004/005).
It’s just as easy and simple to conjure up impressive
slide effects (TP032), a useful addition to any synth bass
sound.
Helper Motors – the LFOs
The Low Frequency Oscillator or LFO is a special kind of
oscillator. Unlike VCOs, the LFOs frequency range is roughly
between 0,1 and 100Hz. Of course the frequencies aren’t
used for audio signals, but rather as controlling signals to
modulate the VCO, VCF or VCA sound components. The
CS1x calls these LFO modulation types PMOD, FMOD and
AMOD.
A synthesizer, just like the human voice, violin, trumpet and
many other acoustic instruments, seems ‘cold’ without the
use of some vibrato. To illustrate, select the aforementioned
pad sound (TP023): although enriched by the detuning of its
two VCOs it still doesn’t appear as ‘alive’ as would be desir-
able for a successful pad sound.
Pitch LFO to the rescue. This little devil can be used to
subtly modulate the pitch of a sound, thereby making it seem
more ‘alive’ – much like the natural vibration of the human
voice.
To achieve this effect, use a consistent waveform like the
triangle wave. Differing speeds and intensities are also use-
ful; both VCO’s LFO values should never be identical. It gen-
erally pays to offset parameters a little against each other,
not just where LFOs are concerned – this gives synthetic
sounds life. Our string pad (TP033) also gains ‘depth’ from
this treatment. In some cases you may even avoid the need
for post-chorusing altogether. Any sounds used for solo
work should use a slightly delayed Pitch LFO, i.e. Vibrato.
This can best be demonstrated with a simple synthesizer
sound (TP034). Here the Material voice used is already pro-
grammed to delay the LFO so that the Vibrato is less abrupt.
Just as much fun can be had with the random Sam-
ple&Hold waveform (TP036). The short melodic phrases
that this waveform can produce have many uses beyond the
obvious lead sounds or imaginative sound collages. An LFO
with a square waveform can also be used to generate little
sequencer-like phrases, such as fifth or whole octave pitch
jumps. Dig deeper in the CS1x’s bag of tricks though and you
will find the ingenious arpeggiator, which will produce stylish
rhythmic musical phrases for you. After all, the overworked
LFO needs a rest now and then!
PERIMENT:
You may have stumbled across some sounds in the User
bank that at first sound like a simple arpeggiator pattern. A
quick glance to the display however reveals that the Arpeg-
giator is inactive. Here are the sounds in question
”Sq:Cyborg” and ”Fx:SinCrony” We have modified both
these performances a little – you can find them in the Tuto-
rial Bank (TP036/037). Your task is to re-activate the LFOs
(AMOD and FMOD). You will find that the LFO modulation
used in this sound plays an very important role.
Completely different sound impressions can be derived
from use of the Filter LFO. Well-known wah-wah effects can
be achieved when using this component to affect a resonat-
ing filter’s Cutoff Frequency. The triangle wave is the obvious
waveform to use here. Start out by using a slow LFO speed
(TP038) – you can always tweak it later. An ‘impulsive’ mod-
ulation is desirable when quick chord changes are in order,
but lingering pad sounds prefer a more gentle LFO move-
ment. The fun really starts though with the sawtooth wave-
form, which will generate rhythmic filter movement just
perfect for a sequenced arrangement. The Filter LFO with the
sawtooth wave can also be used to ‘chop up’ filter sweeps (a
la TP039). Great fun, and not just for our young techno gen-
eration.
Let’s press on: the CS1x LFO can also manipulate ampli-
tude (i.e. volume) as well as filter and pitch. This LFO, known
as Amplitude LFO or ”LFO Amod”, is primarily used for
Tremolo effects. Just so you don’t get lost in the drudgery of
grey theory, here’s another little exercise:
PERIMENT:
Dial-up Performance TP040; a guitar sound which can be
made more interesting by applying tremolo effects. To do
this, call the Amplitude LFO for both Layers into action
(simultaneous edit). The modulation value shouldn’t exceed
+05. You may want to control when the tremolo effect is
applied, rather than have it on all the time. In this case reset
the modulation value back to 0. Now set (say) Assign2 to
control LFO-Amplitude-Modulation. Oh, by the way, we’ve
already done this for you, try playing with Knob6. Now you
can freely add tremolo effects to your guitar sound whenever
you want.
Are you getting familiar with the amplitude LFO? A little
further experimentation should give you an even better idea
how and when it can be used. First in line for treatment are
strings and other pad sounds (TP041). Here too natural
sounding and consistent volume changes are achieved with
the triangle waveform. The sawtooth in contrast produces
more distinctive rhythmic patterns (TP042) which tend to be
more ornate, however, than the comparative LFO Filter mod-
ulation.
Question: what’s even better than a LFO? Answer: two
LFOs! The CS1x though has only a single LFO. How can we
solve this?
PERIMENT:
Simply combine two Layers when you want to play with
two LFOs. Offsetting the speeds of the two LFOs can yield
surprising results. Try doubling/halving the speed of the first
LFO, or vice versa. Panning each VCO hard left and right

13
helps to accentuate the interplay between the two LFOs
(TP043). Even ‘analogue echo effects’ can be achieved with
the LFO. For this, the sawtooth wave is most appropriate. You
will need to play ‘staccato’ (release the keys quickly) in order
to get these echo effects (TP044).
Everything sounds reasonable so far. But what does Init
Phase do? Don’t panic, all shall be revealed: as the name
suggests, this function is used to determine the LFO’s gen-
eral phase setting. All of the CS1x Low Frequency Oscillators
can be synchronised to each key press using the ”Retrigger”
option. When this is set, a sound’s modulation begins exactly
when a key is pressed (TP045), something which is usually
desirable. Now all LFOs are running in phase, there is no vari-
ation between each separate voice. Should you wish to
involve a little randomness in this process however take a
look at ”Freerun” (TP046). Both examples demonstrate
nicely how the different phase settings affect a sound.
About the Little Things
Now that we’re approaching the end of our little workshop
we should take a look at what effect the monophonic mode
has on the Portamento function and other sound parameters,
features which are so often neglected. This is a shame
because as in life, it’s the little things that count.
The Mono/Poly setting determines whether a sound can
play many notes at once or just one at a time. To save on
voices? No, this time it’s not a case of economics, it simply
wouldn’t make sense. Instead, the Mono function is a tool to
replicate specific playing techniques used with analogue
synthesizers.
AMPLE:
All monophonic synths respond in a certain way when a
second note is pressed whilst the first is still being held. Inci-
dentally, a polyphonic synthesizer’s Unison Mode does
exactly the same thing, i.e. all voices are assigned to a single
note – every new voice cuts off the previous, which resur-
faces however when the new note is released. This effect is
used to produce fast trills in synth solos. To demonstrate,
here’s a sound which you can play polyphonically first
(TP047), and then monophonically (TP046). Comparing the
two modes should give you a good insight into the practical
uses of the Mono function.
The difference between the Mono and Poly mode is even
more pronounced when used in conjunction with the Porta-
mento feature (Porta Switch or via Controller #65). This
parameter is also part and parcel of synthesizer playing tech-
niques. The Portamento function principally enables step-
free gliding from one tone to the next, one of electronic
music’s most fundamental stylistic tools. The Portamento
speed has to be selected according to the sound and inter-
pretation used. With the sequencer this can be achieved with
Controller #5 (Portamento Time).
AMPLE:
It is often required to be able to vary the glissando effect on
impulse during a live performance. This can be particularly
useful with different solo phrases. Setting Assign1 to the
PortaTime function will allow you to control the Portamento
speed with Knob3. The Performances TP049/050 will dem-
onstrate this nicely. Pay particular attention to the Porta-
mento differences in the Poly and Mono modes. Try varying
the Portamento speed and observe how the CS1x reacts. A
little time and effort is all it takes to deliver impressive synth
solos to an appreciative audience – practise makes perfect!
The Mono mode in conjunction with the Portamento Func-
tion can approximate the Single Trigger Mode, made popu-
lar by many Minimoog bass lines: when two keys are held
down at the same time during legato style playing, the
second note’s attack phase (usually a typical filter sweep) is
inaudible – the first note’s envelope stays uninterrupted.
Only when the current key is released will the second note’s
envelope come into effect.
PERIMENT:
To make all this a little clearer, call up Performance TP051.
Playing this bass sound staccato style will produce a percus-
sive filter attack for each note. During legato playing how-
ever only the first note’s attack is heard. Why? Simple: the
Portamento function is in effect, although the characteristic
pitch glide is missing. This is achieved by setting the Porta-
mento speed to 0 – a little trick, used here to great effect. If
you want Portamento however, simply adjust the speed for
the required effect. Now disable the Single Trigger Mode
(TP0520). Trill a few notes, and you will find that many play-
ing techniques and much phrasing is now impossible.
The Portamento Function
can be activated for each Layer
Lastly, the somewhat tricky subject of Touch Sensitivity.
The CS1x offers no fewer than four related functions (see
section “Performance”, “Velocity” in the manual). More often
than not you will want to finely tune a Performance’s touch
dynamic individually. How is this achieved?
PERIMENT:
The Performance’s touch sensitivity can be set using the
Velocity Offset function. In order to fully exploit the whole
dynamic range, Velocity Depth should be set to maximum
127. Select Performance TP053. Now gradually increase the
Offset value. See what happens? The touch sensitivity is
beginning to stabilise. This sounds great. Unfortunately the
tone is getting brighter. That’s not quite right! Why is this
happening? The culprit here is the Material Voice. It is pro-
grammed to increase the filter frequency with increasing key
velocity. Therefore, increasing the offset value also increases
the sound’s harmonic overtones. Beware – many other
sounds exhibit this behaviour too when their touch sensitiv-
ity values are changed.
Many sound creators take particular pride in their famous
Velocity Switch sounds. To prove the point we have created
four sounds, which will demonstrate the practical uses of
velocity switching.
AMPLE:
The Performance’s touch sensitivity can be set using the
Velocity Offset function. In order to fully exploit the whole
dynamic range, Velocity Depth should be set to maximum
127. Select Performance TP053. Now gradually increase the
Offset value. See what happens? The touch sensitivity is
beginning to stabilise. This sounds great. Unfortunately the
tone is getting brighter. That’s not quite right! Why is this
happening? The culprit here is the Material Voice. It is pro-
grammed to increase the filter frequency with increasing key
Portament
Time
0
Sw
1234

14
velocity. Therefore, increasing the offset value also increases
the sound’s harmonic overtones. Beware – many other
sounds exhibit this behaviour too when their touch sensitiv-
ity values are changed.
Many sound creators take particular pride in their famous
Velocity Switch sounds. To prove the point we have created
four sounds, which will demonstrate the practical uses of
velocity switching.
Résumé
We’ve made it – that was a lot to take in! Now spoil your-
self, relax to a little demo sequence we prepared earlier
(DEMO1.MID), and listen out for special guest appearances
by the Analogue Workshop All-stars!
(A) The song begins with a Performance with two oscil-
lators that are detuned against each other in real-time using
Assign2 (Knob 6). We‘d like to point out once again that fine
tuning the VCOs can sound interesting in itself and provides
for many yet unexplored possibilities. In general, today‘s
approach to VCOs is quite different from what is was in the
‘70s and ‘80s. Most TB-303 type bass sounds were pro-
grammed with just a single VCO, something that has
become fashionable once again. Back then, mighty Mini-
moog basses using three oscillators (!) were very popular.
Today, two VCOs are commonly detuned against each other,
particularly with lead or sequencer sounds.
(B) You will hear a little sequencer theme starting at bar
9, which we will use to demonstrate a little trick: the sound
is initially programmed without Filter Resonance, but this
becomes active in the second half (bar 13-17). Note how the
sound is changed. It suddenly sounds fresher and as a result
is more discernible in the arrangement. If you wish to apply
this little artistry to other sounds, you need to ensure that the
cutoff frequency used is set to the maximum value, other-
wise you will hear the typical synth bass or sweep sound res-
onance filter effect.
(C) Now we move onto a good example of the interac-
tion between the Filter and Amplitude Envelopes: at first
you can hardly hear this sound‘s filter sweep as the ampli-
tude isn‘t set correctly for it. At bar 21, however, the sound‘s
fade-out time is increased (Assign1: AEGDcyTime) and now
the filter sweep‘s development has become audible. To sum-
marise: the filter envelope is only fully effective when the
amplitude envelope is stable enough.
(D) Bar 33 introduces a pad sound. The sound does
seem a little bland, despite the lively beating produced by its
two detuned VCOs. This becomes even more obvious in bar
39, where the same chords are played by a synth pad for
comparison. The sound‘s richness here is due to intensive
LFO Pitch Modulation. In the most extreme cases you can
even forgo the Chorus effect altogether, which can be a great
help, especially with the Multi mode‘s tricky effect assign-
ment.
(E) The next example will show just how and when the
Amplitude LFO can be applied: it doesn‘t always have to
involve synth sounds. An acoustic guitar sound can be invig-
orated with Tremolo effects, too, especially when blended in
authentically with Knob6. Pay particular attention to when
the Tremolo is applied. With a little practice you‘ll be able to
play many sounds authentically using real-time control.
(F) Bar 54 introduces an extra classy analogue sound:
no, you‘re not listening to the CS1x effects here, these echo
effects are part of the sound! This is done with the aid of the
Amplitude LFO, here using the sawtooth LFO waveform to
imitate this effect. The effect is emphasised six bars later
with determined filter modulation. This trick can be espe-
cially useful in the Multi mode (as in example D), where the
Variation effect may already be assigned to other tasks and
no “Delay” is available.
(G) We‘re now playing a simple chord sequence with
two different LFO Phase settings: you won‘t notice anything
special in the first instance, as all voices start with their
respective triggering as expected (Phase Init: Retrigger). If
you set the LFO to “Free Run” however, the notes are trig-
gered irregularly. This is demonstrated by the repeated chord
sequence, which is now played by Performance TP064. We
have reinforced these irregularities with random Pan move-
ments (“Random”).
Illustration: The CS1x Mono Function –
ideal for Solo or Bass Sounds.
(H) The focus shifts to the Portamento and Poly/
Mono functions at bar 80: here we are switching between
the two modes whilst playing a lead sound, to make studying
these functions easier. Compare the differences between the
two modes; the Portamento function is very revealing here.
It would be better still to try out the behaviour of Mono and
Poly sounds for yourself, so stop the sequencer and select
Performances TP049/050. If you prefer to stay inactive for a
while, then at least listen to the modulations of the following
solo part‘s fade-out, Portamento speed, as well as Filter fre-
quency and Resonance.
(I) Whilst the finale may not be grandiose, it is cer-
tainly informative: note the Single Trigger mode‘s speciali-
ties, here shown with a typical synth bass sound. Hand on
heart, have you ever investigated this subject? If you haven‘t,
you really should spend some time on it. Until you have, you
will not be able to arrange your bass lines for this style. espe-
cially if you want to produce the unmistakable bass slide
effects. So, aquaint yourself with the Single Trigger mode
(also known as Legato mode) and its properties. Bar 118
sees a slide effect without the use of the Single Trigger
mode, which kicks in however at the next bar. Take note of
the two different sounds produced. The previous sequences
also will clarify this interesting phenomenon.

15
Arpeggiator Ð
A B
ox full of
Tricks for all
Occasions
ø
The CS1x Arpeggiator is very clearly laid
out. It consists of only three parts: Type,
Tempo and Subdivide. In addition the
CS1x outshines itself with 2 further set-
tings which you should get aquainted
with early on.
One of these is the Hold function, which can be activated
by pressing both buttons on the left hand side above the LC-
Display. This function greatly aids relaxation during live per-
formances, as it has since its earliest incarnation: you need
to play a chord only once; the Arpeggiator play will repeat it
tirelessly for you. This frees both hands for other tasks and
can, amongst other things, be very ‘handy’ for trying out dif-
ferent arpeggios or sequencer sounds!
With the aid of the Arpeggiator Split function you can limit
the Arpeggio key range to notes below the C3 key (see sec-
tion “Performance Mode”; “Arpeggiator Split” in the manual).
Notes above this point can then be used for accompanying
fills, perhaps using a different sound altogether.
Arpeggiator Uses at a Glance
AMPLE:
We have prepared two sounds for this which can be found
in the Tutorial Bank. To start with, call up Performance
TP058. Now trigger the Arpeggiator using a single key below
C3. The sequence will keep on running, even after you have
let go of the key thanks to the activated Hold function. You
can still use both hands to play chords or fills on any of the
keys above the Split point – go on, try it!
You need to be careful however when using Split Perfor-
mances, as the Arpeggiator will distribute any chord notes
over the entire note range, regardless of which sounds will be
played. In other words, if you are using two different sounds
split across they keyboard, it‘s quite possible that the Arpeg-
giator mix up both sounds! Performance TP059 is a good
example of this. Here a Rhodes sound used above the split
point has suffered in the process. Tip: If you want to ensure
that the Arpeggiator only triggers the sound below the split
point, use the following Arpeggio types: UpOct1, DwnOct1/
2/4, UpDwA/BOct1 as well as Random Oct.
Arpeggiator
Split
Tempo
Type
Subdiv
140
off
UpDnBOct1
1/16
Now let‘s look at the three main functions. To begin with,
you can select any of the 30 available Arpeggio Patterns.
These can broadly be divided into seperated chords and spe-
cial patterns that vary in sound colour, dynamics or rhythm.
The second function is all about tempo. If you want to use the
Arpeggiator with a drum machine or sequencer and wish to
be able to react to any tempo changes or drifting, set this to
MIDI. This instructs the CS1x to wait for an external ‘director’
via the so-called MIDI Clock Pulses.
There are three things you should bear in mind: First check
that your sequencer can actually send MIDI Clock com-
mands. If you can‘t hear an Arpeggio Part, the most likely
explanation is that MIDI Clock is disabled in your sequencer
program, so always check to make sure it‘s enabled. Sec-
ondly it is advisable to time-shift the track containing any
Arpeggiator chords by a few milliseconds. This ensures more
precise Arpeggio starts. Thirdly, experience has shown the
value of re-triggering any Arpeggios that step through the
same notes repeatedly as often as possible. The same
method has also benefited the sampled drum loops by
ensuring clean timing.
To begin with though you have to establish the actual
length of your Arpeggio loop. To work this out we have to
deal with the Arpeggiator‘s third major function, the Rhyth-
mic Resolver (Subdivide). Some of the available divisions
are self explanatory: 1/32, 1/16, 1/8 and 1/4 divide a chord
into 32nds, 16ths, 8ths and quarter notes. 16th, 8th or 4th
triplets are however resolved and played by 1/24, 1/12 and 1/
6. But wait, there‘s more, the CS1x also offers 3 further divi-
sions (3/23, 3/16, 3/8). Later we‘ll deal with their applica-
tions with a little exercise.
PERIMENT:
Without knowing much about it we wish to determine an
Arpeggio‘s length. Just how the Arpeggio proceeds is
dependent on several factors – the Arpeggio type, the rhyth-
mic resolution but also the total voice number used in an
arpeggiated chord. Select Performance TP060.
Now start playing using a four note chord, for example a C
major triad with an octave root note. The Arpeggiator begins
by breaking down the chord into 8ths (Subdivide: 1/8) and
then arpeggiates it over two octaves (type: UpOct2). You will
hear that the Arpeggio repeats itself after exactly one bar (s.
Note Example A). This means the loop is 4 beats long, i.e.
you can re-trigger the Arpeggio after 4 beats. Now experi-
ment with different Arpeggio types and rhythmic resolutions.
For instance, select Arpeggio type “DwOct1” and a 1/16 res-
olution. If you now play the same chord you will notice that
the Arpeggio now loops after only one quarter (s. Note
Example B). Feel free to try a few other combinations. You
will soon get a feel for how the different Arpeggios sound.
Note Example A

16
Note Example B
First Steps
Let‘s deal with the simple Arpeggio patterns “Up/Down”
and “Random” first. These are by no means unique to the
CS1x, but can be found on many a synthesizer and therefore
serve well as an introduction as to the how Areggiators auto-
matically break up chords. What this actually sounds like
isn‘t important right now. We want to concentrate exclusively
on the sequence of notes produced. We recommend Perfor-
mance TP060 or a similar percussive sound for reference.
PERIMENT:
Select a 1/16 re solution and a tempo between 100 and
120bpm. You can of course also set the tempo via MIDI
Clock synchronisation – actually that‘s a good idea, as you
can then use the sequencer as a reference to help you under-
stand the Arpeggio beats and rhythms better. Use the four
note C major chord for all Arpeggios (triad + octave root
note). Now listen how the Arpeggiator translates this chord:
“UpOct1-4” – here each chord note is playing from the
bottom note to the top note over 1, 2 or even 4 octaves if
desired. The opposite sequence results from type
“DownOct1-4”, i.e. the notes are played starting with the
highest down to the lowest. “Random Oct1/2/4” however
selects the chord notes randomly from a 1 to 4 octave range.
Whilst the above Arpeggio types hardly require further
explanation, there is one noteworthy difference in the case of
the combined Up/Down Arpeggio type. As you might expect,
in both cases the Arpeggiator begins with the lowest note,
ascends to the top, and then descends back down again,
regardless whether 1, 2 or 4 octaves are selected. Still, the
note sequence produced is slightly different:
PERIMENT:
Play the C major chord using Performances TP061 and
TP062. If you now follow each sound i.e. the sequences gen-
erated by “UpDwAOct2” and “UpDwBOct2”, you will notice
a small irregularity with type B: the root note is not played
again after the highest note has been reached – all the other
Arpeggio types in the last X-PERIMENT did! This results in
an unwanted ‘shifting’, i.e. the Arpeggio‘s root note doesn‘t
always fall exactly on the correct beat. The following Note
Examples should make this a little clearer.
Note Example: UpDwAOct2
Note Example: UpDwBOct2
Sound Rhythm Tricks
Looking at these UpDown Arpeggios may lead you to the
conclusion that the chord notes ‘are somehow drifting across
the beats’. Perhaps you have already come across this phe-
nomenon when working with other Arpeggiators or testing
some of the CS1x factory sounds. It‘s true: you can never
separate rhythms and chords when working with the Arpeg-
giator! Here‘s a little example.
PERIMENT:
Leave the resolution of Performance TP063 set to 1/16 and
type “UpOct2”. Now play a C major triad in the basic config-
uration and examine which betas the arpeggiated sounds fall
on. After the first cycle the root note lies somewhere
between the second and third beat, after the second cycle it
falls on the fourth and after the third it‘s now between the
first and second beats, and so on. If you set the resolution to
1/24 triplet however, the C note will always fall exactly on
each beat. Let‘s look at this from another angle: Trigger the
Arpeggiator with a four note chord (use the C major chord
with root note octaves) and you will find that the C note
doesn‘t fall on the beat anymore. To correct this, choose an
even-numbered resolution (e.g. 1/16 or 1/8). Now everything
is back to normal – i.e. the arpeggiated root note fall once
again exactly on the expected beats.
Note Example: 1/16
Note Example: 1/24
Are you with us this far? We have a little X-PERIMENT that
will demonstrate the direct relationship between the number
of chord notes and the chord‘s rhythmic resolutio.n The rule
of thumb here is that you should always choose even num-
bered chords for even rhythmic resolutions (1/4, 1/8, 1/16
and 1/32) and (say) three note or five note chords with odd-
numbered resolutions (1/6, 1/12, 1/24). That‘s the only way
to avoid generating unwanted syncopations with the Arpeg-
giator.

17
A special case are the dotted note rhythms (3/8, 3/16 and
3/32). The above rules don‘t apply here. These resolutions
are particularly interesting for odd-numbered beats (e.g. æ,
3/8 or 6/8). You will need to play chords with an even note
number to play back these three-part rhythms correctly.
PERIMENT:
Select Performance TP064 with Arpeggio type „UpOct2“
and a 3/8 resolution. Now playing a triad will find the root
note on the first beat in the 4th bar, in other words irregular
cycles are generated. A 4 note chord however generates
symmetrical 4 bar cycles, i.e. the root note is repeated after
the first cycle on bar 3, after the second cycle on bar 5 and
after the third cycle on bar 7 etc - always on the first beat.
Note Example: 3 notes
Note Example: 4 notes
Between you and me: you don‘t always have to be so
strictly analytical. The occasional breaking of the rules and
other such mischief often produces the most interesting
music! Anyway, these rules only really apply to the consistent
Arpeggio types like the CS1x‘s Up/Down patterns. If you are
planning to use more noise orientated sounds or special
effects, feel free to experiment as much as you want. After
all, if it sounds right, use it.
Fun to the power of 15!
If all this leaves you cold, you clearly haven‘t heard the
CS1x‘s 15 special Arpeggio types! First a quick note: all spe-
cial types don‘t lend themselves well to triplet rhythms. The
best results are achieved with a 4/4 beat and a resolution of
1/16, 1/8 or 1/32.
No doubt, a lot can be achieved with these ready made
sequences, especially when you have just run out of good
ideas. But what exactly is happening here? In order utilise
these 15 Arpeggio types more effectively you will need to
aquaint yourself with each of their properties.
Put simply, the special Arpeggios add filter and pan posi-
tion modulation as well as more complex stepping of rhythm
and dynamics to the more straight forward Up/Down Arpeg-
gios. Chord notes, their number and octave position however
are resolved differently from what you might expect. For
example, playing a four note chord with some Arpeggio
types will result in only two notes being played in different
octaves. We will demonstrate the properties of the special
Arpeggio types with a few exercises. Let‘s use a systematic
approach and start with the filter.
PERIMENT:
Select Performance TP065 and play any single note. Can
you hear the filter modulation already? Well no, of course
not. Don‘t worry, we are not trying to catch you out; we
simply wish to show you that the filter frequency has to be
set correctly in order for the filter modulation to have any
effect. All you need to do is turn the Cutoff knob anti-clock-
wise. Now you should hear the filter change across two bars:
the cutoff frequency rises during the first four beats, then
drops during the second half at the same rate. This is due to
the Arpeggio Type “Techno-A”!
The CS1x however boasts a second type – “SweepLine”:
here, too, the Arpeggio automatically modulates the filter
frequency, raising it after the third quarter, and then dropping
again after the third quarter of the second bar. Intrigued? Go
ahead, select Performance TP066 and see for yourself.
Of course you can always change the filter yourself in real-
time with the CS1x knobs. Dynamic Pan Positions are more
tricky. Never fear, the Arpeggiator will once again make your
life that little bit easier by providing types that take care of
distributing your notes in the stereo image. Here, too, you
will need to pay particular attention to the corresponding
sound parameters, as the modulation can be affected by the
unsuitable effect settings (e.g. an excessive “Chorus Send”
value) as well as the Pan Position function.
PERIMENT:
Using Performance TP067, hold the keys down for at least
two bars. As well as rhythmically distributing the held notes
the Arpeggio pattern “Techno-D” also loosens the rhythm
with pulsating left-right movements. This will breathe plenty
of life into your sequencer arrangement. Arpeggio type
“Echo&Pan” is also a good alternative. Here, too, the Arpeg-
gio sequence influences the sound‘s Pan Position. To demon-
strate, try Performance TP068.
Things don‘t always run as smoothly as in these examples.
Sometimes you need to tinker a little to actually hear the Pan
modulations. For example, try getting these stereo move-
ments to work with Performance TP069! Have you discov-
ered how to do it yet? The key to success here lies with the
Variation effect: set “Var Send” to “On” for the first Layer and
bathe in the full Arpeggio effect inclusive of Pan modulation.
There is much you can do with these filter and Pan modu-
lations. Nevertheless, the most noticeable property of the
special Arpeggios is doubtless their ‘musicality’,’) supported
by individual rhythms, small dynamic shifts as well as the
chord note variations. Let‘s spend a little time on these
‘dynamic’ changes.
PERIMENT:
Let‘s examine Arpeggio “Echo&Pan” a little more closely.
As the name suggests, this type automagically produces
echo effects – mostly with the help of different key velocity
values. Play Performance TP070 with any sound you wish: its
volume audibly fluctuates within a single bar. This process is
repeated every four beats. The same thing happens with
Arpeggio type “TekkEcho” (TP071). Although the Arpeggio
figure here is 8 beats long the dynamic pattern is the same.
You can observe this, for example, with the “BaseLineB”
type. Tip: if you like the Arpeggio‘s rhythmic and pan move-
ments, but aren‘t so keen on the dynamic variations, simply
set the Velocity Offset value to the maximum +63.
Let‘s go one step further and finally examine the musical
aspect. Let‘s look at how many chord notes the Arpeggiator
actually utilises. Particularly with respect to song production,

18
the CS1x offers a choice of very special Arpeggio types.
Their names will already give you clues as to how these may
be put into action.
PERIMENT:
Begin by selecting Performance TP072. Playing (for exam-
ple) a C major triad in it‘s basic configuration will give you a
typical bass figure. Hardly surprising when you take a look at
the Arpeggio type in the display: “BaseLineC”! Now take a
closer listen. The Arpeggiator plays only root notes and 3rds
! Not all your held notes are being played. The Arpeggiator
‘filters’ the notes depending on the context and what its
sequence is supposed to do – just as well! This type, like the
other “BaseLine” types for example simply ignores your
chord‘s 5th.
There are some other types that also don‘t translate your
chords in the way that you might expect. Arpeggio types
“SweepLine” and “PulseLine” as well as “SyncopaA” or
“Techno-C” for example accept only chords with up to three
notes, in other words a 7th or even a 9th is simply ignored.
Alternatively you can reduce a 7th chord to three notes by
leaving out the chord‘s 5th. Use Performances TP073 and
TP075 as a starting point to explore the polyphony and over-
all structure of each Arpeggio type.
Effects –
used in a different way
Enough of these lengthy experiments. With the help of a
few practical examples we now would like to show you the
Arpeggiator‘s many musical day-to-day applications .
The interplay between sounds and Arpeggio sequence is
an important area that we haven‘t even touched on so far,
but therein lies the art of Arpeggio playing! An Arpeggio that
triggers hundreds of different sounds will produce just as
many different results, and when used with especially flexi-
ble instruments like the CS1x they open up a whole world of
possibilities.
This is particularly emphasised when you consider the
musicians used to be stuck with analogue synthesizer
sounds. Many interesting tonal shades could of course be
got from their fast envelopes, heavy ring modulators or pow-
erful noise generators, but it was sheer Utopia to envisage
being able to control all imaginable samples with an Arpeg-
giator. Simply put, the CS1X blows the tonal ‘corset’ to
smithereens, and with it all convention and ability to imagine
the things that can be realised with an Arpeggiator.
Therefore let‘s start with sounds that you might never even
have dreamed of using. Several years ago, when sampling
technology finally become affordable, it‘s performance
wasn‘t restricted to your everyday ‘natural’ instruments like
piano and strings, but extended to very specialised effects
generated by a Sampler, which was particularly popular in
the studio scene and could thus be heard in numerous pro-
ductions.
One of the most well-known of these was the ‘Mickey
Mouse’ effect. So why not use the Arpeggiator to create an
unusual effect?
AMPLE:
The following five Performances really should convince you
that this subject is seriously worth looking into. So, dial up
the first sound example TP076 and play it with just one note.
If this doesn‘t even vaguely make you smile, select the next
Performance. This too is a special kind of effect, which really
doesn‘t require further commentary. Seriously though, don‘t
you think it would be very ‘original’ to use these little
sequences with, or as the basis of one of your songs?
The next three Arpeggiator sounds are much easier to inte-
grate into a sequencer arrangement. For example you could
use them to program unusual rhythm tracks. As mentioned
before, the Arpeggio as well as its tonal aspect play an
important role in this.
AMPLE:
Let‘s deal with Performance TP078. It is based on the SFX
voice “Burst” and has deliberately been transposed another
two octaves (Note Shift=+24) – this is where the ‘Aliasing
Effects’ come to the fore. If you have never come across this
term before, here is a quick explanation: Aliasing errors occur
when a sound‘s frequency is greater than half that of the
sampling frequency used to digitise it. The result is a fre-
quency differential that corresponds exactly to the difference
between the original frequency and the sampling frequency.
Tonally speaking, Aliasing results in drastic distortion, which
can however be used very effectively in sound development
with ROM-Sample-Synthesizers, especially with the aid of
the Arpeggiator.
Perhaps you have by now thought about using the CS1x
Arpeggiator to imitate wave sequencing – well, you can.
AMPLE:
The Arpeggio found in TP076 is straight from the Waves-
tation. The basic sound, as in our last example, was shaped
primarily with the aid of the pitch envelope. Equally impor-
tant are the effects, especially the Delay (VARY TYPE). The
delay times take their cue from the Arpeggiator tempo. A
little tip for fiddlers: try to work with keyboard splits if you
want to create even more interesting wave sequences.
Assign Material voices that complement each other well for
each of the four Layers.
The last SFX Arpeggio is a percussive sequence which can
be applied universally. Particularly nice here is Pan Position
modulation.
AMPLE:
Select Performance TP080 and, as in the previous exam-
ples, play only a single note. The sound‘s main character is
provided by the Flanger effect. This effect is responsible for
the regular up and down movements that you will have
noticed immediately. The Flanger by the way is also some-
times referred to as the ‘Jet Effect’. Pay particular attention
to the relationship between the Flanger‘s LFO speed and the
Arpeggio tempo. With this, too, many variation possibilities
can be achieved.
Feel free to experiment with the Arpeggio types and tempi
of all these SFX examples. Utilising the Hold function will
save you having to constantly re-trigger your Arpeggios.

19
Hard Chord Work
Furthermore you can use the integrated Arpeggiator for
various chord break-up duties. Particularly musical
sequences can be arranged intuitively with the special
Arpeggio types, and here the same applies again: a more
unusual sound results in a more original Arpeggio.
Let‘s however deal first and foremost with the traditional
synthesizer sounds. In this area alone there are thousands of
possibilities to explore, all of which can be used effectively
for your arrangements. To demonstrate we have prepared
two Performances.
AMPLE:
Performance TP081 consists of only one Layer, that is to
say only one sawtooth wave. Of course you could always use
two detuned oscillators to give the sound volume. If this
sound however is only to be used as an arpeggiated accom-
paniment, then one Layer should suffice. Doing so also helps
keep the voice count low, which will benefit any multi-timbral
duties. Again, pay attention to the effects. Here, as with
TP079, the delay is used rhythmically.
If you hold your chord down a little longer you will find that
the Arpeggio generated sequence repeats after exactly two
bars. Here is a simple but efficient trick: vary the length of the
sequence, i.e. trigger the Arpeggio already after a quarter, a
half or a whole bar. This will shape your Arpeggio in ever
more interesting ways and allow it to be used more distinctly.
Select the next Performance (TP082) to hear a classic
Arpeggio sequence. A simple analogue sound is steadily
arpeggiated up and down over four octaves. Altogether this
sound is fairly delicate and can thus be utilised for graceful
as well as frantic accompanying parts (ARP Subdiv 1/32).
Intriguing effects can be achieved by varying the tempo
during the Arpeggio process – simply use Knob 3 (Assign1).
This really is a special means of expression. You can now
shape the Arpeggio to any musical context (for instance to
heighten chord sequences by stepping them chromatically
upwards and downwards) or to your own personal interpre-
tation.
Sounds interesting – but can the Arpeggiator only be used
for Synthesizer sounds? Well, actually no, even traditional
musicians get a great deal out of it. He/she may for example
use it to create Tremolo effects for acoustic instruments, like
the mandolin or steel drums. “UpOct1” or “DwOct1” are the
most appropriate Arpeggiator types for this. Here‘s a little
exercise.
PERIMENT:
Consider Performance TP012 as a “Sound Init”. Now
instead of the sine wave select Steel Drums (e.g. XG001/
#15) and activate the Arpeggiator (the Arpeggiator type is
already set correctly). All that‘s needed now is a tempo
between 200 and 240bpm; all entries have been made. Now
play your Steel Drums, in thirds just like the original. If you
are pleased with the result, save your Performance. To add
even more authenticity to the sound, try setting Assign1 to
control the Arpeggio tempo as in our last example and gently
vary the speed of the Tremolo with Knob 3.
Naturally this isn‘t all there is to it. Following are another
four sequences that are particularly useful for modern styles
like House or Trance – you should like those.
AMPLE:
The Performances TP083/084 are really quite traditional.
With the first you will hear a two bar Clavinet sequence. You
should keep your triggering chords held down for at least
four beats on account of the daring downward octave jump
and special rhythm.
The next Performance is enriched with Pan and Echo
effects, and would work nicely as a House piano. Here a
single key triggers an entire 7th chord (minor 7). Interesting
also is the real-time control via Assign1/2. Knob 6 will let you
vary the chord note‘s volume, whilst Knob 3 is used to vary
the rhythmic resolution (Subdivide). Moving this knob fully
clockwise decreases the note values from 1/16 down to 1/32,
which effectively doubles the speed of the sequence – one
to use quickly and impulsively!
To prove once and for all that the sound used is the most
important element that gives the Arpeggio sequence its
character, we have assigned Arpeggio type “Echo&Pan” to a
phased choir sound. The resulting sound can be found in
TP085. Hard to believe that this fourth and final example is
based on the same Arpeggio type, isn‘t it? Particularly inge-
nious is the use of the differing dynamic values that are gen-
erated by the Arpeggio sequence. If the values exceed 92, an
‘analogue’ filter sound is heard (Layer2), if they are less you
hear a ‘digital’ sound instead (Layer1).
Keeping in Line
It doesn‘t always make sense to trigger arpeggios with
triads or other chords. Often it is better to play a single note,
or the Arpeggiator may reduce polyphonic playing to a single
note anyway. Naturally we have some examples for this, and
will comment on them below.
AMPLE:
The first Performance (TP087) is a good example of arpeg-
gio filter modulation. Combined with the distortion effect the
filter movements are nicely pronounced and should set well
even with Hardcore Freaks. As mentioned before, play this
Performance with a single note only. Triads wouldn‘t really be
useful here because of the fuzz effect. A second voice how-
ever may be added if you insist. A listen to the third Arpeggio
Demo will reveal all.
The second Performance (TP088) is living proof that a bass
line Arpeggiator type isn‘t restricted to bass sounds. Here we
are using a particularly flavoursome sequence, seasoned to
taste with a hefty dose of flanging. The Arpeggiator insists
on playing only the root and 3rd notes, even if you play a
triad; this is a good thing.
Perhaps you prefer to work with monophonic sequences,
but the Arpeggiator occasionally produces two or more
notes at once. No problem, with the aid of a small trick:
simply use the Poly/Mono function to reduce your Arpeggio
to one note, just like that. This opens up a whole new bag of
variation possibilities, which in turn affect the Arpeggio pat-
tern. A little example should make this clearer.
AMPLE:
Change Performance TP089 to POLY (Layer1). Now if you
trigger the Arpeggiator, you can if so desired play polyphonic
chords. This would however be a little impractical with bass
sequences, especially if you use the Portamento function. As
you will have already seen in the Analogue Workshop, sounds
are supposed to be played monophonically with this func-
tion. We have already set up the Performance this way and
thereby enabled the “Techno-B” Arpeggio type for bass lines.
While you‘re at it, try out Performances TP090 and 091. X-
Other manuals for CS1X
3
Table of contents
Other Yamaha Synthesizer manuals

Yamaha
Yamaha DX100 User manual

Yamaha
Yamaha CS-5 User manual

Yamaha
Yamaha MX61 User manual

Yamaha
Yamaha YPP-45 Assembly instructions

Yamaha
Yamaha SY-1 User manual

Yamaha
Yamaha PORTATONE PSR-OR700 Operating and maintenance manual

Yamaha
Yamaha DX21 Quick start guide

Yamaha
Yamaha SY-77 User manual

Yamaha
Yamaha SY-35 Parts list manual

Yamaha
Yamaha YM3806 Manual