MOUSE MODE – TURNS YOUR PEN INTO A MOUSE
ABOUT – Provides you with your Digital Pen software version
information
Writing on your Tablet PC Input Panel (for Windows Vista/2007)
Windows Vista and 7 provides rich inking features & utilities which enable users to take
handwritten notes, convert handwriting to text, annotate documents, add electronic
signatures and send handwritten emails.
With integrated Pen-Tablet support, digital ink technologies and handwriting recognition
technologies your Digital Pen turns into a Tablet PC compatible device that’s practical,
comfortable, intuitive and easy to use while you are on the go and it also works well when
you are at your desk.
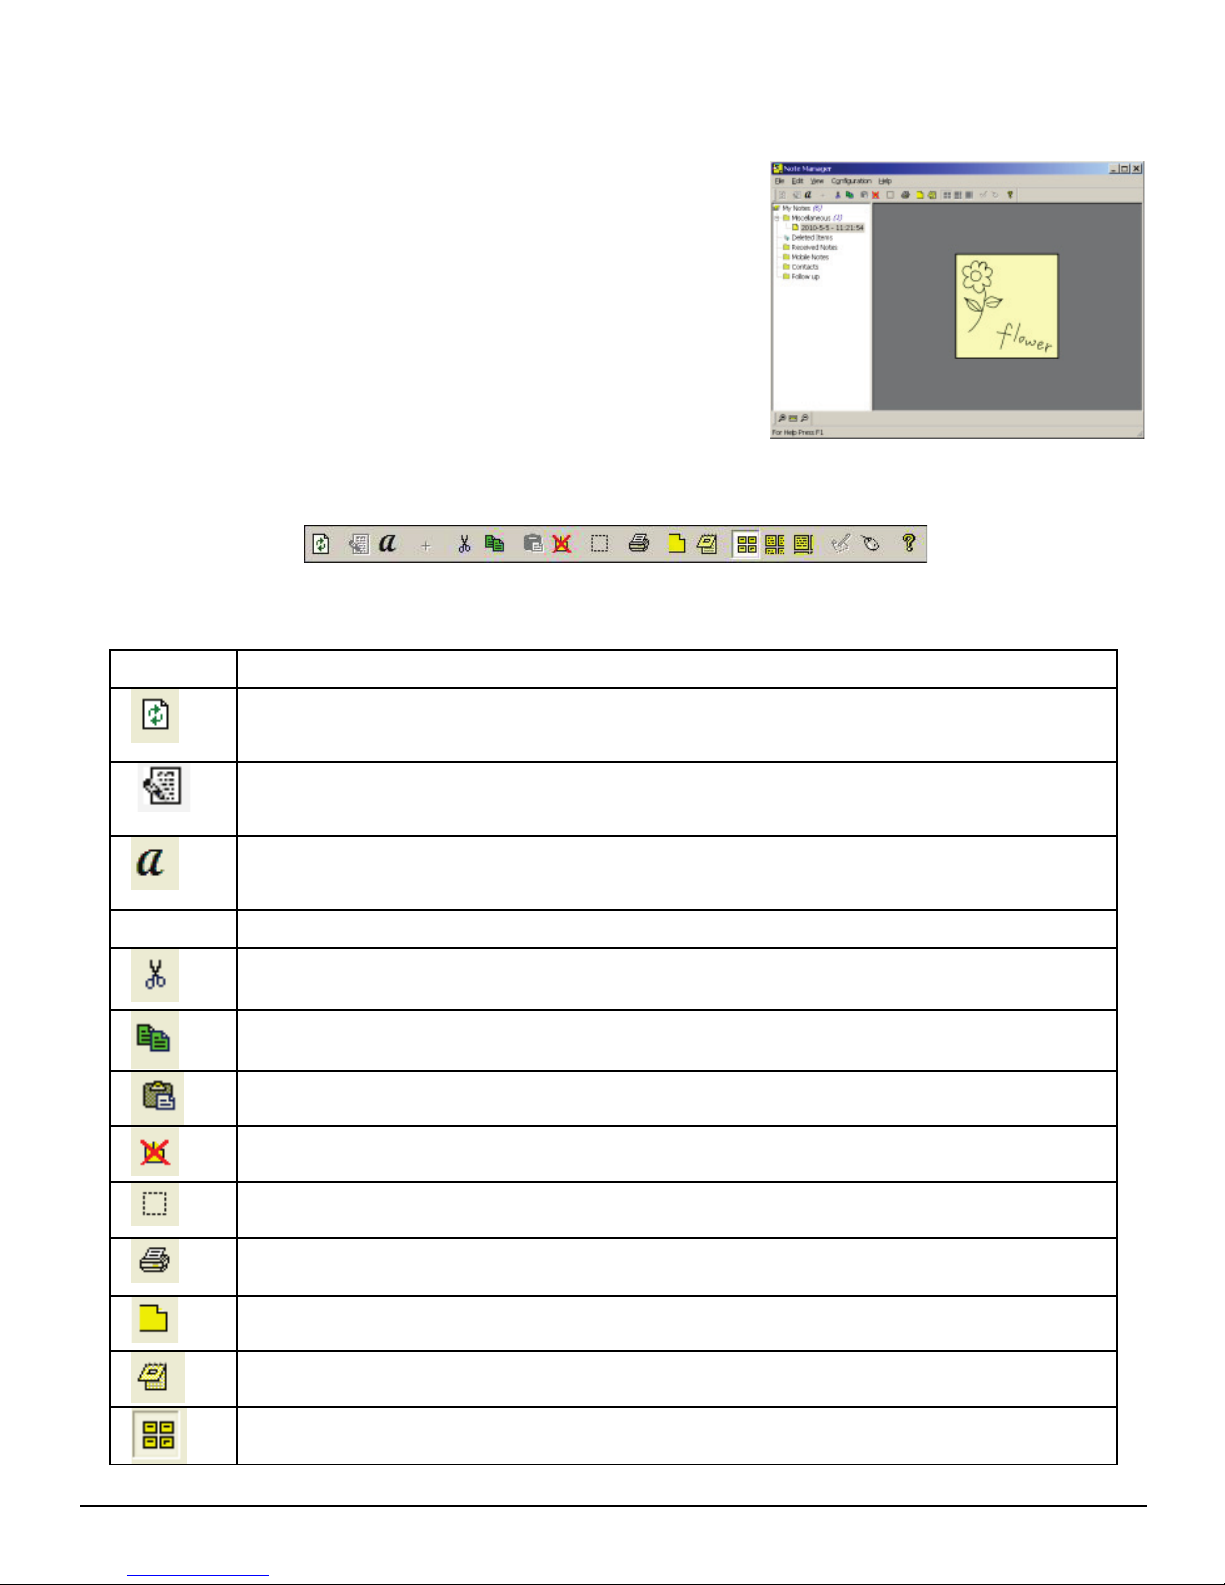
In Windows Vista or 7, the Tablet PC Input Panel allows users to insert text into website
forms, word processing and e-mail applications, web browsers, and more.
Tap the Input Panel icon , which appears when you place the pointer in a text entry
area, such as the Address bar in a web browser or a text box in a dialog box, and then start
writing with your Digital Pen. The Input Panel icon does not appear on the taskbar by
default. To make it appear, right-click the taskbar, tap Toolbars, and then tap Tablet PC
Input Panel.
Annotations in Office 2007 (for Windows Vista/7)
In Windows Vista or 7, Microsoft Office 2007 and Digital Pen offer new capabilities that
allow you to work more naturally and efficiently.
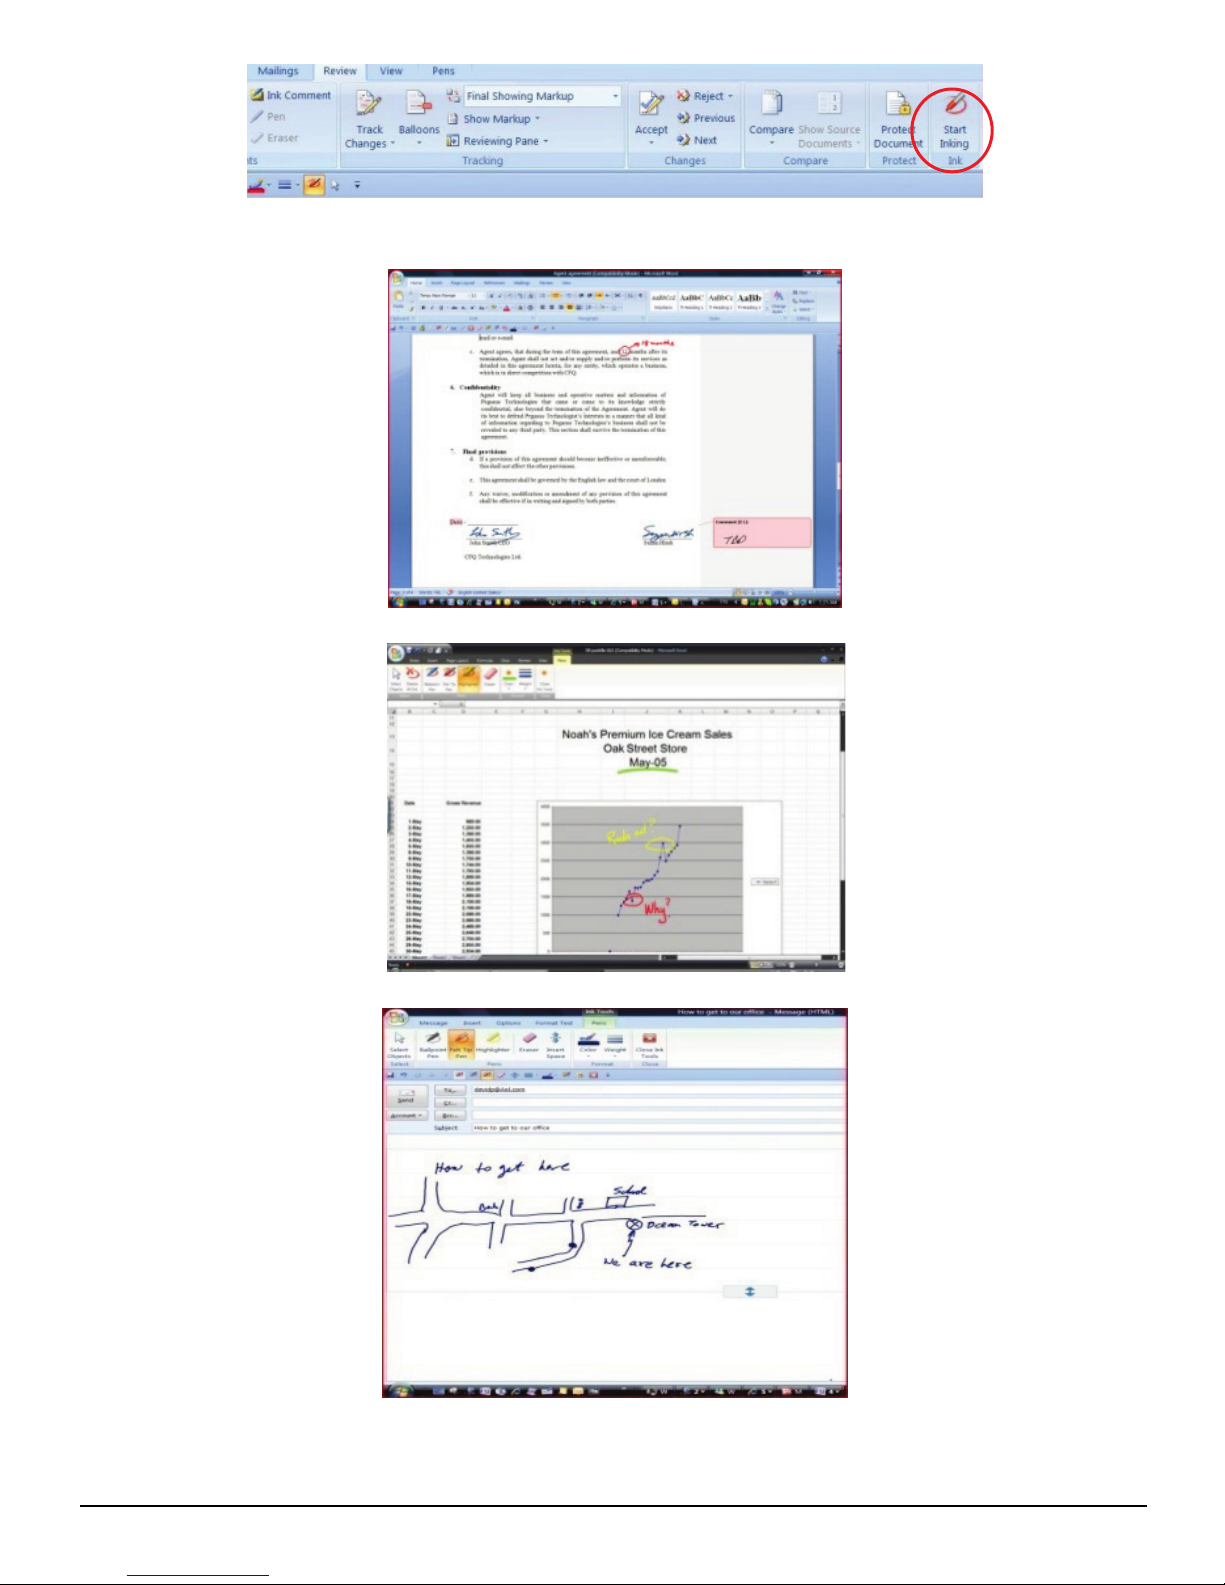
Within Office 2007, numerous applications support digital mark-up with Digital Pen and
provide easy access to digital inking tools for intuitive collaboration in Word, Excel, Outlook,
PowerPoint and OneNote.
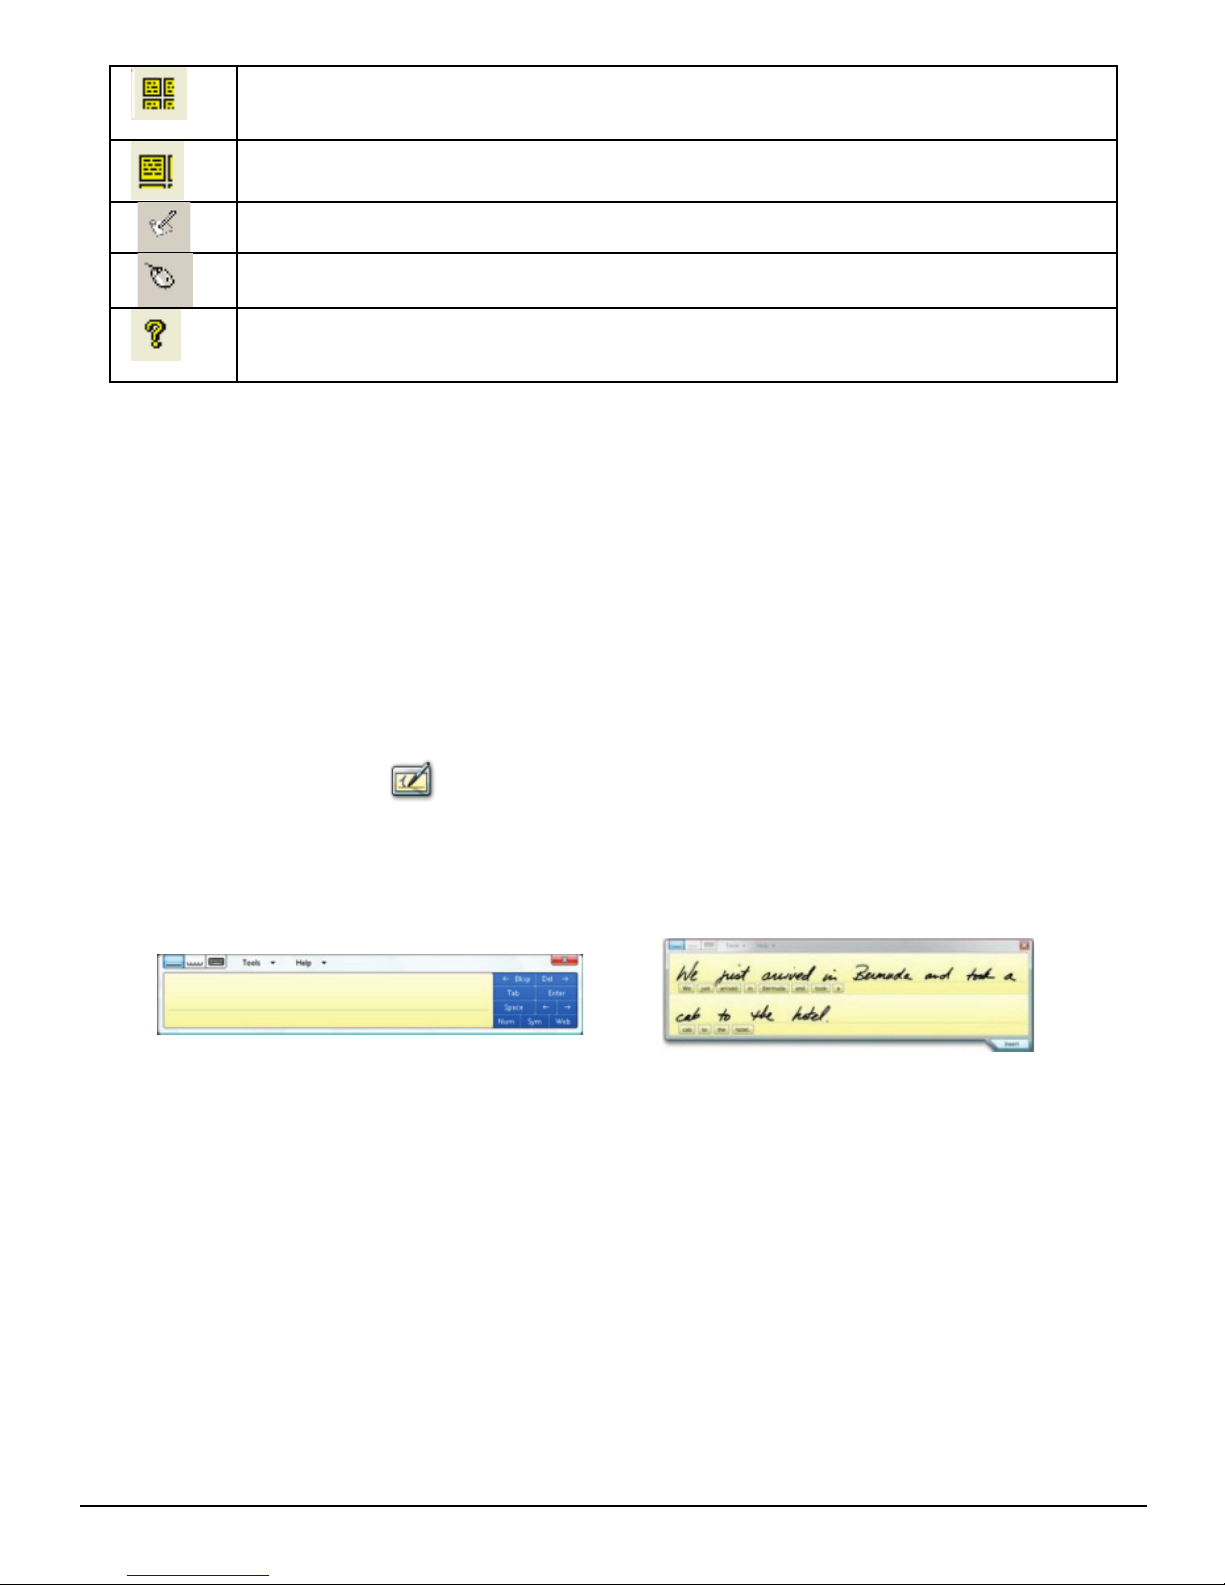
Writing with a pen is a particularly efficient and natural way to comment on an existing
document and to capture rough thoughts that are emerging in real time. Word, PowerPoint
and Excel have a Review tab with a Start Inking button that provides an Ink Tools menu.
This menu includes tools such as: felt tip pen, ballpoint pen, highlighter, and eraser, as well
as options to select the Ink Color.