Table of Contents
1.
Activation Guide
............................................................................................................... 3
1.1 Create a Yellowstone.ai Command Center Account ......................................................... 3
1.2 Activate Camera .................................................................................................................... 3
1.3 Prepare Camera ..................................................................................................................... 3
1.4 Connect to the Network ....................................................................................................... 4
1.5 Receive Your First Image ...................................................................................................... 4
2.
What’s in the Box
............................................................................................................ 5
3.
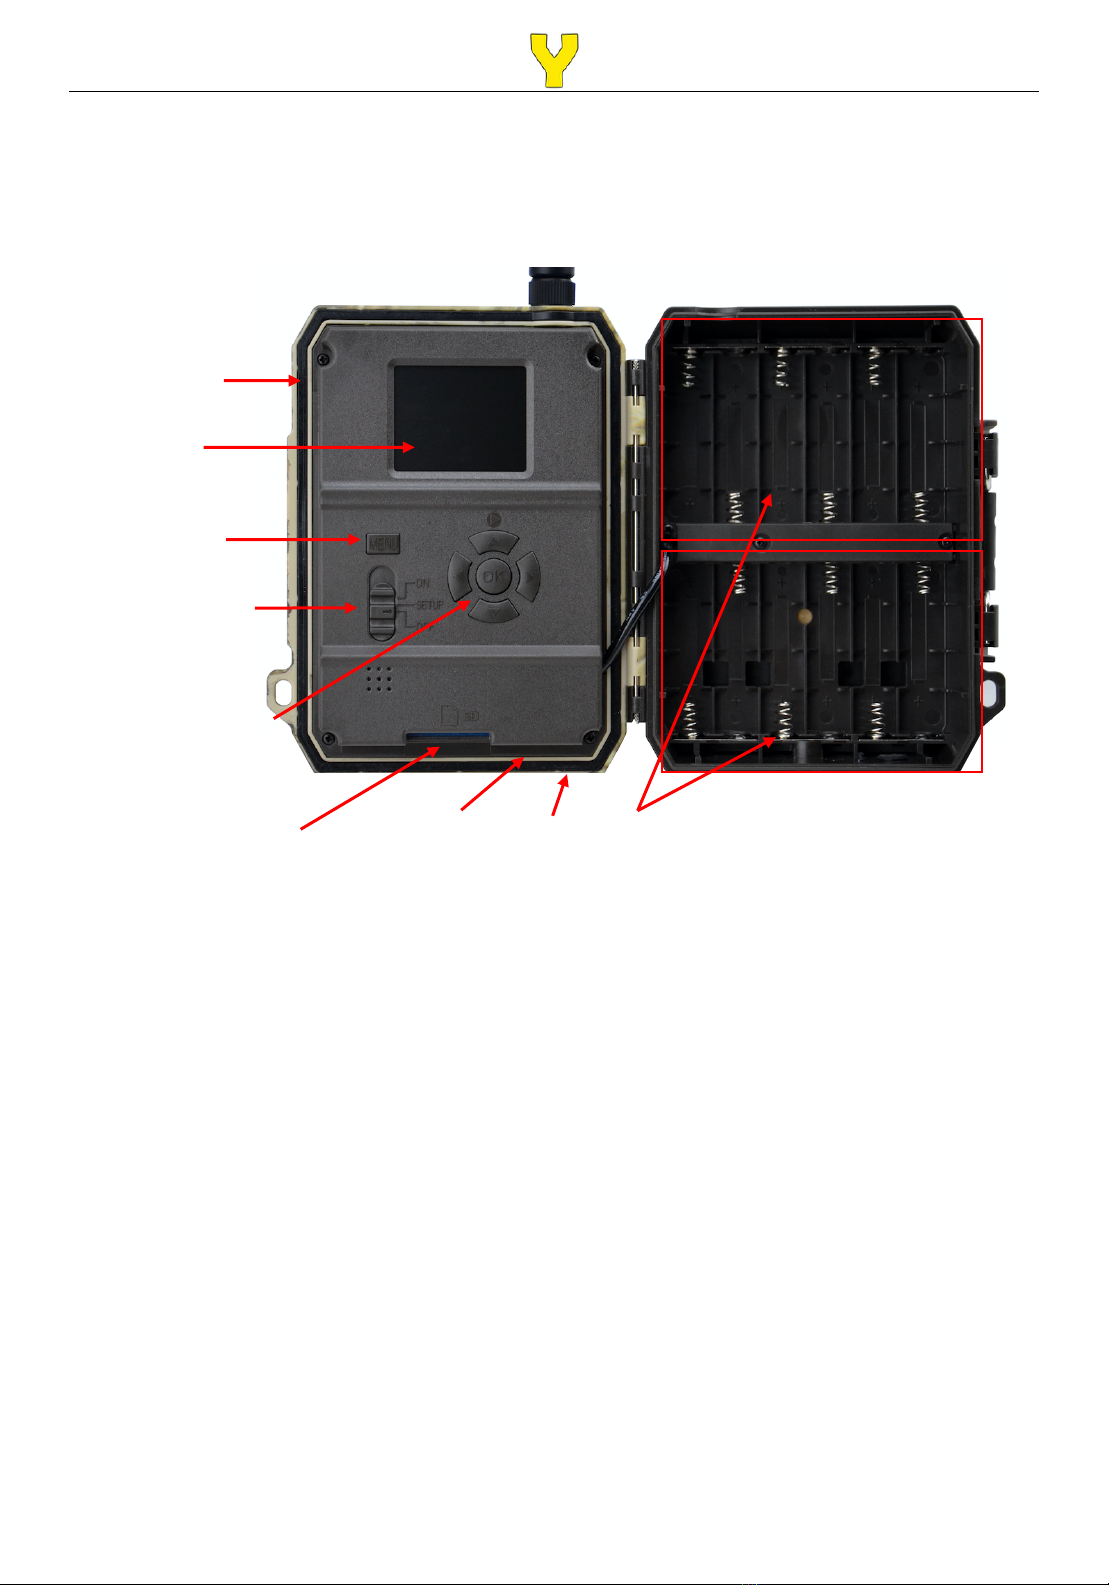
Getting to Know Your Camera
....................................................................................... 6
3.1 Front View .............................................................................................................................. 6
3.2 Inside View ............................................................................................................................. 7
4.
SD Card and Image Storage
........................................................................................... 8
4.1 General Information .............................................................................................................. 8
4.2 Formatting Your SD Card ..................................................................................................... 8
4.3 Viewing Images or Videos .................................................................................................... 9
4.4 Deleting Images or Videos ................................................................................................... 9
5.
Camera Settings
............................................................................................................. 10
5.1 Adjusting Your Settings ...................................................................................................... 10
5.2 Settings (Cam) ..................................................................................................................... 11
5.3 Settings (PIR) ....................................................................................................................... 12
5.4 Settings (4G) ........................................................................................................................ 13
5.5 Settings (Other) ................................................................................................................... 13
5.6 Memory ................................................................................................................................. 14
6.
Camera Specifications
.................................................................................................... 15
7.
Mounting Your Camera
.................................................................................................. 16
8.
Troubleshooting & Questions
....................................................................................... 16