Yitoa M9704 User manual

USER MANUAL
Tablet PC
M9704

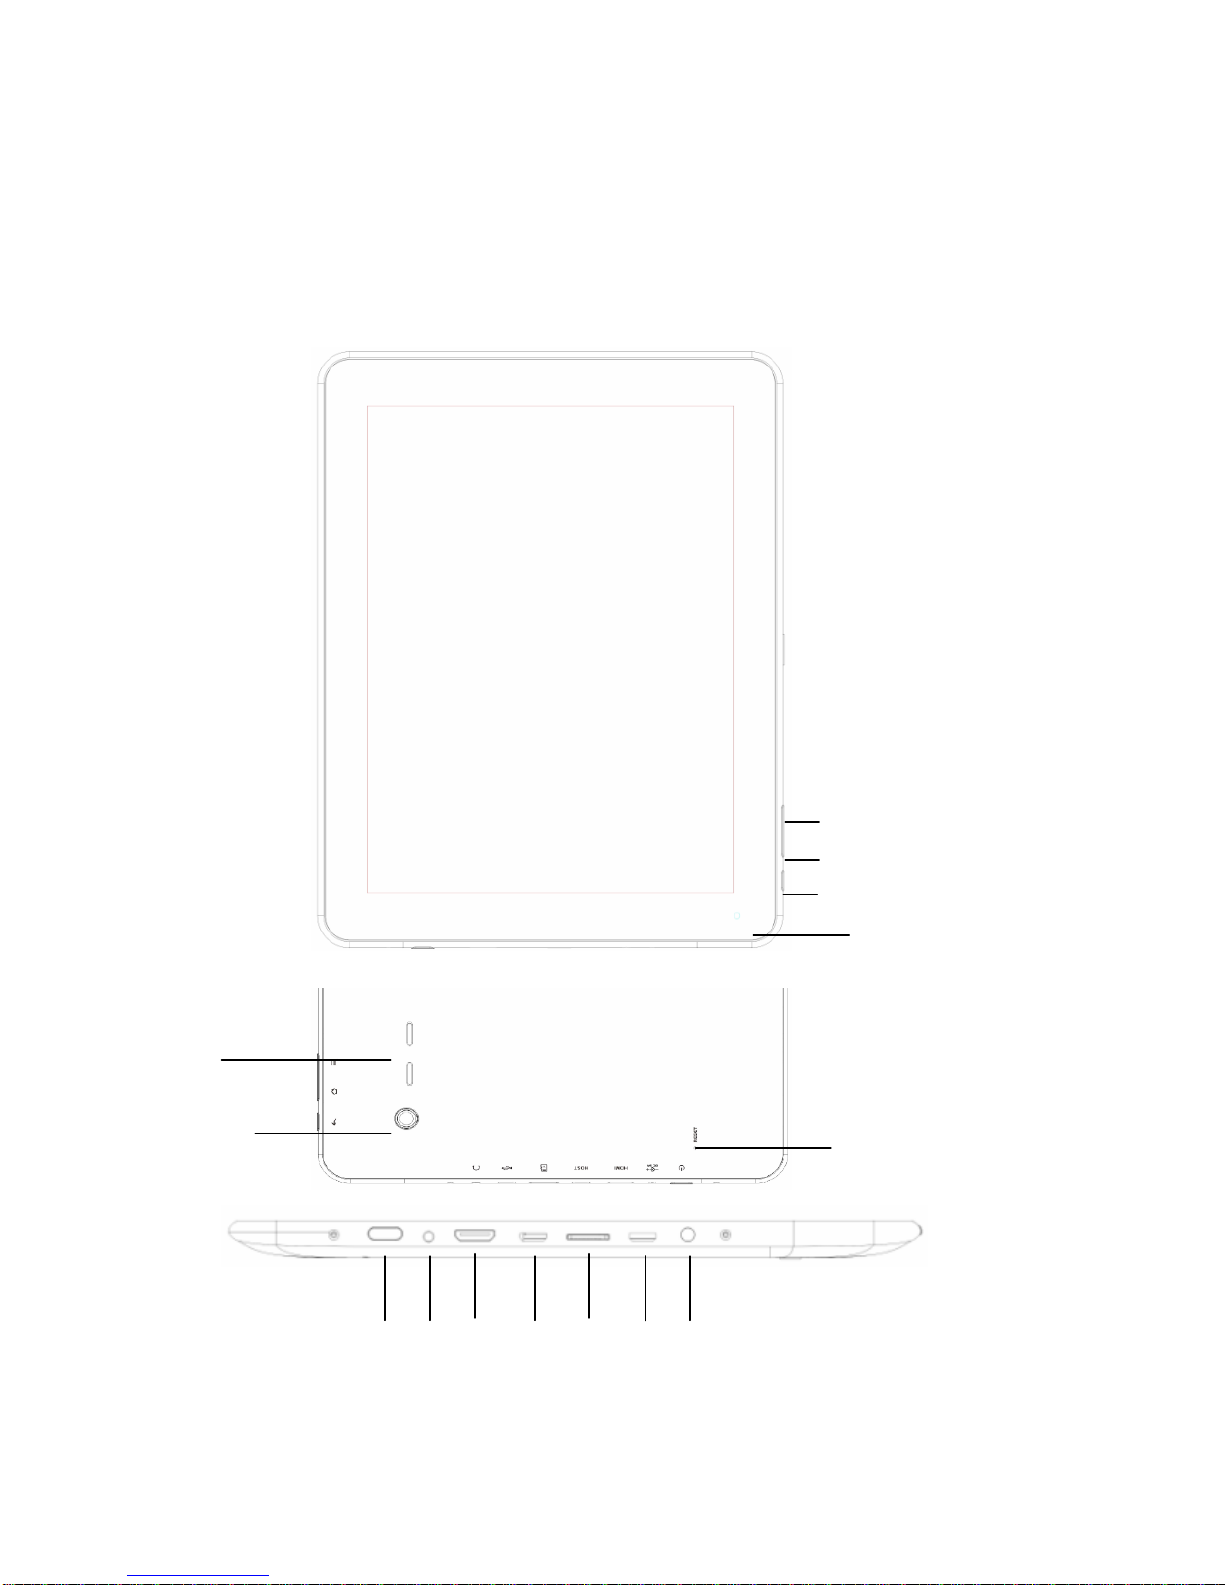
Appearance ..................................................................................................................... 3
Turn On and turn Off....................................................................................................... 4
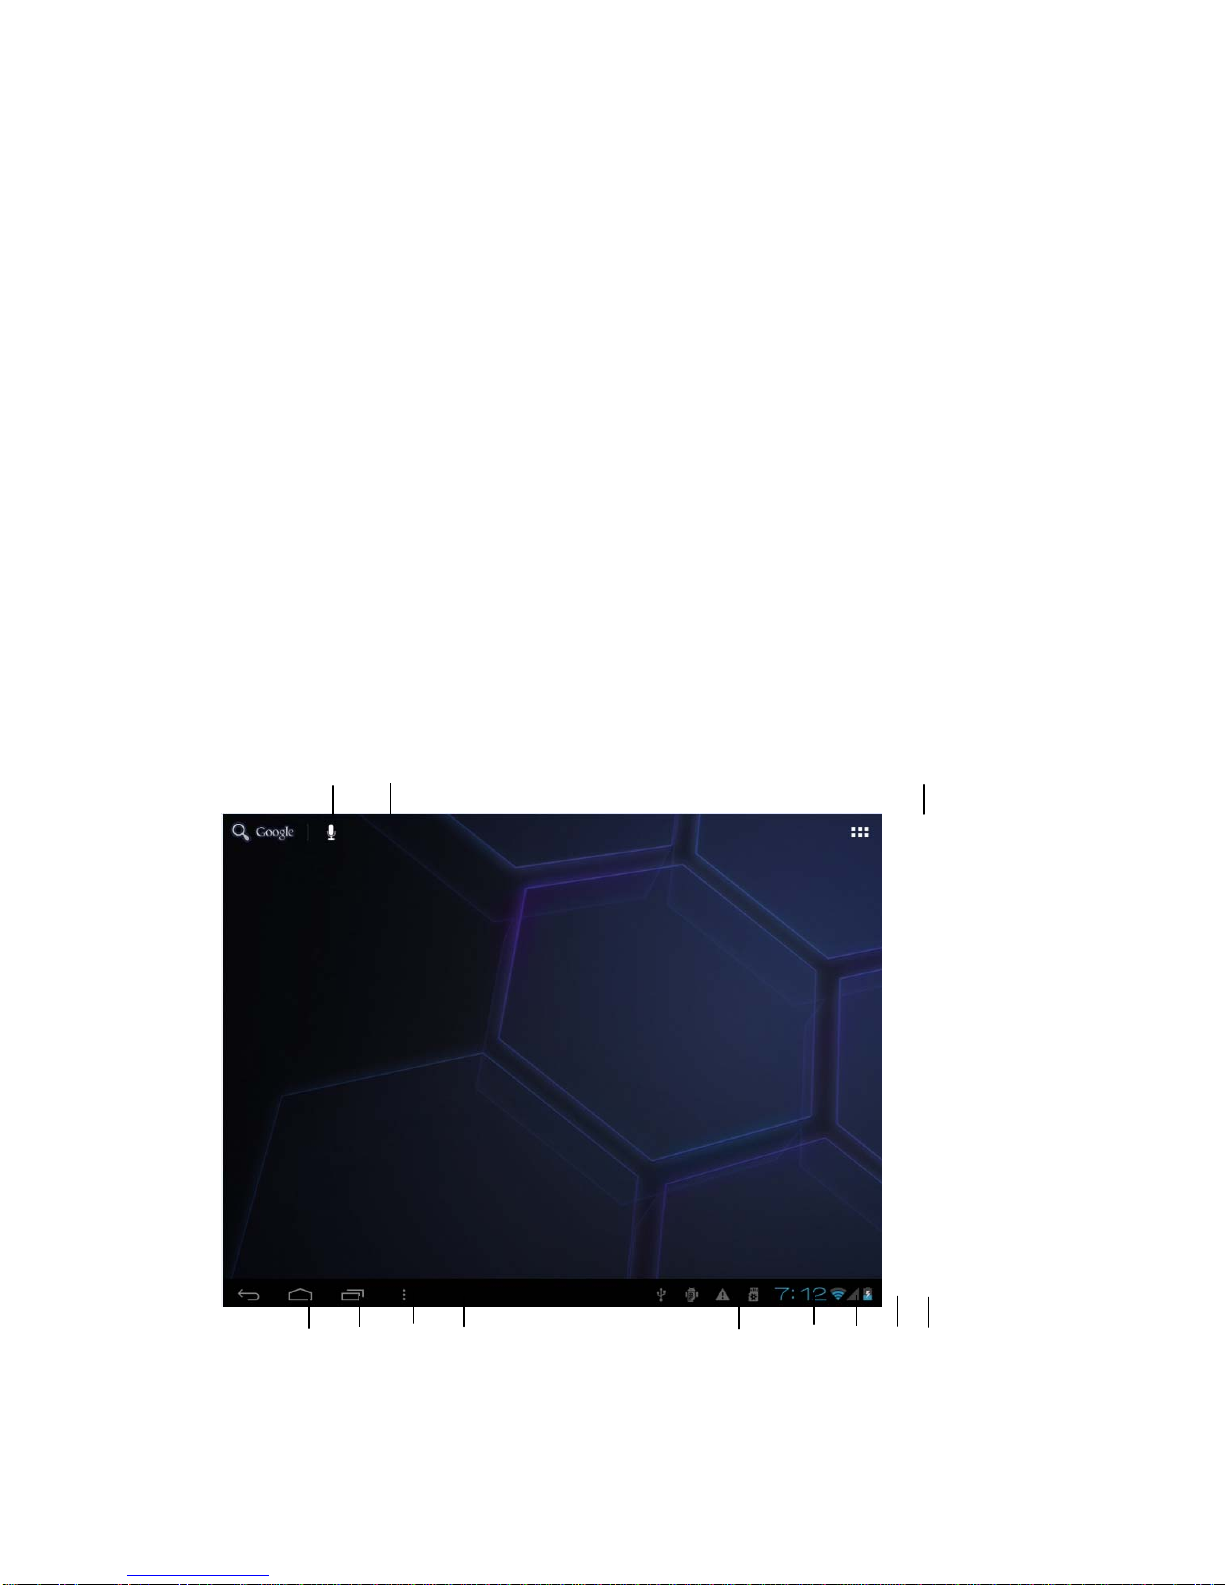
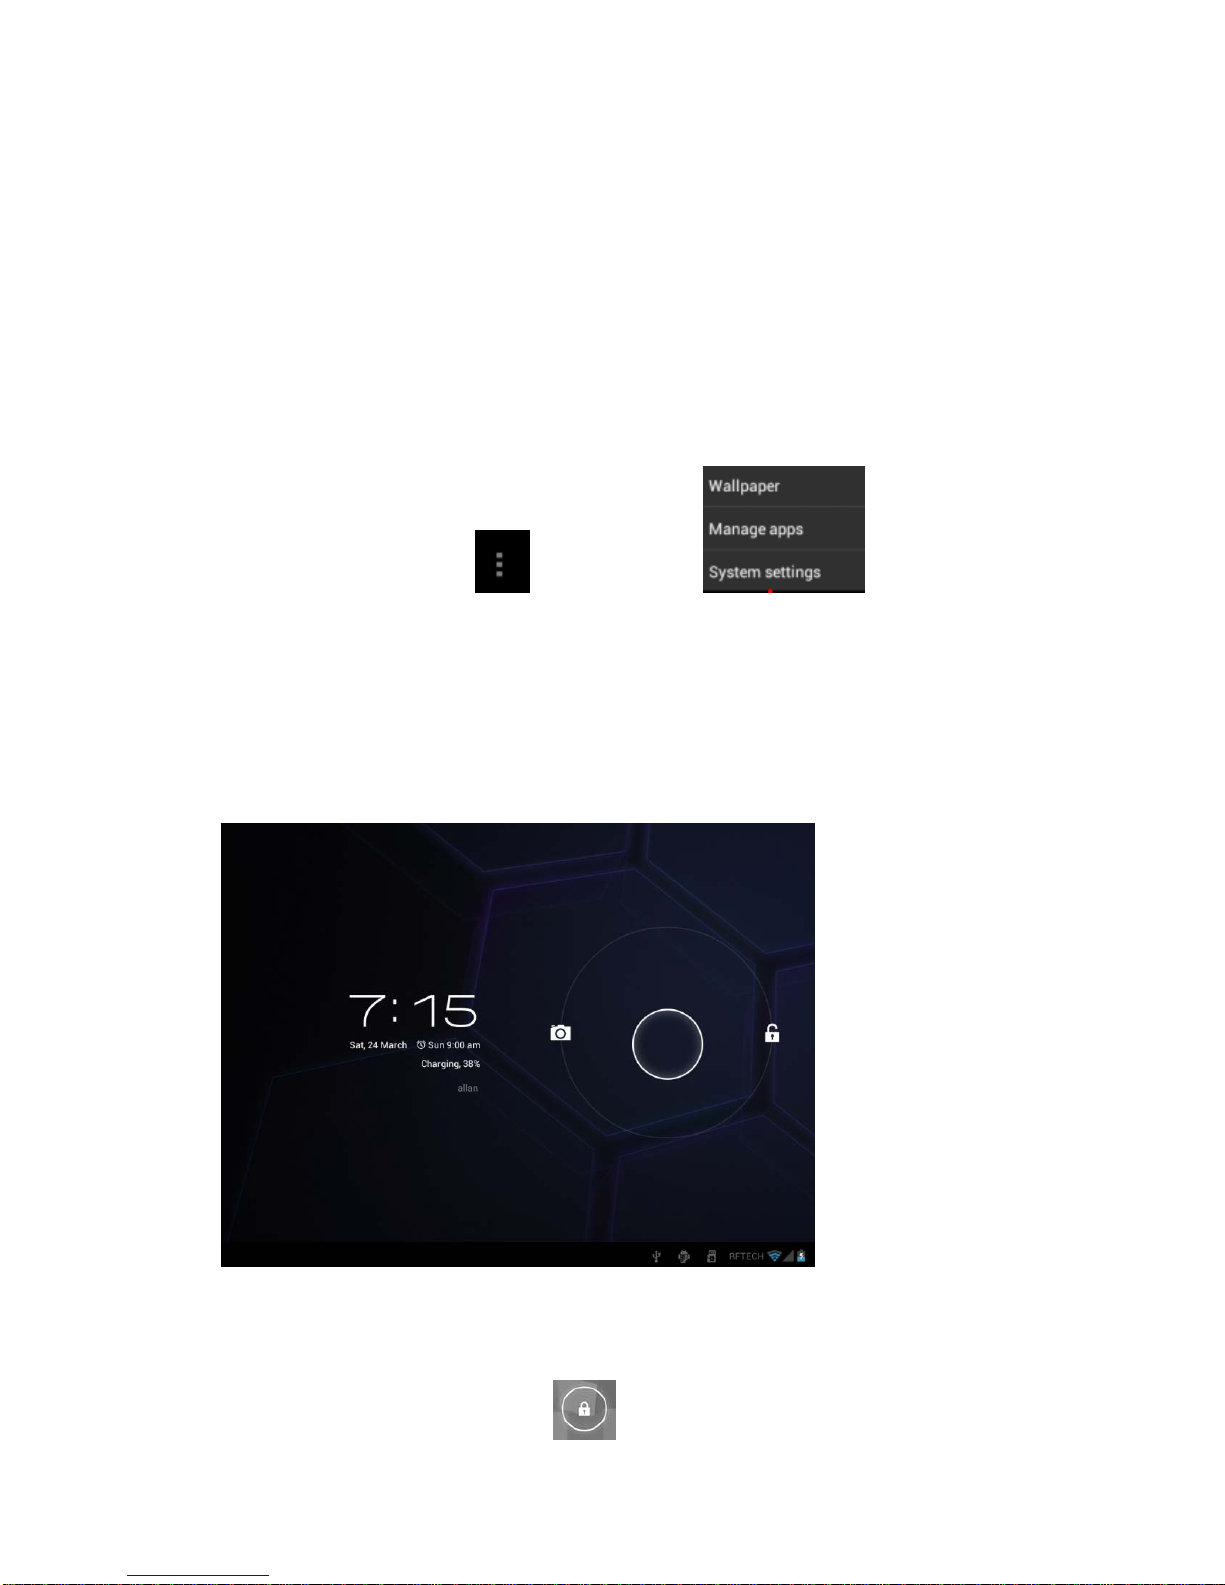
1. Desktop........................................................................................................................ 4
2. Locking desktop......................................................................................................... 5
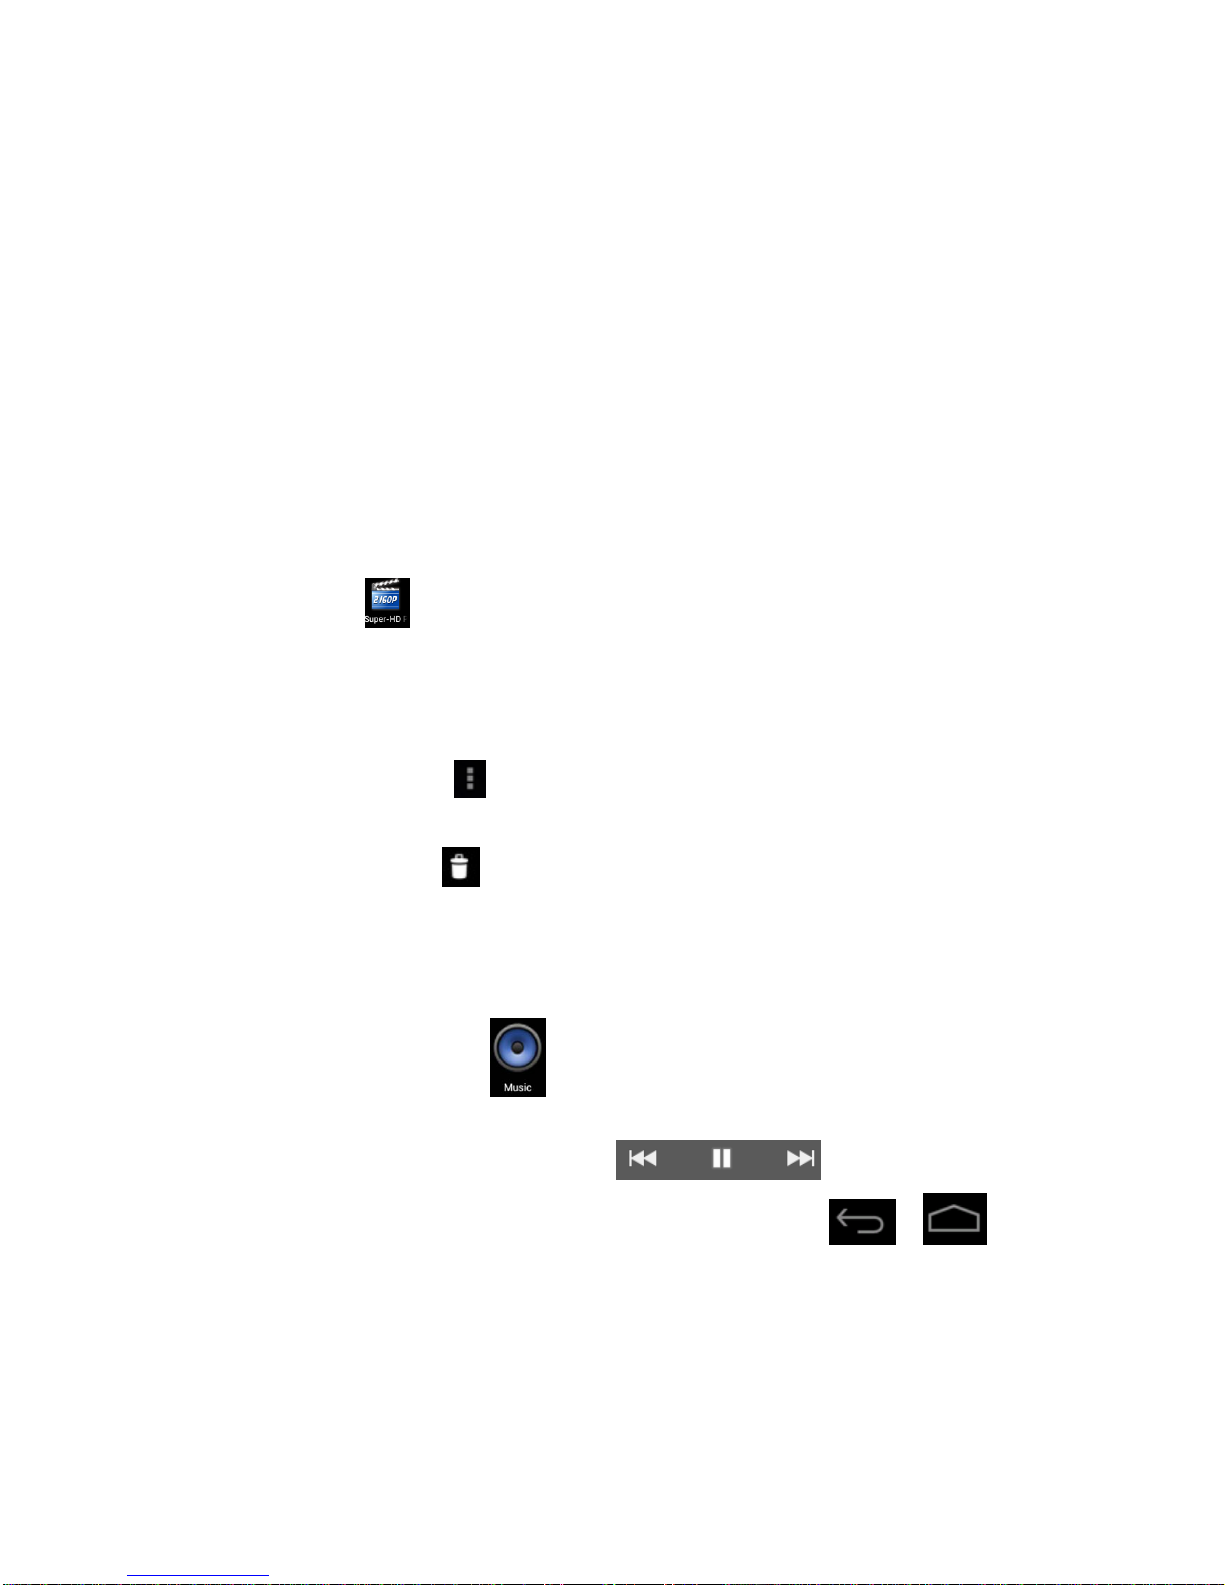
1.Player ......................................................................................................................................6
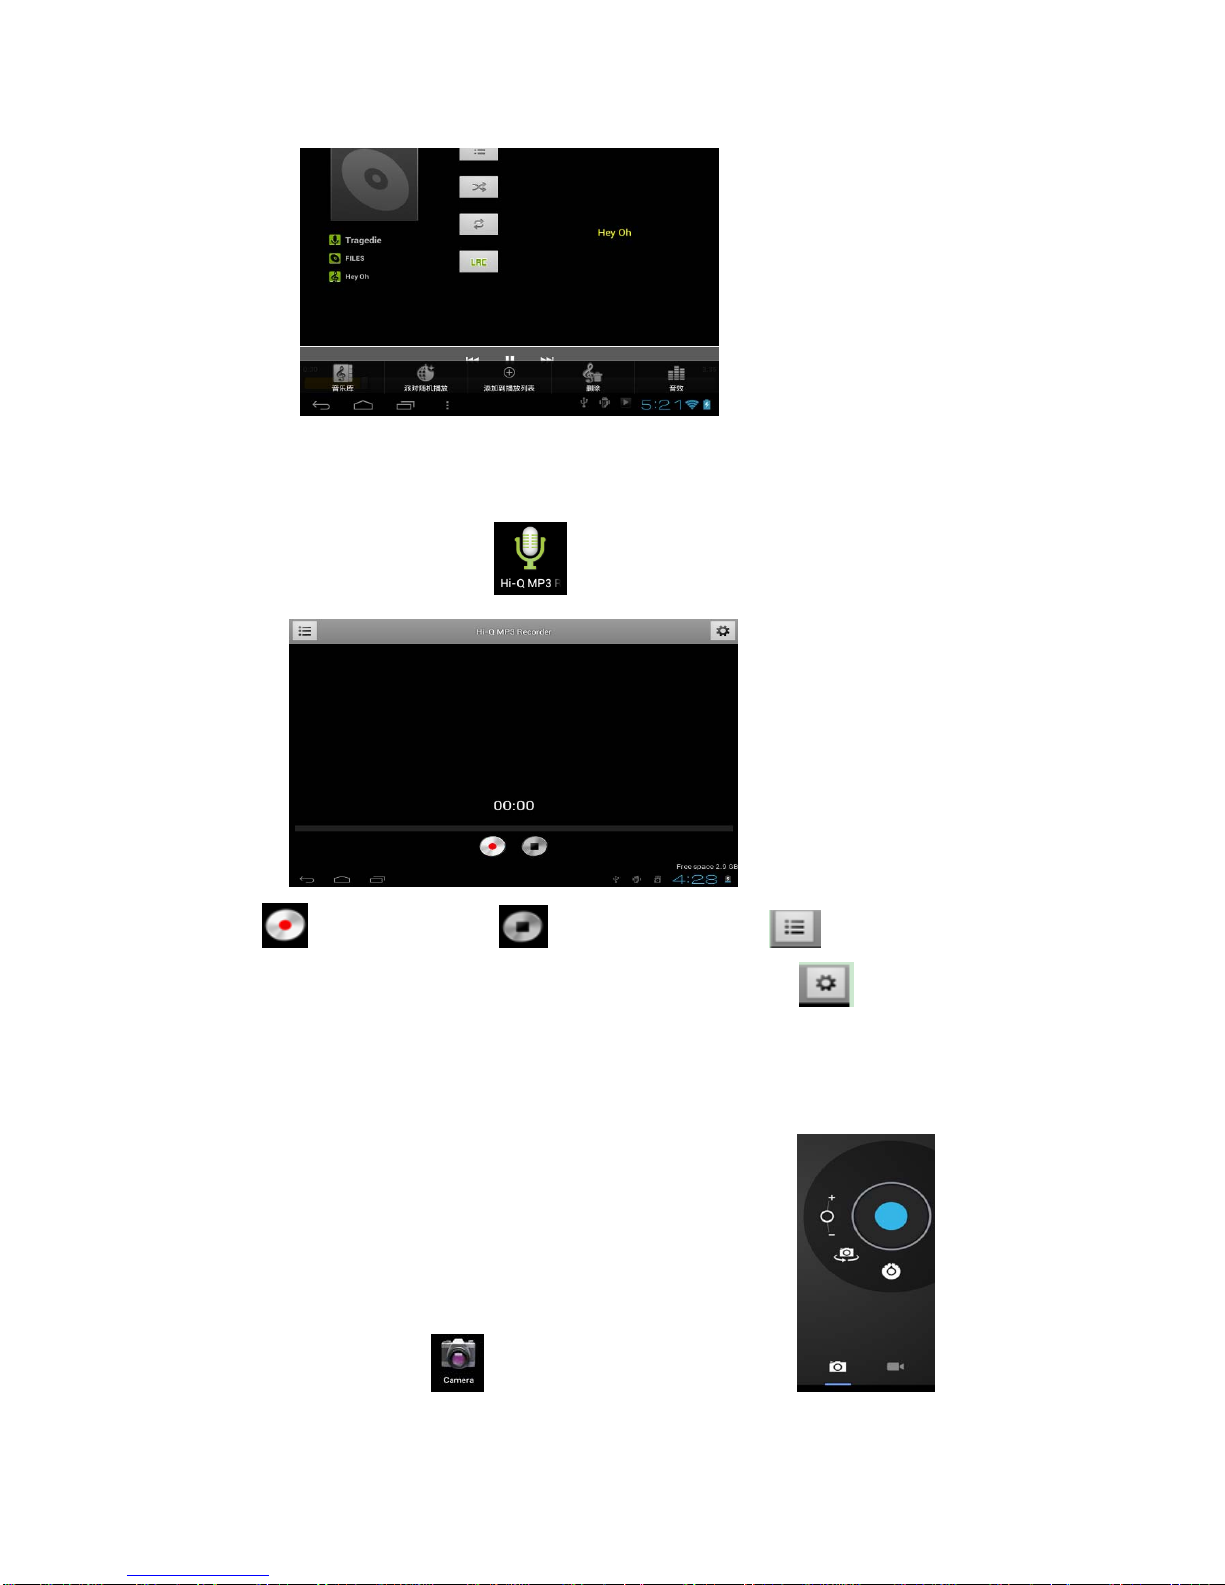
2.Music .........................................................................................................................................6
3. Sound recorder ........................................................................................................... 7
4. Camera........................................................................................................................ 7
Taking pictures ............................................................................................................................7
Recording video...........................................................................................................................8
5. Browser....................................................................................................................... 8
6. Play Store .................................................................................................................... 9
7. Calendar....................................................................................................................... 9
New event.....................................................................................................................................9
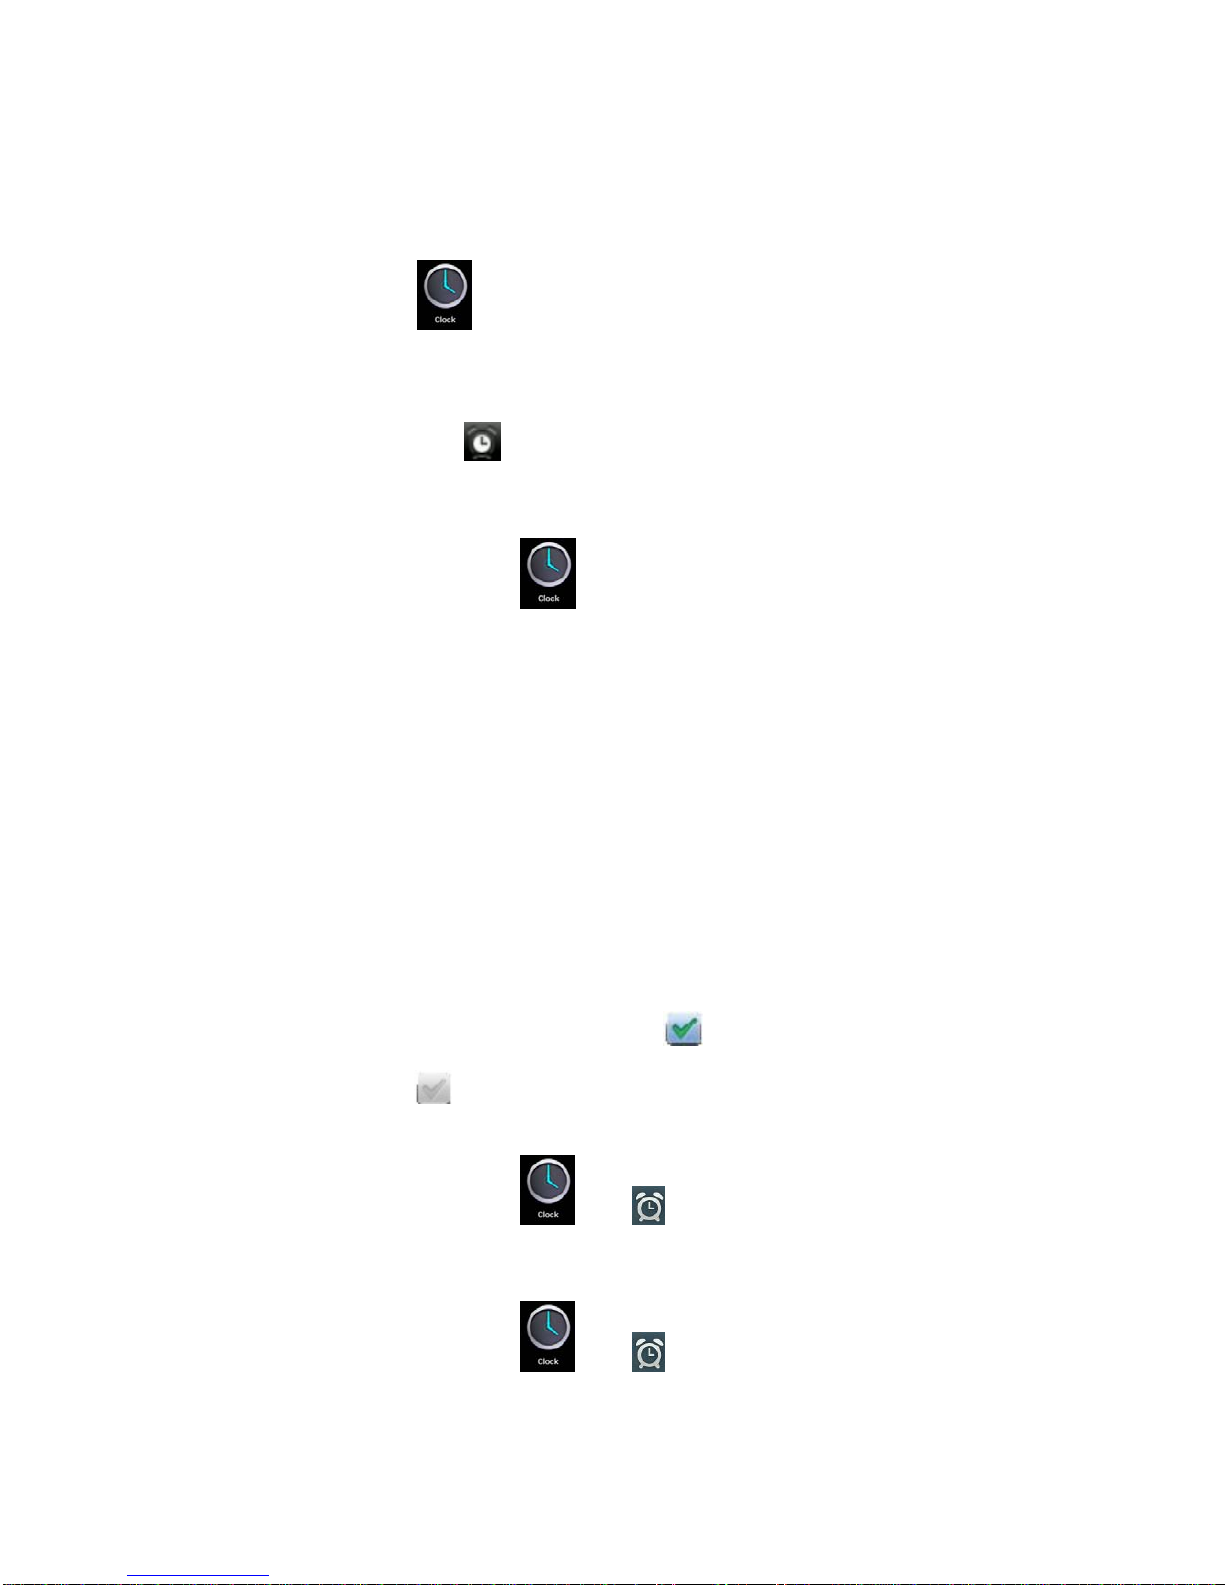
8. Clock ......................................................................................................................... 10
Alarm clock................................................................................................................................10
9. Calculator .................................................................................................................. 11
10. Downloads .............................................................................................................. 11
11. Maps......................................................................................................................... 11
12. E-mail....................................................................................................................... 11
13. File Manager............................................................................................................ 13
14.Copying files between PC and the device ............................................................. 14
Deleting files ..............................................................................................................................14
15.Settings..................................................................................................................... 14
16.Wi-Fi network settings............................................................................................. 16
17. TF card usage.......................................................................................................... 16
Installing programs/Uninstalling the application.................................................................17
Downloading applications from Internet directly ..................................................................17
Uninstalling the application .....................................................................................................18
Charging the device ..................................................................................................................18
Note................................................................................................................................18

Appearance
① ② ③ ④ ⑤ ⑥ ⑦
①On/Off ②DC-5V ③HDMI ④USB HOST ⑤TF Card ⑥USB OTG ⑦ Headset jack
☆Note that USB OTG port can connect USB device as well as computer PC ,while USB HOST
Vo l u m e +
Volume--
Return
Front camera
Horn
Back camera RESET

can only connect USB dongle but not connect computer pc .
Turn On and turn Off
Turning on: Press and hold the power switch for five seconds
Turning off: Press and hold the power switch for five seconds – Tap Turn Off – Tap OK
Screen locking/unlocking: Press the power switch to lock/unlock the screen.
Force shut-down: If the device doesn’t have response, press the Reset key to restart the device.
Note: Do not force shut down the device unless necessary. Under normal condition, please follow
the normal procedure to turn off the device.
Reset key: Press the Reset key to restart the device.。
Touch screen
Tap: Tap to select an icon or option.
Tap and hold: Tap and hold an icon to drag it to the desktop.
Drag and drop: Drag and drop on the desktop to switch among different interfaces.
☆To avoid scratching or breaking the screen, do not put any object on it.
1. Desktop
1:Tap to view all applications
3 2 1
4 5 6 7 8 9 10 11 12

2:Voice search shortcut
3 :Google search
4:Return to current operation
5:Return to desktop directly from the program interface
6:Multipage task selection key
7:Menu function shortcut
8:USB connection symbol
9 : : TF card connection status
10 : Current time
11: WIFI connection signal symbol
12 : Battery status
On desktop, tap the Menu key to show the menu list and perform the
operation. At the same time, set common programs on desktop by tapping and holding the
program icon to move to the desktop;
2. Locking desktop
If the PC won’t be used for a long time, or the power switch is tapped, the device enters standby
state. The standby has two states. One is deep-sleep standby, in which the screen is turned off; the
other is light standby after pressing the power switch. The picture shows the default light standby
state. Tap and hold the unlocking switch , and the A, B symbols as shown in the picture

appear; point A is the camera icon and point B is the unlocking icon. The system will prompt
about the path of unlocking. The ripple at point B in the picture is the path of the prompt. Tap and
drag the unlocking switch to point B to unlock the screen, tap and drag the unlocking switch to
point A to activate the camera function.
Program operation
1.Player
☆AVI, WMV, RM, RMVB, 3GP, MKV, MP4, ASF, VOB, MPG, MOV up to 1080P
HD-Definition
☆The compatible picture formats are: JPEG, BMP, GIF, PNG
1. Tap to into playing interface .
2. Select desired video to play from the all/contents/my favorite/custom list.
3. Tap on the screen to adjust the video (including volume, pause/play, brightness,
etc.)
4. Tap a picture to browse. , sliding screen can browse pictures.
5. Tap the icon for more detailed information or choose pictures to play, or
rotating ,clip etc.
6. Tap the icon to delete .
2.Music
☆
Support music format:MP3、WMA、OGG、FLAC、WAV、ACC。
☆ Tap My Music icon .
☆ Select desired music to play from the music/album/artist/playing list.
☆ Tap Previous→Pause →Next icon for operation.
☆ To return to previous interface while playing music, tap or to
return to the desktop.
Press the Menu key for music operation, as in the interface below:

3. Sound recorder
Click the sound recorder icon .The following interface appears
Tap to start recording, tap to stop the recording, tap to view the recording
files, which will be named by time; select a recording file to play; tap to perform sound
recording setting according to the prompt.
4. Camera
Tap the camera icon to turn on the camera and the interface appears.
Taking pictures

1. In the camera interface, tap to take pictures.
2. The pictures will be saved automatically.
3. Tap the thumbnail of the picture to view the original in Gallery.
4. Press the Back key to return to the camera.
5. Tap the icon to perform camera setting.
Recording video
1. Tap to switch to the video mode, in which you can record video.
2. Tap to start recording, and tap to stop recording.
3. The video files will be saved automatically.
4. Tap the video thumbnail to play the video.
5. Press the Back key to return to the camera.
6. Tap to switch to camera interface.
7. Press the key to perform settings for video recording.
Note: You can tap to switch between front camera and rear camera to take pictures
and record video.
(Note:Only the models with double camera has such function )
5. Browser
Tap the browser icon on desktop to access the Internet:
1 2 3 4

1:Previous web; select to view;2:Current web;3:Add web;;4:: Menu key
6. Play Store
Tap the icon query and download applications.。
When play store is run for the first time, the system will ask to log in with Google account
(if you don’t have a GMAIL account, please apply at http://gmail.google.com).
After downloading, install the applications.
7. Calendar
Tap the calendar icon .
When the calendar is used for the first time, you need to add an Exchange account. Enter the
e-mail address and password of the account, tap Next and follow the prompt the finish the
account setting, and then the calendar is available.
New event
1. In the Calendar interface, tap the date you want to create an event.
2. Select the time →enter the details in each field.
3. Tap OK.
4. Tap the Menu key to select desired calendar interface.
For
ward
\Bac
k
Refresh
Click the link to
open
independent
window
Current
URL
Bookmark
folder
Web
histor
y
Web
interface
shortcut
Search Web history

☆ The dates displayed in grey have events.
8. Clock
Tap the clock icon to view current date and time.
Alarm clock
You can set several alarm clocks at the same time.
☆ When the icon appears in the upper status bar of the screen, at least one
alarm clock is activated.
Adding alarm clock
1. Tap the clock icon .
2. Press the Menu key →Add alarm clock.
3. Set the alarm clock accordingly.
☆If you don’t select Repeat, the alarm clock will be deleted automatically after the
alarm time.
4. Tap Enable alarm clock.
5. Tap OK.
Turning off alarm prompt
When the alarm time is out, a window with the name of alarm clock will pop up.
If you want to repeat the alarm clock in 10 minutes, tap Snooze.
Tap Cancel to stop the prompt.
Enabling alarm clock
If you select Repeat in the settings, the alarm clock will be deactivated temporarily,
but won’t be deleted.
1. In the alarm clock interface, tap the icon after desired alarm clock.
2. Tap to re-activate the alarm clock.
Editing alarm clock
1. Tap the clock icon , →tap .
2. Tap a desired alarm clock →edit.
Deleting alarm clock
1. Tap the clock icon , →tap .
2. Tap desired alarm clock and enter.
3. Tap Delete.

Tap to return to the desktop.
9. Calculator
1. Tap the calculator icon
2. Tap the figures and operators to calculate.
3. Tap Clear to delete one, or tap and hold Clear to clear all the results.
10. Downloads
Tap the download icon .
1. View currently downloaded applications in PC, select and install.
11. Maps
☆This function requires Internet connection.
After connecting to the Internet, tap the map icon to open your current position
automatically; as shown below, you can search desired information;
12. E-mail
☆Support POP3 and SMTP accounts.

Adding e-mail account
You can enter one or several desired e-mail addresses on the device.
1. Tap the e-mail icon .
2. In Your account interface, tap Next.
3. In e-mail address option, enter your e-mail address.
4. In password option, →enter your e-mail password.
5. Tap OK.
6. Manual setting (optional): The server fills the supplier (i.e. gmail.com)
automatically according to your e-mail account. However, if you need to change the
server setting, click Manual setting to make necessary change.
7. Tap Next.
8. Optional: Enter the account name.
9. Enter the name of the message →Tap OK.
☆ After setting, if you can’t access a free e-mail account, please check with your
e-mail service provider whether their server support POP and SMTP protocol.
Inbox
1. Tap the e-mail icon .
2. If you only set one e-mail account, it will be opened directly. If you have set several
accounts the account list will be displayed.
3. Tap desired e-mail account →tap Inbox.
Opening e-mail
1. In the Inbox interface, tap and open an e-mail.
2. For attachment, tap Open to start respective application, or tap Save to save the
attachment to SD card.
3. To Reply, tap Reply or Reply to all.
a) Write the message you want to send.
b) Tap Send to send the e-mail immediately; tap Drafts to save but do not
send the e-mail, or delete directly but do not save or send.
4. To delete the e-mail directly, tap Delete.
Writing new e-mail
1. In Inbox interface, press the Menu key →Write.
2. Tap Send to, and then enter the address of the recipient.
3. Or if you want to send a cc or bcc, press the Menu key →Add cc and bcc, and
enter the e-mail addresses of the recipients.
4. Enter desired subject in the title bar of the e-mail.
5. Tap Write option to enter your personal information.
6. If necessary, press the Menu key →tap Add attachment to add the attachment
file.

7. After writing, press the Menu key →tap Send.
Editing e-mail account
1. Tap the e-mail icon .
2. In the Inbox interface, press the Menu key →tap Account setting.
3. Set your e-mail account accordingly.
4. Tap to return to the Inbox interface.
Deleting e-mail account
☆If you have several accounts and have deleted the default account, the next e-mail
account in the list will be set to default automatically.
1. Tap the e-mail icon .
2. In the Inbox interface, press the Menu key →tap Account.
3. Tap and hold the account you want to delete.
4. In the popup Account option window, tap Delete account.
5. Tap OK to confirm the operation.
Setting default e-mail account
You should always have a default account. Therefore, if you have several e-mail
accounts, you can set anyone to default.
1. Tap the e-mail icon .
2. In the Inbox interface, press the Menu key tap →Account setting.
3. Tap Default account to select it.
If you delete the default account, the next e-mail account in the list will be set to default
automatically.
13. File Manager
Tap the file manager icon to view the files in all storage devices (internal memory,
SD card, USB storage), and install Android applications to the device quickly.
The icons in the top of the screen have the following functions:
1 2 3 4 5 6 7 8

1. Back to previous folder 2. Internal memory
3.Micro SD card 4. USB flash drive
5. Picturefiles 6.Video files
7.Toolbox 8.filesmanager
14.Copying files between PC and the device
You can copy files between external storage device, internal memory and the PC
through File Manager. To copy files to the device, it is required to copy to SD card or
USB storage device first.
1. Tap or to show the files in your storage device.
2. Tap and hold the desired file or folder and tap Copy.
3. Tap the icon to return to the internal memory, tap the target folder and then
tap Paste.
Deleting files
Tap and hold the file or folder, tap Delete and then tap OK to delete.
,
15.Settings
Wireless and network
Wi-Fi
Set and manage wireless access point。(Veiw WIFI
network Settings )
Flow use Flow data settings and management
More.. Flight mode Turn on /stop flying mode

Ethernet Cable network configuration.
VPN VPN network configuration
Device
Volume
Adjust the volume of media, alarm clock and notification
b
y tapping and dragging the slider
,and then tapping
OK。
Notification ringtone Select desired notification ringtone
Voice
Screen lock sounds Play sound when locking and unlocking the screen
Brightness
Adjust the brightness of the screen by tapping and
dragging the slider , and then tapping
OK
wallpaper Wallpaper setting
Auto-rotate screen Switch orientation automatically when rotating the device
System hibernate Adjust the delay before the system automatically
hibernates
Font size Adjust font size interface.
Gravity induction
coordinate system
Choose coordinate system, for some games, need to choose
special coordinate system。
Disply
Screen adaptation Adjust the screen size 。
display device the use situation of storage capacity.
Storage SD Card formatting Remove all the data in the SD card .
Battery Disply battery use data .
Application Disply the application situation in device.
Peesonal
Account and
synchronization Add and manage the account in the device.
Location
service Set the position of Google services and Google search
applications.
Screen safety
protection Screen safety protection setting .
Passwords Passwords setting 。
Equipment
management
1. Add or delete device manager.
2. Unknown source APK installation.
Security
Credentials stored
Application management and access security vouchers and
other documents.
Set the default language system
Keyboard and input
method Set the default keyboard input method and system
Language and
input method Mouse/touch board Adjust the mouse pointer speed of movement .

Backup and
reset 1.backup/Data reduction
2. Restore the factory Settings.
System
Date and time Set and change the time and data in device.
Auxiliary
function Set the screen to be automatic rotation, disply font and
touching effect etc。
Developers
options The basic application for developers
About tables
Check messages, and power, legal information , model,
Android version, the version of the kernel and the version
number.
16.Wi-Fi network settings
Since many functions require Wi-Fi connection, please configure the Wi-Fi network
before operation.
1. Click →Wireless and network.
2. Select to turn on Wi-Fi.
The device will automatically scan and list all available Wi-Fi networks. If the Wi-Fi
connection has icon, you need to enter the valid password.
3. Tap a Wi-Fi connection →if password is required, please enter the valid password →
tap Connect, and the icon appears on the desktop after connecting to Wi-Fi
network.
4. Tap to return to the desktop.
☆If you set to hide Wi-Fi, it won’t be scanned automatically. Please tap Add Wi-Fi
Network, and then enter corresponding information to add the Wi-Fi.
Expand storage
1. USB flash drive
Connect one end of the OTG cable to the flash drive and the other end to the USB OTG
interface of the device. You can use the flash drive when it is ready.
☆ Do not insert/remove the USB flash drive frequently, or else it may damage the flash
drive.
17. TF card usage
☆The device supports memory card up to 32GB.
Insert the memory card into the slot, press with fingers to clamp it; the screen will show
Preparing SD card, and the TF card is ready for use when the characters disappear. You can

operate when the card is ready.
Removing TF card
Close all programs or files opened from the memory card. Tap →TF card and
device memory →Remove TF card. Press the card and it will eject.
☆Do not insert/remove the memory card repeatedly, or else it may damage the
card.
☆Please use qualified memory card to avoid incompatibility.
Installing programs/Uninstalling the application
☆You can install the purchased or downloaded Android applications quickly
through .
1. Copy desired .apk files to SD card or USB storage device →insert the card into the
device or connect USB flash drive to the device.
2. Tap the file manager icon .
3. Tap or and find the folder that saves .apk files.
4. Select an .apk file →Install. After the application is installed, the icon will appear
in the interface that shows all applications.
5. Tap to run the application directly, or tap OK to return to the File Manager
interface.
Downloading applications from Internet directly
You can download Android applications from the Internet directly, and install in the
device quickly.
1. Click the icon to connect to the Internet.
2. Enter the URL and tap the download link of desired application.
3. After downloading, tap and hold the downloaded files (in download log interface),
→click Open →Install.
Connecting to PC to save files
1. Connect the tablet PC to PC and the tablet PC can be used as mobile storage device;
to connect to PC, connect one end of the USB cable to the USB OTG interface of the
tablet PC and the other end to the USB interface of PC;
2. After connected, the tablet PC will prompt ,clickthe icon
and then select Turn on USB storage to transmit data between PC and tablet PC, as

shown below:
Uninstalling the application
You can uninstall the Android application quickly.
1. Tap Menu key →Settings →Application →Manage applications.
2. Tap an application →Uninstall.
3. Tap OK to uninstall.
Charging the device
Connect one end of the power adapter to the socket and the other end to the power jack
to charge the device.
During charging, the battery symbol is ; after charged, the battery symbol turns into .
☆You can use USB cable to charge the device.
☆You can use the device while charging; however, it will extend the charging time.
●Use the device at least once every week.
●Charge the battery regularly.
●Do not keep the battery too low for long time.
Note
When you use this device, please follow the safety notice below to prevent fire, electric
shock and injury.
zKeep the device away from rain and moisture.
zKeep the device away from direct sunlight and heat source.
zProtect the power cord. When connect the power cord, do not step onto it or place
any object on it, which may cause extrusion. Protect the connector of the power
cord connected devices specially.
zPlease use the original power adapter for charging. Nonconforming chargers may
cause harms.
zDo not disassemble the shell or repair it without authorization.
Handle the screen gently. To clear the fingerprints or dust on the screen, use soft cloth
dedicated for camera lens instead of gauze.

WARNING!
FCC Caution: Any changes or modifications not expressly approved by the party responsible
for compliance could void the user's authority to operate this equipment.
This device complies with Part 15 of the FCC Rules. Operation is subject to the following two
conditions: (1) This device may not cause harmful interference, and (2) this device must
accept any interference received, including interference that may cause undesired operation.
This device and its antenna(s) must not be co-located or operating in conjunction with any
other antenna or transmitter.
NOTE: This equipment has been tested and found to comply with the limits for a Class B
digital device, pursuant to Part 15 of the FCC Rules. These limits are designed to provide
reasonable protection against harmful interference in a residential installation. This equipment
generates, uses and can radiate radio frequency energy and, if not installed and used in
accordance with the instructions, may cause harmful interference to radio communications.
However, there is no guarantee that interference will not occur in a particular installation.
If this equipment does cause harmful interference to radio or television reception, which can be
determined by turning the equipment off and on, the user is encouraged to try to correct the
interference by one or more of the following measures:
-- Reorient or relocate the receiving antenna.
-- Increase the separation between the equipment and receiver.
-- Connect the equipment into an outlet on a circuit different
from that to which the receiver is connected.
-- Consult the dealer or an experienced radio/TV technician for help
The device complies with RF specifications when the device used at 5mm form your body
Use careful with the earphone maybe possible excessive sound pressure from earphones and
headphones can cause hearing loss. 阝
Table of contents