SAFETY PRECAUTIONS
CAUTION
CAUTION
NOTE
NOTE
Please read this safety precaution carefully before installation.
Do observe the following safety precautions, for they are very important.
Meaning of marks:
Confirm there is no abnormal phenomena during test operation after installation completed, then hand the
manual to the user.
Others may perform improper installation which cause electric shock or fire.
Improper installation may cause electric shock or fire
Improper installation may cause electric shock or fire
A random disassembly may cause abnormal operation or heating, which may result in fire.
Once combustible gas leaks and remains around central Controller, fire may be caused
Otherwise electricity leakage or heating may be caused, which may result in fire
Otherwise wire break or heating may be caused, which may result in fire.
Installation must be conducted by professionals
Follow this manual as strictly as possible
Another installation must be performed by professionals
Don't disassemble your air conditioner at will
Don't install it in a place where combustible gas easily leaks
Wire must be suitable for the current of central Controller.
Wire must be suitable for central controller, never bring outside force to bear on the terminal
This sign warns of risk of death or serious in jury
This sign warns of injury or damage to property
OTHER PRECAUTIONS
Do not install it in a place with oil, steam or sulphur gas, or else deform or malfunction may occur.
1. This installation manual contains information about the procedure of installing Wire Controller.
Please refer to Indoor Unit Installation Manual for connecting between Wire Controller and Indoor Unit.
2. Circuit of Wire Controller is low voltage circuit. Never connect it with a standard 220V/380V circuit or put it into
a same Wiring Tube with the circuit.
3. The shield cable must be connected stable to the ground, or transmission may fail.
4. Do not attempt to extend the shield cable by cutting, if it is necessary, use Terminal Connection Block to connect.
5. After finishing connection, do not use Megger to have the insulation check to the signal wire.
1. Make sure the following pasts has been prepared
2. Preparing for the following at site
Number
Number
1
2
3
4
5
6
7
1
2
3
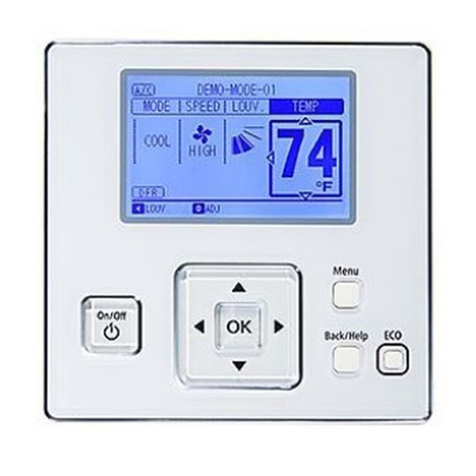
Wire Controller
Wood Mounting Screw
Mounting Screw
Installation Manual
Owner's Manual
5-terminal Group
Terminal Installation Screw
5-core Shield Cable
Switch Box
Wiring Tube (Insulating Sleeve and
Tightening Screw)
1
2
2
1
1
1
2
1
1
1
1
With Corer
M4X16 (For Mounting on the Wall)
M4X25 (For Mounting on the Electrical Switch Box)
RS9005E
ST3.9x12-F-H
2
Take 0.05mmx 5 Cable below 30m length
Name
Name
Quantity
Quantity
Install On
the Wall
Install into
the Wall
Note
Remarks
Installation Location
Wire Controller Installation Notice
Preparation Before Installation
NOTE
NOTE
The diameter of Wire Controller wire must be suitable for its length.
Wiring Tube must be suitable for the wires.
Turn a screwdriver at the concave on bottom panel of the Wire Controller to remove the Cover.
Cut a hole that can let a Three-cores Rubber Insulating Screen Cable pass by from the middle of
Wire Controller Top Cover before installing.
Refer to Electrical Switch Box Installation above for other installation information you need.
Use Clue around the Screen Cables and the Hole for sealing after installation completed.
Never turn screws too tightly, or else the cover would be dented or the Liquid Crystal breaks.
Do not cut wires when installing Wire Controller Cover.
Please leave enough long enough long cable for maintenance of the Wire Controller Board.
Never turn screws too tightly, or else the cover would be dented, or the Liquid Crystal breaks.
Do not cut wires when installing Wire Controller cover.
Wire Tube
Wire Controller Cover Wire Controller Cover
Hole
Electrical Switch Box
Mounting Screw
(M4X25)
Wood Mounting Screw
(M4X25)
Wire Controller
Board Wire Controller
Board
Installation into the wall Installation on the wall
A
B
C
D
INSTALLATION PROCEDURE
WIRE CONTROLLER INSTALLATION MANUAL
(Please K eep this manual in a safe place for future reference)
Model: AMR01M


