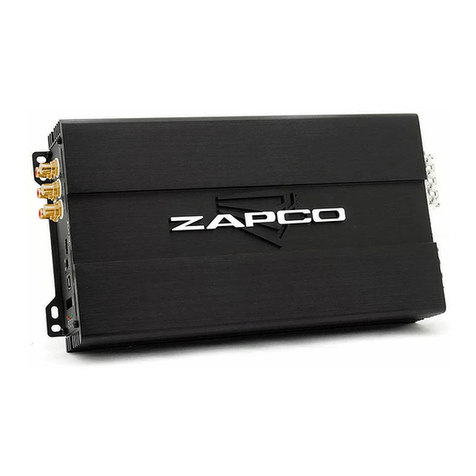
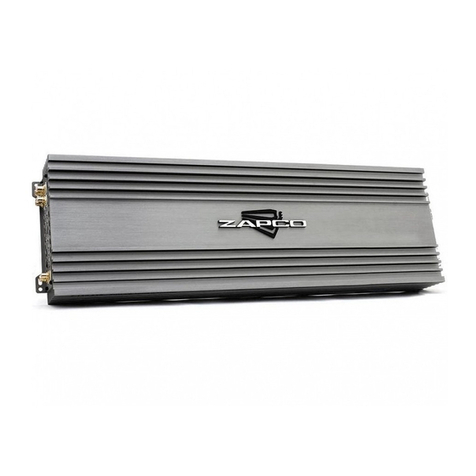
zapco ST-D SQ MINI Series User manual

1
ENGLISH
ITALIANO
ST-D SQ MINI SERIES
Owner’s Manual / Manuale d’uso

3
Table of Contents
A new level of Sound Quality ............................................................................................................................. 4
History of the Studio Series ........................................................................................................................ 4
The ST-D SQ MINI amplifiers ....................................................................................................................... 5
Before you start your installation ....................................................................................................................... 6
All Wire is not created equal .................................................................................................................................. 6
Planning your power connections ................................................................................................................... 7
Wire size ............................................................................................................................................................................ 8
Mounting your amplifier ........................................................................................................................................... 9
ST-64D SQ MINI Controls/Speakers ................................................................................................................ 10
ST-104D SQ MINI Controls/Speakers ............................................................................................................. 11
ST-501D SQ MINI Controls/Speakers ............................................................................................................. 12
Strapping the ST-501D SQ MINI ....................................................................................................................... 13
Speaker Wiring ............................................................................................................................................................. 14
4-Ch. Amplifier - 4-Ch. Stereo Mode .................................................................................................. 14
4-Ch. Amplifier - High Power 2-Ch. Mode ....................................................................................... 15
4-Ch. Amplifier - 5-Ch. Mode ................................................................................................................... 16
Mono Amplifier - Single Voice Coil Subwoofer .......................................................................... 17
Mono Amplifier - Strapping the Outputs ....................................................................................... 18
Mono Amplifier - Dual Voice Coil Subwoofer .............................................................................. 19
Technical Specifications ........................................................................................................................................ 19
Protect your audio investment by using the correct type of wire for Power and Ground.
See All Wire is not created equal on Page 6
ENGLISH

5
The Studio-D SQ MINI Amplifiers
With the new Studio-D SQ MINI amps you get the sound quality that other companies
offer only in their big competition amps (and better than many of them) in a incredibly
compact chassis. But these little beasts aren’t just small, and they aren’t just powerful.
They had to earn the Zapco name before we put them into production.
They have all the advanced features you would expect... and more. Thanks to a brand
new technology, we are able use the NXP Class D solution to get amazing power and
performance in a incredibly compact chassis with over 90% efficiency.
The Mini-Amps Series includes two 4-channel amps with 50 Watts RMS/Ch @ 4Ω (ST-64D
SQ MINI), and 95 Watts RMS/Ch @ 4Ω (ST-104D SQ MINI) at less than 0.5% distortion, and
a 530 Watts Mono amp (ST-501D SQ MINI).
The ST-64D and ST-104D have also the HD Bluetooth Module port, so you can fire up the
music on your phone, tablet, or other Bluetooth smart device. quipped with crossover
controls, high and low inputs, sub outputs, etc... they are the perfect choice for any
application where the minimum space is important. fficiency is also very high, so they
are optimal for powerful system in electric cars.
4
A new level of Sound Quality
Zapco has a reputation for sound quality that is unsurpassed. It is our dedication to sonic
purity and our passion for performance that built that reputation. With all the new
amplifiers coming into the market, none has been any threat to Zapco's standing as the
premiere amp and processor company for pure sound quality.
Just check out the audio competition scene. The pros know what to use to win.
Competition amps however, do not come cheap, and not everyone wants to compete.
The challenge then, was to put Zapco's 40 plus years of experience to use in the
development of an amplifier that would bring Zapco sound a line of products for every-
day use and that everyone could afford. And the studio line is just that amplifier. In the
time it has been out it has built a reputation as the best sounding amp in the class.
Of course, not everyone buys strictly by sound (although they should). Maybe it's the
wrong color, maybe it's too big... or too small. But one thing is constant. veryone who
hears the studio amps agrees; it sounds better than any other product in the class.
History of the Studio Series
Perfection cannot be achieved. But that does not make its pursuit less valuable. Zapco is
committed to making every product we make better than the last. We introduced the
ST-X amps in 2013. In 2015 we improved the PCB design and upgraded components to
make the sonically improved ST-X II.
Three years ago we introduced the Studio SQ amplifier to take affordable sound quality
to a new level. We added the proprietary RCA connectors from the Z-LX amplifiers,
changed the capacitors to a higher end audio cap, and made a few other small changes.
All this takes took the Studio sound to a new level of sonic performance for an affordable
amplifier.
This year we bring you the Studio-SQ III series with a new high efficiency finned chassis
and temperature controlled fans to assure that your amplifier plays all day long with no
problems of overheating, even when you get that urge to really boogie. And with the
new chassis, we even made a few tweaks to the internal components to take the sound
quality up another notch.
15,1 cm
8,6 cm
ST-64D MI I
What makes the MI I amps truly amazing are their extremely small sizes.
The ST-64D MI I measures only 15,1 cm (6”) x 8,6 cm (3,4”), and the ST-104D MI I is only 23,6 cm (9,3”) x 9,5 cm (3,7”).

Before you start your installation
ZAPCO highly recommends that a fuse or circuit breaker be placed within 18" of the
battery. Although you will add a fuse or fuse block near the amplifier it is still a possibility
that a pinched power wire between the component fuse and the battery could result in
a short, or even a fire. The protection device should be placed where it can be accessed
easily and all wiring should be routed safely and correctly according to the following
guidelines:
• Do not run wiring close to hot or spinning objects
• Always use wire grommets when routing wire through the firewall or any other
metal panels
• Make sure that the potential for pinched wiring is avoided by routing all wires away
from moving objects, including brake, gas and clutch pedals, etc
When connecting our amplifiers to pre-wired stock speakers, care must be taken that there
are no common connections between left and right speaker wires, i.e. two or more speakers
using the same ground connection (very common in pre-85 cars), as this will cause the
amplifier to go into immediate protection or may cause damage to the amplifier. Output
connections are not common chassis ground. Please follow the hookup instructions in
this owner's manual. Any questions should be directed to your local ZAPCO dealer.
All Wire is not created equal
Please do not use CCA wire with Zapco amplifiers
It is easy to think of wire as just wire but the fact is there are major differences between
the types of wires being offered today. The price of copper has gone up quite a bit lately,
but you will notice that you can still buy heavy primary wire at very reasonable prices.
How can this be? Simple... That lower price wire is not all copper, it is CCA wire.
CCA stands for Copper Clad, Aluminum. That means it is aluminum wire with a thin coating
of copper around the outside of the wire. Does it look like copper wire? Absolutely. But
does it conduct electrical current like copper? Absolutely NOT!
If the wire does not say OFC Copper wire or Solid Copper wire do not use it.
Two things can and likely will happen:
• Because CCA wire can not conduct DC electrical current like copper wire can, your amp
will not get the current it needs to produce its rated power. That means you get less
power and more distortion. It also taxes the amplifier that is trying to make its power,
shortening the life of the amp.
• CCA wire corrodes quickly and causes terminals that used to be tight to become
loose. This causes arcing when electrons to fly around all the open space lookin for
more copper. This causes heat that damages connections and can even eventually
melt the terminal blocks on your amplifier.
In short: While CCA wire is excellent for high frequency AC current (like tweeter voice
coils), it is absolutely bad for high current 12V DC like power and ground for a car audio
amplifier.
We have seen CCA wire become a major cause of amplifier failures as buyers are offered
CCA as a low cost alternative to pure copper wire. So always look at the description of the
contents of wire that you purchase. When someone offers to save you some money with
CCA wire just say "No, thank you". Protect your investment with real copper wire.
Planning your power connections
The power end plates of the Zapco ST-D MINI amplifiers carry the power connections
and the speaker connections and vary somewhat by the number of channels. The main
12-volt power input, the 12-volt turn-on wire, and the main Ground connection are
common to both models.
• The +12V B is the main power input. This must be connected the vehicle battery's
positive (+) terminal, and a main system fuse should be placed close to the battery
• The GND is the main ground or negative connection. This must be securely attached
to bare metal at the vehicle frame, or other heavy chassis component with a direct
connection to the frame
ote: Seat bolts and seat belt bolts are OT good ground points
• The terminal between the main power and ground is the +12 turn-on input (R M)
and can be connected to the head unit turn-on output wire. If none is available it can
be connected to an accessory (ACC) terminal. You should avoid using any ignition-on
(IGN) wire, as they can be noisy
76
9
Wire Sizing Chart
4 ft 7 ft 10 ft 13 ft 16 ft 19 ft 22 ft 28 ft
0-20 amps 14 12 12 10 10 888
20-35 amps 12 10 886664
35-50 amps 10 8866444
50-60 amps 88644442
65-85 amps 66442220
85 -105amps 66422220
105-125 amps 44422000
125-150 amps 22220000
Let's look at a fairly small system. If you use a 50 watt/ch amp (25 amps) for the highs and
a 100 watt/ch amp (40 amps) for the woofers, you need at least a 4-gauge and maybe a
2-Guage wire to provide 65 amps at the trunk. Use the Wire Sizing Chart. Add up the fuse
values on the amplifier(s) then choose the proper size wire based on the distance from
the car battery to the amplifier location. Always use the same gauge wire for the main
ground as you do for the main power. Always make your ground as short as possible and
secure it to a clean solid surface, preferably the vehicle frame.
Mounting your amplifier
Mounting your Zapco amplifier is easy. Just keep in mind a few guidelines:
• The amplifier can be mounted in any direction, on wood, metal, or carpet
• The metal chassis of the amp can be grounded or left isolated
• The amplifier requires adequate ventilation. Creating power creates heat, and
cooling requires air. Position the amplifier with sufficient surrounding area for air
supply and keep the end plates clear for future access
• Keep the amplifier out of the engine compartment or other locations that may
cause excessive heat or moisture
• Do not mount the amplifier to a subwoofer box or other place that may have
excessive vibration
Setting Gains: Gain pots are not volume controls. Before you first turn on your system,
you should make sure all gain controls are set to minimum. Gain controls should be used
only if absolutely necessary. Turning up gain controls causes increased noise, makes
distortion more likely and reduces the dynamic range of your system. If you head unit
does not have sufficient output, you will get much better results by investing in a line
driver to provide more signal to the amplifier.
8
Some words about Power and Ground
The second most common cause of under performing amplifiers is insufficient power
current or a poor power connection. The most common cause of under performing
amplifiers is insufficient ground current or a bad ground connection.
12-volt current: Battery power works only if it travels in a complete circuit from the battery
positive terminal to the battery negative terminal. Main power input, of course, is attached
to the battery positive terminal. Ground current is returned to the battery through the
chassis to the point where the battery is grounded.
The current available for your amplifier to use to produce power will be restricted by the
smallest gauge of wire in the circuit and by the weakest physical connection in the circuit.
Wire Size
It's often surprising how many people will obsess about signal wire but routinely provide
the amplifier with only a fraction of the current it needs to do its job. The most common
wire gauge used in car audio is 10-gauge, and the most common location for amplifiers
is in the trunk.
Length of Run
Turn-on trigger wire
Ground to frame or chassis part
directly connected to the frame
+12 volt at Battery positive terminal

1110
ST-64D SQ MINI Controls/Speakers
2
1
1• Comm Port for HD-BT Module
2• Rear channels variable gain control
3• Rear crossover function switch for high
pass, full range, or low pass
4• Rear Low Pass frequency control
5• Rear channels Variable Bass Boost
6• Green power-on LED and red protect LED
7• RCA input and Preamp output (see labels
on harness)
8• Speaker level input plug for OEM hookup
9• Front channels variable gain control
10• Front High Pass frequency control
34 5
6 7
8
910
ST-104D SQ MINI Controls/Speakers
2
134 5
6 7
8
9
1• Input mode 2Ch/4Ch
2• Front crossover function switch for high
pass or full range
3• RCA input and Preamp output (see labels
on harness)
4• Rear crossover function switch for high
pass, full range, or low pass
5• Comm Port for HD-BT Module
6• Front High Pass frequency control
7• Front channels variable gain control
8• Rear channels variable gain control
9• Rear High Pass/Low Pass frequency control
1• Ch1/2 speaker output (Ch1+/Ch2- Bridge)
2• Ch3/4 speaker output (Ch3+/Ch4- Bridge)
3• +12V at Battery positive terminal
4• Turn-on trigger wire
5• Ground to frame or chassis part directly
connected to the frame
2
134 5
1• Ground to frame or chassis part directly
connected to the frame
2• Turn-on trigger wire
3• +12V at Battery positive terminal
4• Speaker level input plug for OEM hookup
5• Ch1/4 speaker output (Ch1+/Ch2-,
Ch3+/Ch4- Bridge)
5
4
12 3

1312
ST-501D SQ MINI Controls/Speakers
2
1
1• RCA In/Out (Linked)
2• Variable gain control
3• Low Pass frequency control
4• Bass boost frequency control sets the
center point of the boost
5• Subsonic filter
6• Green power-on LED and red protect LED
7• Master/Slave selector when linked
8• Remote control
9• RCA input (see labels on harness)
10• Phase selector
34 5
7 8
9
10
1• Ground to frame or chassis part directly
connected to the frame
2• Turn-on trigger wire
3• +12V at Battery positive terminal
4• Speaker output
2
134
6
Strapping the ST-501D SQ MINI
The ST-501D SQ MINI amplifier is true mono unit and you can double his power by
“strapping” two units of the same model together to drive a single voice coil. Always keep
in mind that each amp must see a minimum load of 2 Ohm (1V per amp).
• Decide which amplifier will be the “master” and which will be the “slave”, and move the
LINK selector to the corresponding position
• Connect the head unit output (Full range or bass if available) to the LOW (RCA) input
of the master amplifier
• Connect the RCA link of the master amplifier to the RCA of the slave amplifier with a
single RCA cable
• Connect the Bass Remote to the Remote In of the master amplifier
The master amplifier is now the control amplifier. All the adjustments you make to the
bass remote and to the master amplifier’s other controls will be transferred to the slave
amplifier, and the slave amplifier will be driving the negative side of the signal and have
no control functions of its own.
Go to Pag. 18 to see how strapping the outputs.

1514
4-Ch. Amplifier - High Power 2-Ch. Mode
Similar to bridging a stereo amp to a mono woofer, you can use the 4-Ch amp in a dual
mono mode to create (in this case) a stereo amp with 150 watts (ST-64D) and 240 watts
(ST-104D) RMS/ch. As with any bridged setup the speakers must be a minimum of 4Ω
impedance. If you are using the active crossovers you should be sure that they are set to
the same frequency.
BRIDGED 4 OHM MIN
BRIDGED 4 OHM MIN
Speaker Wiring
The Very Basics
No speaker wires can be shorted to, or touching either ground or each other. This will put
the amp into protect and may damage the amplifier. When bridging the left and right
channels of any ST-D SQ MINI amplifier, you use the left channel (Ch1) positive and the
right channel (Ch2) negative, as indicated on the chassis by the speaker terminals.
4-Ch. Amplifier - Stereo Mode
A simple 4 channels hookup for a right and left stereo pair.
X-OVER
WF WF
TW TW
X-OVER
2 OHM MIN/CH
2 OHM MIN/CH
WF WF
TW TW
X-OVER X-OVER

16
4-Ch. Amplifier - 5-Ch. Mode
A 3-way system with front stage, rear stage and subwoofer in mixed mono configuration.
The 5-speakers system requires a passive crossover between the front highs and the mono
woofer, with capacitors on the front highs positives and a coil on the woofer positive. All
amplifiers channels are full range.
X-OVER
WF WF
TW TW
X-OVER
2 OHM MIN/CH
2 OHM MIN/CH
WF WF
TW TW
4 OHM MIN LOAD
X-OVER X-OVER
17
Mono Amplifier - Single Voice Coil Subwoofer
4 OHM LOAD
(1 x 4 OHM SUB)
2 OHM LOAD
(2 x 4 OHM SUB)
1 OHM LOAD
(4 x 4 OHM SUB)

1918
Mono Amplifier - Double Voice Coil Subwoofer
2 OHM LOAD
(1 x 4 OHM SUB)
1 OHM LOAD
(2 x 4 OHM SUB)
Mono Amplifier - Strapping the Ouputs
• Connect the master amplifier’s speaker output + terminal to the + (positive)
terminal of the woofer
• Connect the slave amplifier’s speaker output + terminal to the - (negative) terminal
of the woofer
• Connect the two amplifier’s speaker output - (negative) terminals together
You are creating a much more powerful amplifier in this way and doubling the output.
Make sure your speaker wire can transfer the power, we recommend a minimum of 12
gauge speaker lead, and for best performances you should use 10 or 8 gauge.
MASTER
AMPLIFIER
SLAVE
AMPLIFIER
Technical Specifications
Model
ST-64D SQ MINI
ST-104D SQ MINI
ST-501D SQ MINI
Type
4-Ch, Class D
4-Ch, Class D
Mono, Class D
Power (W)
Ch./ MS
4 x 50 (4Ω)
4 x 75 (2Ω)
2 x 150 (Br, 4Ω)
4 x 95 (4Ω)
4 x 120 (2Ω)
2 x 240 (Br, 4Ω)
180 (4Ω)
320 (2Ω)
530 (1Ω)
THD
< 0.1%
< 0.1%
< 0.1%
S/N
90dB
90dB
100dB
Frequency
esponse
15Hz - 30KHz
15Hz - 30KHz
10Hz - 350Hz

3
Tabella Contenuti
Un nuovo livello di Qualità Audio .................................................................................................................... 4
Storia della Serie Studio ................................................................................................................................ 4
Gli amplificatori ST-D SQ MINI ................................................................................................................... 5
Prima di iniziare l’installazione ............................................................................................................................. 6
Non tutti i cavi sono uguali .................................................................................................................................... 6
Pianificare l’alimentazione ..................................................................................................................................... 7
Dimensioni dei Cavi ................................................................................................................................................... 8
Installare l’amplificatore ............................................................................................................................................. 9
Controlli/Connessioni ST-64D SQ MINI ........................................................................................................ 10
Controlli/Connessioni ST-104D SQ MINI ...................................................................................................... 11
Controlli/Connessioni ST-501D SQ MINI ..................................................................................................... 12
Collegare 2 ST-501D SQ MINI ............................................................................................................................. 13
Collegamenti Altoparlanti .................................................................................................................................... 14
Amplificatori 4-Ch. - Modalità Stereo 4-Ch. .................................................................................. 14
Amplificatori 4-Ch. - Modalità 2-Ch. Alta Potenza .................................................................... 15
Amplificatori 4-Ch. - Modalità Stereo 5-Ch. .................................................................................. 16
Amplificatore Mono - Subwoofer Singola Bobina ................................................................... 17
Amplificatore Mono - Collegamento 2 Ampli ............................................................................. 18
Amplificatore Mono - Subwoofer Doppia Bobina ................................................................... 19
Specifiche Tecniche ................................................................................................................................................. 19
Proteggi il tuo investimento utilizzando il tipo di cavo corretto per alimentazione.
Guarda on tutti i cavi sono uguali a Pagina 6
ITALIANO

5
Gli amplificatori Studio-D SQ MINI
Con i nuovi amplificatori Studio-D SQ MINI ottieni la qualità del suono che altre aziende
offrono solo nei loro grandi amplificatori da competizione (e migliore di molti di loro) in
uno chassis incredibilmente compatto. Ma queste piccole “bestie” non sono solo piccole
e potenti. Hanno dovuto guadagnarsi il nome Zapco prima di entrare in produzione.
Hanno tutte le funzionalità avanzate che ti aspetteresti... e altro ancora. Grazie a una
nuovissima tecnologia, siamo in grado di utilizzare la soluzione NXP Classe D per ottenere
potenza e prestazioni straordinarie in uno chassis incredibilmente compatto con
un'efficienza superiore al 90%.
La serie MINI include due amplificatori a 4 canali con 50 Watt RMS/Ch @ 4Ω (ST-64D SQ
MINI) e 95 Watt RMS/Ch @ 4Ω (ST-104D SQ MINI) con una distorsione inferiore allo 0,5%,
e un amplificatore mono da 530 Watt (ST-501D SQ MINI).
L'ST-64D e l'ST-104D hanno anche l’ingresso per il modulo HD Bluetooth, così puoi
ascoltare la musica dal tuo telefono, tablet o altro dispositivo smart Bluetooth. Dotati di
controlli crossover, ingressi a basso e alto livello, ecc... sono la scelta perfetta per qualsiasi
applicazione in cui il minimo spazio è importante. Anche l'efficienza è molto elevata,
quindi sono ottimali per sistemi potenti in auto elettriche.
4
Un nuovo livello di Qualità Audio
Zapco ha una reputazione consolidata per la qualità audio. È la nostra dedizione alla
purezza del suono e la nostra passione per le prestazioni che hanno costruito questa
reputazione. Nonostante i tanti nuovi marchi oggi sul mercato, nessuno ha minacciato
la posizione di Zapco come azienda leader di amplificatori e processori di alta qualità.
Diamo un'occhiata alla scena delle competizioni audio. I professionisti sanno cosa usare
per vincere. Tuttavia, gli amplificatori da competizione non costano poco e non tutti
vogliono competere. La sfida, quindi, era quella di mettere a frutto gli oltre 40 anni di
esperienza nello sviluppo di un amplificatore che avrebbe portato il suono Zapco in una
linea di prodotti per l'uso quotidiano e che tutti potessero permettersi. nata così la
Serie Studio, che si è costruita la reputazione di miglior amplificatore sul mercato.
Naturalmente, non tutti acquistano rigorosamente in base al suono (anche se dovrebbero).
Forse è del colore sbagliato, forse è troppo grande... o troppo piccolo. Ma una cosa è
costante. Tutti coloro che ascoltano gli amplificatori Studio sono d'accordo; suona meglio
di qualsiasi altro prodotto nella sua classe d’appartenenza.
Storia della Serie Studio
La perfezione non può essere raggiunta. Ma ciò non rende la sua ricerca meno preziosa.
Zapco si impegna a rendere ogni prodotto che realizza migliore del precedente. Abbiamo
introdotto gli amplificatori ST-X nel 2013. Nel 2015 abbiamo migliorato il design del PCB e
aggiornato i componenti per rendere l'ST-X II ancora migliore dal punto di vista sonoro.
Tre anni fa abbiamo introdotto l'amplificatore Studio SQ per portare la qualità audio ad
un ulteriore nuovo livello. Abbiamo aggiunto gli esclusivi connettori RCA degli ampli
Z-LX, cambiato i condensatori con componenti di fascia alta ed apportato alcune altre
piccole modifiche. Tutto ciò ha portato la Serie Studio ad un nuovo livello di prestazioni
sonore.
Quest'anno presentiamo la serie Studio-SQ MINI III con un nuovo telaio alettato ad alta
efficienza e ventole a temperatura controllata per garantire che il tuo amplificatore suoni
tutto il giorno senza problemi di surriscaldamento, anche quando hai voglia di ballare
davvero. con il nuovo chassis, abbiamo anche apportato alcune modifiche ai componenti
interni per aumentare ulteriormente la qualità audio.
15,1 cm
8,6 cm
ST-64D MI I
Ciò che rende gli amplicatori MI I davvero sorprendenti sono le loro dimensioni estremamente ridotte.
L'ST-64D MI I misura solo 15,1 cm (6”) x 8,6 cm (3,4”) e l'ST-104D MI I solo 23,6 cm (9,3”) x 9,5 cm (3,7”).

Prima di iniziare l’installazione
ZAPCO consiglia vivamente di posizionare un fusibile entro 18" dalla batteria. Sebbene
venga aggiunto un fusibile o un blocco fusibili vicino all'amplificatore, è comunque pos-
sibile che un cavo di alimentazione schiacciato tra il fusibile e la batteria possa provocare
un cortocircuito o addirittura un incendio. Il dispositivo di protezione deve essere po-
sizionato in un punto di facile accesso e tutti i cablaggi devono essere instradati in modo
sicuro e corretto secondo le seguenti linee guida:
• Non eseguire il cablaggio vicino a oggetti caldi o taglienti
• Utilizzare sempre i passacavi quando si instrada il cavo attraverso pannelli metallici
• Assicurarsi che venga evitato il rischio di schiacciamento dei cavi allontanando tutti i
cavi da oggetti in movimento, inclusi i pedali del freno, dell'acceleratore e della
frizione, ecc
Quando si collega un amplificatore ad altoparlanti di serie precablati, è necessario prestare
attenzione che non ci siano collegamenti comuni tra i cavi degli altoparlanti sinistro e
destro, ovvero due o più altoparlanti che utilizzano la stessa connessione di massa (molto
comune nelle auto pre-85), in quanto questo causerà la protezione immediata o potrebbe
causare danni all'amplificatore. Si prega di seguire le istruzioni di collegamento presenti
in questo manuale. Rivolgere eventuali domande al rivenditore ZAPCO locale.
Non tutti i cavo sono uguali
on usare cavi CCA con gli amplificatori Zapco
È facile pensare al cavo come ad un semplice cavo, ma ci sono grandi differenze tra i tipi
di cavi offerti oggi. Il prezzo del rame è aumentato ultimamente, ma è ancora acquistare
un cavo primario pesante a prezzi molto ragionevoli. Come può essere? Semplice... Quel
cavo a basso prezzo non è tutto rame, è un cavo CCA.
CCA sta per Copper Clad Aluminium. Ciò significa che è un cavo di alluminio con un sottile
rivestimento in rame. Sembra un cavo di rame? Assolutamente. Ma conduce corrente
elettrica come il rame? Assolutamente no!
Se il cavo non è specificato come rame OFC o rame solido, non usarlo.
Due cose possono accadere:
• Poiché un cavo CCA non può condurre corrente elettrica CC come fa un cavo di
rame, l’amplificatore non riceverà la corrente necessaria per produrre la sua potenza
nominale. Ciò significa meno potenza e maggiore distorsione, accorciando la vita
dell'amplificatore
• Un cavo CCA si corrode rapidamente e fa allentare prima i terminali. Ciò provoca un
arco elettrico quando gli elettroni volano in tutto lo spazio aperto alla ricerca di più
rame, generando calore che danneggia le connessioni e può persino fondere le
morsettiere dell'amplificatore
In breve: mentre un cavo CCA è eccellente per la corrente CA ad alta frequenza (come la
bobina di un tweeter), è assolutamente inadeguato per l'alta corrente a 12 V CC come
l'alimentazione e la messa a terra per un amplificatore per auto.
Abbiamo notato come frequenti cablaggi CCA siano una delle principali cause di guasti
all'amplificatore, poiché agli acquirenti vengono offerti come alternativa a basso costo al
rame puro. Guardare sempre la descrizione del cavo acquistato. Quando qualcuno si
offre di risparmiare un po' di soldi con cavi CCA, dì semplicemente "No, grazie". Proteggi
il tuo investimento con un vero filo di rame.
Pianificare l’alimentazione
Le piastre di alimentazione degli amplificatori Zapco ST-D MINI portano le connessioni di
alimentazione, le connessioni degli altoparlanti e variano leggermente in base al numero
di canali. L'ingresso di alimentazione principale a 12 volt, il collegamento remoto ed il
collegamento a terra principale sono comuni a tutti i modelli.
• Il +12V B è l'ingresso di alimentazione principale. Questo deve essere collegato al
terminale positivo (+) della batteria del veicolo ed un fusibile di sistema deve essere
posizionato vicino alla batteria
• Il GND è la massa principale o il collegamento negativo. Questo deve essere fissato
saldamente al metallo nudo del telaio del veicolo
ota: i bulloni dei sedili e delle cinture di sicurezza O sono buoni punti di messa a terra
• Il terminale tra l'alimentazione principale e la massa è l'ingresso di accensione +12
(R M) e può essere collegato al cavo di uscita di accensione dell'unità principale. Se
non è disponibile, può essere collegato ad un terminale accessorio (ACC). vitare di
utilizzare qualsiasi cavo di accensione (IGN), poiché può essere rumoroso
76

9
Tabella Dimensione Cavi
4 ft 7 ft 10 ft 13 ft 16 ft 19 ft 22 ft 28 ft
0-20 amp 14 12 12 10 10 888
20-35 amp 12 10 886664
35-50 amp 10 8866444
50-60 amp 88644442
65-85 amp 66442220
85 -105 amp 66422220
105-125 amp 44422000
125-150 amp 22220000
Se si utilizza un amplificatore da 50 w/canale (25 amp) per gli alti e un amplificatore da
100 w/canale (40 amp) per i woofer, è necessario almeno un cavo 4 gauge e forse 2 per
fornire 65 amp. Fare riferimento alla tabella. Sommare i valori dei fusibili sugli amplificatori,
quindi scegliere il cavo della dimensione corretta in base alla distanza dalla batteria
dell'auto all'amplificatore. Utilizzare sempre lo stesso calibro di cavo per la messa a terra,
così come per l'alimentazione principale. Rendere la messa a terra il più breve possibile e
fissarla su una superficie solida e pulita, preferibilmente il telaio del veicolo.
Installare l’amplificatore
Installare il tuo amplificatore Zapco è facile. Basta tenere a mente alcune linee guida:
• L'amplificatore può essere installato su legno, metallo o moquette
• Il telaio metallico dell'amplificatore può essere messo a terra o lasciato isolato
• L'amplificatore richiede una ventilazione adeguata. La creazione di energia crea
calore e il raffreddamento richiede aria. Posizionare l'amplificatore in una zona
sufficientemente areata e mantenere le piastre terminali libere per accessi futuri
• Tenere l'amplificatore fuori dal vano motore o da altri luoghi che potrebbero
causare calore o umidità eccessivi
• Non installare l'amplificatore su un subwoofer o in un altro posto che potrebbe
generare vibrazioni eccessive
Regolazione guadagni: I potenziometri di guadagno non sono controlli del volume.
Prima di accendere il sistema per la prima volta, assicurarsi che tutti i potenziometri siano
regolati al minimo. Questi dovrebbero essere usati solo se assolutamente necessario.
Aumentare il guadagno provoca un aumento del rumore, distorsione e riduce la gamma
dinamica. Se la tua unità principale non ha un'uscita sufficiente, otterrai risultati molto
migliori investendo in un driver di linea per fornire più segnale all'amplificatore.
8
Alcune parole su Alimentazione e Massa
La seconda causa più comune di amplificatori con prestazioni insufficienti è la corrente di
alimentazione insufficiente o una connessione di alimentazione scadente. La causa più
comune di amplificatori con prestazioni insufficienti è una corrente di terra insufficiente o
una cattiva connessione di terra.
Corrente a 12 volt: l'alimentazione della batteria funziona solo se viaggia in un circuito
completo dal polo positivo della batteria al polo negativo della batteria. L'ingresso di
alimentazione principale, ovviamente, è collegato al polo positivo della batteria. La
corrente di terra viene restituita alla batteria attraverso lo chassis fino al punto in cui la
batteria è collegata a terra.
La corrente disponibile per l'amplificatore da utilizzare per produrre potenza sarà limitata
dal più piccolo calibro di cavo utilizzato e dalla connessione fisica più debole nel circuito.
Dimensione dei cavi
’ sorprendente quante persone siano ossessionate dal cavo del segnale, ma abitualmente
forniscono all'amplificatore solo una frazione della corrente di cui ha bisogno per fare il
suo lavoro. Il calibro del cavo più comune utilizzato nell'audio dell'auto è 10 gauge e la
posizione più comune per gli amplificatori è nel bagagliaio.
Lunghezza
Collegamento accensione remota
Collegamento a terra su parti
del telaio o al telaio stesso
Al positivo della batteria

1110
Controlli/Connessioni ST-64D SQ MINI
2
1
1• Ingresso modulo HD-BT
2• Controllo guadagno canali posteriori
3• Switch crossover canali posteriori per
passa alto, passa banda o passa basso
4• Controllo frequenza passa basso posteriori
5• Bass Boost canali posteriori
6• LED accensione (verde) e protezione (rosso)
7• Ingresso RCA e uscita Preamp (vedere
l’etichetta sul cablaggio)
8• Ingresso alto livello per applicazioni OEM
9• Controllo guadagno canali anteriori
10• Controllo frequenza passa alto anteriori
34 5
6 7
8
910
Controlli/Connessioni ST-104D SQ MINI
2
134 5
6 7
8
9
1• Modalità ingresso 2Ch/4Ch
2• Switch crossover canali anteriori per passa
alto o passa banda
3• Ingresso RCA e uscita Preamp (vedere
l’etichetta sul cablaggio)
4• Switch crossover canali posteriori per
passa alto, passa banda o passa basso
5• Ingresso modulo HD-BT
6• Controllo frequenza passa alto anteriori
7• Controllo guadagno canali anteriori
8• Controllo guadagno canali posteriori
9• Controllo frequenza passa alto / passa
basso canali posteriori
1• Uscite altoparlanti Ch1/2 (Ch1+/Ch2- ponte)
2• Uscite altoparlanti Ch3/4 (Ch3+/Ch4- ponte)
3• +12V al terminale positivo della batteria
4• Collegamento accensione remota
5• Collegamento a terra su parti del telaio o al
telaio stesso
2
134 5
1• Collegamento a terra su parti del telaio o
al telaio stesso
2• Collegamento accensione remota
3• +12V al terminale positivo della batteria
4• Ingresso alto livello per applicazioni OEM
5• Uscite altoparlanti (Ch1+/Ch2-, Ch3+/Ch4-
ponte)
5
4
12 3

1312
Controlli/Connessioni ST-501D SQ MINI
2
1
1• Ingresso/uscita RCA (Link)
2• Controllo guadagno
3• Controllo frequenza passa basso
4• Controllo Bass Boost
5• Filtro subsonico
6• LED clipping e accensione/protezione
7• Switch Master/Slave (Link)
8• Ingresso per controllo remoto
9• Ing. RCA (vedere l’etichetta sul cablaggio)
10• Switch fase
34 5
7 8
9
10
1• Collegamento a terra su parti del telaio o
al telaio stesso
2• Collegamento accensione remota
3• +12V al terminale positivo della batteria
4• Uscite altoparlanti
2
134
6
Collegare 2 ST-501D SQ MINI
L'amplificatore ST-501D SQ MINI è una vera unità mono e puoi raddoppiare la sua
potenza "legando" due unità dello stesso modello insieme per pilotare una singola
bobina mobile. Ogni amplificatore deve vedere un carico minimo di 2 Ohm (1V per amp).
• Decidere quale amplificatore sarà il “master” e quale sarà lo “slave”, e spostare il selettore
LINK nella posizione corrispondente
• Collegare l'uscita dell'unità principale (passa banda o basso se disponibile) all'ingresso
LOW (RCA) dell'amplificatore principale
• Collegare l’uscita RCA dell'amplificatore master all'ingresso RCA dell'amplificatore slave
con un unico cavo RCA
• Collegare il Controllo Remoto all'amplificatore master
L'amplificatore master è ora l'amplificatore di controllo. Tutte le regolazioni apportate
tramite controllo remoto ed agli altri controlli dell'amplificatore master verranno trasferite
all'amplificatore slave e l'amplificatore slave guiderà il lato negativo del segnale e non avrà
funzioni di controllo proprie.
Vedere a Pag. 18 come effettuare il collegamento degli altoparlanti.

1514
Amplificatori 4-Ch. - Modalità 2-Ch. Alta Potenza
Simile al collegamento a ponte di un amplificatore stereo con un woofer mono, è possibile
utilizzare l'amplificatore a 4 canali in modalità dual mono per creare (in questo caso) un
amplificatore stereo con 150 watt (ST-64D) e 240 watt (ST-104D) RMS/cap. Come con
qualsiasi configurazione a ponte, gli altoparlanti devono avere un'impedenza minima di
4Ω. Se si usano crossover attivi, assicurarsi che siano impostati sulla stessa frequenza.
BRIDGED 4 OHM MIN
BRIDGED 4 OHM MIN
Collegamenti Altoparlanti
Nozioni base
Nessun cavo degli altoparlanti deve essere cortocircuitato o toccarsi l'un l'altro. Questo
metterà l'amplificatore in protezione e potrebbe danneggiarlo. Quando si collegano i canali
sinistro e destro di qualsiasi amplificatore ST-D SQ MINI, utilizzare il positivo del canale
sinistro (Ch1) ed il negativo del canale destro (Ch2), come indicato sullo chassis.
Amplificatori 4-Ch. - Modalità Stereo 4-Ch.
Un semplice sistema a 4 canali per coppie di altoparlanti stereo destre e sinistre.
X-OVER
WF WF
TW TW
X-OVER
2 OHM MIN/CH
2 OHM MIN/CH
WF WF
TW TW
X-OVER X-OVER

16
Amplificatori 4-Ch. - Modalità Stereo 5-Ch.
Un sistema a 3 vie con anteriore, posteriore e subwoofer in configurazione mono mista.
Il sistema a 5 altoparlanti richiede un crossover passivo tra gli alti anteriori e il woofer
mono, con condensatori sui positivi degli alti anteriori e una bobina sul positivo del
woofer. Tutti i canali degli amplificatori sono passa banda.
X-OVER
WF WF
TW TW
X-OVER
2 OHM MIN/CH
2 OHM MIN/CH
WF WF
TW TW
4 OHM MIN LOAD
X-OVER X-OVER
17
Amplificatore Mono - Subwoofer Singola Bobina
4 OHM LOAD
(1 x 4 OHM SUB)
2 OHM LOAD
(2 x 4 OHM SUB)
1 OHM LOAD
(4 x 4 OHM SUB)

1918
Amplificatore Mono - Subwoofer Doppia Bobina
2 OHM LOAD
(1 x 4 OHM SUB)
1 OHM LOAD
(2 x 4 OHM SUB)
Amplificatore Mono - Collegamento 2 Ampli
• Collegare il terminale + di uscita dell'amplificatore master al terminale + (positivo)
del woofer
• Collegare il terminale + di uscita dell'amplificatore slave al terminale - (negativo)
del woofer
• Collegare i due terminali di uscita dell'amplificatore - (negativo) insieme
In questa modalità si sta creando un amplificatore molto più potente e raddoppiando
l'uscita. Assicurarsi che il cavo dell’altoparlante possa gestire questa potenza. Usare un
cavo di almeno 12 gauge e per prestazioni ancora migliori 10 o 8 gauge.
MASTER
AMPLIFIER
SLAVE
AMPLIFIER
Specifiche Tecniche
Modello
ST-64D SQ MINI
ST-104D SQ MINI
ST-501D SQ MINI
Tipologia
4-Ch, Class D
4-Ch, Class D
Mono, Class D
Potenza (W)
Canali/ MS
4 x 50 (4Ω)
4 x 75 (2Ω)
2 x 150 (Br, 4Ω)
4 x 95 (4Ω)
4 x 120 (2Ω)
2 x 240 (Br, 4Ω)
180 (4Ω)
320 (2Ω)
530 (1Ω)
THD
< 0.1%
< 0.1%
< 0.1%
S/N
90dB
90dB
100dB
isposta in
Frequenza
15Hz - 30KHz
15Hz - 30KHz
10Hz - 350Hz

E G
Continuous exposure to excessive sound pressure levels may cause permanent hearing loss. ZAPCO strongly
advises that you use common sense when setting volume levels. verything written in this manual is for the
proper use of the products. Some features or specifications could be modified during production to improve the
product performance. The technical specifications and functionalities stated here are current as of the time of
publication. General instructions and safety warnings are intended in any case to be always effective for this type
of product. The latest manual with any updates is always available at www.zapco.com/download
ITA
L'esposizione continua a livelli di pressione sonora eccessivi può causare la perdita permanente dell'udito.
ZAPCO consiglia vivamente di utilizzare il buon senso quando si impostano i livelli di volume. Tutto quanto
scritto in questo manuale è finalizzato al corretto utilizzo dei prodotti. Alcune caratteristiche o specifiche
potrebbero essere modificate durante la produzione per migliorare le prestazioni del prodotto. Le specifiche
tecniche e le funzionalità qui riportate sono aggiornate al momento della pubblicazione. Le indicazioni generali
e le avvertenze di sicurezza si intendono comunque sempre valide per questa tipologia di prodotto. Il manuale
più recente con eventuali aggiornamenti è sempre disponibile all'indirizzo www.zapco.com/download
AP X USA - ARPA of AM RICA, 801 Davis St. Unit C, Vacaville, CA 95687 - USA
AP X UROP - AP X urope srl, Via della Meccanica, 14 - 04011 Aprilia (Latina) - ITALY - PI 02496950599
AP X CHINA, 东莞市艾柏贸易有限公司Room201,Unit 7, Dahongshan Industrial zone, No.143 Guanlong
Road, Guancheng Street, Dongguan City, Guangdong Province, China, 523008
地址:广东省东莞市莞城街道莞龙路143号大宏山工业区7单元201室AP X GROUP - AP X Business Development (ABD) CO LTD, Bright Way Tower, office 04 7/Fl, 33 Mong Kok Road
Kowloon City, Hong Kong 999077
fb.com/zapcocaraudio
instagram.com/zapco
_
official
ZAPCO is a brand of AP X Group ©All rights reserved
This manual suits for next models
3
Table of contents
Languages:
Other zapco Amplifier manuals

zapco
zapco Z-150.2 SP User manual

zapco
zapco DSP-Z8 IV AT User manual

zapco
zapco ZX-series User manual

zapco
zapco STUDIO 100 User manual

zapco
zapco Reference Series 2 User manual

zapco
zapco AG200 User manual

zapco
zapco DC-352 User manual

zapco
zapco ST-2B User manual

zapco
zapco Symbilink Z100C2-SL User manual

zapco
zapco ST-X DSP User manual

zapco
zapco Z-series User manual

zapco
zapco ST-X III Series User manual

zapco
zapco AG350 User manual

zapco
zapco ST-2X SQ User manual

zapco
zapco STUDIO 500 User manual

zapco
zapco Z600C2-SL SymbiLink User manual

zapco
zapco AG750 User manual

zapco
zapco AG650 User manual

zapco
zapco DSP-Z8 IV II User manual

zapco
zapco C2K User manual