ZappBug Oven 2 User manual

SAFE PROVEN EXTERMINATION
The ZappBug Oven 2™
Owner’s Manual
IMPORTANT NOTICE:
Read Warnings Before Use!
V2.09.19

©2014-2019 ZappBug. All rights reserved. Product specications subject to change. 2
This page is intentionally left blank

To learn more, please visit us at ZappBug.com 3
Table of Contents
Important Safety Information .....................................................4
WARNING! ....................................................................................5
Hints & Tips ....................................................................................7
Components Included................................................................8
Use & Operation...........................................................................9
1. Unfold the ZappBug Oven 2...............................................................9
2. Connect the Two Heating Units.........................................................9
3. Select Appropriate Support Conguration.....................................10
4. Locate Two Independent Power Outlets........................................10
5. Wireless Thermometer Set Up............................................................11
6. Turn on Heating Units.........................................................................14
7. Insert Items for Heat Treatment.........................................................15
8. Run Time...............................................................................................15
9. Remove Items After Heat Treatment................................................16
10. Folding and Storing the ZappBug Oven 2......................................16
Heat Treatment Chart.................................................................17
Troubleshooting............................................................................18
Warranty Information..................................................................20

©2014-2019 ZappBug. All rights reserved. Product specications subject to change. 4
Important Safety Information
You must comply with all safety information and operating
instructions when using this product. Please read all Warnings
outlined in this manual.
Failure to comply could result in personal injury, damage to
property, or re hazards.

To learn more, please visit us at ZappBug.com 5
WARNING!
Power outlets with poor electrical connections can
become dangerously overheated and may result in
severe injury, damage to property, or re.
High-power appliances require more electric current than most household items.
Old or high-use outlets can have poor or loose connections. The high current
required by this product, combined with a poor electrical connection can cause
outlets to overheat and melt. It is important to make sure that any outlets used
with this product have strong electrical contact.
Follow the steps below for safe use of ANY high-power appliances:
1. Inspect outlet connection and contact strength.
Insert a standard, two-prong plug (without third, Ground connection)
into outlet. Ensure that both prong connections offer equal and strong
resistance when inserted. If the two-prong plug does not offer strong
resistance or one prong feels easier to insert than the other, this outlet
could be unsafe for high-power appliances. Have an electrician
inspect and/or replace outlet before use.
2. Inspect outlets and plugs after each use
3. If you are unsure about an outlet, have an electrician inspect and/or
replace the outlet.
Read This WARNING!
Before Proceeding

©2014-2019 ZappBug. All rights reserved. Product specications subject to change. 6
Warning: Extension Cords
Some extension cords are not adequate to carry the load of current drawn by
this heating unit without becoming dangerously overheated. If an extension
cord must be used, do not use a cord rated less than 1500 watts or 15 amps,
and of a minimum size of 16 gauge. Only use an extension cord with the UL
seal. Use of an inadequate extension cord may result in overheating of the ex-
tension cord or re.
Warning: Old Electrical Wiring and Outlets
Each ZappBug heating unit will draw 12-15 amps of current (1500 Watts) and
must be run on circuits rated 15 amps and above only. Some old electrical
wiring and outlets may not be capable of sustaining these loads. If you are
unsure of the electrical wiring or outlets in your location, contact an electrician
before operating ZappBug or any other high-current products. Old or faulty
electrical wiring could lead to damage, injury, or re. If an electrical cord
appears deformed or feels hot to the touch, unplug it immediately and contact
ZappBug customer service.
Additional Warnings
• Failure to comply with the warnings presented by this manual may result in
severe injury and/or damage to property.
• Incorrect assembly or improper use may result in hazardous conditions.
Only assemble the ZappBug Oven 2 according to instructions in this manual.
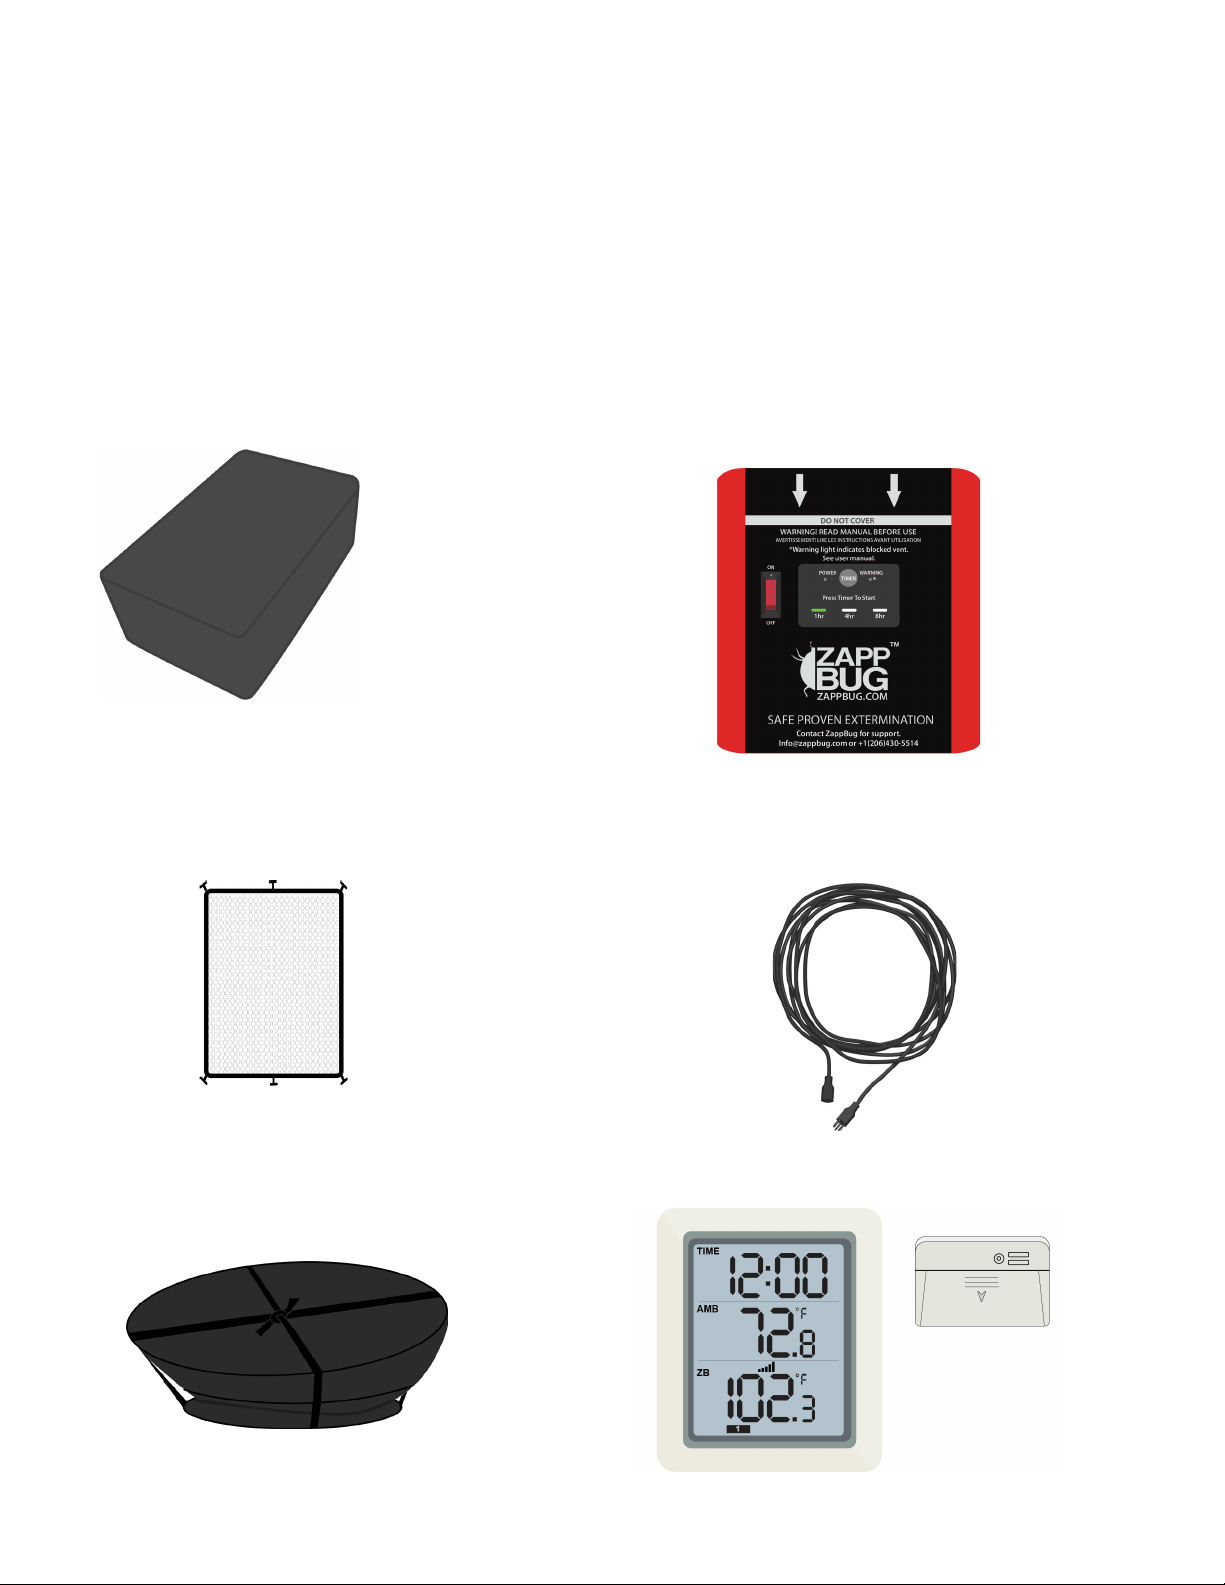
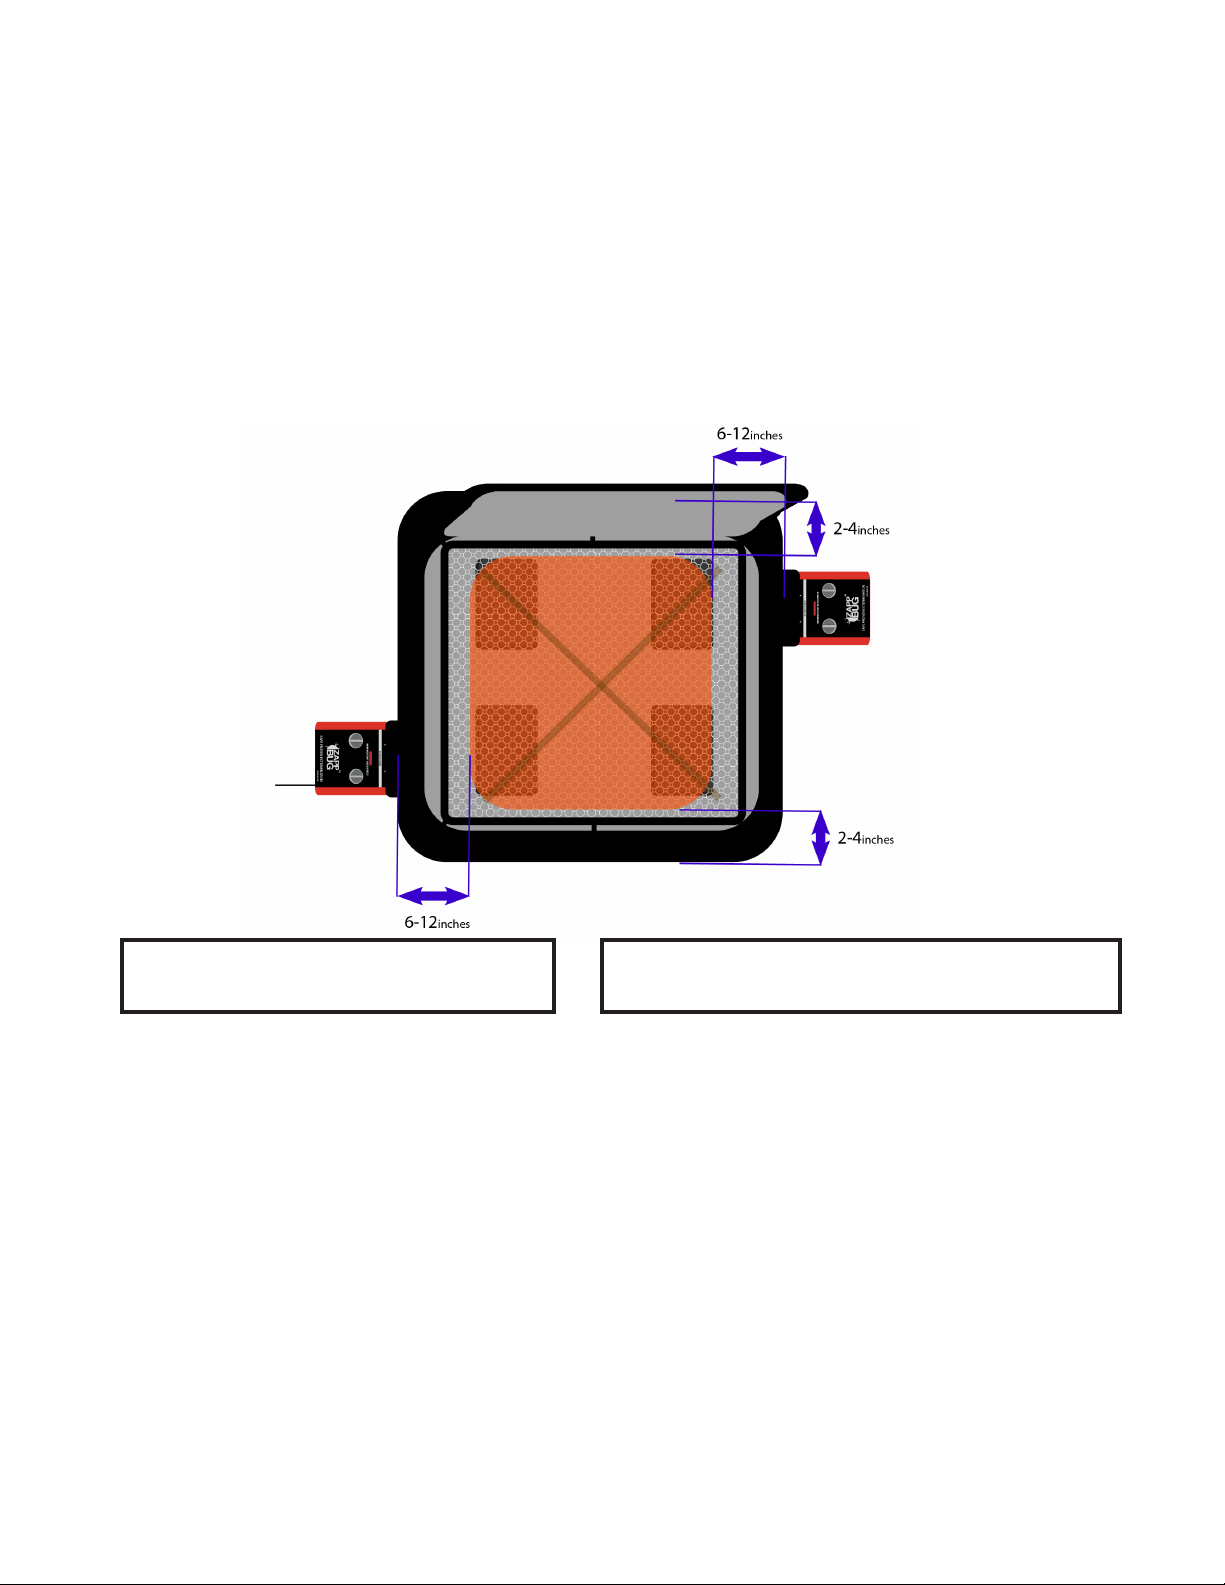
• Do not block air intake or exhaust vents on heater. Obstructions of the
intake or exhaust vents can cause the heating unit to overheat and pose a
re hazard. Always maintain 6 or more inches of clearance around the
heating unit during operation.
• Do not use outside or in a wet environment. This product is designed for
indoor use only.
• Do not reach into or insert objects into the ventilation fan while the heating
unit is running. This may result in personal injury or damage to the unit.
• Do not place ammable objects or aerosols inside the ZappBug Oven 2.
• Some items may be damaged during heat treatment. Use caution when
heat treating fragile items made of materials such as antique leather
and wood.
• Consult the manufacturer of items in question, such as electronics, for a
maximum safe temperature before placing them in the ZappBug Oven 2.
Always monitor the temperature to ensure it does not exceed the
recommended level.

To learn more, please visit us at ZappBug.com 7
Hints & Tips
BED BUGS
• Researchers have found that bed bugs at all life stages die quickly at
temperatures at or above 120°F.
• Bed bug eggs are nearly translucent and incredibly difcult to detect.
• A best practice is to heat treat all items that may have been in the vicinity
of bed bugs even if no bed bugs are found. For pictures of bed bugs and
bed bug eggs, please visit zappbug.com/bed-bug-pictures.
• Bed bugs can survive for up to 18 months without feeding. It is critical that
all potentially infested items are heat treated or, alternatively, sealed and
stored for 18 months.
• Bed bugs can atten their bodies and slip into tiny cracks.
• Bed bugs are unable to climb smooth, nonporous surfaces like the lining of
the ZappBug Oven 2.
• For more information please visit zappbug.com/get-rid-of-bed-bugs.
THE ZAPPBUG OVEN 2
• Always use provided support blocks and/or net to ensure maximum air
circulation around your belongings. If your belongings are densely packed
together it will take signicantly more time for them to reach bed bug
killing temperatures.
• Make sure to turn the heating units on before placing potentially infested
items inside the ZappBug Oven 2.
• Only use indoors with an ambient room temperature at or above 70°F. The
heating unit works by adding heat to the air from the room in which it is
located. If the ambient temperature is below 70°F, the ZappBug Oven 2
may not reach bed bug killing temperatures.
• Always monitor the temperature inside the ZappBug Oven 2 with the
thermometer and thermometer probe provided.
• Do not place the ZappBug Oven 2 directly on cold oors such as
concrete. Always place the ZappBug Oven 2 on surfaces at or above 70°F.

©2014-2019 ZappBug. All rights reserved. Product specications subject to change. 8
Components Included
The following components are required for proper use of this product. If you did
not receive all of the components listed below, contact ZappBug immediately
by phone at (206)-430-5514 or by e-mail at [email protected].
Note: Some components may appear different from the representations below.
Support Block
Support Net
Carry Bag &
Folding Oven
Wireless Thermometer
X4
X1
X2
X1
X1
Extension Cord
X1
ZappBug Heating Unit with
Integrated Timer

To learn more, please visit us at ZappBug.com 9
X2
X1
X1
Use & Operation
1. Unfold the ZappBug Oven 2
2. Connect the Two Heating Units
Note: It is normal for one side of the
ZappBug Oven 2 to appear warped.
This allows the oven to easily fold and
does not affect functionality. If warping
appears excessive, shake the ZappBug
Oven 2 to ensure that each side panel is
fully extended.
Locate Ventilation Tube Place Base of Heating Unit
in Tube
Stretch Tube Around
Heating Unit
(Observe “Do Not Cover” markings)
Note: It is normal for small gaps to appear between the textured side of the
heating unit and the ventilation tube. Bed bugs will not escape through these
gaps if the heating unit is on. Bed bugs experience thermal shock and are not
capable of moving toward the heating unit. Always ensure that the heating
units are on when placing potentially infested items inside the ZappBug Oven 2.
Safety Note: Always maintain a minimum clearance of 6 inches around the
heating units when operating.

©2014-2019 ZappBug. All rights reserved. Product specications subject to change. 10
3. Select Appropriate Support Conguration
The ZappBug Oven 2 has a unique and modular support system which is designed
to accommodate a wide range of items. Support blocks allow for ventilation
around rigid, heavy items such as luggage and small furniture. A combination of
support blocks and the support net allow for ventilation around loose items such as
books and clothing. Follow the appropriate support conguration for your items as
shown below. It is critical that air is allowed to ow freely around the items you are
heat treating.
4. Locate Two Independent Power Outlets
NOTE: Each heating unit must be powered from its own circuit. Typical residential
and commercial buildings have one circuit per room. Use the included extension
cord to reach outlets in other rooms if necessary.
One extension cord is included with each ZappBug Oven 2. Plug one heating
unit directly into a nearby electrical outlet.
Locate an electrical outlet in another room or area that operates on a separate
electrical circuit. Typically, each room will have its own independent electrical
circuit. Use the included extension cord to connect the remaining heating unit
to a separate electrical outlet.
Use & Operation (continued)
Attach support net to loops located
inside the ZappBug Oven 2
Place support blocks under the
support net

To learn more, please visit us at ZappBug.com 11
Use & Operation (continued)
5. Wireless Thermometer Set Up
The ZappBug Oven 2 comes with thermometer base station and a remote probe.
Thermometer Base Station
Thermometer Probes
Note: Set up the thermometer
base station rst

©2014-2019 ZappBug. All rights reserved. Product specications subject to change. 12
Thermometer Base Station Set Up
3
1
2
1. Time
2. Ambient Room Temperature
3. Reception Icon
4. Probe Sensor Temperature
1. Battery Compartment
2. Stand Mount
2
1
Figure 2
Figure 2
Figure 1
Figure 1
1. Remove the battery door on the back of the base station as, shown in
Figure 1 below.
2. Insert one AA battery. All of the LCD segments will light up for a few seconds
to verify that all segments are operating properly.
3. The thermometer base station will instantly display the ambient temperature.
The probe temperatures will update on the display within a few minutes after
you place batteries in the thermometer probe. See Thermometer Probe Set
Up on page 13.
4
Use & Operation (continued)
IMPORTANT: Insert batteries and set
up thermometer base station rst

To learn more, please visit us at ZappBug.com 13
Thermometer Probe Set Up
1
2
3
1. Wireless Transmitter LED
2. AA Battery
3. Battery Door
Thermometer Probe
Use & Operation (continued)
Remove the battery door on the back of the thermometer probe by sliding the
door down and insert one AA battery.
1. After inserting the battery, the remote sensor LED indicator will light for 4
seconds, and then ash once per minute, thereafter. Each time it ashes, the
sensor is transmitting data.
2. Close the battery door.
on the thermometer base station. See Figure 2.
3. Place the wireless thermometer probe in the deepest, most insulated part of
the item being treated. Allow the ZappBug Oven 2 to run for 60 minutes or
longer after the temperature reaches 120°F.
4. If you are not present while the unit is running, we advise setting the timers to
8 hours, however this is generally more time than required for the ZappBug
Oven 2 to reach 120°F and maintain it for one hour.
5. If the base station does not update, view troubleshooting tips on page 18.
While in search mode, the reception icon will ash

©2014-2019 ZappBug. All rights reserved. Product specications subject to change. 14
Use & Operation (continued)
6. Turn on Heating Units
1. Plug the heating unit into power outlet.
2. Place power switch in ON position.
3. Press the TIMER button to select desired run time.
We recommend using the 8-hour setting for large loads and the 4-hour setting for
small to medium loads. Always use the included thermometer and thermometer
probe to conrm that the temperature reaches lethal levels. See Heat Treatment
Chart on page 17 for more information.
Warning Light
If the unit overheats, the warning light will
turn on and the unit will begin to beep.
If the warning light is on, turn the heating unit
off by switching the power switch to the OFF
position. Remove the heating unit from the
ventilation tube and allow it to cool for 20
minutes.
The unit overheats when hot air is being
blocked from exiting the heating unit. Before
restarting the treatment, be sure that all
ZappBug enclosure contents are at least
6 inches away from the heating unit to
ensure proper air circulation.
If the problem persists, contact ZappBug customer service.
Safety Note: Each heating unit draws 1500 watts of electrical power. Do not use
extension cords rated below 1500 watts. Each heating unit should be plugged
into a separate circuit, using the included extension cord if necessary.

To learn more, please visit us at ZappBug.com 15
Use & Operation (continued)
7. Insert Items for Heat Treatment
8. Run Time
Place items inside the ZappBug Oven 2 on top of support blocks and/or support
net. To ensure adequate airow, items should not touch the walls or ceiling of
the chamber. Place the wireless thermometer probe in the deepest location in
the items being treated to ensure all the materials will be exposed to the 120°F
necessary to kill bed bugs. After that, zip the top cover closed.
Hint: Always open luggage and arrange items loosely to ensure proper air
circulation. If items are densely packed, they take longer to heat.
Bed bugs die at temperatures of 120°F or above in less than two minutes.
The higher the temperature, the less time it takes to kill them. The standard
practice for heat treating is to measure the temperature at one, representative
location. When the temperature at this location reaches 120°F and is held at
120°F (or above) for one hour, you can be condent that any bed bugs in your
belongings are dead.
Once the remote sensor reaches a temperature of
120°F or above, run the heating unit for 60 minutes.
Safety Note: The heaters draws 1500 watts of electrical power. Do not use
extension cords rated below 1500 watts. Each heating unit should be plugged
into a separate circuit, using the included extension cord if necessary.
Safety Tip Over Switch
If the heating unit and timer are plugged into an
outlet, and the timer is ON, the heating unit should
automatically begin to run. If the unit is plugged
in but not operating, check the safety tip-over
switch located on the bottom of the heating unit.
The safety tip-over switch is a small black button
that must be pressed in to run the heating unit.
This switch is a safety feature to stop the unit from
running if it is tipped over.
Safety Tip Over Switch

©2014-2019 ZappBug. All rights reserved. Product specications subject to change. 16
10. Folding and Storing the ZappBug Oven 2
Zip Top Closed, Leaving 4”
Gap for Air to Escape
Place Oven on Side
Step On Corner &
Collapse Oven as Shown
Allow Air to
Escape
Ensure Side Panels
Fold Flat
Fold Sides Inward Complete Fold
Store the folded ZappBug Oven 2, thermometer and thermometer probe, support
blocks and net inside the carry bag. Store in a dry place.
Store Oven & Support Blocks
in Carry Bag
Use & Operation (continued)
9. Remove Items After Heat Treatment
Hint: If your home is infested with bed bugs, place all items into sealed plastic
bags or containers immediately after heat treatment to prevent re-exposure.
WARNING: Items may be hot after heat treatment. Wait for items to cool before
handling. Items such as metal zippers can remain hot after heat treatment and
cause burns.

To learn more, please visit us at ZappBug.com 17
Heat Treatment Chart
Typical Heat Treatment
(Actual Treatment Times Will Vary)
010 20 30 40 50 60 70 80 90 100 110 120 130 140 150 160 170
600F
700F
800F
900F
1000F
1100F
1200F
1300F
1400F
1500F
LETHAL IN 1 MINUTE - 1200F
BED BUGS DEAD
TIME IN MINUTES
TEMPERATURE
INSIDE ZAP-
PBUG
LETHAL IN 1 HOUR - 1130F
120°F 5 mins
1min
7 mins
8 mins
10 mins
120°F
130°F
140°F
140°F
Ants
Bed Bugs
Cockroaches
Dust Mites
Fleas
10 mins
10 mins
30 mins
30 mins
30 mins
125°F
122°F
130°F
120°F
120°F
Termites
Scabies
Lice
Moths
Carpet Beetles
PEST TREATMENT
TEMPATURE
HOW LONG
BEFORE THEY DIE PEST TREATMENT
TEMPATURE
HOW LONG
BEFORE THEY DIE
ZappBug recommends adding one hour to the suggested treatment time to
ensure extermination.

©2014-2019 ZappBug. All rights reserved. Product specications subject to change. 18
Troubleshooting
Thermometer Reset
If you’re having issues getting a temperature reading, you may need to reset
the thermometer and probe. To do that, remove the batteries from the sensor
and the display screen at the same time. Put the batteries back in the display
screen rst, followed by the probe.
Keep in mind that the display screen may lose signal if it is too far away from
the thermometer probe, or if the unit heats above 140°F. If this happens, simply
follow the reset instructions above.
Safety Tip Over Switch
If you plug in and turn on the heating unit and it still does not turn on, please
check the safety tip over switch which is a little black button on the bottom of
the red square heating unit. This button needs to be pressed in for the heating
unit to turn on and is designed so that if the unit is knocked over, possibly
blocking the vents, it turns off for safety. When the heating unit is plugged into
a wall outlet and is at on the ground the button should naturally be pressed in
and the heating unit should turn on.
Getting Up to Temperature
It can take a while for the unit to fully heat up, sometimes 2-3 hours or more
depending on ambient temperature or the size of the treatment load.
The most common reasons why the unit struggles to get up to 120°F are
ambient conditions and item arrangement. The ZappBug Oven 2 works best in
rooms that are 70°F or above.
Whenever possible do not place the ZappBug Oven 2 on concrete ooring.
If you must, place insulation such as cardboard or area rugs between the
ZappBug Oven 2 and the oor in order to limit heat loss.
Always arrange items as spread out as possible to allow air to ow easily
throughout the ZappBug Oven 2.
Thermometer Probe Channel
If you are aren’t able to receive a signal from the thermometer probe you may
need to set the probe channel. To do that, take the back off of the thermometer
probe and change the channel by sliding the button to position 1. The probe
needs to be on the correct channel in order to monitor treatment correctly.
Circuits popping
Each heating unit should be run on its own circuit to avoid electrical overload.

To learn more, please visit us at ZappBug.com 19
Notes:
Questions?
Please contact ZappBug directly before place of purchase
ZappBug’s expert staff are here to help! If you have any questions about
ZappBug or are experiencing any issues, please don’t hesitate to contact
Customer Service by phone or e-mail. Our experts are ready to assist
Monday-Friday, 9a.m. to 5p.m. PST.
(206) 430-5514

©2014-2019 ZappBug. All rights reserved. Product specications subject to change. 20
Warranty Information
One Year Limited Warranty for the ZappBug Oven 2™
What Does This Warranty Cover?
This warranty covers any defects or malfunctions in the ZappBug Oven 2. This includes ZappBug Oven 2 items
such as: two heating units, one ZappBug Oven 2 shell, one carry bag, one support net, four support blocks,
and one wireless thermometer and probe set. Coverage terminates if you sell or otherwise transfer the
ZappBug Oven 2.
What Does This Warranty Not Cover?
This warranty does not cover the following:
1. Any defect or malfunction of the ZappBug Oven 2 caused by abuse, misuse, neglect, carelessness, or accident.
2. Any defect or malfunction caused by alteration or modication of the ZappBug Oven 2.
3. Any defect or malfunction of the ZappBug Oven 2 which would not have occurred if instructions in the
owner’s manual had been followed.
4. The cost of repairing or replacing any electronics that are placed in the ZappBug Oven 2. (In our
experience, the ZappBug Oven 2 operates at temperature ranges that are safe for most electronics, but we do
not cover any damage to electronics that might occur while using the ZappBug Oven 2).
5. The cost of repairing or replacing any property which is damaged when the ZappBug Oven 2 does not
work properly.
6. The cost of repairing or replacing any property which is damaged due to not following the instructions in the
owner’s manual.
What is the Period of Coverage?
Coverage under this warranty is for 365 days from the original date of purchase. Coverage terminates if you sell
or otherwise transfer the ZappBug Oven 2.
What Will We Do to Correct Problems?
If there is a problem, we will replace or repair (at ZappBug’s discretion) the ZappBug Oven 2, free of charge.
You are responsible for shipping charges to send the ZappBug Oven 2 to us for repair or replacement. We are
responsible for shipping charges to return the repaired or replaced ZappBug Oven 2 to you.
How Do You Get Service if There is a Problem?
E-mail us at [email protected] or call us at (206) 430-5514. Tell us the problem and when and where you
purchased the ZappBug Oven 2. We will e-mail you back with instructions on how to send us the ZappBug Oven
2 for repair or replacement.
How State Law Applies
This warranty gives you specic legal rights, and you may also have other rights which vary from state to state.
ZappBug™ warranty obligations are limited to the terms set forth below:
ZappBug warrants this product against defects in materials and workmanship for
a period of 365 days from the date of original retail purchase. This warranty is
good only to the original purchaser.
Other manuals for Oven 2
1
This manual suits for next models
1
Table of contents
Other ZappBug Lawn And Garden Equipment manuals
Popular Lawn And Garden Equipment manuals by other brands

Sioux Chief
Sioux Chief StreamLine installation guide

Midwest grow kits
Midwest grow kits Ultimate Kit Setup guide

Makita
Makita DUM604 instruction manual

Premier designs
Premier designs Wind Garden 25948 Assembly instructions

Premier designs
Premier designs WindGarden 26827 Assembly instructions

Sunjoy
Sunjoy L-PS158PST-5 Assembly instructions