Important Safety Tips
Contents
3
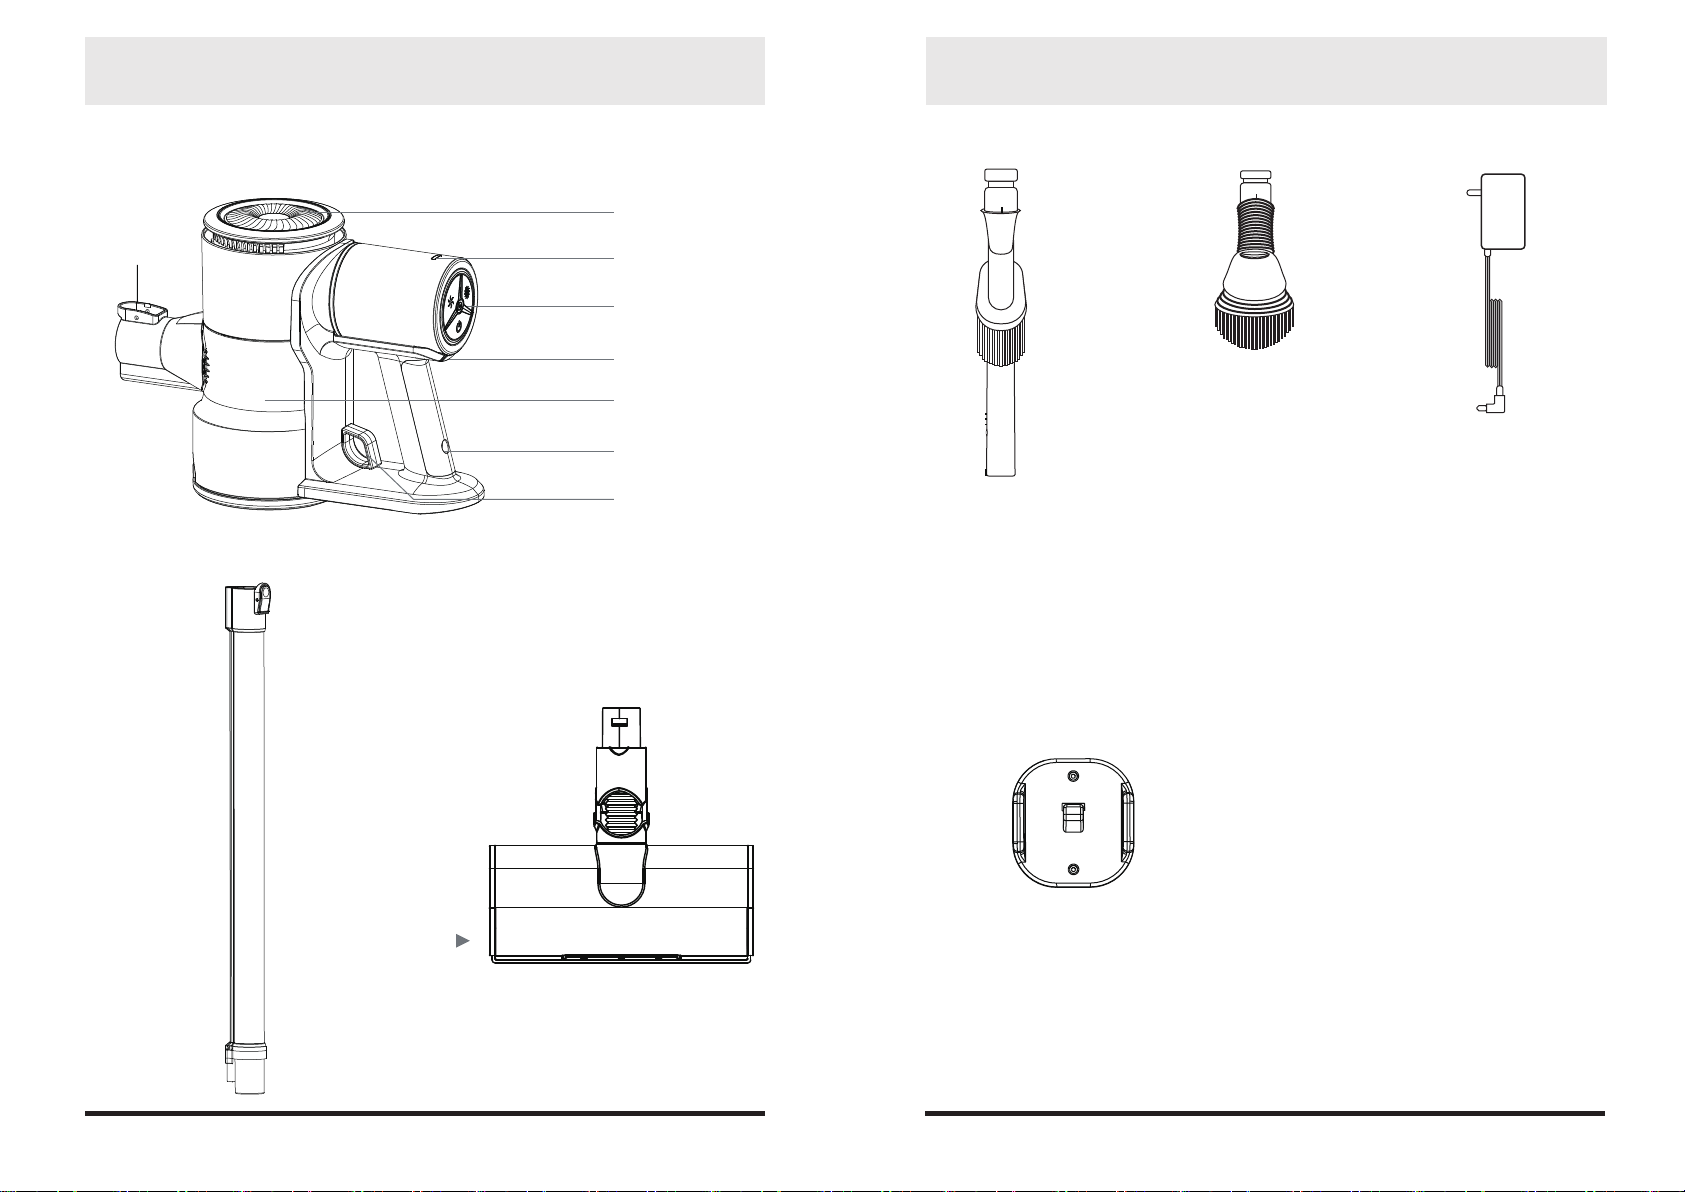
Parts Name
Parts List
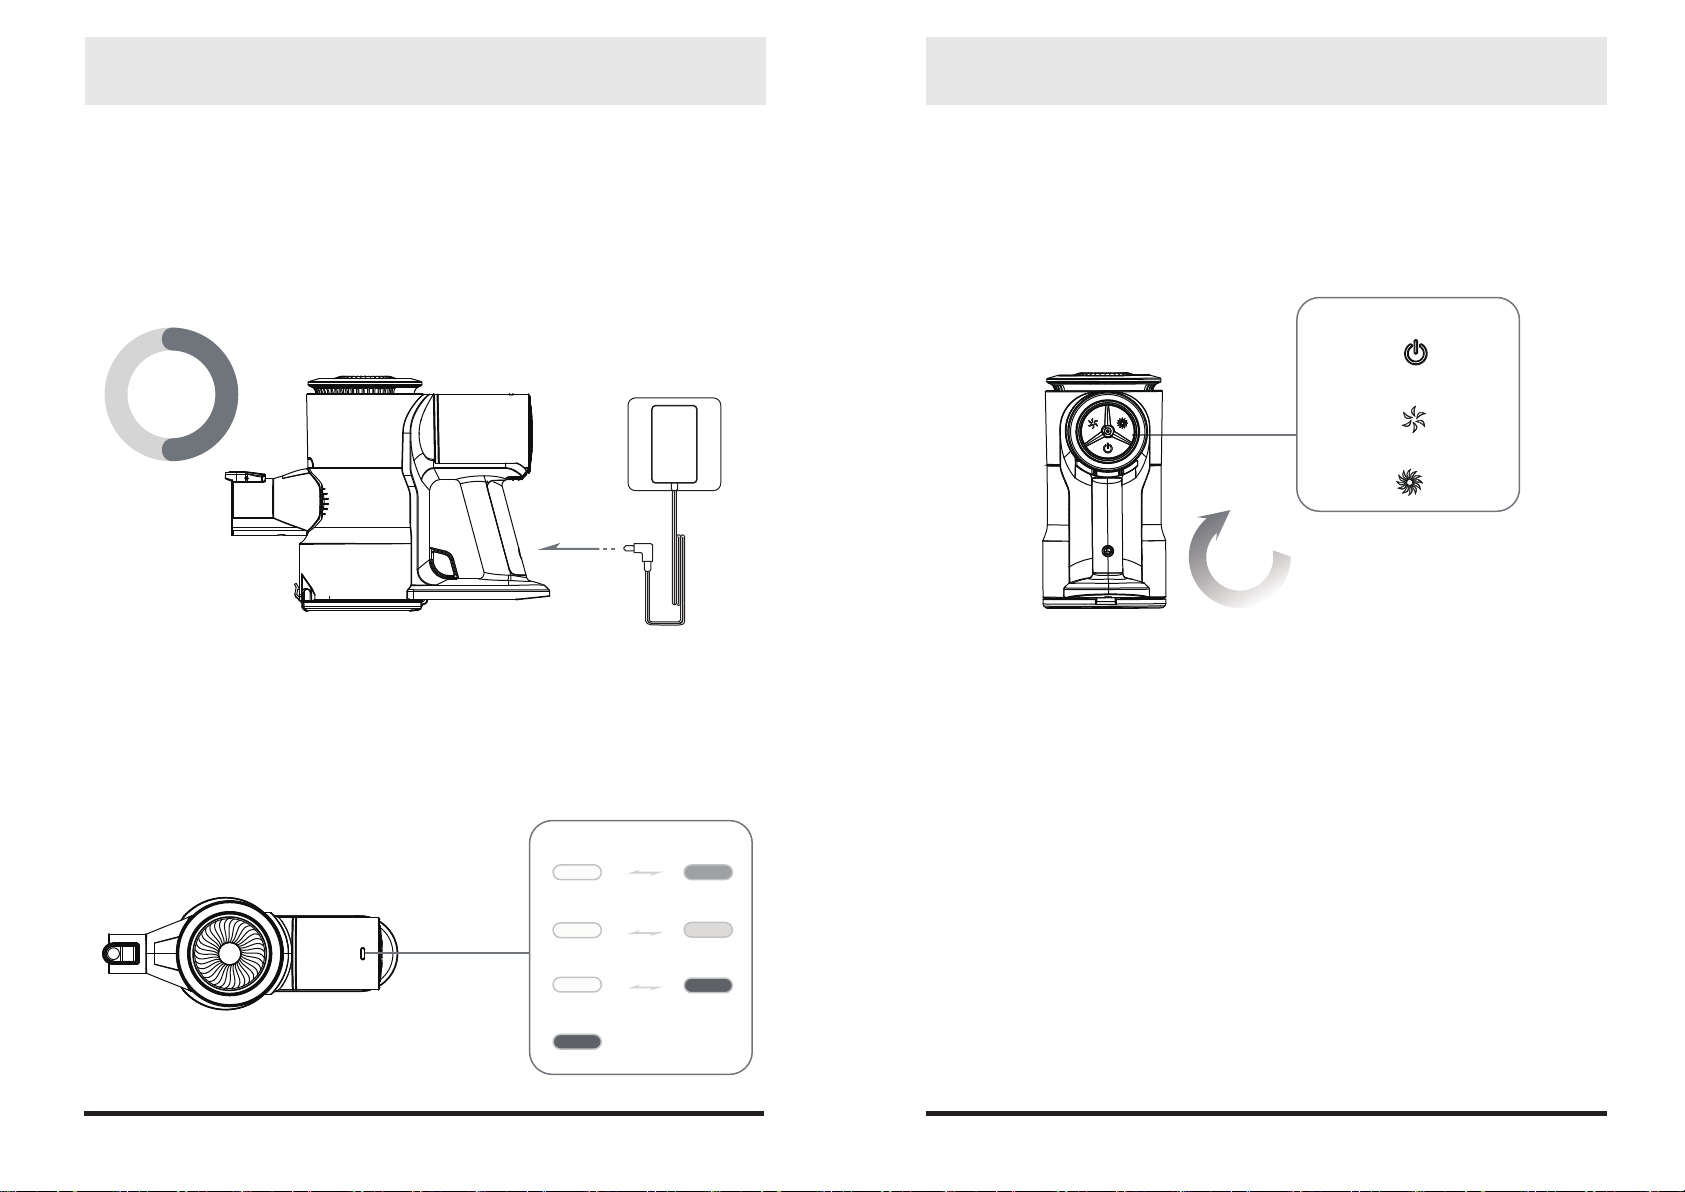
Assemble Unit
Use vacuum
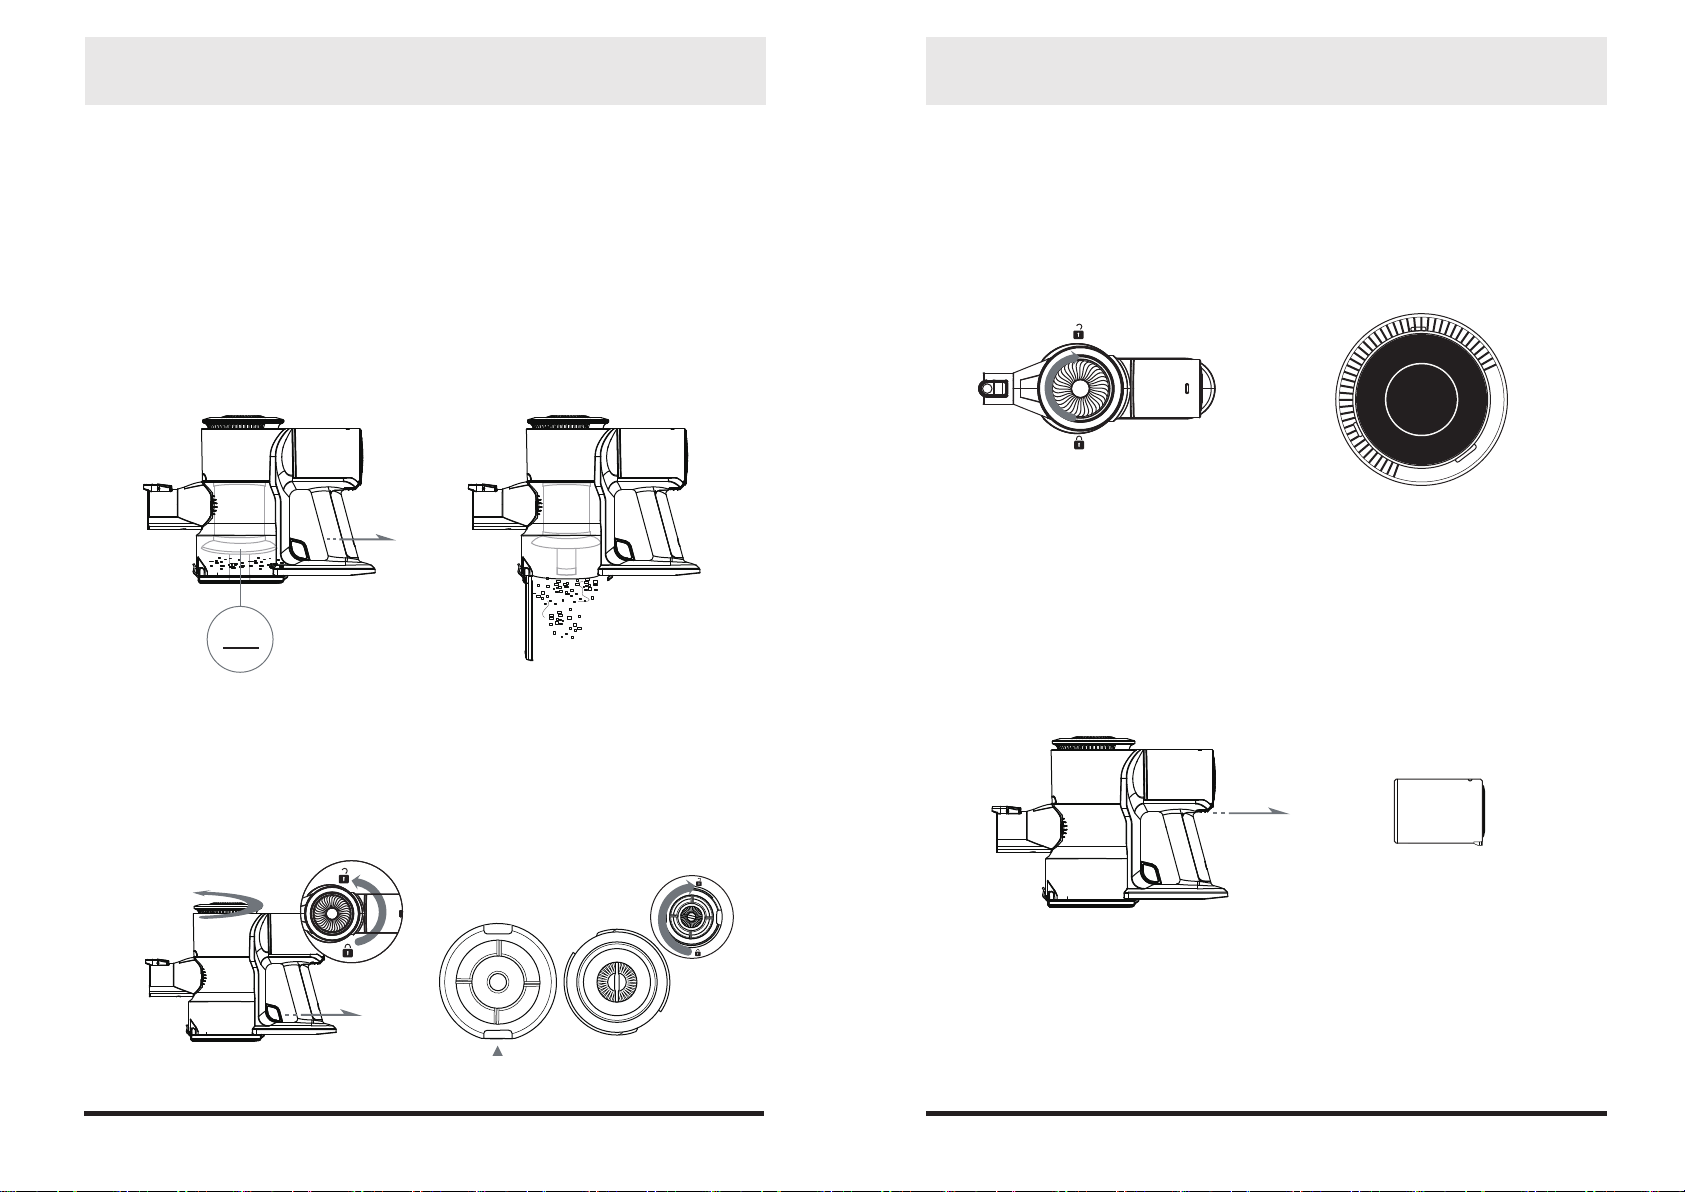
Unit maintenance
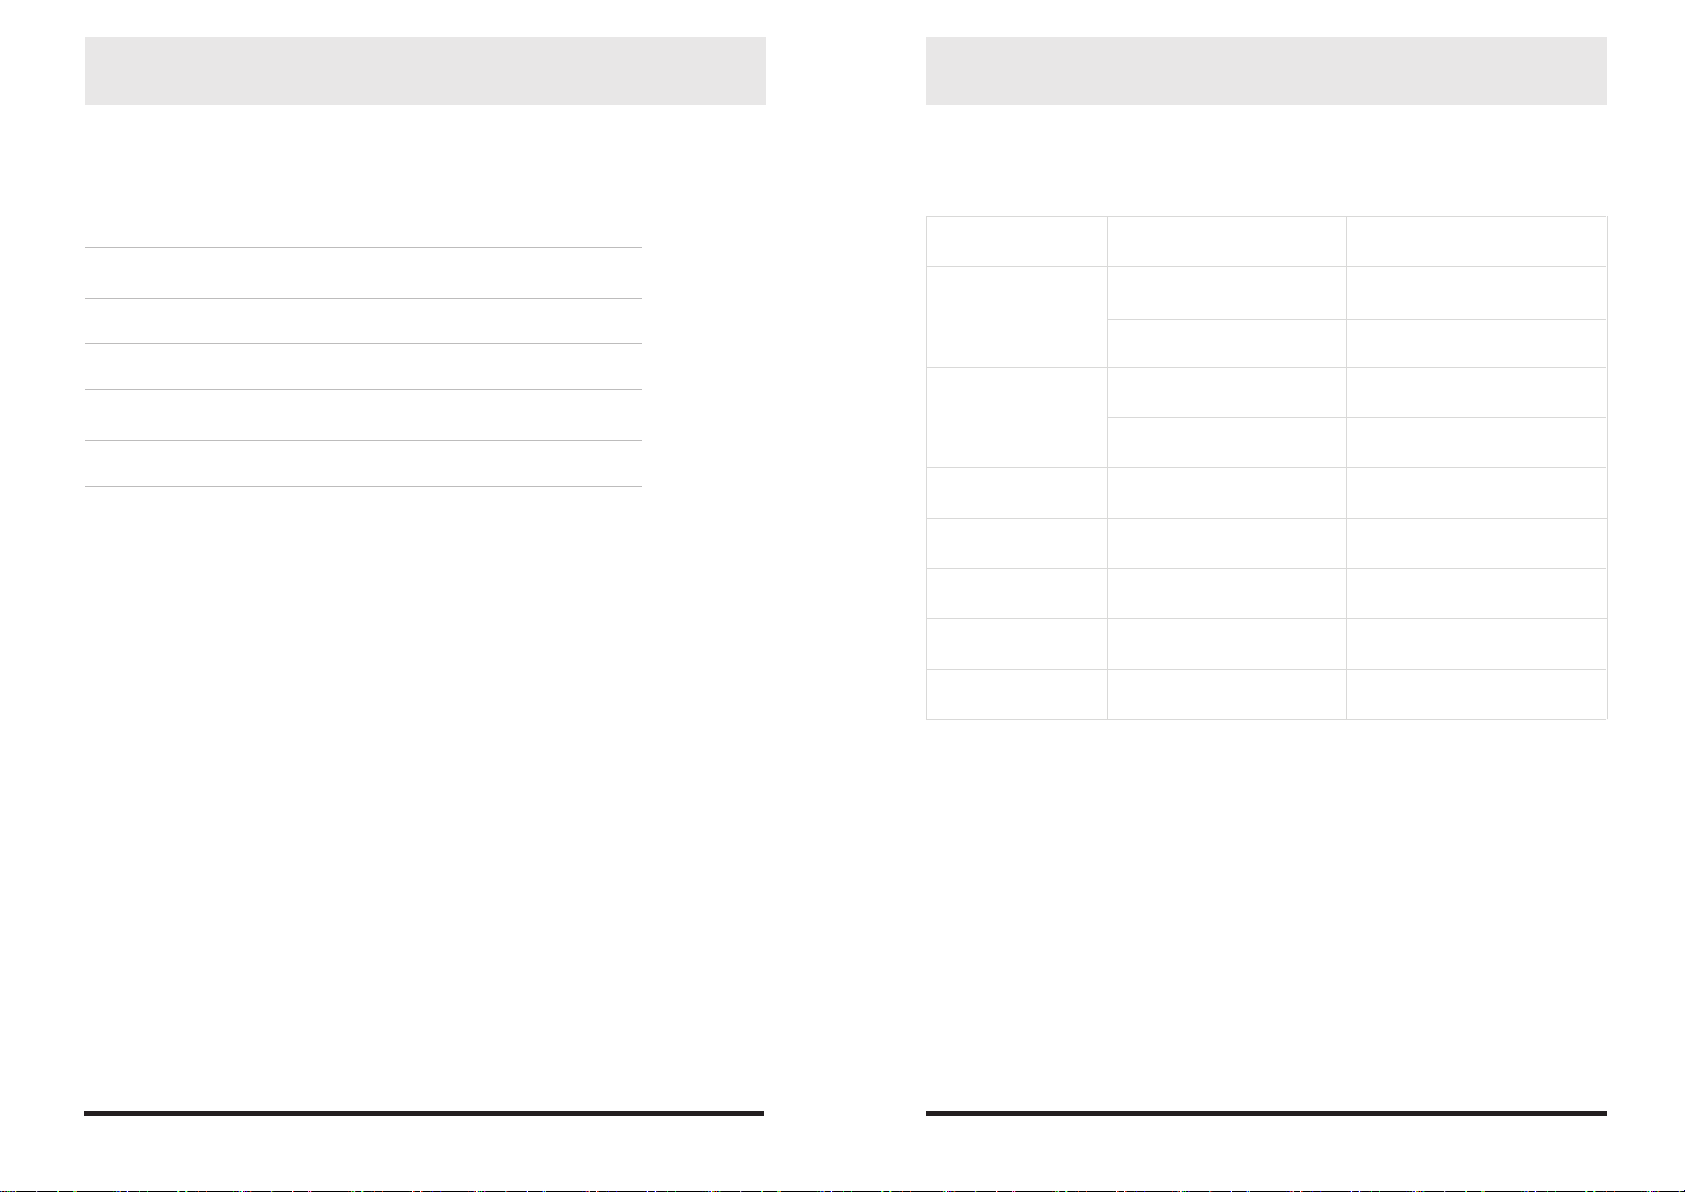
Product specification
Trouble Shooting
Warranty
After service
4
5
6
8
10
12
13
14
15
It’s a must to check all the following instructions carefully before using our vacuum
cleaner.
When you are using the vacuum , please follow the instructions on operation as below.
Only use the vacuum in suitable environment.
If the vacuum or charger is damaged, please return it to authorized service supplier for
maintenance or replacement in order not to cause individual injury.
Children below age 8 are not allowed to use this vacuum.
Children at age 8 or above age 8 are only allowed to use this vacuum with company of
their custodian. Children are forbidden to play with this unit.
In order to avoid electric shock, please do not dip any part of the vacuum into liquid.
In order to avoid electric shock, please do not tear down or repair the vacuum in person if
it’s damaged. Please return the damaged unit to authorized repair center.
If you are using the vacuum beside children, please do not walk away leaving it alone with
the children. Please make sure hair, cloth and any part of your body be away from the
suction inlet.
It’s forbidden to suck flaming ash / cigar butt / match and flammable liquid, such as
gasoline.
Please watch the steps when you are using the vacuum on stairs.
Please do not use the product if the dust bin is not fitted on the main unit.
This vacuum can only be for home use following this instruction manual.
Please do not keep the vacuum in charging status if you are away from it for long time.
This vacuum can not be played as toy. Please pay special attention when you’re using it
beside child, pet and plant.
Please only use spare parts from authentic vendor.
When charging the vacuum, please make sure the charger is first connected to the power
socket and then to the unit in order, so as to extend the product life.
Please do not start the vacuum when the dust bin is blocked. Please often empty the bin
to ensure good air flow.
Please store product in dry condition.
Please keep any parts of your body away from the main unit.
Please use the vacuum with correct voltage in order not to cause damage.
Warning:
In order to reduce the risk of getting injured, please pull out
the charger plug first before moving the vacuum.
In order to reduce the risk of electric shock, please pull out
the charge plug first before using the vacuum.
In order to reduce the risk of electric shock, please do not use
the vacuum out door or in damp area.
Use the unit, and keep it in good condition in case of usage in future.
Please check this manual carefully before.