ZENIC ForteVision FV-3000HS User manual

INSTRUCTION MANUAL
IMAGE CLARIFYING UNIT
M01-0007-00
FV-3000HS

Safety Rules
Thank you for purchasing our product, this time.
Before using this unit, be sure to carefully read this instruction manual and understand its
contents, and exercise sufcient caution for safety when handling this unit.
In this instruction manual, the signal words, "WARNING" and "CAUTION", are used against
prospective hazards according to the hazardous level.
WARNING
Indicates a potentially hazardous situation which, if
not avoided, will result in death or serious injury.
CAUTION
Indicates a hazardous situation which, if not avoided,
could result in personal injury or property damage.
WARNING
Do not connect any AC adapter other than the one attached as an
accessory.
Do not touch any internal parts nor modify the product by opening its
cover.
Do not adapt this unit for any applications such as life-related
transportation machinery, medical equipment, aerospace equipment and
atomic energy-related equipment, which require higher reliability.
This unit is designed so that safety is secured when used indoors.
Therefore, be sure to use it indoors.
Immediately turn OFF the power supply if smoke or abnormal smell has
been generated.
Do not touch this unit, its power cable, and the video signal cable in the
event of thunder. Otherwise, an electric shock may result.
Do not splash any liquid like water on the product.
Do not put any container with some liquid in it on and around the top plate.

CAUTION
Do not use this unit in an environment at low or high temperature
extreme.
Do not change the settings of the operation setting switches by opening
the unit case.
Exercise caution when connecting I/O cables since no warranty is given
to any inuence on other equipment due to incorrect cable connections
at the input/output terminals.
Set the unit on a at and stable place.
Do not use the unit in an environment where magnetic or electric eld is
intense or waveform distortion or noise of the input power supply is great.
Do not move the main body of the unit, applying excess force on it with
its cables connected.
Regularly check the power cord against tear of its sheath, open-circuit, etc.
Gently wipe with a soft cloth wet with a neutral detergent when the panel
surface is dirty. Do not use volatile solvent like thinner and benzine.
Do not play the attached CD on a music CD player as it includes various
documents and software.
• Though the contrast improvement algorithm built in this unit is designed to successfully
process the images in various situations, its performance may not be prominent when a
great offset is given to the video input signal or the image adjustment parameters (such as
"Brightness") of the target monitor is quite different from the standard.
• The image clarifying function of this unit is designed, targeting the natural (non-artificial)
images taken by a camera, etc. Good results may not be obtained or unnatural images may
result for artificially created or processed images, such as graphical images on a personal
computer.
Notices on Use

1. Introduction................................................................................................................1
2. Basic Specications...................................................................................................1
3. Congurations ...........................................................................................................1
4. Panel (Operation / Connections) ...............................................................................2
4.1. Front panel........................................................................................................2
4.2. Rear panel ........................................................................................................2
4.3. Connection diagram..........................................................................................3
5. USB Control Functions..............................................................................................4
5.1. Outline...............................................................................................................4
5.2. Adaptable OS....................................................................................................4
5.3. Installation of driver...........................................................................................4
5.3.1. Startup of installer .....................................................................................4
5.3.2. Setup wizard..............................................................................................4
5.3.3. Installation of driver ...................................................................................5
5.3.4. Completion of installation ..........................................................................5
5.4. Installation of control software ..........................................................................5
5.4.1. Startup of installer .....................................................................................5
5.4.2. Setup wizard..............................................................................................6
5.4.3. Selection of installation folder and user ....................................................6
5.4.4. Conrmation of installation........................................................................6
5.4.5. Completion of installation ..........................................................................7
5.4.6. Startup of control software ........................................................................7
5.5. Operation on control software screen ...............................................................8
6. Troubleshooting .......................................................................................................10
Table of Contents.................................................................................................... Page

1
1. Introduction
This is an image processing unit that improves the visibility of objects by clarifying video images at
low contrast. Images whose visibility has lowered due to various factors such as low illuminance,
backlight, and fogs are optimized easy on human eyes. Our original real time image clarifying
technology "ForteVision" is introduced into the image clarifying processing. The built-in contrast
improvement processing and Gaussian noise lter processing have improved contrast and reduced
noise at low illuminance. The adopted video signal covers HD-SDI and can be easily built into the
existing video transmission system.
Since image clarifying processing is executed automatically, it is not necessary to change the setting
of each parameter even when external light condition has changed.
Normally, no adjustment is necessary for the improvement level, but the image clarifying processing
strength level can be switched over in 3 steps. (However, note that noise and contour may become
obvious if the image clarifying processing strength level is raised).
The range adjustment function is also incorporated to process the video signal whose range is
compressed.
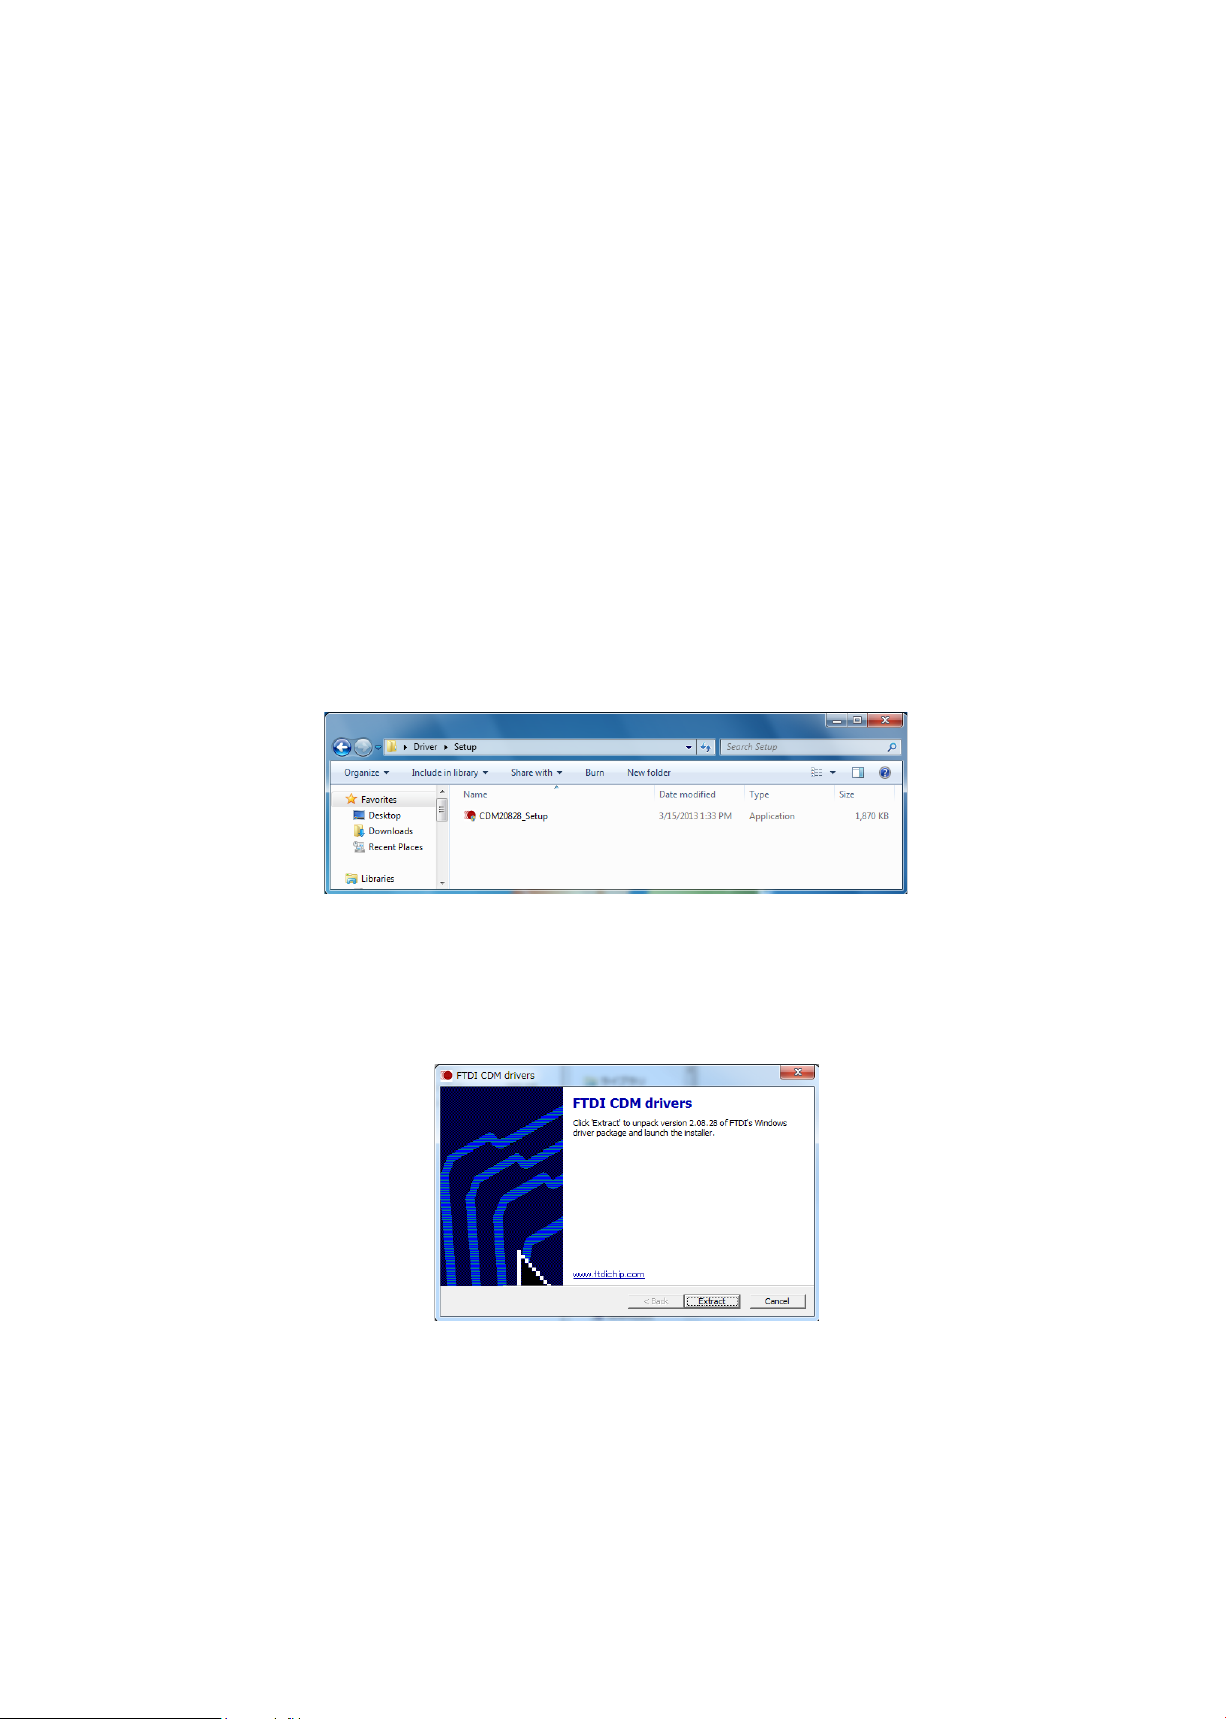
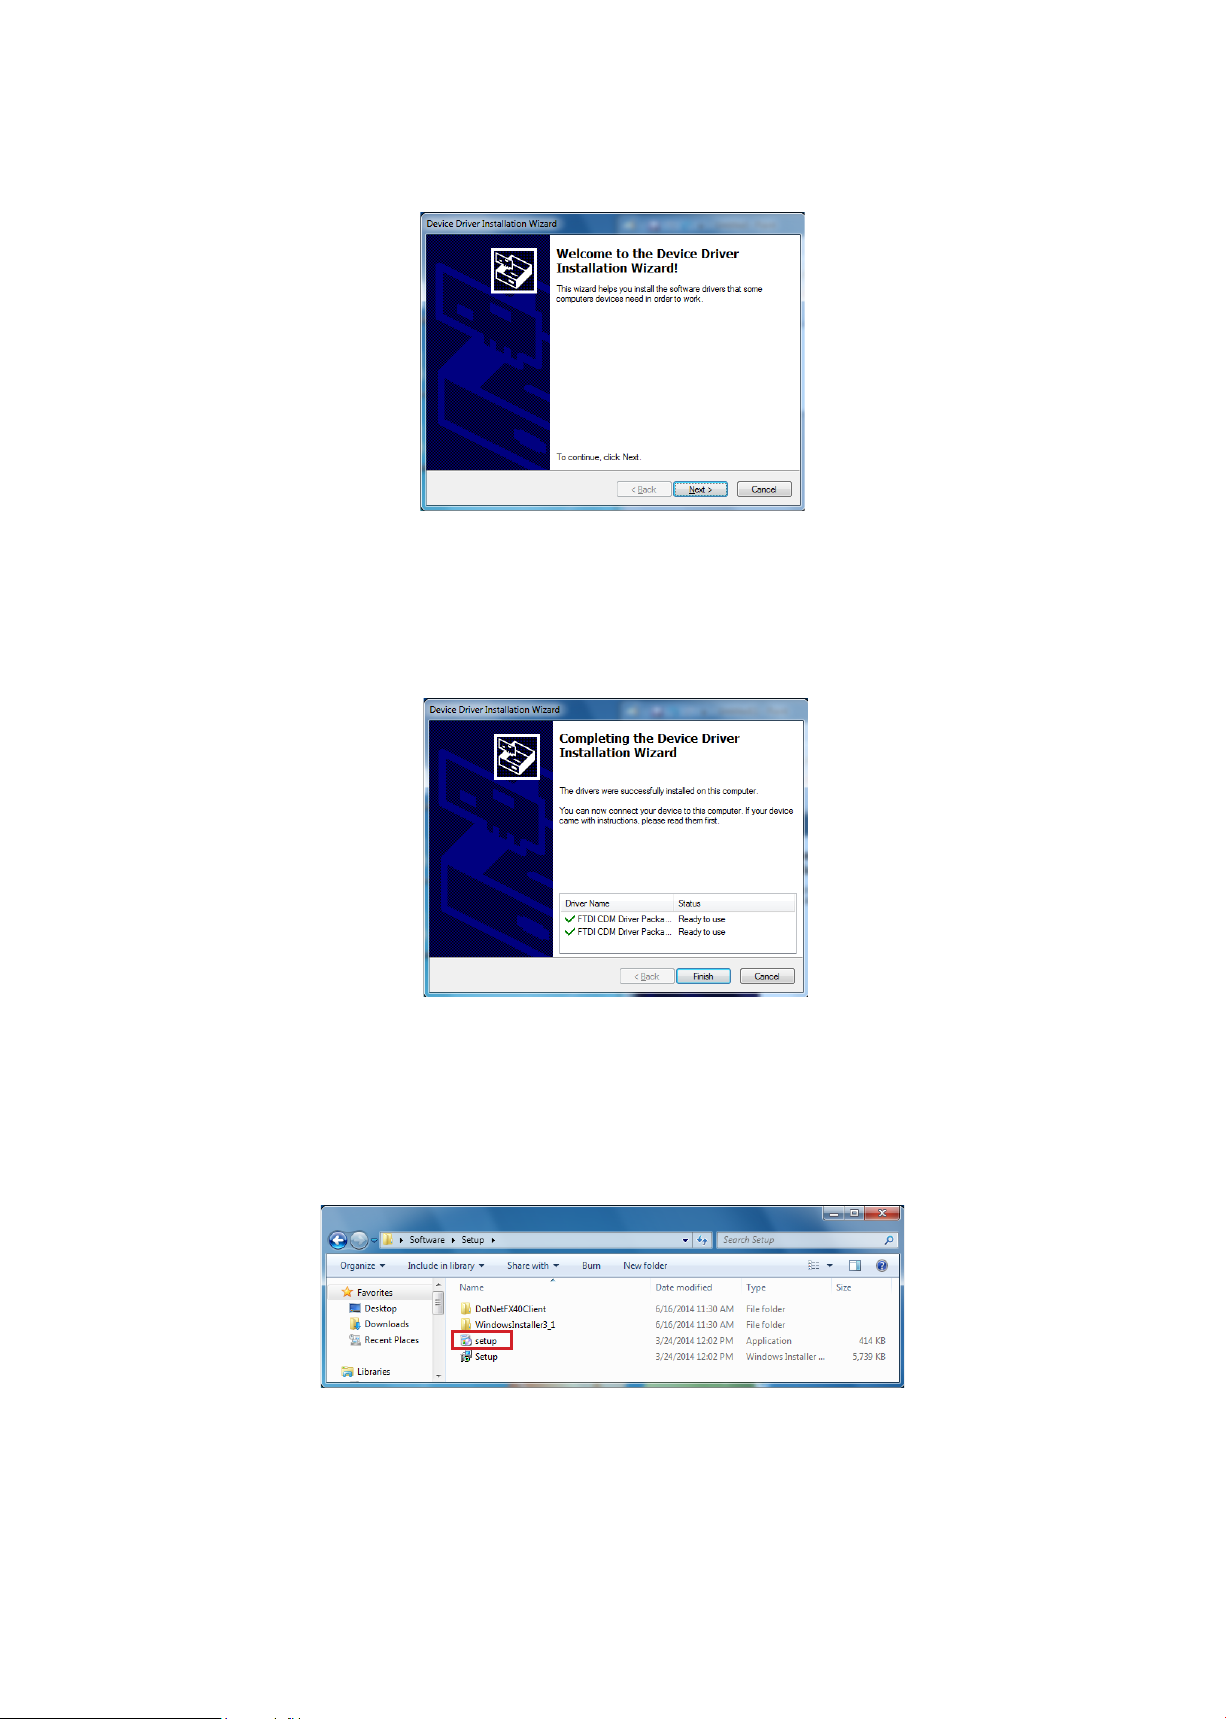
All the operations other than power ON of this unit is done by the attached USB control software only.
2. Basic Specications
Item Specications
Input video signal HD-SDl
Input signal format Full HD digital (1920 × 1080 60 i)
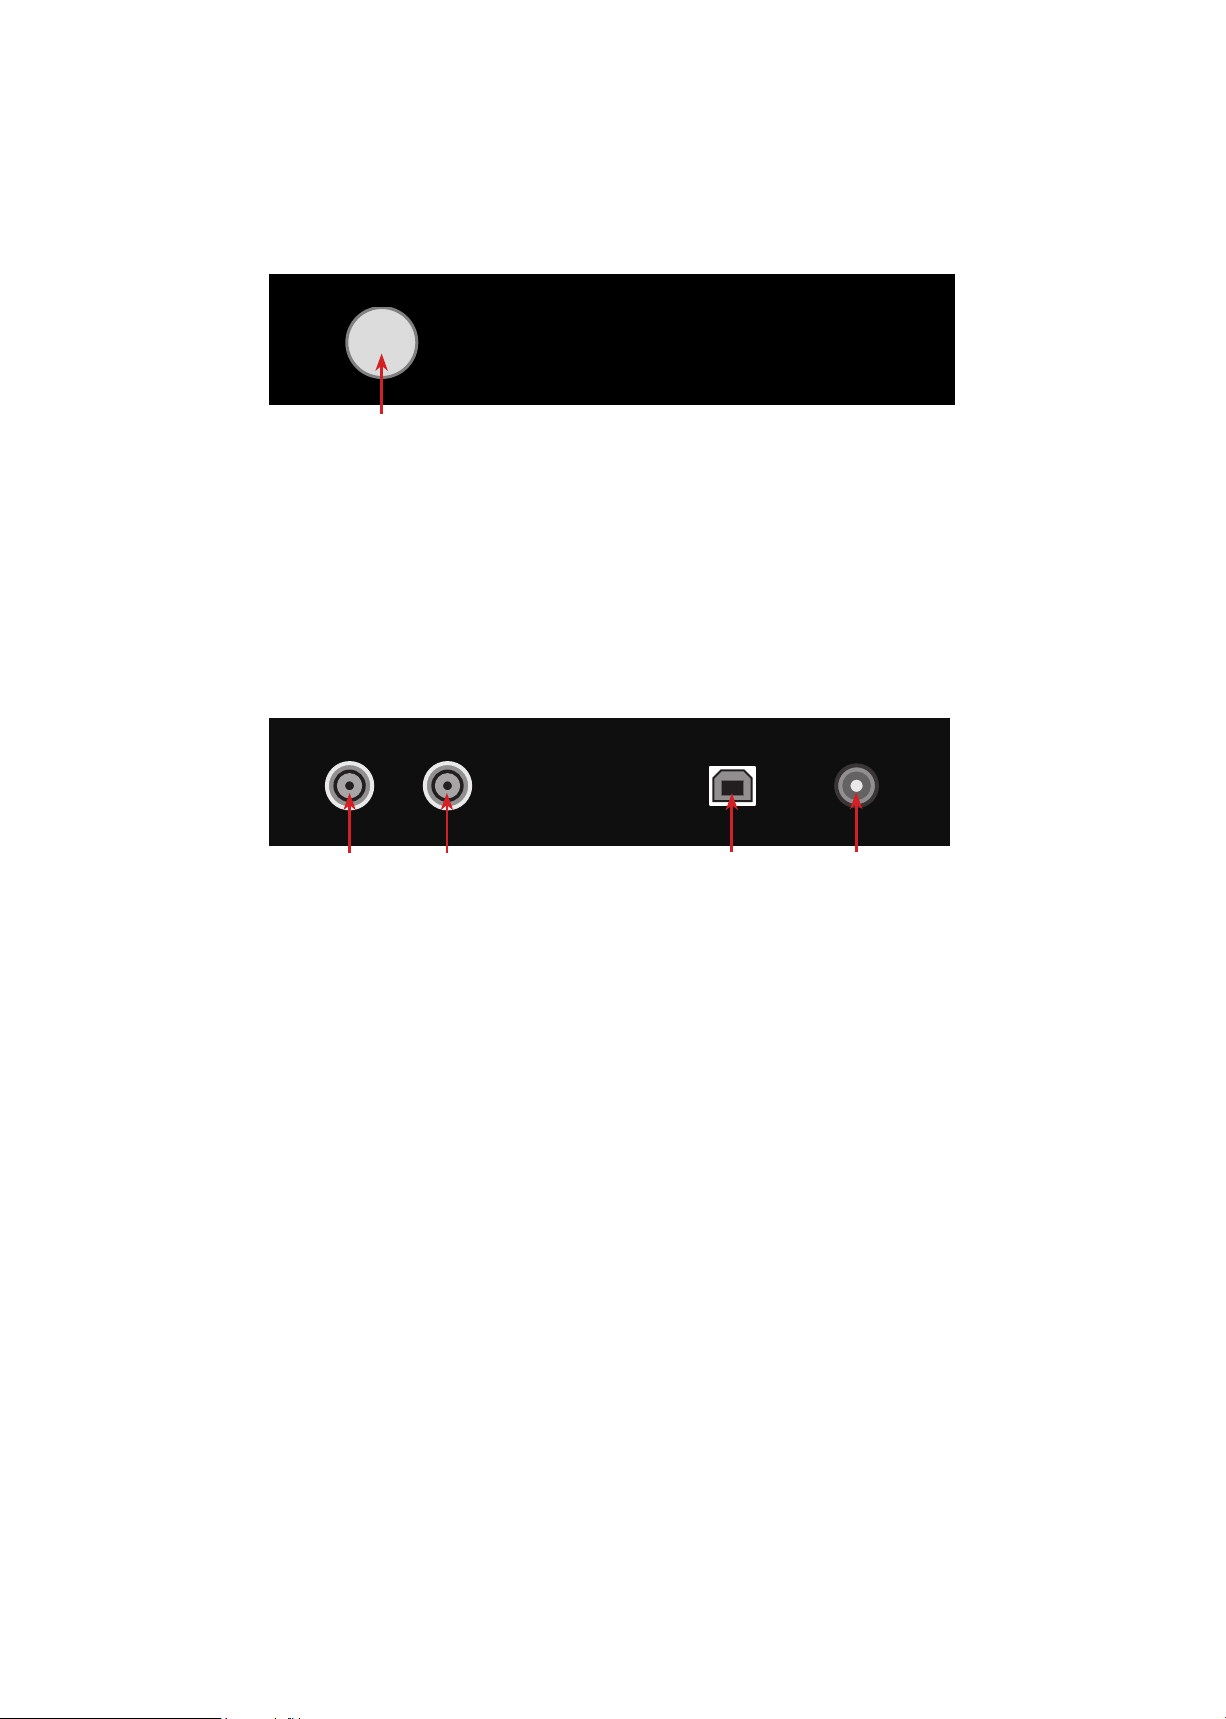
Input signal terminal BNC connector 75 Ω
Output video signal HD-SDl
Output signal format Full HD digital (1920 × 1080 60 i)
Output signal terminal BNC connector 75 Ω
Pass-through function Input video is output as is when the unit is powered OFF.
Image clarifying processing
strength adjustment 3-step switchover of OFF / Normal / Enhance
Range adjustment 3-step switchover of Full / Limited / Custom
Brightness adjustment 3-step switchover of Low / Middle / High
Audio signal Not adaptable
Remote control USB
Control unit connector USB-B connector
Power supply voltage 100 - 240 V +-10% AC 50 / 60 Hz (attached AC adapter)
Power consumption 5 W
Environmental conditions Temperature: 0 ºC - 50 ºC (32 ºF - 122 ºF)
Humidity: 20 % - 80 % (with no dew deposition)
Mass 1.3 kg (with AC adapter excluded)
Outside dimensions
205 mm (W) × 143 mm (D) × 44 mm (H) (Projections excluded.)
*Adjustment value can be changed by the USB control software.
3. Congurations
• Unit (main body) × 1 pc • AC adapter × 1 pc
• USB cable × 1 • Instruction manual(this paper) × 1
• CD (USB control software and instruction manual included.) × 1 pc

2
POWER
①POWER
Turns ON/OFF the power supply of this unit.
The periphery of the button lights up when pressed ON.
①Digital video signal input
This is the input terminal (BNC) of the HD-SDI video signal. Video signal that needs image processing is
inputted from this terminal.
②Digital video signal output
This is the output terminal (BNC) of the HD-SDI video signal. Processed video signal is outputted from this
terminal.
The input video signal is outputted as is when this unit is powered OFF.
③USB input
This is a control input terminal conformed with the USB 2.0 standard. This unit can be remote-operated by
connecting with a personal computer, using the attached USB control software.
④ Power supply terminal
Connect the attached AC adapter. Never connect any AC adapter other than the attached.
4. Panel (Operation / Connections)
4.1. Front panel
①
4.2. Rear panel
IN OUT USB DC12V
① ② ③④

3
4.3. Connection diagram
When the video data from a video recorder is image-clarifying-processed and displayed on a
monitor:
Camera
Camera
DVR, etc FV-3000HS Monitor
When the image data from a camera is image-optimized and then outputted to a video
recorder:
* The image data from a camera can be optimized in real time.
Camera
Camera
Camera
Camera
DVR, etc
DVR, etc Monitor
Monitor
Switcher, etc.
FV-3000HS
FV-3000HS
FV-3000HS
* Since the I/O signal of FV-3000HS is HD-SDI (BNC), a converter and the like is necessary
in case of other signal format.

4
5. USB Control Functions
5.1. Outline
The setting of each function can be remotely switched over from a distance when this unit is
connected with a personal computer with a USB cable.
Install the attached USB control software to remotely control from a personal computer.
5.2. Adaptable OS
The attached USB control software supports the following OS environment.
・Microsoft Windows Vista (32bit/64bit)
・Microsoft Windows 7 (32bit/64bit)
・Microsoft Windows 8 (32bit/64bit)
5.3. Installation of driver
5.3.1. Startup of installer
Execute “Driver\Setup\CDM20828_Setup.exe" in the attached CD.
5.3.2. Setup wizard
The installer starts. Click on "Extract".

5
5.3.3. Installation of driver
Install the driver. Click on "Next>"
5.3.4. Completion of installation
Installation will automatically proceed and complete with the following screen displayed.
Then, click on "Finish>"
5.4. Installation of control software
5.4.1. Startup of installer
Execute "Software\Setup\Setup.exe" in the attached CD.

6
5.4.2. Setup wizard
The installer starts. Then, click on "Next>".
* The setup screen ".NET Framework 4.0" is displayed when ".NET Framework 4.0" is not
installed in the personal computer. In this case, install it according to the instruction.
5.4.3. Selection of installation folder and user
Select an intended destination folder for installation and a user type ("Everyone" or "Just
me"), and then click on "Next>".
5.4.4. Conrmation of installation
The installation conrmation screen is displayed. Then, click on "Next>".

7
5.4.5. Completion of installation
Installation will automatically proceed and complete with the following screen displayed.
Then, click on "Close".
5.4.6. Startup of control software
The following short cut icon appears on the desktop as soon as the installation is complete.
Double-click on this icon to start the software.

8
5.5. Operation on control software screen
Double-click on the short cut icon to start the control software.
①
①Series selection
By double-clicking the short cut, rst of all, the screen as shown above will appear. Then
select "FV-3000HS" from the pull down menu and click on. The device selection screen
as shown below will appear when the series selection is successful. If the screen is not
displayed, conrm that this unit is powered ON and the USB cable is correctly connected.
②
② Device opening
Next on the device selection screen, select the ID of FV-3000HS to make setting, and then
click on "Open" (The ID of each product is printed on the bottom of the unit). The control screen
as shown below will appear when the series selection is successful. If the screen is not
displayed , conrm that this unit is powered ON and the USB cable is correctly connected.
③ ④
⑤ ⑥
⑦ ⑧
③ Device close
When completing the software, click on “Close" to close the connection with this unit. The device
selection screen will appear again when the operation for device close is successful. Then, click on
× icon at the upper right of the window to close the software. If the device selection screen is not
displayed, conrm that this unit is powered ON and the USB cable is correctly connected.
MODEL
S/N
ID
FV-XXXXXX
SXXXXXXXXXXX
XXXXXXXX ID

9
④ "Default" button
When this button is clicked on, all the settings of this unit return to those at the product shipment.
⑤Image clarifying processing strength adjustment
This function improves images hard to see to those easy to see by correcting Contrast.
The images under non-ideal external light conditions at low illuminance, backlight or fogs are corrected
adaptively. Strength of correction can be set in 3 steps (Off / Normal / Enhance). We normally recommend
"Normal" for setting since noise becomes obvious depending on the image when strength is raised.
Setting Contents of adjustment
OFF
Image clarifying processing strength is turned off. The input video signal is
outputted as is.
Normal Image clarifying processing strength is turned ON (Normal). Normally use
in this mode.
Enhance Image clarifying processing strength is turned ON (Strength is enhanced).
Each function Image clarifying processing
OFF Normal Enhance
Contrast improvement OFF ON (Normal) ON (Enhance)
Brightness adjustment OFF ON ON
Range adjustment ON ON ON
⑥Brightness adjustment
This function adjusts the brightness of an output image. The standard setting is "Middle". Low brightness
portion becomes easy to see by adjusting this setting to "High" when the black level of the display
monitor is a bit low. On the other hand, the noise obvious at low brightness portions can be reduced by
adjusting this brightness level to "Low".
Setting Contents of adjustment
Low Adjusts to a little darker.
Middle Adjusts to the standard brightness.
High Adjusts to a little brighter.
⑦Range adjustment
This button sets the range of the video signal to be inputted to and outputted from this unit.
The following three setting options are available to match the specifications of the video
signal range of the apparatus to be connected before and after this unit.
Setting Input signal range Output signal range
Full 0 - 255 0 - 255
Limited 16 - 235 16 - 235
Custom 16 - 235 0 - 255

10
ZENIC Inc.
URL http://www.zenic.co.jp/ /E-Mail : [email protected]
OPTEX Bldg. 8F 4-7-5, Nionohama Otsu SHIGA, 520-0801, JAPAN
Phone: +81-77-526-2101 / Fax. : +81-77-526-0500
(1) This unit, this material, and the attached software are copyrighted by ZENIC Inc.
(2) The contents described in this material neither guarantees the execution of the industrial
property rights and other rights nor permits its license.
(3) The specifications of this unit may be changed without prior notice for the improvement
of its performance. The contents in this material may also be revised according to the
specification change of this unit.
6. Troubleshooting
Trouble Possible cause Remedy
The unit does
not power ON.
The power plug is off the outlet. Firmly insert the AC adapter to the outlet.
The power connector is
disconnected. Firmly insert the connector to this unit.
Image does
not appear.
BNC connector is disconnected. Firmly insert the connector to this unit.
There is no input signal. Check the input device.
Clarifying
does not work.
Setting is at "FV OFF". Conrm the setting, set to "FV ON".
Much noise is in the input video. Adjust setting items and enter the settings.
Clarifying
does not work
or image is
not seemed to
be claried.
Input image is a natural image in
daylight.
As for a good natural image in
daylight,even if clarifying is turned on,
drastic changes may not occur and
clarifying just doesn't seem to work(it is
not malfunction).
* Contact our ofce if a trouble cannot be corrected even after the remedies above are taken
or other additional trouble has been generated.
Bottom
Serial No.
MODEL
S/N
ID
FV-XXXXXX
SXXXXXXXXXXX
XXXXXXXX
Table of contents