manuals.online logo
Brands
  1. Home
  2. •
  3. Brands
  4. •
  5. Zhenan
  6. •
  7. Vacuum Cleaner
  8. •
  9. Zhenan ZN102-1 User manual

Zhenan ZN102-1 User manual

Instruction Manual
Components
ZN102-1 Wet&DryVacuumCleaner)
Productprofile
●Multiplefilters to preventsecondarypollution Hose
Switch
Socket
●Equipped with various kinds ofnozzle, onemachinewith Handle
multifunction Adjustableswitch
between vacuuming
With various kinds ofnozzleit notonlycan absorb duston carpet,
flooring, butalso duston wall, ceiling, sofa, bed, and duston the
Metalextension tube
Note:This productis avacuumcleaner designed forlargeplaces,
suitableforhomeuse, industrialpurposeand hotels etc.
Itadopts themultiplefilters and notonlycan absorb dust
completely, butalso ensure thattheexhausted airis clean and can
avoid secondarypollution.
between vacuuming
and airblowing Lock
●Manualwindingofthecord
Tank
Up/down switch forfloornozzle Floornozzle Roller wheel
●Realizingdustcleaningand airblowingfunction through onekey
flooring, butalso duston wall, ceiling, sofa, bed, and duston the
surface ofvarious kinds ofhousehold appliance.
Points for Attention
●Mounttheelbowtubeto thehose
When connectinginsertthesmaller end oftheextension tubeinto the
floornozzlethan swivelit to frim connection. (Fig.10)
Mountingtheassembly
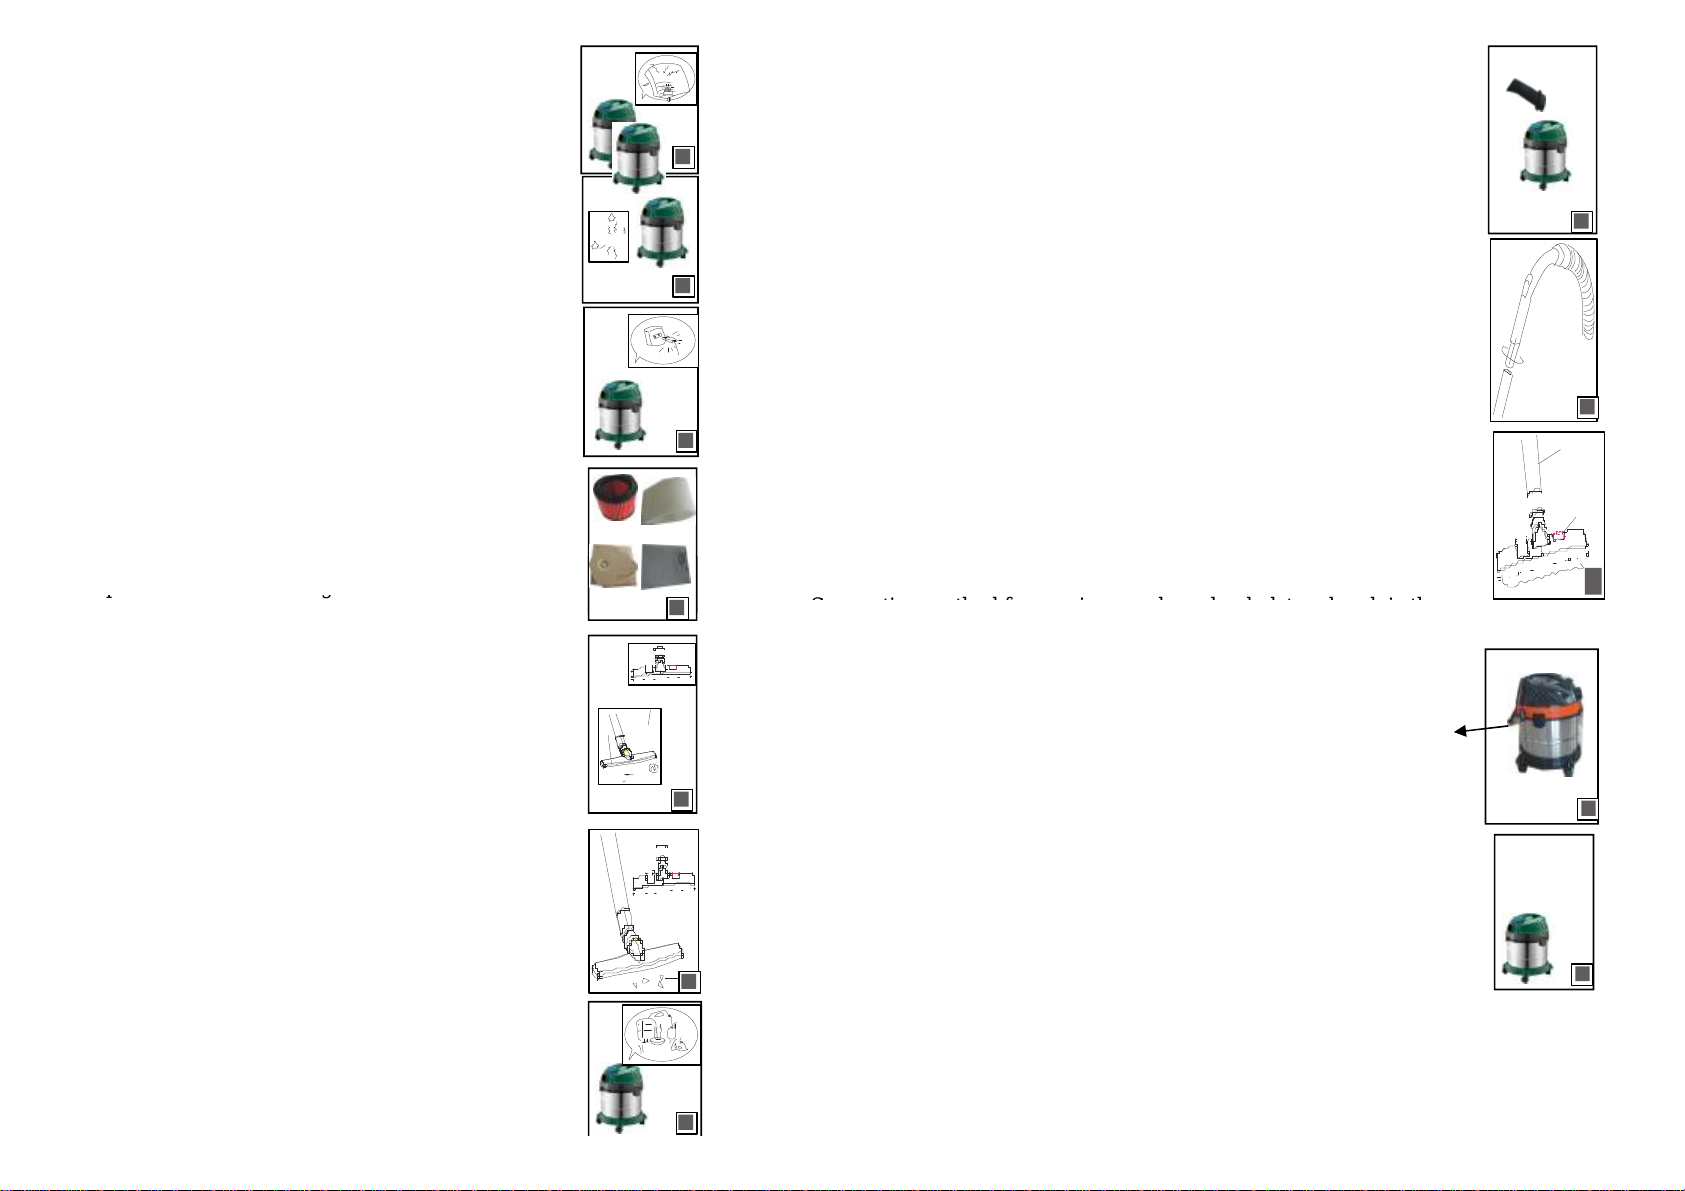
●Mountthehoseto thetank
Hold on thehoseconnectorand insertit into theinletopening.and
makesure thatthebayonetcouplers catch theirtracks. Then push
forward and turn clockwiseuntil thecouplinglocks. When
disassemblingthehoseturn counterclockwiseand pull it out. Fig.8)
Connection method forcrevice nozzleand upholsterybrush is the
When connectinginserttheelbowtubeinto thebigger holeofthe
extension tubethen swivelit to firmconnection. (Fig.9)
●Themethod ofconnectingtheextension tubes is thesameatabove
(you can useoneextension tubeortwo).
●Amounttheextension tubeto thefloornozzle
●Do notletthis vacuumcleaner near thefurnace and
subjectwith higher temperature in order to avoid plastic
deformation and damage. (Fig.1)
●Avoid bending, stampingand draggingthehose. Do
notusethevacuumcleaner when hosedamaged.
Fig.2)
●Pleasedisconnectthepower cord plugwhen you don
tusethevacuumcleaner, as well as formaintenance
work and cleaning. Pleasehold on theplugand do not
dragthepower cord whileinsertingand pluggingthe
cord. Fig.3)
●Before usingthevacuumcleaner, pleasecheck if
filter, filter sponge, paper bagorcloth bagare properly
mounted. pleasedon tusethevacuumcleaner when
aboveparts do notexist. Fig.4)
1
2
3
4
8
9
10
管
地面刷
Beginto use
●Power cord Crank
Unplugtheplugfromthesocketwhen you havefinished usingit and
rewind thepower cord with thecrank into thewindingroll insidethe
vacuumcleaner.(Fig.11)
Theeffectivelength ofpower cord is 4 meters.
●Pleaseuseacloth dampened with water ormild soap
forcleaningthevacuumcleaner. Do notusegasoline,
bananaoil, otherwiseit will lead to crack orfade.
Fig.7)
Connection method forcrevice nozzleand upholsterybrush is the
sameas above.
After insertingthepluginto thepower socket, press theposition "I"the
vacuumcleaner will work. Press theposition "0"thevacuumcleaner
will stop working, press theposition "II":Synchronization Function
(onlyin synchroniztion vacuumcleaner):Putthepower supplyplugof
puter machines into thesocketofthevacuumcleaner, once open the
switch oftheouter machines, theywill besynchronization work.
●Power source
●Whileabsorbingpleasedo notabsorb mud, gypsum
material, wall powder etc. otherwisethevacuumcleaner
filter can causeblockageand themotorwill beburned.
Ifthesesmall particles were absorbed pleaseclean the
dustbagorfilter. Fig.6)
aboveparts do notexist.
Fig.4
)
●When usingthevacuumcleaner, do notabsorb hair
group, largeball ofpaper and other items thatmaymake
theabsorbinginlet, tubeand hosegetblocked.
Otherwiseit maycausemalfunction ordeformation. If
theseitems were absorbed pleasedisconnectthepower
cord immediatelyand clean it.(Fig.5)
4
6
7
10
11
12
5
Trouble
Troubleshooting
●Before contactan authorised service workshop, pleasecheck thefollowing
points first.
Operationmethods
●Forcleaningin corners and crevices you can use
crevice nozzle.(Fig.14)
Solution
Themachinedoes not
start
1.Check to see ifthepower plug
is stablyconnected to thesocket.
2.Check to see ifthepower
switch was turned on.
●Turn theadjustableswitch leftorrightto setup
absorbingorairblowingfunction
●Pleaseuseupholsterybrush forcleaningsofa, curtain
orduston thedecoratingsurfaces. Usefloornozzlefor
common places such as carpetand floor. Fig.15)
●Operation method forremovingand cleaningthe
filter 1.Check ifthefloorbrush, hose
and extension tubewere
clogged.
Thesuction power is
Possiblecause
Removethe
obstruction in time,
emptythetank, clean
1)Hold on thelock on both sides oftheproductand
rotateit outwards to open. Then grasp thehandleup to
carryoutthemotorhead.
Fig.17
)
2.Check ifthetank is full.
Turn leftto theend thevacuumcleaner will beused for
absorbingand turn rightto theend it will beused forair
blowing. Fig.16)Adjustableswitch
Insertthepluginto
thesocketagain and
makesure thatthe
sockethas power.
And turn on the
switch.
1
4
7
Model Voltage Frequency
ZN102-1 220~240V 50HZ
Rangeofpower
1250W/1400W
Thesuction power is
reduced
emptythetank, clean
thefilter and
reassemblethe
extension tube.
carryoutthemotorhead.
Fig.17
)
2)Grasp thehandlewith onehand and thefilter with
theother hand and then rotateit counterclockwiseto
remove. Fig.18)
2.Check ifthetank is full.
3.Check ifthefilter is clogged,
thesuction power switch is fully
turned on and extension tubeis
connected correctly.
3)Clean thefilter with runningwater firstand then
slap it with hand orswingit. After removingthewater
letit dried in theairorin theshade. Don tdryit with
dryer in order to avoid deformation caused byhigh
temperature. Fig.19)
7
8

Popular Vacuum Cleaner manuals by other brands

Nilfisk-Advance Coupe Neo user manual

Nilfisk-Advance

Nilfisk-Advance Coupe Neo user manual

Hoover H84-7WD-ZA Instructions and warranty

Hoover

Hoover H84-7WD-ZA Instructions and warranty

Russell Hobbs Extreme Suction RHF209 Instructions and warranty

Russell Hobbs

Russell Hobbs Extreme Suction RHF209 Instructions and warranty

Kenmore 116.22251C owner's manual

Kenmore

Kenmore 116.22251C owner's manual

VOLTA LITE II instruction manual

VOLTA

VOLTA LITE II instruction manual

Clemas & Co KV20 Operator's manual

Clemas & Co

Clemas & Co KV20 Operator's manual

Simplicity SV1 owner's manual

Simplicity

Simplicity SV1 owner's manual

Bissell PowerForce® Bagless Vacuum Guía del usuario

Bissell

Bissell PowerForce® Bagless Vacuum Guía del usuario

Panasonic MCV7721 - UPRIGHT VACUUM operating instructions

Panasonic

Panasonic MCV7721 - UPRIGHT VACUUM operating instructions

Bissell CleanView Helix 95P1 SERIES user guide

Bissell

Bissell CleanView Helix 95P1 SERIES user guide

TECTOOL NTS 30 PREMIUM Original instruction

TECTOOL

TECTOOL NTS 30 PREMIUM Original instruction

lubluelu TPH06 instruction manual

lubluelu

lubluelu TPH06 instruction manual

Hoover RC71 user manual

Hoover

Hoover RC71 user manual

Green-It 1687048 user manual

Green-It

Green-It 1687048 user manual

Shark LIFT-AWAY NV590UK Series quick start guide

Shark

Shark LIFT-AWAY NV590UK Series quick start guide

Beko VCW 30915 WR user manual

Beko

Beko VCW 30915 WR user manual

UMAX Technologies U-Smart Robot Vacuum manual

UMAX Technologies

UMAX Technologies U-Smart Robot Vacuum manual

Blaupunkt VCH601 owner's manual

Blaupunkt

Blaupunkt VCH601 owner's manual

manuals.online logo
manuals.online logoBrands
  • About & Mission
  • Contact us
  • Privacy Policy
  • Terms and Conditions

Copyright 2025 Manuals.Online. All Rights Reserved.