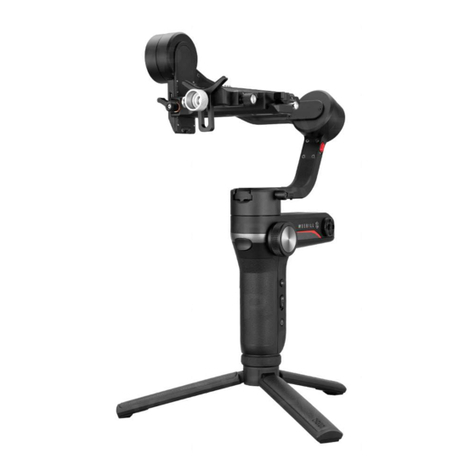
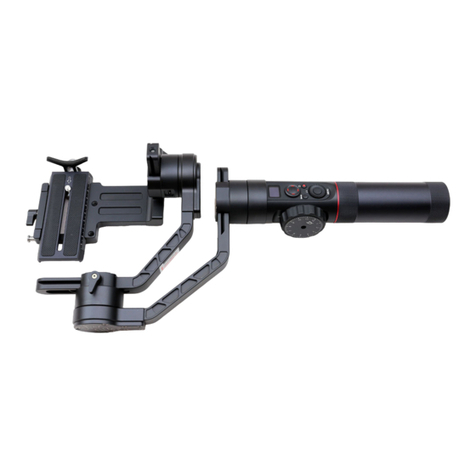
Zhiyun CRANE 2S User manual

The following features are available in
this PDF document.
Quick Keyword Search
Enter the keyword in the search box
and hit the search button
Quick Jump between
Chapters
Click the title of a specific chapter on
the Contents to jump to it
*Reading software such as Adobe Reader is
needed to support the functions above.

CRANE 2S
User Guide
ZHIYUN-EN-v1.00

Contents
■Packing list
Packing list·····················································································1
■Get to know the CRANE 2S
Get to know the CRANE 2S····························································2
Port introduction ·············································································3
■Charging and Battery
Charger and battery description ······················································4
Charging Procedure········································································5
■Installation and Balance Adjustment
Installing the battery ········································································6
Installing the tripod··········································································6
Installing the quick release base plate··············································6
Installing the camera ·······································································7
Connecting the control cable ·························································· 8
Balance adjustment········································································9
■Using the CRANE 2S
Quick Release Plate Adjustment Module··········································12
How to use the hex wrench ···························································· 13
Control panel description ································································13
Display screen description ······························································15
Menu options description································································17
Motor Torque Adjustment································································19
Operation Modes ···········································································20
Manual Repositioning ·····································································24

■How to Use the App
App Download ···············································································25
Connect and activate······································································25
■APP Operations
Main App Features ········································································· 26
■Calibration and firmware upgrade
When is Calibration Required ··························································27
How to initialize··············································································· 27
How to perform six-side calibration··················································28
Motor Fine-tuning ···········································································30
CRANE 2S firmware upgrade··························································30
■Product Specifications
■Disclaimer and Warnings
Reading Tips··················································································33
Warnings························································································33
Safe Operation Guidelines ······························································34
■Warranty Terms
Warranty Period ·············································································· 37
Warranty Exclusions········································································37
Warranty Claim Procedure·······························································37
■Contact Card

1
Packing list
Packing list
The product package comes with the following items. If there are any missing items,
please contact ZHIYUN or your local distributor.
CRANE 2S × 1 Quick release plate × 1 Camera Backing Base × 1
Tripod × 1 18650 lithium battery × 3 Charger × 1
Wrench × 3 1/4-20 screw x 3 Type-C to Micro USB
camera control cable x 1
Type-C to Mini USB camera
control cable x 1
Type-C to Type-C camera
control cable x 1
Type-C to Multi-USB
camera control cable x 1
USB Type-C Cable x 1 Quick Start Guide x 1 Storage case x 1

2
Get to know the CRANE 2S
1
7
8
9
10
11
12
13
2
3
4
5
6
1. Tilt axis
2. Quick release base
3. Pan axis motor
4.1/4” screw thread with crown
gear
5. Follow focus wheel
6. Handle
7. Tilt axis motor
8. Roll axis
9. Roll axis motor
10. Pan axis
11. Control panel
12.1/4 threaded hole (compatible
with 3/8)
13. Tripod
14
22
23
24
25
26
15
16
17
18
27
19
20
21
14. Vertical shooting safety lock
15. Vertical shooting locking screw
16. Tilt axis locking switch
17. Tilt axis locking latch
18. Type-C port for TransMount
Follow Focus Motor × 2
19. Quick release base safety lock
20. Pan axis locking screw
21. Pan axis locking switch
22. Trigger button
23. Roll axis locking screw
24. Roll axis locking switch
25. Quick release plate safety lock
26. Quick release plate adjustment
module
27. Quick release plate locking
latch

3
Get to know the CRANE 2S
28. Type-C camera control port
29. Quick release base adjustment
module
30. Quick release base locking latch
31. 1/4” screw thread with crown gear
32. Type-C firmware update port
33. 1/4 camera locking screw
34. Camera backing base
35. Quick release plate
36. Lens support
37. Locking screw for lens support
Serial
No. Port type Function Output Input
1Type-C camera control
port Camera connection and control 5V1A NA
2
Type-C port for
TransMount Follow
Focus Motor
TransMount Zoom or Focus
Motors connection and control 8.7V2A NA
3 firmware update port Connect to the computer to
upgrade the CRANE 2S firmware / /
Port introduction
28
31
32
29
35
33
34
36
37
30

4
Charging and Battery
Before using the CRANE 2S for the first time, use the charging device provided in the
package to fully charge the batteries so as to activate them and ensure the smooth
use of the product.
Charger and battery description
Charger specifications
Name: 18650 Li-ion battery (three
slots)
Model: CH18650-3B
Input: 5V=2400mA
Output: 4.2V=800mA × 3
●The LED indicator shines solid red
when charging.
●The LED indicators shines solid blue
when fully charged.
Battery specifications
Name: 18650 Li-ion battery
Model: INR 18650-26EC
Capacity: 2600mAh
Voltage: 3.7V
状态指示灯
①The stabilizer is equipped with batteries of high energy density, which
may cause fire, economic loss or personal injury when improperly stored
or handled. Please read the disclaimer and warning herein as well as the
description on the battery label carefully before using the batteries.
②Please use batteries provided or approved by ZHIYUN only. ZHIYUN will not
take any responsibility for explosion, fire and/or accidents caused by non-
ZHIYUN batteries.
When the batteries are not in use, please make sure to put them in the battery slot
of the package or in plastic storage cases (the storage case needs to be purchased
separately).
Status indicator lights

5
Charging and Battery
Charging Procedure
1. Insert the batteries into the charger in the right direction(positive/negative end)
accordingly.
2. Connect the charger to the adapter via the USB Type-C cable.
3. Plug the adapter into a power outlet to start charging.
USB Type-C
cable Adapter Power supply
①Due to the differences of the charger itself, charging the batteries may fail
when the power supply is insufficient (for instance, when the current of the
adapter is lower than 500mA). Conditions may vary depending on the specific
chargers used. It is recommended to use an adapter with a higher current
capacity.
②The battery cannot be charged through the Type-C port on the stabilizer.
① Please use a qualified standard 5V/ ≥ 2000mA adapter for battery charging;
charging time depends on the maximum input current of the adapter.
②This stabilizer comes standard with three high-discharge-rate ZHIYUN
batteries. Use ZHIYUN batteries only.
③Please make sure the three batteries are fully charged. Undercharged
batteries can cause stabilizer malfunction.

6
Installation and Balance Adjustment
Installing the battery
Unscrew the rear cover of the handle and install three original 18650 Li-ion batteries
(note the direction of the positive and negative poles of the batteries). Then, tighten
the rear cover of the handle.
①
②
Installing the tripod
Screw the tripod to the base of the CRANE 2S handle, then unfold the tripod and
place the CRANE 2S on a flat surface.
①
②③
Installing the quick release base plate
Take out the quick release base and push the quick release base into the CRANE
2S tilt arm. The detachable design means that you can quickly dismount the camera
from the CRANE 2S. The rear of the quick release base contains three 1/4 screw
holes making it easy for you to mount the entire quick release base to other devices.
①②

7
Installation and Balance Adjustment
Installing the camera
1.Mount the camera on the camera backing base and quick release plate, and
tighten the bottom screw. Mount the lens support to the front end of the quick
release plate and tighten the screw.
You may decide whether or not to use the camera backing base depending
on your camera-lens combo. You will need the camera backing base in the
following situations:
① When using smaller and lighter cameras, such as the Sony 6000 series
cameras.
② When using lenses with larger diameters, such as the Canon RF28-70mm F2
L USM lens.
③ When installing the TransMount Follow Focus Motor.
④ If it is difficult to balance the roll axis when the camera is mounted vertically.
2. Adjust the lens support on the quick release plate so that it can hold the lens.
Ensure that the lens is stable.
3. Install the quick release plate with the mounted camera onto the gimbal, and lock
the quick release plate.
To avoid mechanical noises from the gimbal, tighten the vertical locking screw
when mounting in horizontal mode; when mounting in vertical mode, tighten the
quick release base locking latch; and you may choose whether or not to install
the quick release base depending on the shooting conditions.
Horizontal mount Vertical mount

8
Installation and Balance Adjustment
Connecting the control cable
Method to select a camera manufacturer:
Press the menu button, turn the dial to “Camera Settings”, and press the right button once to access
camera settings. Turn the dial again to select the corresponding camera brand, and press the right
button once to confirm.
①The table uses only some camera models as examples, and should only be taken as a
reference. For the full and latest list of camera models supported by the CRANE 2S, check
out the “CRANE 2S Camera Compatibility List” on ZHIYUN’s official website at www.zhiyun-
tech.com.
②When using the CRANE 2S with a Sony camera, connect the control cable and turn on the
CRANE 2S before turning on the camera. Ensure that the camera has sufficient power. You
may use a motorized lens that supports optical zoom, or a non-motorized lens that supports
digital zoom. The lens type can be set in the camera menu.
Control cable
name
Type-C to Micro USB
LN-MBUC-A01
Type-C to Mini
USB
LN-NBUC-A01
Type-C to Type-C
LN-UCUC-A01
Type-C to Multi
USB
LN-UCUS-A01
Camera
interface type Micro USB Mini USB Type-C Multi USB
Camera brand
and model
Nikon Canon Panasonic Nikon Sony
D850 5D Mark Ⅳ 6D Mark Ⅱ EOS R GH5 Z6 A7RM3
Take photo √ √ √ √ √ √ √
Take video √ √ √ √ √ √ √
Live Preview √ √ √ × × × ×
AV √ √ √ √ √ √ ×
TV √ √ √ √ √ √ ×
ISO √ √ √ √ √ √ ×
EV √ √ √ √ √ √ ×
Electronic
Focus √ √ √ √ √ √ ×
Digital zoom × × × × × × √

9
Installation and Balance Adjustment
Balance adjustment
① The CRANE 2S has three lock switches corresponding to each of the
three motor shafts. You can lock the CRANE 2S in the mounting or storage
position for your convenience. Make sure that the three lock switches are
unlocked when powering on to increase stability. Before balance adjustment,
you can lock the CRANE 2S in the mounting position and release the locks of
each axis in stages to facilitate balance adjustment.
安装锁定姿态 收纳锁定姿态
② Place the camera handle close to the tilt axis motor for optimal stability. Loosen
the quick release base locking latch and push the entire quick release base so
that the camera handle is close to the tilt axis motor before locking the latch.
①②
Locked stage for
mounting
Locked stage for
storage

10
Installation and Balance Adjustment
1. Tilt axis horizontal balance adjustment. Unlock the tilt axis and Quick Release
Plate Latch, push the camera to move forward or backward until the camera can
stay still and almost level with its lens facing front (as shown below). Complete
this step by tightening up Quick Release Plate Latch.
2. Tilt axis vertical balance adjustment. Make the lens face up, slightly loosen the
thumb screw of the tilt axis, and push the camera to move upward or downward
until the camera can stay still with the lens facing up. Complete this step by
tightening up the thumb screw.

11
Installation and Balance Adjustment
3. Roll axis balance adjustment. Unlock the roll axis, and slightly loosen the roll
axis thumb screw under the quick release plate, push the camera to move left or
right until the camera can stay still and horizontal to the ground. Complete this
step by tightening up thumb screw.
4. Pan axis balance adjustment. Unlock the pan axis, slightly loosen the thumb
screw on it, then adjust the pan axis until it stays still and horizontal to the ground.
Complete this step by tightening up thumb screw.

12
Quick Release Plate Adjustment Module
1. Due to mechanical friction wear after a long time of use, the quick release plate
locking latch (quick release base locking latch) can still move back and forth (left
and right) after has been locked.
1
1
2
2
2. Now, you can keep pushing the adjustment module as shown in ① , adjust the
latch until it is loosened as shown in ② , then let go of the adjustment module as
shown in ① . Then, tighten the latch to ensure that the quick release plate (quick
release base) is properly locked. If it fails to lock the first time, you may repeat the
process several times until it is locked
Using the CRANE 2S

13
How to use the hex wrench
M2 M4
M1.5
This product comes with hex wrenches in three sizes. The M1.5 and M2 wrenches
can be used for routine maintenance of the CRANE 2S. Tighten the screws as
necessary when they become loose. The M4 wrench can be used to lock the 1/4
screw of the quick release plate.
Control panel description
Using the CRANE 2S

14
Using the CRANE 2S
① Display screen
• Displays status information and camera
control parameters for the CRANE
2S (see display screen description for
details).
② Stabilizer joystick
• Push the joystick up and down, and
left and right to control the stabilizer
movement (does not work in PhoneGo
mode or Point of View mode).
③ Power button/record button
• Long press the power button for three
seconds to turn the CRANE 2S on or off.
• Press once to start/stop recording.
④ LV button
• Press once to access/exit live view mode
on the DSLR.
⑤ Left selection button
• Press to switch to the previous control
item in the main interface.
• Press to return to the previous menu level
in the menu interface.
• Controls the camera's electronic zoom
when mounted with a Sony camera.
⑥ Right selection button
• Press to switch to the next control item in
the main interface.
• Press to confirm selection in the menu
interface.
• Controls the camera's electronic zoom
when mounted with a Sony camera.
⑦ Photo button
• Half press this button to activate auto
camera focus.
• Full press this button to take a photo.
⑧ Dial
• Turn the dial to adjust camera parameters
in the main interface.
• Rotate the dial to move up and down in
the menu interface.
⑨ Menu button
• Press to access or exit menu options.
⑩ Follow focus wheel
• The dial either controls the rotation of the
electronic follow focus or TransFollow
Focus Motor - you can select one in the
menu.
⑪M button
• Press the M button and the CRANE 2S
will switch between Pan Following mode
and Locking mode (Pan Following mode
is the default mode after powering on).
• Press the M button twice and the
CRANE 2S will switch between Point of
View mode and Vortex mode. Press the
M button again to return to Pan Following
mode.
• Press the M button thrice and the
CRANE 2S will enter Phone Go mode.
Press the M button again to return to
Pan Following mode.
• Long press the M button and the CRANE
2S will enter or exit Standby mode.
⑫Trigger button
• Press or press and hold to enter
Following mode (you can select this in
the menu). Press again or release the
button to return to the previous mode.
• Press twice and the motor will return to
the initial point of the current mode (this
will not work in Phone Go mode or Point
of View mode).
• Press thrice to rotate the pan axis
motor 180° . The current mode remains
unchanged (this does not work in
Locking mode).
*For installation instructions for TransMount Follow Focus Motor, refer to the instruction
manual that comes with TransMount Follow Focus Motor.
①When starting the CRANE 2S, hold the camera gently to prevent possible
malfunctions of the CRANE 2S, which may cause it to turn randomly, resulting in
damage to the camera.
②When starting the CRANE 2S, hold the handle or place the CRANE 2S on a desktop.
Shaking the CRANE 2S during startup may cause startup failure; do not leave the
handle suspended in the air.

15
Using the CRANE 2S
Display screen description
*电机⼒矩
相机设置
参数设置
请激活
Camera parameters are not
adjustable
Camera parameters are
adjustable
Sony camera connection
control interface
菜单界面
*Motor torque
Camera Settings
Parameter Settings
Menu interface
Axis lock prompt interface
Activation prompt interface Standby interface

16
Icon description:
axislock
PF
L
POV
V
F
GO
AV
TV
ISO
Using the CRANE 2S
Camera successfully connected to gimbal
Camera is in video mode
Camera is in photo mode
Current battery level
Indicates that the locks on the three axes have not been released and an alarm
will sound (release the locks, and press and hold the M button to resume
operation)
Standby icon, displayed when the motor is in sleep mode
You are in Pan Following mode
You are in Locking mode
You are in Point of View mode
You are in Vortex mode
You are in Following mode
You are in Go mode
Current aperture
Current shutter speed
Current ISO
Current EV
Table of contents
Other Zhiyun Camera Accessories manuals
Zhiyun
Zhiyun Smooth 5S User manual

Zhiyun
Zhiyun CRANE 2 User manual

Zhiyun
Zhiyun MOLUS X100 User manual

Zhiyun
Zhiyun Z1-Proud User manual

Zhiyun
Zhiyun MOLUS G60 User manual

Zhiyun
Zhiyun CRANE-M 3S User manual

Zhiyun
Zhiyun WEEBILL-S User manual
Zhiyun
Zhiyun CRANE 3S User manual

Zhiyun
Zhiyun CRANE 4 User manual

Zhiyun
Zhiyun Crane 3 Lab User manual

Zhiyun
Zhiyun WEEBILL 2 User manual

Zhiyun
Zhiyun SMOOTH-X User manual
Zhiyun
Zhiyun Evolution User manual

Zhiyun
Zhiyun CRANE - M2 S User manual

Zhiyun
Zhiyun SMOOTH-Q User manual
Zhiyun
Zhiyun shining User manual
Zhiyun
Zhiyun CRANE-M2 User manual

Zhiyun
Zhiyun WEEBILL 3 User manual
Zhiyun
Zhiyun FIVERAY FR100C User manual

Zhiyun
Zhiyun WEEBILL 3S User manual