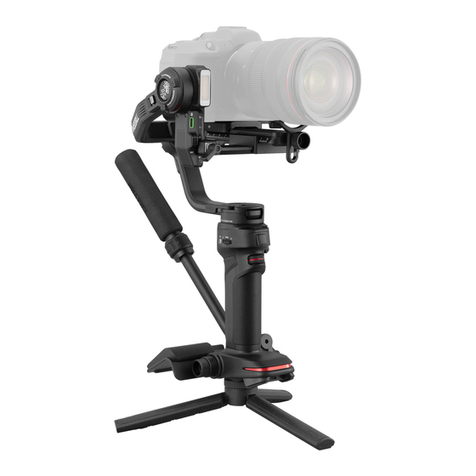
Zhiyun WEEBILL 2 User manual

The following features are available in
this PDF document.
Quick Keyword Search
Enter the keyword in the search box
and hit the search button
Quick Jump between
Chapters
Click the title of a specific chapter on
the Contents to jump to it
*Reading software such as Adobe Reader is
needed to support the functions above.

WEEBILL 2
User Guide
ZHIYUN-EN-v1.10

Contents
■Product List
Product List···················································································· 1
■Get to Know WEEBILL 2
Get to Know WEEBILL 2································································· 3
■Battery and Charging
Battery and Charging······································································ 5
■Installation and Balance Adjustment
Mount the Tripod ············································································6
ount the Camera ············································································ 7
Balance the Stabilizer······································································9
■How to Use WEEBILL 2
Buttons Description ········································································12
Touch Screen Introduction ······························································13
How to Use the Touch Screen ························································14
Motor Torque Adjustment································································17
Stabilizer Mode Description·····························································19
Manual Reposition·········································································· 22
Use with TransMount Image Transmission Transmitter AI (hereinafter
referred to as "transmitter AI") ··························································23
■How to Use the App
Download the App··········································································27
Connect to the App········································································27
App Features··················································································28
■Calibration and Firmware Upgrade

When to Calibrate the Stabilizer·······················································29
Six-side Calibration·········································································29
Motor Fine-Tuning ···········································································31
Stabilizer Firmware Update······························································ 32
■Product Specifications
■Disclaimer and Warning
Reading Tips··················································································35
Warnings························································································35
Safe Operation Guidelines ······························································36
■Warranty Terms
Warranty Period ··············································································38
Warranty Exclusions········································································38
Warranty Claim Procedure······························································· 38
■Contact Card

1
Product List
Product List
Before using this product, please check carefully that all the following items are
included in the product package. In case that any item is found missing, please
contact ZHIYUN or your local selling agent.
Stabilizer × 1 Quick Release Plate × 1
TransMount WEEBILL 2 Handheld Tripod
x 1 Backing Base x 1
1/4 Screw x 3 / M4 Wrench x 1* Type-C to Micro USB LN-MBUC-A02
Camera Control Cable x 1
Type-C to Mini USB LN-NBUC-A01
Camera Control Cable x 1
Type-C to Type-C LN-UCUC-A02
Camera Control Cable x 1

2
“*” Only in WEEBILL 2 COMBO or WEEBILL 2 PRO
“**”Only in WEEBILL 2 PRO
Product List
Type-C to Multi USB LN-UCUS-A03
Camera Control Cable x 1 USB Type-C Cable x 1
Quick Start Guide x 1 Storage Box x 1
TransMount WEEBILL Carrying Case x1* Sling Grip Handle x1*
TransMount Image Transmission
Transmitter AI x1**
TransMount Focus/Zoom Control Motor
2.0 x1**

3
Get to Know WEEBILL 2
1
2
3
4
5
6
7
8
9
10
11
12
13
14
15
16
17
18
19
20
21
22
23
24
25
26
27
28
29
30
31
32
33
1. Quick Release Plate Latch
2. Quick Release Plate Safety Lock
3. Quick Release Plate Base Latch
4. Pan Axis Lock Switch
5. Pan Axis Motor
6. Power Button
7. Photo/Video Button
8. Joystick
9. Handle
10. Tripod
11. Camera Control Port
12. Roll Axis Lock Switch
13. Roll Axis Motor
14. Touch Screen (Retract State)
15. 1/4" Screw Hole
16. Indicator Lights
17. Control Wheel
18. Mode Switch (PF/F/L)
19. Type-C Charging/Upgrade Port
20. Tilt Axis Lock Switch
21. Tilt Axis Motor
22. Level Mount Lock Screw
23. Pan Axis Latch
24. Sling Grip Handle Latch
25. 1/4" Screw Thread with Rosette
Mount
26. Trigger Button
27. Follow Focus Control Port
28. Follow Focus/Image Transmission
Control Port
29. Camera Backing Base
30. Lens Support
31. Lens Support Lock Screw
32. Quick Release Plate
33. Touch Screen (Launch State)

4
Ports Introduction
No. Port Description Using cable
11 Camera Control
Port
Connect to camera Control cable corresponding to
the camera port
Connect to TransMount
Image Transmission
Transmitter 2.0
Type-C to Type-C
( LN-UCUC-A02 straight)
or
Type-C to Type-C
(LN-UCUC-A03 straight
Transmitter To stabilizer Only,
with yellow tag)
19
Type-C
Charging/
Upgrade Port
Connect to charger
USB Type-C cable
Connect to computer
for WEEBILL 2 firmware
upgrade
27 Follow Focus
Control Port
Connect to TransMount
Focus/Zoom Control
Motor 2.0
Type-C to Type-C
(LN-UCUC-D02 curved)
28
Follow Focus/
Image
Transmission
Control Port
Connect to TransMount
Focus/Zoom Control
Motor 2.0
Type-C to Type-C
(LN-UCUC-D02 curved)
Connect to TransMount
Image Transmission
Transmitter AI
Type-C to Type-C
(LN-UCUC-A03 straight.
Transmitter To stabilizer Only,
with yellow tag)
Get to Know WEEBILL 2

5
Battery and Charging
WEEBILL 2 adopts built-in battery. When using for the first time, please
fully charge the battery to ensure the proper function of the stabilizer.
Use provided USB Type-C cable to connect with the USB charger (not provided) to
charge the WEEBILL 2. It is recommended to use USB chargers that meet the PD
policy. (supports 24W at most). When the four indicator lights stay solid, the charging
is completed.
Battery and Charging
AC power
(100-240V)
USB Charger
USB Type-C cable WEEBILL 2
WEEBILL 2 is equipped with batteries of high energy density, which may cause
fire, economic loss or personal injury when improperly stored or handled. Please
read the disclaimer and warning herein as well as the description on the battery
label carefully before using the batteries.
LED 1 LED 2 LED 3 LED 4
<5% Single Flashing
Red Light Light Off Light Off Light Off
5%-25% Solid White
Light Light Off Light Off Light Off
25%-50% Solid White
Light
Solid White
Light Light Off Light Off
50%-75% Solid White
Light
Solid White
Light
Solid White
Light Light Off
75%-100% Solid White
Light
Solid White
Light
Solid White
Light
Solid White
Light
LED
Lights
Battery
Level

6
Installation and Balance Adjustment
Mount the tripod to the bottom of the WEEBILL 2 handle, then unfold the tripod and
place the WEEBILL 2 on a flat surface.
Mount the Tripod
You can also mount the tripod onto the position as shown in the image to enter Sling
Mode.
Sling Mode
When using the sling mode, please make sure to put the sling grip handle latch
to the lock position.

7
Installation and Balance Adjustment
① Before mounting the camera, make sure it is prepared ahead of time.
Remove the lens cap and make sure the camera's battery and memory card
are already in place.
② Each axis of the stabilizer is equipped with a lock switch. You can use these
lock switches to lock the axes for convenient installation and storage. The
storage state is the default state. Please unlock three axes, expand the
stabilizer as shown in the image and lock the axes again for convenient
camera installation.
Lock state for storage Lock state for installation
1.Mount the camera on the camera
backing base. Tighten the bottom
screw and ensure a firm installation.
You may decide whether or not
to use the camera backing base
depending on your camera-lens
combo. You will need the camera
backing base in the following
situations:
① When mounting external follow
focus motor.
② When using lenses with larger
diameters, such as the Canon
RF24-70mm F2.8 L IS USM
lens.
Mount the Camera

8
Installation and Balance Adjustment
3. Loosen the quick release plate latch. Take the quick release plate with the camera
mounted on it and mount it on the stabilizer. Make sure it clicks into the safety
lock, and make sure a firm installation.
When detaching the camera from the
stabilizer, loosen the quick release
plate latch, press the safety lock, and
push out the whole quick release
plate.
2. Mount the camera on the quick
release plate. In order to be stable,
when mounted with a longer or
heavier lens, please mount the
lens support and make sure a firm
installation.

9
Installation and Balance Adjustment
For details of supported camera model for WEEBILL 2, please visit the official
website of ZHIYUN (www.zhiyun-tech.com) and check the "WEEBILL 2 Camera
Compatibility List".
4. Choose the correct camera control cable according to the camera model.
Connect the USB control port of the camera and the camera control port of
WEEBILL 2.
1. Horizontal Balance of the Tilt Axis
Unlock the tilt axis. Loosen the quick release plate latch. Push the quick release plate
to move forward or backward until the camera can stay still and almost level with its
lens facing front. Complete this step by tightening up the quick release plate latch.
④
⑤
Balance the Stabilizer

10
Installation and Balance Adjustment
2. Vertical Balance of the Tilt Axis
Unlock the tilt axis, make the lens face up, loosen the level mount lock screw. Push
the whole level mount to move forward or backward. Push until the camera can
stay still with the lens facing up (i.e.the camera stays still and vertical to the ground).
Complete this step by tightening up the screw.
①
②
②
③
④
3. Roll Axis Balance
Unlock the roll axis and the quick release plate latch, push the
camera to move left or right until the camera can stay still and horizontal to the
ground (as shown below). Complete this step by tightening up the latch.

11
4. Pan Axis Balance
Unlock the pan axis, loosen the pan axis latch, hold and slightly tilt the handle, push
the pan axis to move left or right until the pan axis can stay still in any position.
Complete this step by tightening up the pan axis latch.
Installation and Balance Adjustment
①
③
②
④
After balancing WEEBILL 2, the motor torque needs to be adjusted for proper
function. For the adjustment details, please see the methods introduced in
"Motor Torque Adjustment".

12
Buttons Description
1. Power Button
• Press and hold: Power on/off
• Single press: Turn on/off the screen
• Double press: Sleep mode/wake
mode for the stabilizer motor
2. Trigger Button
• Single press: Enable/disable
SmartFollow (Need to mount
TransMount Image Transmission
Transmitter AI Version)
• Double press: Reposition
• Triple press: Selfie Mode
• Press and hold: Enter POV mode.
Release the button to return to the
previous mode.
3. Joystick
Control the stabilizer to rotate.
4. Indicator Lights
5. Control Wheel
Can customize on the touch screen (Roll
axis/Aperture/ISO/Shutter/Electronic
Focus/Zoom Control/Focus Control)
6. Mode Switch
• Three modes to switch: Pan Follow
Mode (PF)/Follow Mode (F)/Lock
Mode (L)
7. Photo/Video Button
• Half press: Auto camera focus for
some of the cameras
• Single press: Start/stop shooting
video
• Press and hold: Take photo
How to Use WEEBILL 2

13
Touch Screen Introduction
Launch/Retract the Touch Screen
Launch the touch screen before using it. Please rotate in the correct direction as
shown in the image. The rotate angle for the touch screen is limited, please rotate it
properly to avoid damaging the touch screen. Please retract the touch screen when
you don't need to use it.
Launch
How to Use WEEBILL 2
Retract

14
How to Use WEEBILL 2
How to Use the Touch Screen
ModeSettings
BalanceCheck
AdvancedFeatures
Stabilizer Modes
General
Stabilizer
Settings
System
Camera Connection
Status Battery Level
Main Page (Set as default)
SmartFollow
Frame
Follow Speed
Swipe down at the top of the screen:
Image transmission interface (Need to mount
TransMount Image Transmission AI version)

15
How to Use WEEBILL 2
MotorSettings
Smoothness
FollowSpeeds
JoystickResponsiveness
Swipe left at sub menu: Return to the previous menu
ModeSettings
BalanceCheck
AdvancedFeatures
Touch screen menu introduction
General:
1. Mode Settings: For selecting stabilizer modes. Available modes are: Pan Follow
Mode (PF)/Lock Mode (L)/POV Mode (POV)/Portrait Mode/Go Mode (GO)/Vortex
Mode (V)
2. Balance Check: To see the balance status of three stabilizer axes.
3. Advanced Features: For setting Panorama/Timelapse/Motionlapse/V Mode.

16
How to Use WEEBILL 2
ParameterSettings
AutoCalibration
ParameterReset
Stabilizer:
1. Parameter Settings: For setting motor torque/smoothness/follow speed/joystick
responsiveness/deadband.(You can customize the parameters or set them to be
"Low", "Medium", or "High" in default.)
2. Auto Calibration: To perform auto calibration after the balancing is finished.
3. Parameter Reset: Tap to reset to the default parameters.
ControlWheel
FollowFocusMotor
Fine-Tuning
Settings:
1. Control Wheel: Customize the function of the control wheel. Available functions
are: roll axis/aperture/ISO/shutter/electronic focus/focus control/zoom control
2. Follow Focus Motor: Set the AB point/sensitivity of the follow focus motor (A/
B point setting is only available when the ZHIYUN external follow focus motor is
connected correctly)
3. Fine-Tuning: Fine-tune the tilt/roll axis.
Table of contents
Other Zhiyun Camera Accessories manuals
Zhiyun
Zhiyun CRANE-M 3S User manual

Zhiyun
Zhiyun CRANE 2S User manual

Zhiyun
Zhiyun CRANE-M2 User manual

Zhiyun
Zhiyun Evolution User manual
Zhiyun
Zhiyun CRANE 4 User manual

Zhiyun
Zhiyun CRANE 2 User manual

Zhiyun
Zhiyun Smooth 5S User manual

Zhiyun
Zhiyun CRANE 3S User manual

Zhiyun
Zhiyun SMOOTH -X2 User manual

Zhiyun
Zhiyun Crane 3 Lab User manual

Zhiyun
Zhiyun SMOOTH 4 User manual

Zhiyun
Zhiyun FIVERAY F100 User manual

Zhiyun
Zhiyun Crane Plus User manual

Zhiyun
Zhiyun Z1-Proud User manual

Zhiyun
Zhiyun CRANE-M2 User manual

Zhiyun
Zhiyun SMOOTH-Q4 User manual
Zhiyun
Zhiyun RIDER-M User manual

Zhiyun
Zhiyun WEEBILL-S User manual

Zhiyun
Zhiyun CRANE - M2 S User manual

Zhiyun
Zhiyun MOLUS G60 User manual