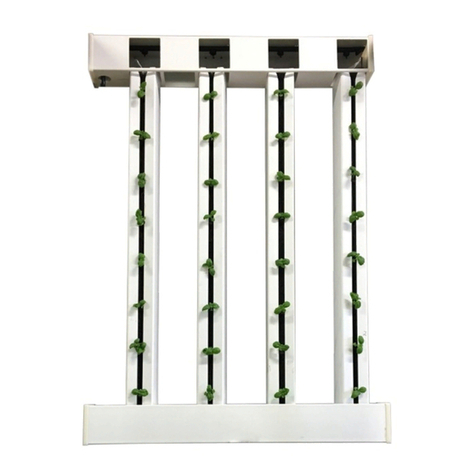
ZipGrow ZIPGARDEN User manual

THE ZIPGROW™
ZIPGARDEN™MANUAL
www.ZipGrow.com
hello@ZipGrow.com
855-ZIPGROW
Copyright © 2020Copyright © 2021

This manual provides guidance for operating and
troubleshooting the operation of a ZipGrow™
ZipGarden™. Feel free to reach out to our skilled team
of growers with questions at any time. Happy growing!
To download this manual, including video tutorials please visit.
https //zipgrow.com/guides

Purpose Of This Guide
This manual was created to walk ZipGarden™ owners through the installation and
growing process of their hydroponic systems. This manual will provide you with the tools
you need to install and operate your ZipGarden™ effectively. If you have questions about
anything covered (or not covered) in this guide feel free to reach out to our team via
email at hello@zipgrow.com or call 855-ZIPGROW.
3
Overview
About Small-Scale Growing
The first reported soilless horticulture
techniques were published in the late 1600s.
Since then the science and techniques
associated with hydroponics have exploded;
making growing plants without soil sustainable
and much more accessible. The same is true
for vertical growing technology—what you see
in the design of our ZipGarden™ is many
centuries of work in the making. That said
more than ever it is easy to oversimplify
growing plants in soilless environments. Small-
scale systems like the ZipGarden™ can be
tricky to manage since fluctuations in air
quality and water quality can have a greater
effect. Now that you’re about to embark on
this endeavour know that there will be times
when growing is really simple and everything is
perfect but there will also be times where it
will not be as easy. We encourage you to take
challenges as learning opportunities! There will
be times when your plants aren’t growing the
way you want or expect and that’s okay as
long as you have the right outlook. Any time
something might not go according to plan this
is a chance for you to master the art of
growing in this exceptional way. We are thrilled
to help you troubleshoot and get to a place
where growing without soil becomes second-
nature. That’s why we’ve created guides like
this! This manual is littered with links and
resources you can use to your advantage —
keep your eye out for those and use them.
And as always if you have questions don’t
hesitate to reach out!

Components List
Assembly
Back Support x 2
Front Right Support
Bottom Cabinet
Drip Tray Assembly Towers w/Matrix
Me ia x3
Leveling Feet
Drain Hose 3/4” Door Han le
(with Logo)
4ft LED Grow Lights
(x2)
Daisy Chain LED
Connector LED Power Cable
Power Bar
Wicking Strips
(pre-installe )
Pipe Assembly A
Pipe Assembly B
Top Cabinet Front Left Support
Nursary
Water Pump Air Pump
4

ZipGarden™ Specifications
Dimensions 27"W x 20"D x 74"H
3.75’
120 @<150W
8 Gallon
Electrical
Requirements
Reservoir Capacity
Area Needed (ft2)
5
AirStone
Reservoir
Timer x2 Strainer Drip Tray Cover
AirStone Tube
Components List (con t)
Anti Tip Device
Tool Require
#2 Phillips Srew river
GFCI
Cabinet Divi er
#6-32 x ⅜” Flat
Hea Phillips, SS,
Machine Screw (x36)

6
Removeeverythingfrominsidethebaseunitand
placethebaseunitupsidedownonthefloor.
1
3
2Screw the our leveling eet into the our
pre-drilled holes on the bottom o the unit.
Once secure, flip the base unit upright.
Open the cabinet door and locate the three
pre-drilled holes on the inside o the door.
Secure the ront handle to the door with a
screwdriver and three o the screws
provided.
Cabinet Assembly

Cabinet Assembly
On the ront right side o the cabinet, locate the
3 pairs o pre-drilled holes. This is where the
ront right support attaches to the bottom o
the cabinet. Ensure that the open corner o the
support is acing inwards, towards the back le t
corner o the cabinet.
Line up the six pre-drilled holes. Wood dowels
have be pre-installed to insure proper
alignment.
Attach the ront right support to the inside o
the cabinet with the machine screws.
7
4
6
5

Cabinet Assembly
Repeat on the le t side with the ront le t
support
Locate the back supports. These parts are
interchangeable on the le t or right position.
**Installing the supports it is a two person job.
One person holds the support, while the other
person secures the machine screws with a
screwdriver
Locate the three pairs o pre-drilled holes on
the right backside o the bottom cabinet.
8
7
9
8

9
Cabinet Assembly
Repeat on the opposite back support.
Locate the Plumbing Assembly A. Attach the
plumbing assembly to the back supports. Locate
the pre-drilled holes on either side o the two
back supports. Orient the pipes that the hose
pipe is on the le t side o the cabinet. Attach the
pipe hanger on both ends o the steel pipe to
each back support. The top will hook over the
back supports and line up the pre-drilled holes.
Secure with machine screws, ront and back, on
each side
10
12
11

10
Cabinet Assembly
Attach the top o the unit to the ront and back
supports by first ensuring the wood panel is
acing outwards. Then screw in the ront and
back supports using the provided machine
screws into the pre-drilled holes. These screws
should be inserted rom the outside o the
cabinet, and the back supports will be on the
inside o the top assembly.
Insert the cabinet partition by using the pre-
installed channels. Ensure that the cutout hole is
at the top back side o the cabinet.
Locate the two 4 oot LED lights. Take note o
the lights controls and screw in one hal o the
daisy chain provided to the end urthest away
rom the controls. This is your le t LED.
13
15
14

11
Screw in the other end o the daisy chain into
the other LED closest to the end o the controls
This will be your right LED.
Next locate the power cord rom one o your
LED packages and secure it to the bottom side
o the right LED.
Cabinet Assembly
With the controls and cord acing upward.
Attach the le t LED to the le t support bar by
pressing the light into the light clips attached to
the inside o the support bar. Ensure that the
cut out lines o the support match the controls
o the LED and that the LED is centered along
the bar.
**Note, you will not use the onboard light
controls or your LED. You will using the supplied
external timers
***Repeat these steps or the right LED
16
18
17

Lighting & Electrical
12
The daisy chain connecting the lights will be at
the top o the cabinet. Locate and place the
cable holders on the inside top o the cabinet.
These will hold the wires in place.
Locate the power bar. With the wire o the
power bar acing to the back o the cabinet,
mount the power bar to the inside o the cabinet
by connecting the two pegs to the back side
eyelets o the powerbar. The plug will exit
throught the pre-installed urniture grommet on
the back o the cabinet.
Place the reservoir on the le t side o the
partition in the bottom o the ZipGarden cabinet.
19
21
20

13
Attach one end o the air stone tube to the air
pump.
Place the air pump on the right side o the
vertical partition in the bottom o the ZipGarden
cabinet.
Cabinet Assembly
Run the tube through the circle cutout in the
cabinet partition and attach the air stone . You
may then rest the air stone on the bottom o the
reservoir.
22
24
23

*** For watering and lighting schedules, re er to the operations manual.
14
Screw Plumbing Assembly B to the top o the
water pump.
Attach the ree end o the hal inch hose tube to
the control valve o Plumbing Assembly A. Then
place the water pump inside the reservoir. Run
the power cable o the water pump through the
circle cut out o the cabinet partition.
Cabinet Assembly
Plug the included timers into the power bar .
Then plug the LEDS and the pump into their
respective timer.
**Please re er to the timer instructions or
programming and operation.
25
27
26

15
Locate the drip tray and the three quarter inch
pipe. Attach the pipe to the bottom o the drain.
Place the drip tray assembly on the top o the
cabinet. Ensure the pipe points into the
resevoir.
Ensure that the imprint or the three towers is
positioned at the back. It’s help ul to tilt the ront
side in while tucking the water pipe into the U
channel and then lowering the back end in
place.
Cabinet Assembly
Place the strainer onto the designated hole in
the drop tray assembly.
28
30
29

34
17
Place your seedling station.
Cabinet Assembly
You are now ready to grow!

18
Operation
When locating the ZipGrow™ZipGarden™there are three major considerations:
1.) Lighting
I not using the ZipGarden™ Lights, place your ZipGarden™ in a location that receives ample
light or your crops. I growing in the northern hemisphere, a south- acing window is ideal to
access the maximum amount o sunlight.
2.) Accessibility to Water
Replenishing your ZipGarden™ water and nutrient couldn’t be any easier. Simply remove the
reservoir bucket rom the base and fill at your nearest sink our water spout. ** Pro-tip - to save
the uss o removing the reservoir, simple trans er the water using a large water-cooler jug, and
pour the water directly into the drip pan drain.
3.) Support
When choosing a location or the ZipGarden™look or a solid level sur ace. I the sur ace in not
per ectly level, use the adjustable levelling eet achieve level.
*Safety Warning* We strongly recommend you use the anti-tip device and GFCI included with
the ZipGarden to maximize sa ety.
ZipGarden™Placement
Watering Schedule
Starting Your Seeds
Many hydroponic systems run on a 24hr schedule. To reduce algae growth the ZipGarden is
setup to water for 15 minutes every hour. f you notice that your crops are wilting during the
day, try increasing the watering schedule to 15 minutes every half-hour.
Lighting Schedule
When starting out, we recommend running your lights for 16 hours per day. Different plants
like like more or less light. Check out Best Crops For Hydroponics Guide for specifics on more
crops.
Place 24 Peat Moss Plugs in your nursery's plug Tray.
Each plug has a small divot to place your seed in. Place one seed in each. Don't forget to take
note of what you have planted and where.
Add tap water to the nursery base until it is about half full and place your plug tray in the
bottom. Let the plugs soak in the water for 15 minutes.
Afterwards, dump out the remaining water and put the lid on your Nursery. Wait a few days
for your seeds to germinate. f you see condensation on the lid, you know that the humidify
levels are adequate for your seeds. You should leave the lid on for the first few weeks, or until
the seedlings are starting to touch the top.

19
Now that your ZipGrow Farm Wall is completely assembled it’s time to plant your
ZipGrow™ towers and start growing.
Remove the Matrix
Media™from the
Tower with a pulling
hook
Line the media with the wicking strip,
which should not protrude rom the
media. It should be ½ inch rom the edge
ront o the media.
Matrix Media
Wicking Strip
Pulling Hook
As you “zip” the media back into the
Tower, sandwich the seedlings in the
old o the media.
Not sure what to grow? Here’s our free Best Crops For Hydroponics Guide!
Need more information on how to grow? Learn more about planting, growing,
and selling crops at Upstart University, the online training platform.
*Use code ZIPGARDEN for a free 1 month trial.
Planting ZipGrow™

20
Fill the reservoir to the base o the upper collar (approximately 25L) with water by pouring water
slowly into the drain. When filled to this volume, the ZipGarden™ is capable o operating or about
2 weeks be ore the reservoir needs to be cleaned and refilled (re er to the Maintenance and
Cleaning section or urther details). Depending on crop size and temperature, the ZipGarden™
may need to be refilled more requently.
The ZipGarden™ comes with pre-packaged envelopes o dry nutrients tailored to the 25L
reservoir; eliminating the hassle o having to measure it out or each reservoir change.
The nutrients are broken into a 2-part solution: Pack A is 16 grams (g) o ZipGrow
ertilizer with 8g o epsom salt, and Pack B is 16g o calcium nitrate. Some salts, such as
the calcium nitrate and magnesium sulphate in our ertilizers, do not get along when
mixed together in high concentrations; they can actually bind together orming a
precipitate, or sludge. Once diluted into the reservoir, this problem is avoided; there ore,
when adding your nutrients to the reservoir, stir in one packet and wait or it to ully
dissolve be ore stirring in the second one. The nutrients we provide are specially
ormulated or all hydroponic growing systems.
Note: Dry nutrients dissolve easier in warm to hot water. Try filling your reservoir hal -way with
hot water, mixing in your nutrients, then filling it the rest o the way with cold water. I you wish
to skip over using hot water, the nutrients will still dissolve in cold water; it can just take a bit
more time and stirring.
Water Quality Management
Visit our store at www.ZipGrow.com for refills
Table of contents
Other ZipGrow Lawn And Garden Equipment manuals