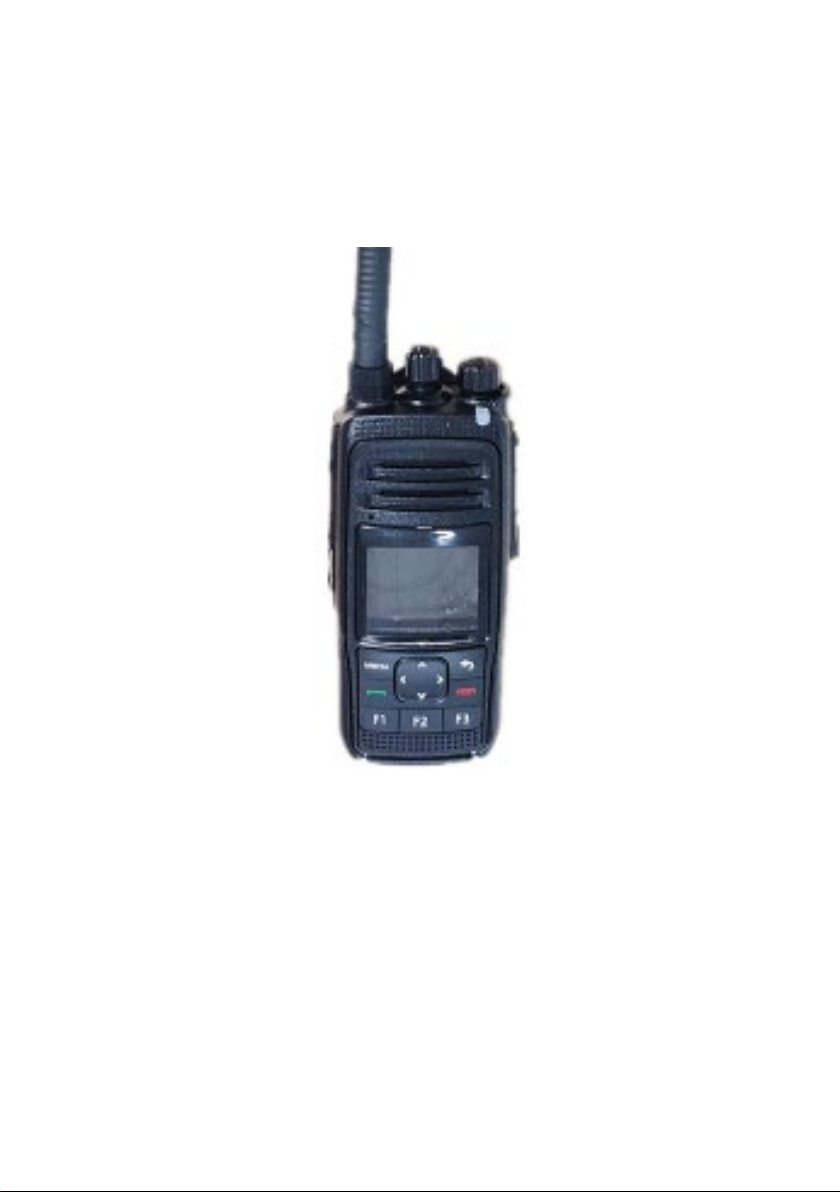
Zodiac D-ONE BT User manual

User Manual
ZODIAC D-ONE BT

ICON DESCRIPTION
Function Distinction Icon
: Indicates a function unique to the digital mode, which can only be
used on the digital channel.
: Indicates the unique function of the analog mode, which can only be
used on the analog channel.
Functions not distinguished by icons are available on both digital and
analog modes.
TERM DESCRIPTION
Key operation
Short press: press and quickly release
Long press: press and hold for a moment
Press and hold: keep pressing the key
Single call: it is a call made to a specific user (Optional)
Group call: it is a call made by a user to all users in the group (Optional)
All call: it is a call made by a user to all other users on the channel
Squelch - this technology can filter out excessive background noise to
solve the problem of call quality and noise.

INTRODUCTION
IMPORTANT
READ ALL INSTRUCTIONS carefully and completely before using the radio.
SAVE THIS INSTRUCTION MANUAL – This radio manual contains
important operation instructions for the D-ONE BT.
PRODUCT SAFETY AND RADIO FREQUENCY RADIATION FOR HANDHELD
RADIOS
Before using this radio, please carefully read the operating instructions for
the safe use of the radio in the product safety and radio frequency
radiation manual supplied with the product.
Notice! This radio is limited to occupational applications that meet CE RF
energy exposure requirements. Before using this radio, please carefully
read the relevant RF energy information and safe operation instructions in
the product safety and RF exposure manual provided with the product to
ensure compliance with RF energy radiation limit standards.
PRECAUTIONS
WARNING! NEVER hold the radio so that the antenna is very close to/or
touching exposed parts of the body, especially the face or eyes while use
radio. The radio will perform best if the microphone is 5-10 cm (2 to 4
inches) away from the lips and the radio is vertical.
WARNING! NEVER operate the radio with a headset or other audio
accessories at high volume levels.
Hearing experts advise against continuous high-volume operation. If you
experience a ringing in your ears, reduce the volume or discontinue use.

NEVER connect the radio to a power source that is DC fused at more than
5A. Accidental reverse connection will be protected by this fuse, but higher
fuse values will not give any protection against such accidents and the radio
will be ruined.
DO NOT push the PTT when not actually desiring to transmit. Place the unit
in a secure place to avoid inadvertent use by children.
DO NOT operate the radio near unshielded electrical blasting caps or in an
explosive atmosphere.
AVOID using or placing the radio in direct sunlight or in areas with the
temperatures below -40℃(+14℉) or above +60 ℃(+140℉).
The use of non Zodiac D-ONE BT battery /chargers may impair radio
performance and invalidate the warranty.
Even when the radio power is OFF, a slight current still flows in the circuits.
Remove the battery from the radio when not using it for a long time,
otherwise the battery will become exhausted.
INCLUDED IN YOUR PACKAGE
The box contains the following items. If any items are missing or damaged,
please contact the dealer where you purchased the product.
1. Dualband antenna
2. Beltclip
3. Batterypack
4. Handstrap
5. AC/DC adaptor
6. Desktop charger
7. User manual

PREPARATION
OVERVIEW
No.
Items
No.
Items
1
Antenna
11
Return Key/Back Key
2
Speaker
12
PK2 (Not in use)
3
Microphone
13
FK1 (Band selector)
4
LCD Display
14
FK2 (Scan ON/OFF)
5
MENU/ Enter Key
15
FK3 (Battery status)
6
P1 key (Not in use)
16
SK1 (Keylock ON/OFF)
7
Channel Knob
17
PTT Key
8
ON/OFF/Volume Knob
18
SK2 (Squelch)
9
LED Indicator
19
SK3(Zonelist)
10
Navigation Keys
[▲][▼][►][◄]
20
Accessories Jack

LCD DISPLAY
No.
Function
Description
1
Receiving signal
strength bar
The number of displayed signal strength
bars indicates the received signal
strength, more bars stronger.
2
Power level
H: high output power setting
L: low output power setting
3
Bluetooth
Indicate Bluetooth icon when turn on
4
Digital channel
indication
Indicates that the current channel type is
digital channel
5
Working mode
Direct Repeater
Direct mode: TX and RX same frequency
Repeater mode: TX and RX difference
frequency.
6
Battery power
The number of power bars (0-4) shows
the remaining power in the battery
7
Channel number
The current channel No. of the primary
2
1
3
4
5
6
7
8
9
10
11
15
14
13
12

channel member;
8
Channel number
The current channel number of the
secondary channel member
9
Channel name
(Channel mode) or
frequency
(Frequency mode)
The current channel name (Channel
Mode) or frequency (Freq Mode) of the
primary channel member
10
P2 function display
The currently selected function item of
the programmable key P2 (Not in use)
11
P1 function display
The currently selected function item of
the programmable key P1 (Not in use)
12
Zone display
display the name of the current zone
13
Channel name
(Channel mode) or
frequency
(Frequency mode)
The current channel name (Channel
Mode) or frequency (Freq. Mode) of the
secondary channel member
14
Channel display
The primary channel indicated, and the
channel in the other line is the secondary
channel
15
Channel type
A: the channel type is analog channel;
D: the channel type is digital channel.

LCD Display - digital mode display
No.
Function
Description
16
SMS
Not in use
17
Single call
indicates that a single call is in progress
18
Group call
indicates that a group call is in progress
16
17
18

BASIC OPERATION
Turn On Power
Rotate the power switch/volume control knob clockwise until you hear a
"click" sound and a short beep. At this time, you will see the radio LED
indicator flashes green and the screen lights up.
Note:
1) If all LED indicators are disabled, the screen will not light up during power-on. A
short beep will sound to indicate that the power-on test is successful.
If the radio beep sound is disabled, there will be no power-on sound. To turn off
the intercom, turn the power knob counterclockwise until you hear a "click"
sound.
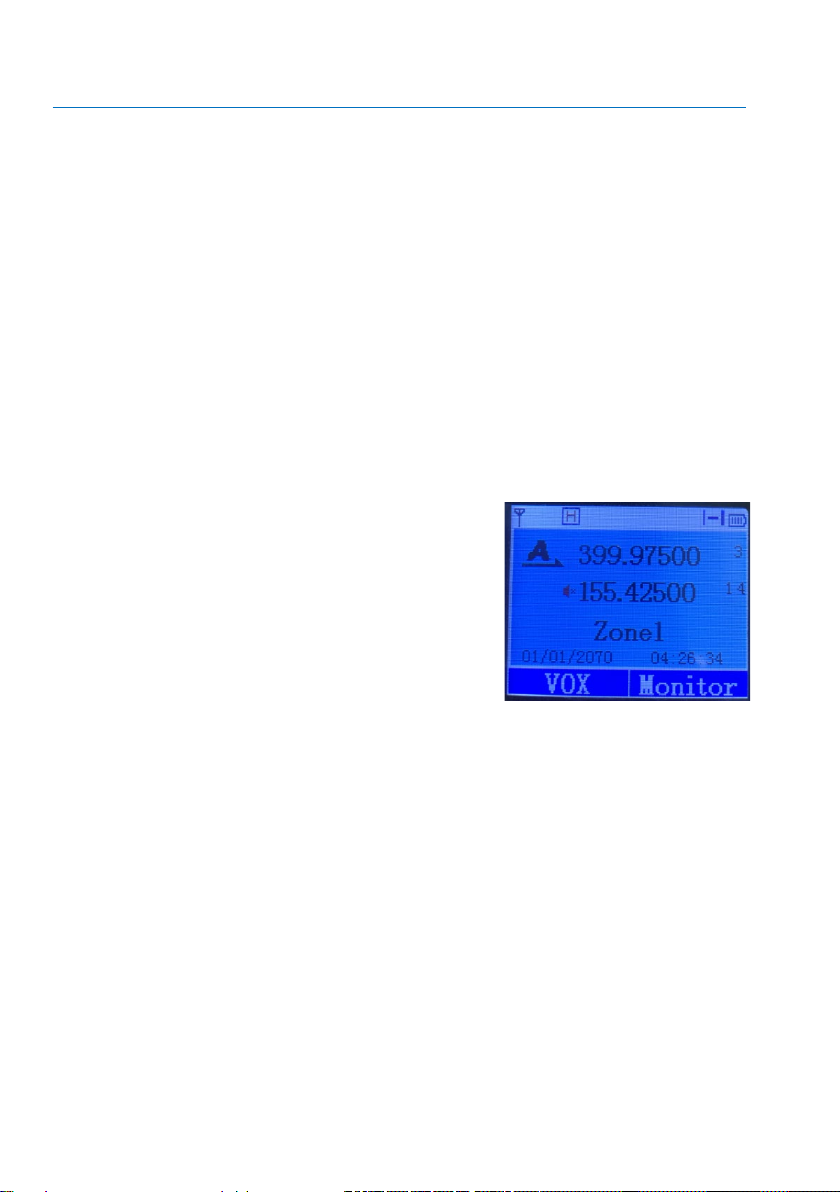
Single Frequency Receiving Mode
Under the normal mode, and the signal of
another channel can be shielded by short
pressing the [Back] key. At this time, a red
speaker symbol will appear before the
name of another channel. After that, the
channel cannot receive any signal, and the
radio only works on the main channel. Press
the [Back] key again resume signal reception.
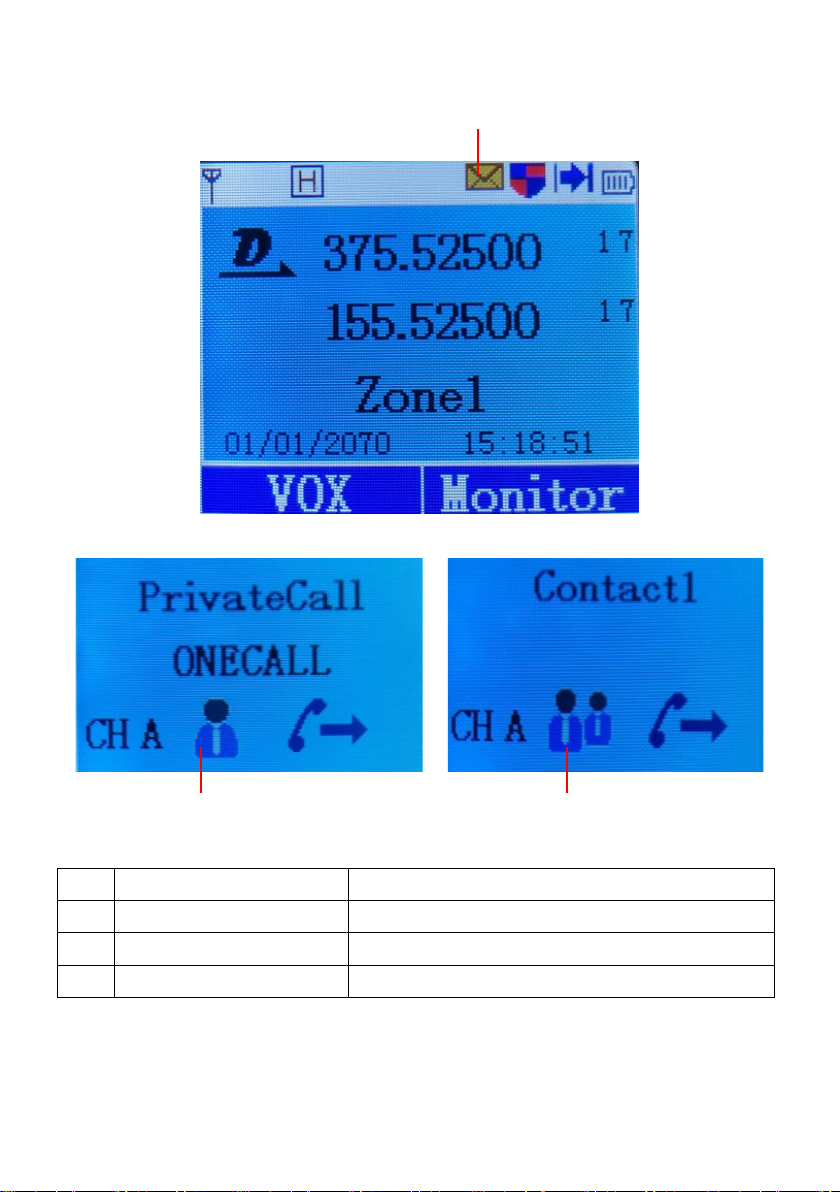
Digital / Analog Icon
In the standby mode, the digital channel is represented by a black [D]
icon, and the analog channel is represented by a black [A] icon. When the
carrier is received, there will be a green speaker icon before the
corresponding channel name; when the [D]/[A] icon turns green, it means
that the channel in using and becomes a temporary main channel. Press
[PTT] key at this time to initiate a call on the using channel. The suspend
time can be set by "channel suspend time" on the frequency writing
software.

Volume Adjustment
Turn the power /volume knob clockwise to increase the volume of the
radio and turn the knob counterclockwise to decrease the volume.
TRANSMITTING & RECEIVING
Zone Selective
A zone is a channel group. This radio can support up to 250 zones and
each zone can add up to 128 channels, each of which occupies 64
channels for uplink and downlink.
Menu operation:
1. Press [MENU] key enter menu mode;
2. Press Navigation Keys to “Zone”, press
[MENU] key enter Zone list;
3. Display the current Zone, and display the
Zone name, choose the Zone you want to
use.
4. Press [MENU] key enter it and press ON
to confirm the Zone, The screen display “XXX Selected” and return to
standby status.
Receiving & Reply a Call
All Call -- All call is a call from an individual radio to all radios on the
channel. It is used to issue important announcements that require special
attention from users.
No
All Call
1 LED indicated green light;
2 The Top line of Screen display icon RSSI, and the display area below the top
line:
First line displays all call;
Middle line displays user ID or name;
Bottom line displays icon of all call

(for Digital mode only)
3 Hold the radio in a vertical position and keep a distance of 2,5 to 5 cm ( 1 to
2 inches) from your mouth;
If the "Channel Idle Prompt Tone" function is enabled, when the radio
releases the [PTT] button, you will hear a short beep, indicating that the
channel is free, and waiting for your answer;
4
Note: When receiving an all call, if you switch to another channel, the radio
will stop receiving the all call. During a all call, you will not be able to use any
pre-programmed buttons until the call ends.
Transmitting under Analog Channel
On the analog channel, press the [PTT] key to transmitting and release the
key to receiving.
All Call -- All call is a call from an individual radio to all radios on the
channel. It is used to issue important announcements that require special
attention from users.
No
All Call
1 LED indicated green light;
2 The Top line of Screen display icon RSSI, and the display area below the top
line:
First line displays all call;
Middle line displays user ID or name;
Bottom line displays icon of all call
(for Digital mode only)
3 Hold the radio in a vertical position and keep a distance of 1 to 2 inches
(2.5 to 5.0 cm) from your mouth;
If the "Channel Idle Prompt Tone" function is enabled, when the radio
releases the [PTT] button, you will hear a short beep, indicating that the
channel is free, and waiting for your answer;
4
After the finished all call communication, the radio returns to the screen
before receiving the all-call.

Note:
When receiving an all call, if you switch to another channel, the
radio will stop receiving the all call. During a all call, you will not be able to
use any pre-programmed buttons until the call ends.
BLUETOOTH
The Bluetooth setting includes Bluetooth switch and connection.
Note: Only when the Bluetooth switch is turned on and connected to
the Bluetooth device, then have a Bluetooth connection item in Menu.
Bluetooth Switch
1. Press [MENU] enter menu/ utilities/ settings and press [Up]/[Down]
key to find the Bluetooth.
2. Press [MENU] confirm selection, it will turn on Bluetooth, the screen
display Bluetooth ON. The radio will search Bluetooth device
automatic and display a gray icon . When the screen show
connect Bluetooth success, the Bluetooth device is connected. You can
press [MENU] key to turn off Bluetooth function and the screen will
display it off.
Bluetooth Connection
1. Press [MENU] enter menu/ utilities/ settings and press [Up]/[Down]
key to find the Bluetooth connection;
2. Press [MENU] confirms selection. The radio will connect Bluetooth
device when select Bluetooth connection. The screen will display
“Bluetooth connected”, the Bluetooth icon will be blue color. Or press
[MENU] to select off, it will turn off Bluetooth connection, and the
screen display Bluetooth connection cancellation.

MENU
How to Use the Menu
1. Press the [MENU] key to enter the menu mode, and then press the
[◄]/ [►]/ [▼]/ [▲] to access the menu functions;
2. Press [MENU] to select a function or enter a submenu;
3. Press the [back] key to return to the previous menu.
Menu of Analog Mode
Menu of Digital Mode
MENU
Contacts
Scan
Zone
Messages
Call log
Utilities
MENU
Scan
Zone
Utilities
Radio Info
Radio Setting
Program Radio
Radio Info
Radio Setting
Program Radio

Note: After a period of inactivity, the radio will automatically exit the
menu and return to the main screen (the suspension time is set by the
programming software).
FUNCTIONS OF MENU
Scan
When scanning is started, your radio will cycle through the pre-
programmed scan list to check whether there is signal activity on the
current channel. The LED indicator flashes red light, and the scan icon
appears on the screen, when scanning is disabled, the LED indicator is
of and the scanning icon is not displayed.
During dual-mode scanning, if you are on a digital channel and your radio
locks an analog channel, it will automatically switch from digital mode to
analog mode for the entire duration of the call, and vice versa.
There are two scanning methods:
Manual Scan -- Start the scan according to the pre-programmed scan
on key or menu function. When the scan is started, the radio will
detect all channels/ communication groups in the present scan list.
Auto Scan -- When you select a channel/ communication group that
has activated auto scan, the radio starts scanning from the channel
where auto scan is activated.
Active and Stop Scanning
Press the pre-programmed scan on/off key or enter the MENU to turn
on/off the function.

Scan Reply
When the radio detects an active channel/ communication group during
scanning, the radio stays in the channel/ talk group, during the pre-
programmed time limit. In this time, you can press [PTT] key to reply on
that channel, the light will indicate red light. Release the key to receiving.
If you do not respond within the suspend time, the radio will continue to
scan.
Scan List
Create scan lists and assign them to a single channel/ group. Your radio
can support up to 500 scan lists, each with a maximum of 31 members.
Each scan list supports a mix of analog and digital channels. You can
add/delete channels or set priority for channels by editing the scan list.
Note:Each scan list can be set to 2 priority channels.
After entering the scan menu, press the [►][◄] keys to enter "View List"
to check each channel in the scan list.
If the channel was set priority, the priority icon is displayed on the left side
of the member alias, indicating that the member is a priority
channel or priority channel. If the priority is set to none, the
priority icon is not displayed. There cannot be multiple priority 1 or
priority 2 channels in a scan list. You can also delete the corresponding
member through the delete option.
Note: You can also add a new channel to the current scan list through the add
channel option “Add CH” in the scan menu.

Zone
A zone is a channel group. This radio can support up to 250 Zone and each
Zone can add up to 128 channels, each of which occupies 64 channels for
uplink and downlink.
Contacts
The address book provides a "Contacts" for the handheld radio. Each entry
corresponds to an alias or ID used to initiate a call. In addition, each entry
is related to one of the three types of calls according to the setting
content: group call, single call, and all call. Your radio supports digital
address book “Contacts”.
Radio Info
The radio contains the following information:
• Local number
Including the list of the local number and the intercom number, there are
3 intercom numbers preset by the frequency writing software for
selection and editing of the intercom numbers.
• Radio version {firmware version, CP version}
Note: Press the [back] key at any time to return to the previous screen.
After entering my number, you can view the own radio number, view contacts
number, and edit the own radio number.
View the name of the radio
1. Press the [MENU] key to enter the menu/ utilites/ settings.
2. Press the [up and down] keys to set, and then press the [MENU] key to
select.
3. Press the [up and down] keys to reach the radio information, and then
press the [MENU] key to select.

4. Press the [up and down] keys to the number of the phone, and then
press the [MENU] key to select "View?".
5. The screen displays the name and number of the radio.
List of contacts numbers
1. Press the [MENU] key to enter the menu mode.
2. Press the [up and down] keys to set, and then press the [MENU] key to
select.
3. Press the [up and down] keys to reach the radio information, and then
press the [MENU] key to select.
4. Press the [up and down] keys to the number of the phone, and then
press the [MENU] key to select.
5. Press the [up and down] keys to the list of intercom numbers, and then
press the [MENU] key to select.
6. Press the [MENU] key to select the new radio number.
7. The screen displays the corresponding radio number, and then returns
to the previous menu.
Program Radio
The radio configuration is mainly to edit the content of the channel.
Editable channel content includes:
•Time Out Timer
•CTCSS
•Color Code
•Time Slot
•VOX
•Tx Contacts
•Group List
•Mic Level

Time out Timer
This function is used to limit the user's over-time transmission on the
channel and to avoid the radio damaged caused by long time
transmission.
After entering the “MENU” and selecting this function, the screen displays
infinity, 15S, 30S... 60S and other options (incremented by 15s), press the
[up] and [down] key to the corresponding option, and then press the
[MENU] key to select, if the selection of infinity, the screen will display the
transmission time limit closed, if select other, the screen will display”.. S”
is selected.
CTCSS
The CTCSS can only be set under the analog channel, including:
•CTC encoding/decoding
Color code
The color code can only be set under the digital channel.
1. Press the [MENU] key to enter the menu mode.
2. Press the [up and down] keys to utilities/ settings, and then press the
[MENU] key to select.
3. Press the [up and down] keys to configure the radio, and then press the
[MENU] key to select.
5. Press the [up and down] keys to select the color code value to be set,
and then press the [MENU] key to select. The screen displays X (the
selected color code value) is selected.
Time slot
The time slot can only be set under the digital channel.
1. Press the [MENU] key to enter the menu mode.
2. Press the [up and down] keys to utilities/ settings, and then press the
[MENU] key to select.

3. Press the [up and down] keys to configure the radio, and then press the
[MENU] key to select.
4. Press the [up and down] keys to select the time slot value to be set, and
then press the [MENU] key to select. The screen shows that X (the
selected time slot value) is selected.
VOX
1. Press the [MENU] key to enter the menu mode.
2. Press the [up and down] keys to utilities/ settings, and then press the
[MENU] key to select.
3. Press the [up and down] keys to configure the radio, and then press the
[MENU] key to select.
4. Press the [up and down] keys to select the VOX level value to be set,
and then press the [MENU] key to select. The screen shows that X (the
selected VOX level value) is selected.
Note: The voice-activated VOX level setting is applicable to all channels.
Launch Contact (Tx Contacts)
The transmission contact can only be set under the digital channel.
1. Press the [MENU] key to enter the menu mode.
2. Press the [up and down] keys to utilities/ settings, and then press the
[MENU] key to select.
3. Press the [up and down] keys to configure the radio, and then press the
[MENU] key to select.
4. Press the [up and down] keys to select the transmission contact to be
set, and then press the [MENU] key to select. The screen shows that the
transmission contact has been selected.
Group List
The group call list can only be set under the digital channel.
1. Press the [MENU] key to enter the menu mode.
2. Press the [up and down] keys to utilities/ settings, and then press the
[MENU] key to select.

3. Press the [up and down] keys to configure the radio, and then press the
[MENU] key to select.
4. Press the [up and down] keys to select the receiving group call list to be
set, and then press the [MENU] key to select "Apply". The screen shows
that the group call list has been selected.
Microphone Level
Digital microphone level: you can set the sensitivity of the microphone
during digital voice calls.
Analog microphone level: you can set the sensitivity of the microphone
during analog voice calls.
Note: The microphone level setting is applicable to all channels of the
same type (digital/analog).
Radio Setting
Tones / Alerts
When the transponder is not working, or when the intercom is outside the
range of the transponder but within the call range of other intercoms, you
can continue to communicate. This is the so-called "off-net".
Contains the following options:
• All Tones
• Talk Permit
• Keypad Tones
All tones
If necessary, you can enable or disable all radio tones and prompts (except
for incoming emergency prompts).
Power
You can set the radio power level of each channel to high or low.
Settings: High power to achieve communication with radios at relatively
long distances. Low power realizes communication with nearby radios.
Table of contents
Other Zodiac Portable Radio manuals