3
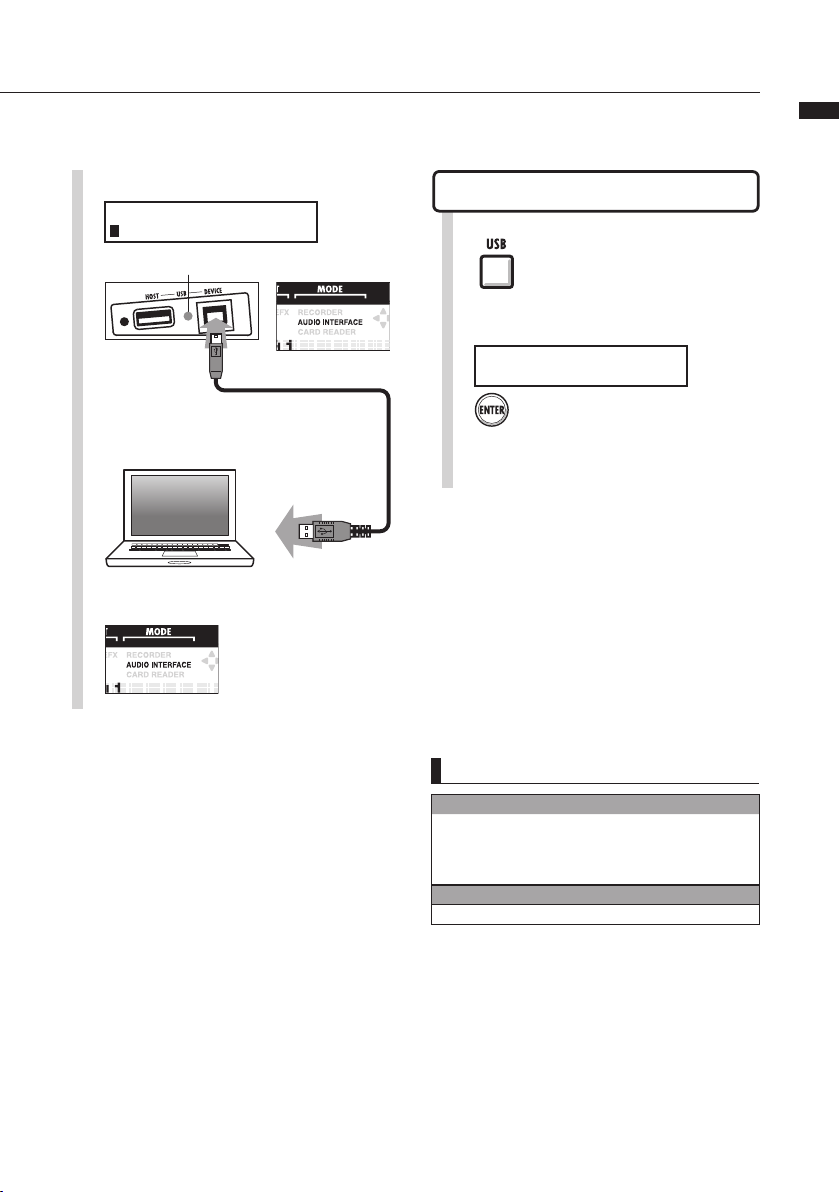
Audio interface manual
Multifunction tuner
In addition to standard chromatic tuning,
the multifunction tuner also has on-board
support for 7-string guitar, 5-string bass
and various drop tunings.
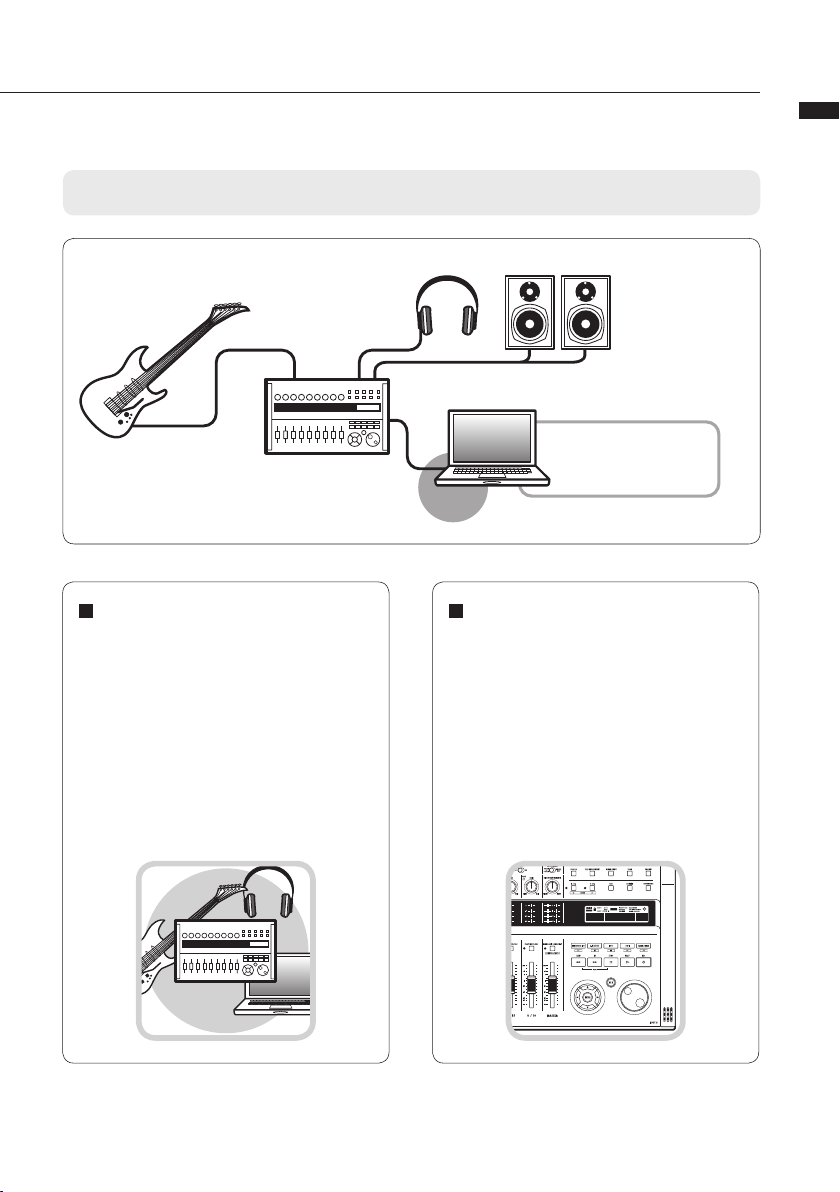
Comprehensive built-in mixer
Using the R16’s mixer, you can make a
mix for monitoring live and playback. When
simultaneously recording guitar and vocals,
for example, you can independently adjust
volume balance, panning and reverb levels.
Versatile effect functions
The insert eect can be applied to specic
channel paths and the send/return effect
works via the mixer send/return. The two
kinds of built-in eects can be applied when
recording, of course, but they can also be
applied to aect only the monitoring output.
For example, when recording vocals, you
can apply reverb to the monitor signal to
make singing easier, but record a dry signal.
Supports input from a variety
of sources, including guitars,
mics and line level instruments.
The 8 onboard jacks, which accept XLR
and standard phone plugs, include one
high-impedance input and two with 48V
phantom power. From high-impedance
guitars and basses to dynamic and
condenser microphones and line-level
devices like synthesizers, many sources are
supported. In addition, the built-in high-
performance condenser microphones are
convenient for recording acoustic guitar and
vocals.