The Zoomion® Philae 114
Congratulations on the purchase
of the new Zoomion®Philae 114.
This telescope will give you
hours of fun, with its all optical
mirror lens and light gathering
capability, it is the ideal
companion to start in the world
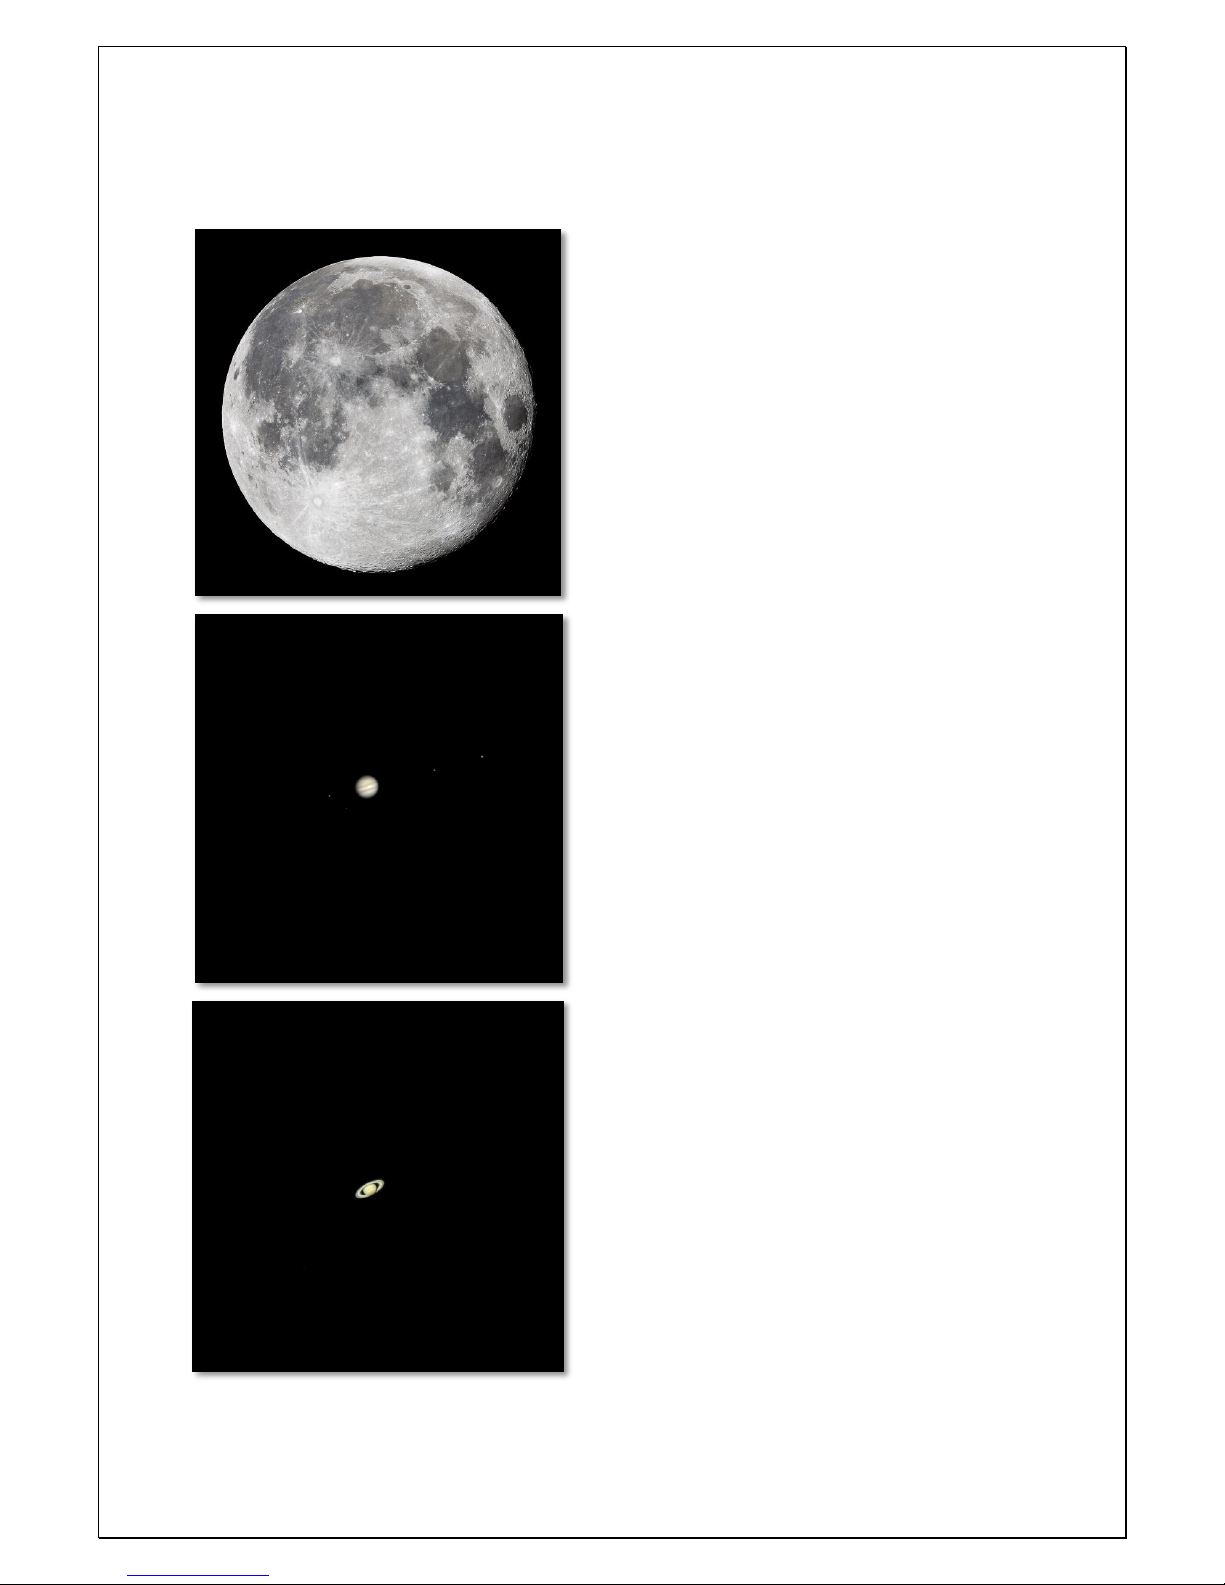
of amateur astronomy. With this
telescope you will be able to see
the craters on the Moon, star
clusters, some nebulae, the
Jupite’sr disc features and its
Galilean moons and the rings of
Saturn.
Included parts. Besides the
complete telescope we have
also included the following
accessories: Eyepiece
H12.5mm, Eyepiece H20mm,
Barlow lens 2x, Red-dot finder
scope;
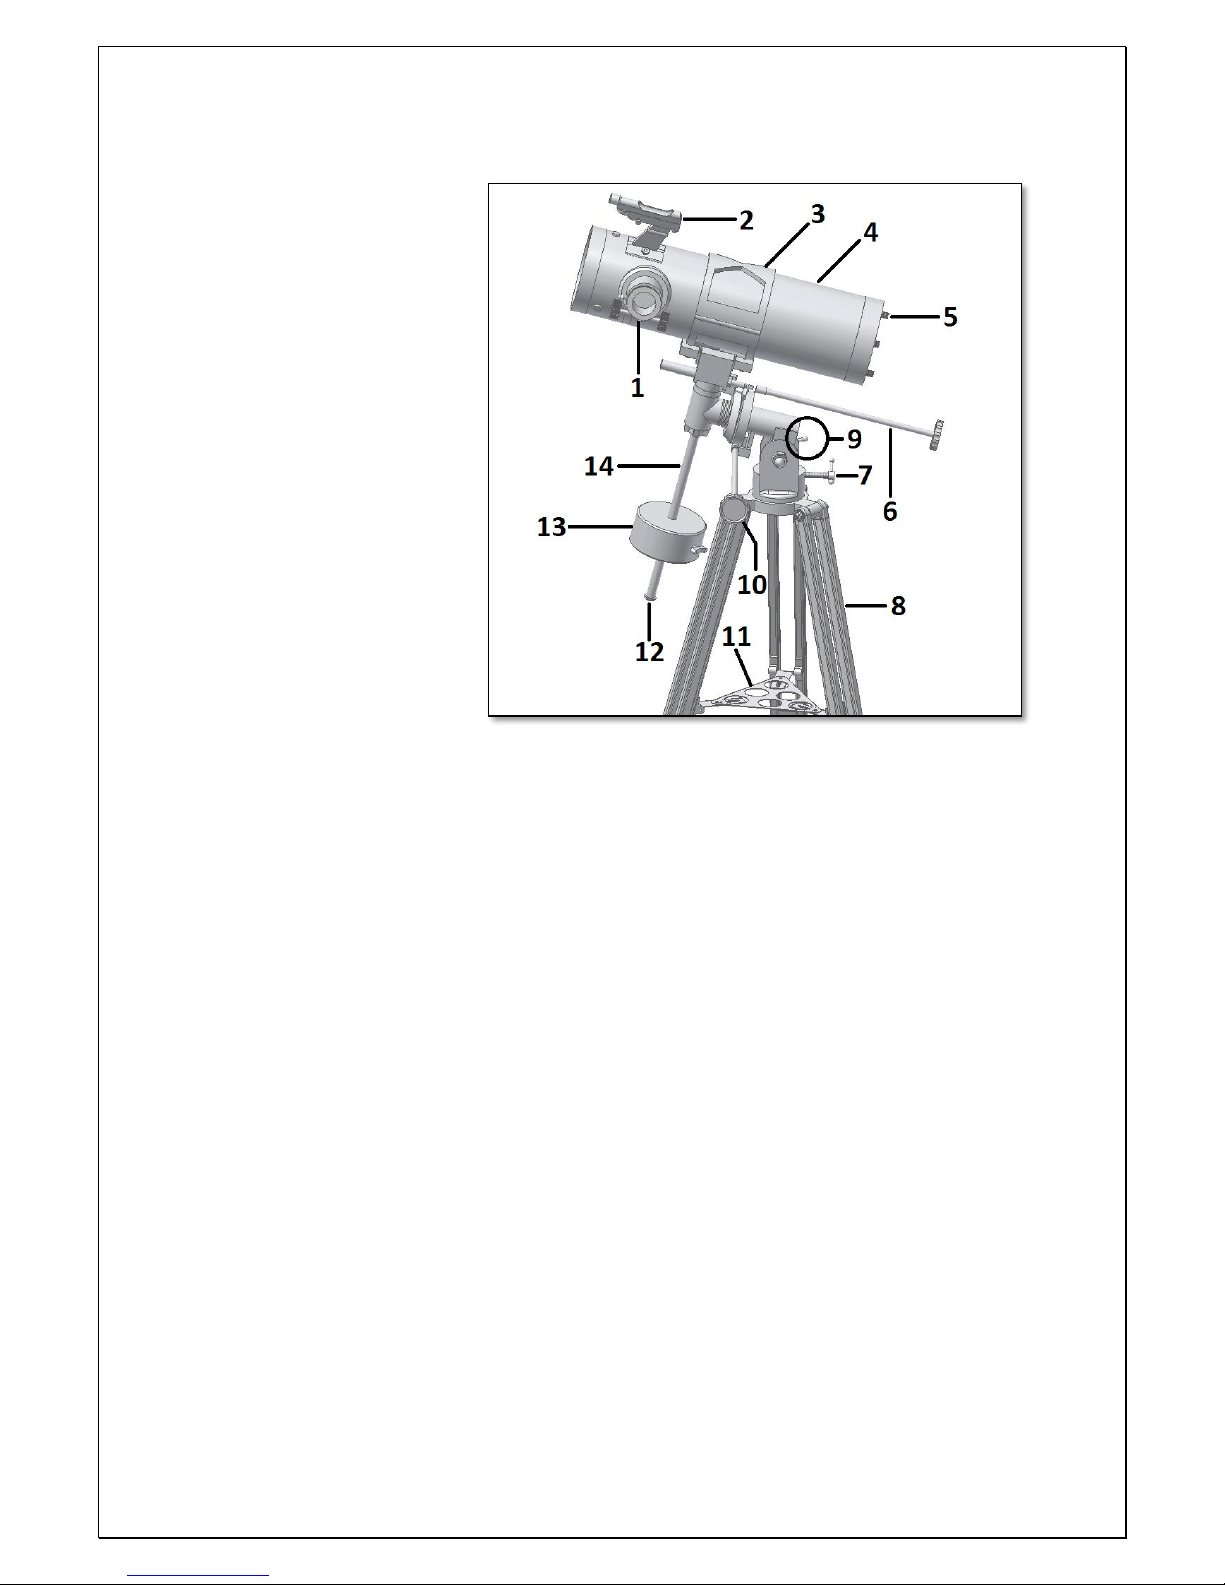
1. Knowing your telescope.
1- Focuser; 8- Tripod leg;
2- Red-dot finderscope; 9- Altitude side fix knob (partially shown);
3- Tube ring; 10- R.A. adjustment handle;
4- Optical tube; 11- Accessory tray;
5- Collimation thumbscrew for primary mirror; 12- Counterweigth stop/foot saver;
6- Declination adjustment handle; 13- Counterweight;
7- Altitude/Latitude adjustment; 14- Counterweight shaft;
2. Getting Started. It is very simple to get started. Here is how the telescope works. The telescope
should point to the object being observed. The mirror at the bottom of the telescope’s tube gathers
the object’s light and reflects it to the secondary mirror that brings it to the eyepiece. Close to the
telescope’s aperture there is the focuser. The focuser tube moves up and down to get a precise
focused image. At the focuser one can use the supplied accessories. Different accessories
combinations give different results, such as different image magnifications or correct image. But all
this will be explained in detail in the next pages. 3. Assembly. Start by setting up the tripod as
shown in figure 2. Use the supplied bolts and nuts. Next place the accessory tray (part #11 –fig. 1)
and fix it using the wing nuts and small screws –fig. 3. After this, the tripod should be stable. Place
the equatorial mount head on top of the tripods base, as shown in figure 4. Use the supplied hand-
bolt to fix it. Thread the counter-weight shaft and slide the counter-weight (figure 5). Use the
counter-weight’s thumbscrew to avoid it from slipping. Place the control-handles as shown in figure
6. Now fix the tube’s ring (figure 7) and place the tube. The mount’s altitude axis can be adjusted as
shown in figure 8. Use the side hand-knob to tighten or release the altitude’s axis (fig. 9). Release the
R.A. locking thumb-screw so that the R.A. axis is loose. Slide the counter-weight’s position to balance
the axis (figure 10). Proceed likewise with the Dec. Axis, slide the tube (figure 11).