Zoox 3000 User manual

User Manual
Professional DC Pump
3000 , 5500 , 8000 ,10000 , 15000 , 20000
Ultimate Aquarium DC-Pump

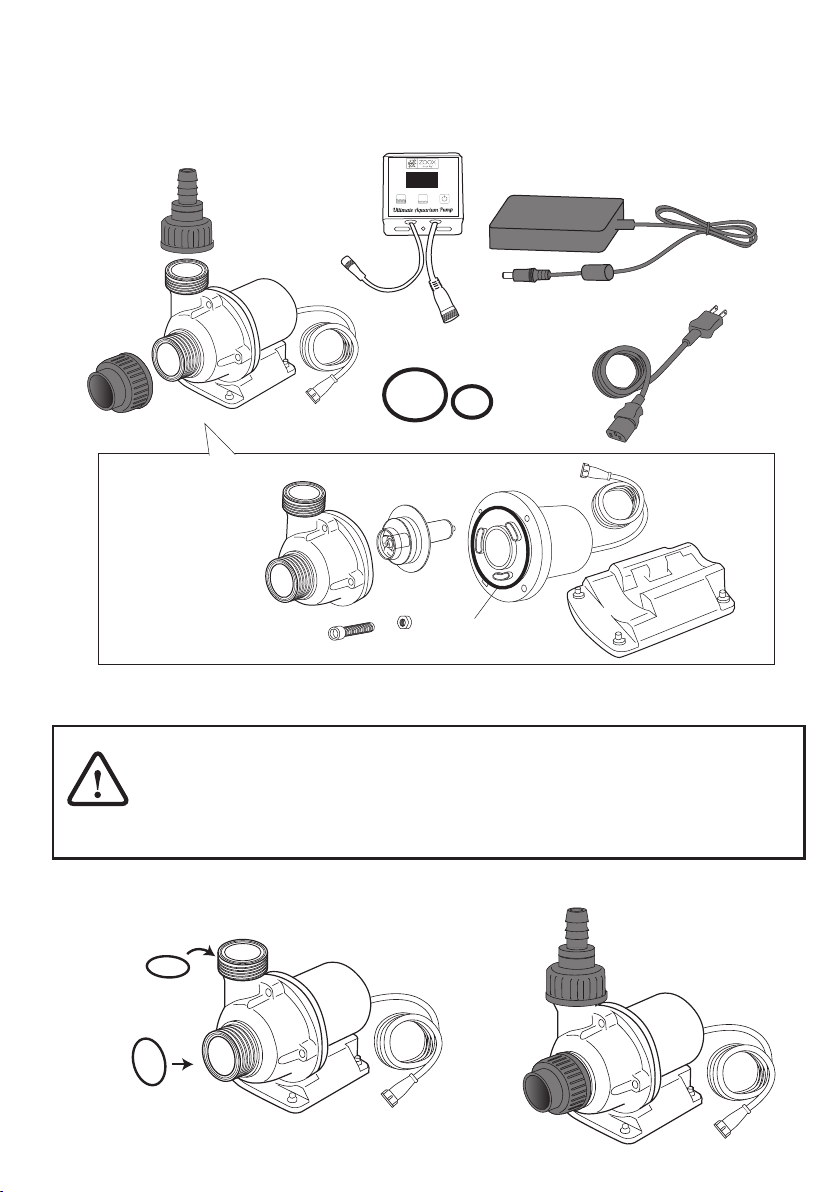
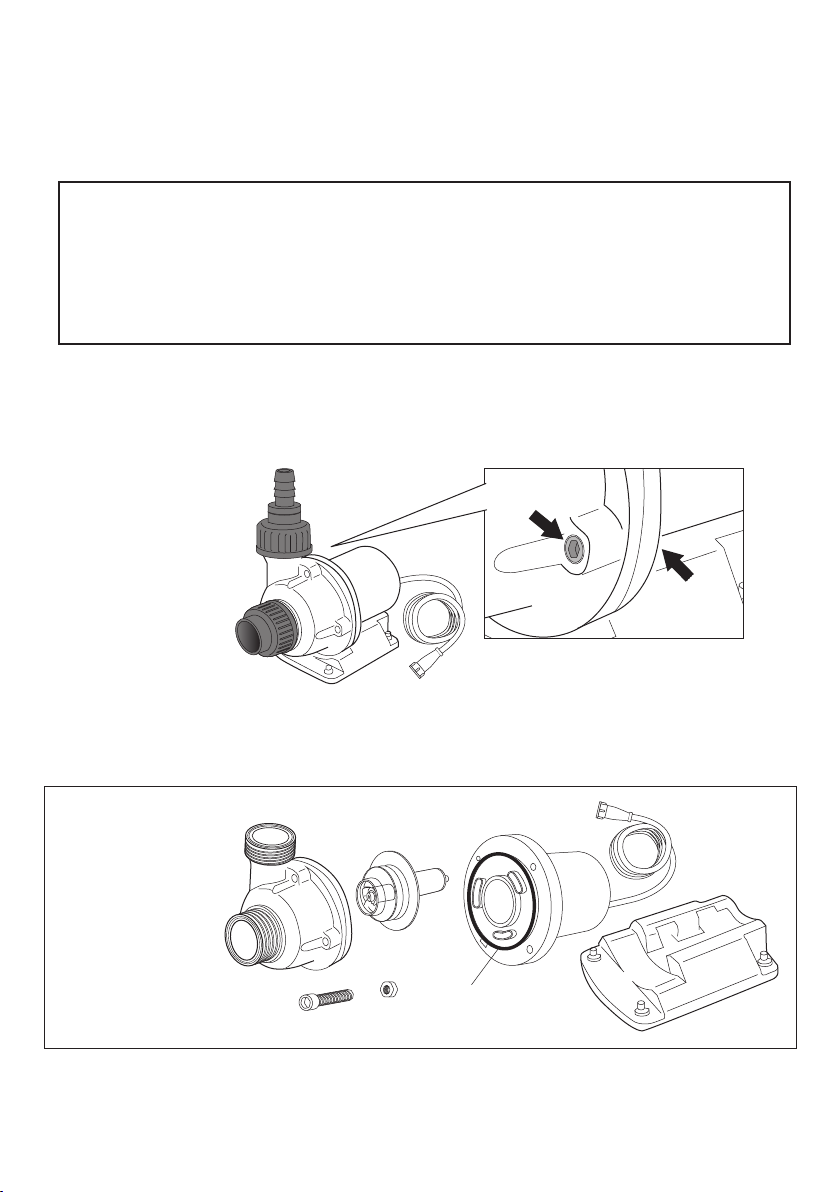
Thank you for purchasing the ZOOX Ultimate Aquarium DC Pump.
This product can be used as a circulation pump in both freshwater and seawater environments.
This manual supports DC3000, DC5500, DC8000, DC10000 ,DC15000, DC20000L.
Please read this instruction manual carefully and understand the usage and structure before use.
After reading, keep it in a place where you can read it again at any time.
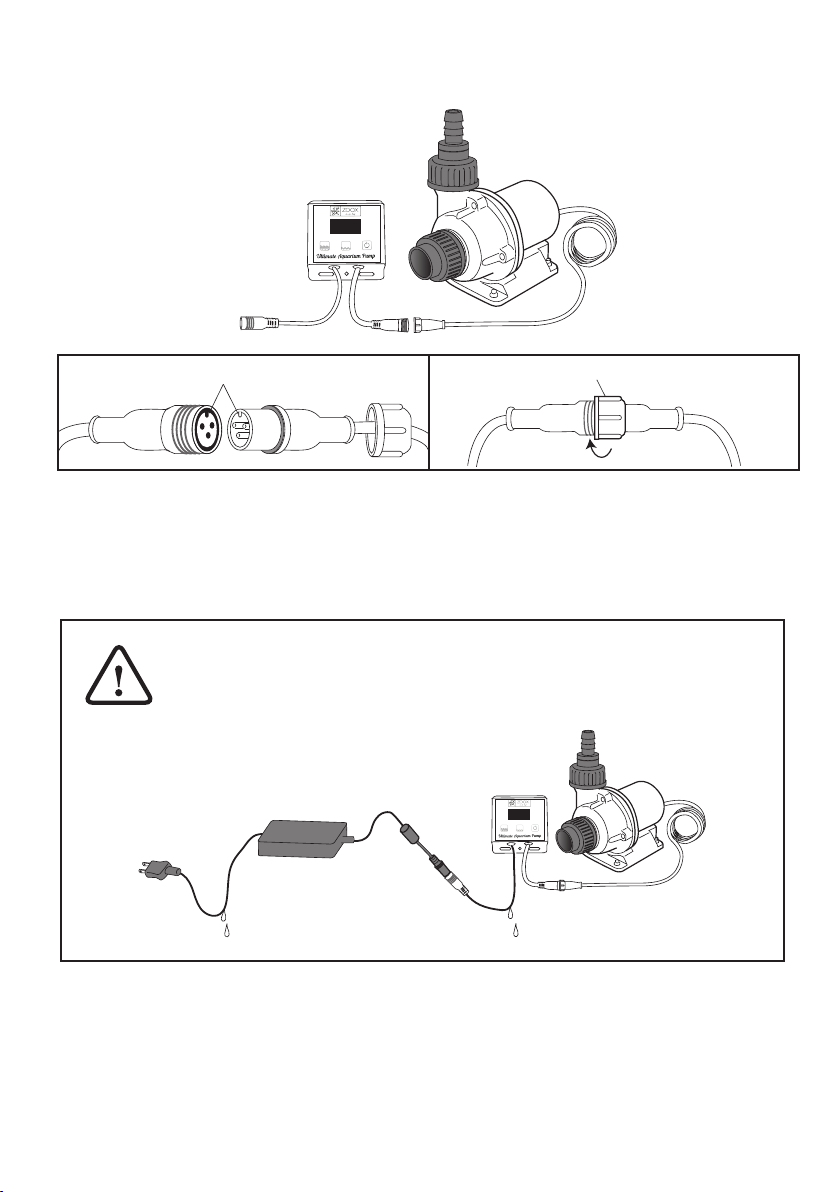
Connect the ground wire securely
There is a risk of electric shock in the event
of a failure or short circuit. Before connecting
or disconnecting the ground, make sure that
the power plug is disconnected from the
Safety Guide
The precautions are for the safe and correct use of the product and to prevent harm or damage to
the user or other people.
Attachment are the warning levels with different situations.
Please read carefully to have the best performance and safety.
That is mean it has the possibility of serious injury to people or
death immediately
That is mean it may cause the serious injury to people or death if
keep running in this situation
Attention
Warning
Danger
That is mean it may cause property damge or even damage
to people
Classification of Warning
FORBID FORCE UNPLUG THE POWER
Meaning of Marks
WARNING
HANDLING OF POWER PLUG, POWER CORD & SOCKET
FORBID
The power supply is AC 100V, and
the outlet with a rating of 15A or
more need to be used alone.
Use of an AC outlet other than 100V or using an
outlet with other equipment at the same time may
cause a fire or electric shock.
If you need an extension cord, use the one with the
correct rating. Using cords with amperage and
wattage that are lower than the rating of the
quipment may result in overheating.
Do not forcibly bend, pull, twist, slap,
or place heavy objects on, pinch,
or modify the power cord or power
adapter. The power cord may be
damaged, resulting in fire or electric
shock.
Do not connect or disconnect the
power with wet hands. It may cause
an electric shock.
FORBID
Insert the power adapter securely
to the bottom
Failure to do so may cause fire due
to electric shock or overheating.
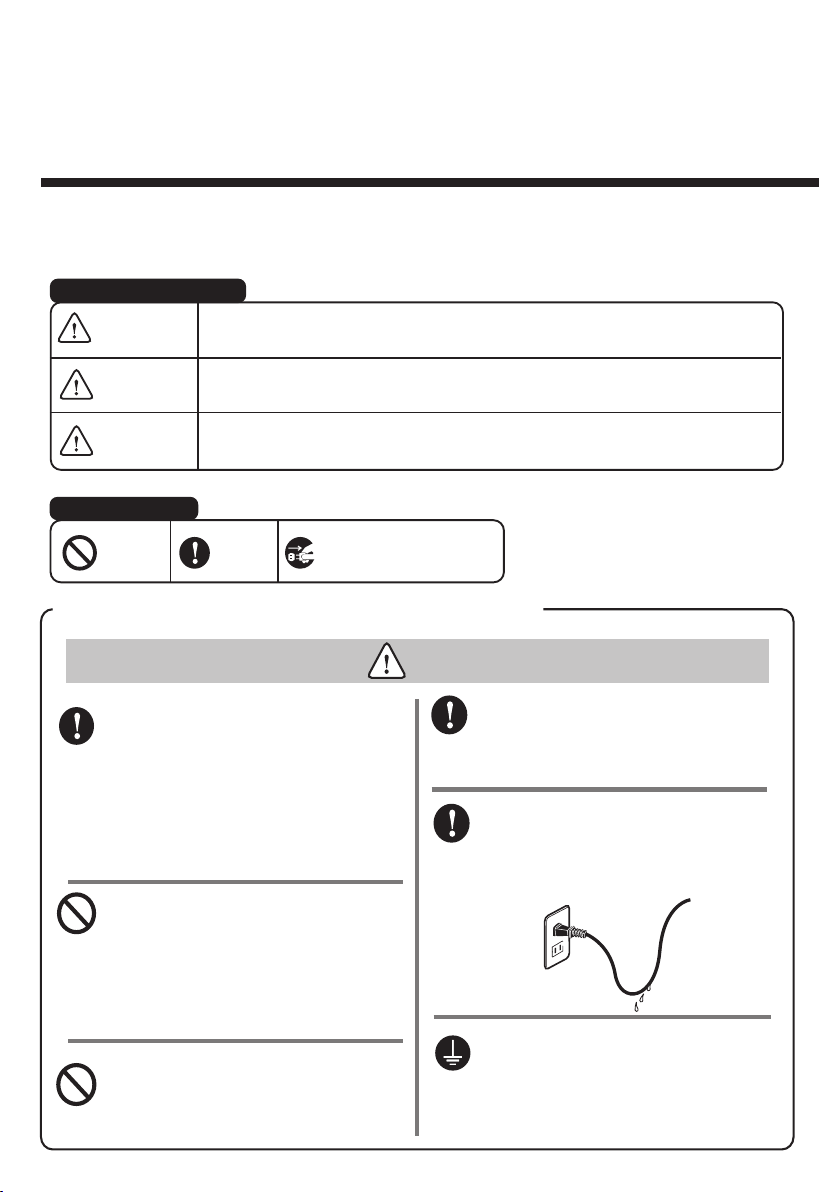
DRIP LOOP
Always have a drip loop on the
power cord. Do not allow water
droplets to travel through the cord
and come in contact with the outlet
since it may cause a fire or electric
shock.

It may cause electic shock.
When pulling out the power
adapter from the outlet, hold
the power adapter first, then
pull it out.
If pulling out the cord while
holding it, that may damage
the cord and cause a fire or
electric shock.
Unplug the power adapter when
putting your hands in the aquarium
or performing maintenance
SAFETY GUIDE
WARNING
HANDLING OF POWER PLUG, POWER CORD & SOCKET
Dust on power adapter needed to
be cleaned regularly. Accumulated
dust may cause fire due to moisture.
Please
wipe off with a dry cloth.
ATTENTION
INSTALLATION
Do not install in places with the high
temperatures (e.g near a fire, near a
heater, under the scorching sun) or
exposed directly under the sunlight.
It can only be used indoors below 35 ° C.
Do not install in places where the
power cord or ballast may get wet.
It may cause electric shock and
leakage.
Be careful when carrying or installing
this product in order to prevent
damage from product.
Do not use or placed at outdoors. It
may cause overheat, explosion, etc.
Do not install this product near to
children, since there is an danger
to children.
WHILE OPERATION
In case of abnormality (burnt smell, etc),
immediately unplug the power and
stop using it. It may cause overheat
or fire. Please contact the retailer that
you purchased or our company.
Do not modify or process this produuct
by yourself. It may cause damage or
injury to people.
Do not operate when the pump can
not circulate water or the body is
not filled with water. It may cause
damage or fire.
Do not use for any purpose other
than recommendation. It may cause an
unexpected accident or danger.
WARNING
WARNING
ATTENTION

1
※Does not include controller power consumption.
Attention
Model
Pump Max Power Consumption
※
Rated voltage / frequency Max Flow
Outlet hose inner diameter /
PVC inner diameter
DC3000 25W(±5%)
100-240V 50/60Hz
3000l/h 16mm/20mm
DC5500 34W(±5%)
FlowFlow
100-240V 50/60Hz
5500l/h 16mm/20mm
Body Size(cm)
W16×D9.1×H18
W18.5×D10.1×H19.3
DC8000 68W(±5%)
100-240V 50/60Hz
8000l/h 20mm/20mm W18.5×D10.1×H19.3
Total Head(m)
Total Head(m)Total Head(m)
DC3000 DC5500
Flow
DC8000
●Specification
0.5
500 1000 1500 2000 2500 3000 1000 2000 3000 4000 5000 60003500
1.5
2.5
1
2
3
1.5
2.5
1
0.5
0
0
2
3
3.5
4
4.5
5
●Before Use
・Be careful not to let the pump run idle due to a drop in water level.
・ Be careful that do not let sand and foreign matter being sucked into the main unit.
This can cause serious damage. The warranty is not covered in this case.
・ Do not use with corrosive or abrasive liquids.
・ When holding the pump, do not lift the pump by the cord.
・ Perform regular cleaning to prevent lime, algae, calcium and moss from adhering.
・ Be sure to turn off the power before connecting the adapter connector to the controller.
Please read the following precuations carefully before using the pump
※The total head is the length of the pipe (hose) and varies depending on the pipe
friction and the resistance when connecting equipment.
・We do not compensate for living bodies by stopping the pump. Please use it after
consent beforehand.
・This product is for underwater use only.
1000 2000 3000 4000 5000 6000 7000 8000 9000
1
0
0
2
3
4
5
6

2
Pump
Controller
Adapter
Power Cord
O Ring large / small
Name of each part
A Pump Cover
B Fixing Bolt
C Fixing Nut
D Impeller
E O Ring
F Pump Core
G Pump Mount
A
BC
D
EF
G
Drain Hose
Connector
Water Intake Parts
●Content
●Installation method in the water tank
1. Attach the large O-ring to the water inlet and the small O-ring to the drain, and then
attach the water inlet part and drain hose connector from above.
O Ring
Big
O Ring
Small
Make sure that the pump does not run idle due to a drop in the water level at the
pump installation location or water absorption location. Since it may cause a pump
failure or serious accident. The warranty is not cover in this case.
Install the adapter and controller in a place without heat or humidity.
Attention
Drain hose
connector
Water intake parts
Remove the main unit and all attached parts from the box and check that if there any
damage during transportation.In particular, make sure that the cord is not damaged.
If any damage is found, do not use it and contact your dealer.

3
Align the protrusions and insert Tighten the connection cover
2. Connect the joint between the pump and controller referring to the following
connection method.
3. Connect the adapter to the controller.
Make sure to have a "drip loop" between the outlet and the
controller.
"Drip loop" is mean that the part of the cord is below the location
of the outlet, as it can prevent water from running down the
cord and coming into connect with the outle
4. Connect the power cord to the adapter.
5. Make sure that the main unit is underwater and that the inside of the main unit
is filled with water before connecting the plug to the outlet.
※Before connecting, make sure that the power is not connected to the outlet.
Attention
How to Connect

4
Diameter
Become small
Diameter
Become large
45°elbow
Same diameter
45°
●Do not reduce the diameter in the middle of piping.
●When connecting a valve in the middle of piping, be sure to provide a bypass point.
Precautions for Piping
Excessive drainage resistance results in reduced flow, abnormal pump noise and malfunction.
Please observe the following precautions.
●Do not use a right-angle elbow pipe at the end of the water intake pipe or the drain pipe.
If necessary, use a pipe with a smooth angle.

5
●How to use the controller
※Each button is a touch panel type, so do not push it strongly,
as it will be the cause of the failure.
Attention
It is recommended to use at a rotation speed (RPM) of 2500 rpm or less.
Use at high speeds not only increases power consumption,
but also causes failures and accelerates wear.
If the flow rate is weak when used at 2500 rpm or less, check the connected
devices and piping.
※The number (RPM) displayed in the center indicates the rotation speed of the
impeller.Increasing the flow rate by increases the RPM (rotational speed), as well
as decreasing it.In addition, when resistance is applied to the drainage, the RPM
(rotational speed) increases to maintain the set flow rate.
1. If you touch the High button while "OFF" is displayed, the pump will
Starts running.
2. Use the "High button" and "Low button" to adjust the flow rate to match the tank.
Touch the High button to increase the number of rotations to increase the water flow.
3. Touch the power button once to enter pause mode and stop the pump.
※Pause mode is released after about 30 minutes, and starts running with the power
before the pause.
4. If you touch the power button again in the pause mode, the power turns off.
High Button Low Button Power Button

6
※Be sure to disconnect the power plug from the outlet and make sure that the
power is not turned on before doing the maintenance.
* Please understand the structure of the pump well before proceeding.
* Do not use detergent, hard sponge or brush.
* When cleaning the power cord and outlet, clean with a dry soft cloth.
●Maintenance
For safety use, please do the maintenance (cleaning) to remove dirt and calcium
components regularly (at least once a month). Also, remove dust and dirt from the
power cord connection and the outlet.
1. Use a hexagon wrench (not included, so please prepare separately)
Remove the fixing bolt (B). At this time, be careful not to lose the fixing nut (C).
2. Remove the pump cover (A) from the pump core (F).
3. Remove the impeller (D) from the pump core (F).
A
BC
D
EF
G
Fixing bolt (B)
On the back
Fixing nut(C)
Name of each part
A Pump Cover
B Fixing Bolt
C Fixing Nut
D Impeller
E O Ring
F Pump Core
G Pump Mount

7
※If lime algae or calcium components are stuck, remove them using a special
cleaner or Hydrochloric Acid.
※Even small scratches can cause water leaks and malfunctions, so if you
find them, replace them immediately.
* Impellers and O-rings are treated as consumables and are not covered by
the warranty.
* We recommend that you apply silicone grease (sold separately).
4. Use a soft-bristle toothbrush to remove any dirt from each part.
5. Check the impeller if there any damage.
6. Check the O-ring if there any damage.
7. Reassemble the pump in the reverse order of steps 1-3, and install it in the
original place.
8. Turn on the power and check for any abnormalities for a while.

●Q&A
●Error Code Solution
Attention Please note that we do not compensate for living bodies by stopping the pump.
※All error codes cause the pump to stop automatically. After solving the problem, restart the pump.
Error Code Cause Solution
Er01 Run idle Check that the water level at the pump location is not low.
Add water if necessary.
Er02 Low voltage
Check that if it is connected to the genuine dedicated adapter.
If used with heaters, coolers, lighting fixtures, and octopus wiring,
the voltage may be constant. Review the wiring of the peripheral
equipment.
If the problem still exists, contact your dealer or us.
Er03 High voltage Check that if it is connected to the genuine dedicated adapter.
If the problem still exists, contact your dealer or us.
Er04
Water supply/
drainage pressure
Abnormal
Check that there is no resistance to water absorption or drainage.
If necessary, review the piping according to “ Precautions of
Piping” on page 4.
Foreign matter
contamination
・ Dirt
Disassemble it and clean the pump.
Er05
Abnormal
current
Check that if it is connected to the genuine dedicated adapter.
If the problem still exists, contact your dealer or us.
Foreign matter
contamination
・ Dirt
Disassemble it and clean the impeller and pump.
Q.The pump does not run even if the power is turned on and settings are made and saved.
A.
The shaft of the impeller may be shifted due to transportation.
Take out the impeller once, check for any damage, and then reassemble.
* If the impeller is damaged, stop using it and contact your dealer or us.
Please contact us by email.
Email :[email protected]
8
This manual suits for next models
5
Table of contents
Other Zoox Water Pump manuals
Popular Water Pump manuals by other brands

TeichTip
TeichTip SUNSUN CEF-16000 user manual

Xylem
Xylem LOWARA e-LNE Series Installation, operation and maintenance manual

FujiMAC
FujiMAC FujiMAC40 R2 instruction manual

Gardena
Gardena 21000 inox operating instructions

Agilent Technologies
Agilent Technologies 9130037 instruction manual

Vortec
Vortec Dual-Force Vac 2109 Operation and safety instructions