Zopu SL122M User manual

Zopu Trail Camera
Model: SL122M
INSTRUCTION MANUAL
V3.2

Congratulations on your purchase of one of the best trail cameras
on the market! We appreciate your business and want to earn your
trust. Please refer to the notes below and the instructions in this
manual to ensure that you are completely satisfied with this
product.
In case of any further questions or concerns, please get in touch
with us at:
support@zopudt.com
or visit our page:
www.zopudt.com

TABLE OF CONTENT
1. IMPORTANT NOTE...................................................... 1
2. INTRODUCTION ..........................................................2
2.1. ABOUT THE CAMERA......................................2
2.2. APPLICATIONS.................................................3
3. PARTS AND CONTROLS ............................................3
4. INSTALLING THE BATTERIES AND SD CARD...... 6
4.1. LOADING BATTERIES......................................6
4.2. INSERTING THE SD CARD ..............................7
5. USING THE CAMERA.................................................. 8
6. THE OFF, ON, AND SET MODES...............................9
6.1. OFF MODE........................................................ 9
6.2. ON MODE.......................................................... 9
6.3. SET MODE.......................................................10
7. ADVANCED SETTINGS ............................................11
8. MOUNTING AND POSITIONING THE CAMERA .. 16
8.1. MOUNTING..................................................... 16
8.2. SENSING ANGLE AND DISTANCE TEST...... 17
8.3. SWITCHING ON THE CAMERA.....................18
9. REVIEW PHOTOS OR VIDEOS ................................19
10. TROUBLESHOOTING / FAQ................................... 19
11. TECHNICAL SPECIFICATIONS .............................25
12. WARRANTY ............................................................. 27
13. FCC COMPLIANCE STATEMENT .........................28

1
1. IMPORTANT NOTE
Require eight (8) 1.5V AA Alkaline or Lithium batteries (not
included). We recommend the use of Energizer AA Lithium
batteries in this camera to obtain maximum battery life.
Do not mix old and new batteries.
Do not mix battery type.
Rechargeable AA batteries are NOT recommended as the lower
voltage they produce can cause operational issues.
Remove batteries when the camera is NOT in use.
Require a regular SD memory card, up to 32GB (not included).
We recommend using SanDisk 32GB SDHC/Class10 memory
cards in the camera to obtain the best performance. Format the
SD card before use by the “Format” command in the camera
MENU settings.
Before use, please remove the protective films on the front of
the camera to get the best performance.
* TROUBLESHOOTING *
If your camera does not seem to be functioning properly or if
you are having photo/video quality issues, please check the
Troubleshooting/FAQ section.
Problems are often due to something simple that was
overlooked, or require only changing one setting to solve.
If your unit is still having trouble, please feel free to contact us.

2
2. INTRODUCTION
2.1. ABOUT THE CAMERA
The camera is a digital scouting camera, it can be triggered by
any movement of game in a location, detected by a highly
sensitive Passive Infra-Red (PIR) motion sensor, and then take
high quality pictures (up to 20MP still photos), or video clips
with sound.
The camera consumes very little power (less than 0.15mA) in a
stand-by (surveillance) state. This means it can deliver up to six
months standby operation time when the device is powered by
eight AA alkaline batteries. Once motion in the monitored area
is detected, the digital camera unit will be triggered at once
(typically approx. 0.2~0.6 second) and then automatically take
photos or videos according to previously programmed settings.
The camera is equipped with built-in infrared LEDs that
function as a flash (invisible to human eyes), so that it delivers
clear photos or videos (in black & white) even in the dark, and
it can take color photos or videos under sufficient daylight. The
camera is designed for outdoor use and is resistant against water
and snow.
Main features:
Deliver high quality pictures (up to 20MP still photos) or full
HD video clips with sound recording. The camera is
equipped with dedicated large aperture, full glass lens and
deep imaging optimization, take color photos or videos under
sufficient daylight
Clear night vision, up to 65ft/20m distance. The camera is
equipped with 38pcs built-in high efficiency infrared LEDs
that function as a flash (invisible to human eyes), delivers
clear photos or videos (in black & white)

3
Easy to use/program with unique well-designed keypad and
built-in 2.4-inch LCD color screen, easy to review pictures
and videos on the screen
3 optional live working modes - Camera only, Video Only,
Camera + Video
Fast trigger time approx. 0.2~0.6 second, Long trigger
distance up to 82ft/25m, Wide detection angle 120°when
side motion sensors enabled, Wide view angle 90°
Date, Time, Temperature & Moon Phase Imprint in the
pictures
Timer (Operation hours), Time Lapse, Serial Number,
Lockable and password protected, Loop Recording
IP66 Waterproof. The camera is designed for outdoor use
and is resistant against rain and snow
Support SD/SDHC memory card up to 32GB (user supplied)
Extremely long in-field battery life up to six months in
standby mode with 8 AA batteries (user supplied)
2.2. APPLICATIONS
The camera can be used as follows:
For hunting, trail animals’ trace or habit
For wildlife observing and researching, captures pictures and
videos of wild animals
As sports camera, for riding, driving, camping or exploring
As motion-triggered security camera, for home, farm, office
and community
All other indoor & outdoor surveillance where invasion
evidence needed
3. PARTS AND CONTROLS
The camera is equipped with 38pcs built-in high efficiency
infrared LEDs, LED Indicators, Lens, PIR Sensors, Lock Holes

4
in front view (Figure 1).
Figure 1: Front View
The camera provides the following connections for external
devices: Mini USB port and regular SD card Holder (Figure 2).
Figure 2: Bottom View
The camera has two strap holes on the back.The strap can be put
through the strap holes and fastened securely around the tree
trunk by pulling the end of the strap firmly (Figure 3).
LED
Indicators
IR LEDs
Lock Hole
Side PIR
Motion Sensor
Lens
Center PIR
Motion Sensor
Side PIR
Motion Sensor
Mic
Tripod Base
1/4" - 20
SD Card
Holder
DC 6V/1~2A
Plug 4.0x1.7mm
Mini USB Port

5
Figure 3: Back View
The camera has a 2.4inch built-in LCD color screen, which can
be used for reviewing pictures or videos and menu displaying,
and unique keypad design for easy program and operation, 8 AA
batteries compartment supported (Figure 4).
Figure 4: Inside View
Figure 5: Keypad and Shortcut
Color
Screen
Battery
Compartment
and Cover
Operation
Buttons
Strap Hole
Lock
Buckle
RIGHT Key as
Manual Shutter
("SHOT")
UP Key as
Video Mode
DOWN Key as
Camera Mode
OK Key as
Playback Mode
Power Switch

6
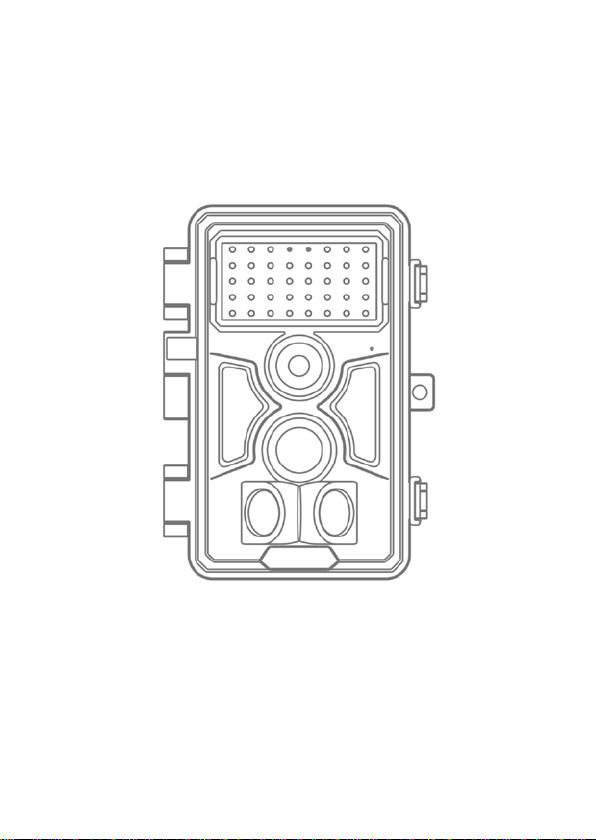
A 3-way power switch is used to select the main operating
modes: OFF,ON,and SET (Figure 5).
A control key interface with six keys is primarily used in SET
mode to select operational functions and parameters. As shown
in Figure.5, these keys are: UP,DOWN,LEFT,RIGHT,OK
and MENU. Four of the keys can also perform a second
function (shortcut operations in SET mode) in addition to their
main function: The DOWN key can be used to set the camera to
Camera mode, and the UP key can set the camera to Video
mode. The RIGHT key also serves as the manual shutter
("SHOT") button of the camera and the OK key switches the
camera to the Playback ("REPLAY") mode. These secondary
functions are indicated by icons or text above the key as show
in Figure 5.
4. INSTALLING THE BATTERIES AND SD CARD
Before you begin learning how to use your camera, you will
first need to install a set of batteries and insert an SD card.
Although that may only take you a minute, there are some
important notes about both batteries and SD cards you should
be aware of, so please take the time to read the following
directions and cautions.
4.1. LOADING BATTERIES
After opening the cover of the battery slot, you will see that the
camera has eight battery slots (Figure 6). A full set of four or
eight batteries must be installed for the camera to operate. Be
sure to insert each battery with correct polarity (negative or
"flat" end against the long spring of each battery slot).
The camera takes 1.5V AA Lithium or Alkaline batteries. We
recommend using 1.5V Lithium AA batteries (Energizer brand)
to get maximum batteries lifetime. NiMH Rechargeable can

7
also be used, but they might have a shorter life span due to their
reduced efficiency over time and at low temperature.
On SET mode when battery power level gets low, the message
"Low Battery"will show on the screen, please replace the
batteries. And if the message "Night vision is unavailable in
low voltage"shown on the screen, that means the batteries
don’t have enough power to driver IR LEDs working, you have
to replace the batteries if you want the camera take pictures or
videos at night, but the camera still can work at daytime.
Figure 6: Loading the batteries
4.2. INSERTING THE SD CARD
Insert the SD card (with the camera's power switch in the OFF
position) before beginning to operate the camera. Don't insert or
remove the SD card when the power switch is in the ON
position. The camera uses a regular SD (Secure Digital)
memory card to save photos (in .jpg format) and/or videos (in
.avi format). SD and SDHC (High Capacity) cards up to a
maximum 32GB capacity are supported (Figure 7).

8
Figure 7: Inserting the SD Card
Please make sure that the write-protect switch on the side of the
card is "OFF" (NOT in the "Lock" position). The following
describes how to insert and remove the SD card:
Insert the SD card into the card slot with its label side
upwards. A "click" sound indicates that the card is installed
successfully. If the wrong side of the card is facing up, you
will not be able to insert it without force-there is only one
correct way to insert cards. If the SD card is not installed
correctly, the device will not display an SD card icon on the
LCD in SET mode (the SD card icon displayed after
switching to SET mode will have a "lock" symbol inside it in
it if the card is locked). Formatting the SD card by using the
camera's "Format" parameter before using it for the first time
is recommended, especially when a card has been used in
other devices.
To take out the SD card, just gently push in the card (do not
try to pull it out without pushing in first). The card is released
from the slot and ready to be removed when you hear the
click. Be sure the camera's power is switched OFF before
inserting or removing SD cards or batteries.
5. USING THE CAMERA
Once you've prepared your camera by properly installing
batteries and an SD card, you could simply take it outside, strap it

9
to a tree (or not-according to your application scenario), switch
it ON and leave-and you might get some great photos that are
exactly what you wanted. However, we highly recommend that
you first spend some additional time indoors with this manual
and your camera until you know a bit more about what the 3-way
switch and those control keys do. If nothing else, you'll probably
want to at least set the date and time so the camera will imprint
them (or not-it's your option) on your photos as they are taken,
learn how to set the camera to shoot video clips instead of still
photos if you like, and read some tips about mounting it on a tree.
6. THE OFF, ON, AND SET MODES
The camera has three basic operational modes:
OFF mode: Power switch in the OFF position.
ON mode: Power switch in the ON position (screen is off.)
SET mode: Power switch at SET position (screen is on).
6.1. OFF MODE
The OFF mode is the "safe" mode when any actions must be
taken, e.g., replacing the SD card or batteries, or transporting
the device. You will also use OFF mode (ON or SET is
available) if you connect the camera to a computer's USB port
later to download your photos/videos. And of course, when you
are storing or not using the camera, you will switch it to OFF.
Please note that in the OFF mode the camera consumes little
power. It's a good idea to take the batteries out of the battery
compartment if the camera will not be used for a long time.
6.2. ON MODE
Anytime after the batteries and SD card have been inserted, you
can switch on the camera. When the power switch is moved to

10
the middle position, the camera will enter into the ON (Live)
mode. The motion indicator LED will blink blue for about 15
seconds. This interval allows time for you to close the camera's
front cover, lock it, and leave the monitored area. Once in the
ON mode, no manual controls are needed or possible (the
control keys have no effect). The camera will take photos or
videos automatically (according to its current parameter
settings) when it is triggered by the PIR sensor's detection of
activity in the area it covers.
You can either move the power switch directly from OFF to
ON mode, or stop at the SET position first to change one or
more settings, then move the switch to ON after you have
finished doing so. NOTES: It takes approximately 60 seconds
to fully activate PIR motion sensors. When the power switch is
moved to the ON position, the camera does not immediately
sense game motions and take pictures until the motion sensors
are fully activated.
6.3. SET MODE
In the SET mode you can check and change the settings of the
camera with the help of its built-in LCD. These settings, found
in the menu by pressing MENU key, let you change the photo
or video resolution, interval between photos, switch the time
imprint on, etc. (See more in Section 7 ADVANCED
SETTINGS)
Moving the power switch to the SET position will turn on the
LCD display, and you will see an information screen that shows
how many images have been taken, the battery level, camera or
video mode, etc.
Shortcut Keys/Functions

11
As mentioned earlier in "Parts & Controls", the keypads have
secondary, "shortcut" functions when the camera is switched to
SET mode (but the key has not been pressed):
Press the UP key to quickly set the camera to shoot video
clips.
Press the DOWN key to quickly set the camera to take still
photos.
Press the RIGHT key to manually trigger the shutter. This is
useful for testing the camera-make sure you are in SET
mode, press the RIGHT key, and a few seconds later a photo
or video (depending on how the camera was set) will be
saved to the SD card. The "number of images taken" counter
on the top right of the LCD will increase by one. If the
display indicates "Card Protected" when you press the
RIGHT key, turn off the camera OFF, remove the SD card
and slide its protect switch off.
Press the OK key to playback. Then press UP or DOWN
key to navigate the history photo or video if you want.
During playback, press the MENU key to manage the stored
photos/ videos during scrolling photos or videos. You can
Delete one/ Delete All/Slide Show/Protect the photos and
videos you want. Press the MENU key again to back.
NOTE: after deleting a picture or a video file, the
deleted files can't be restored! It is also possible to delete
all files from the card by using the Format parameter.
7. ADVANCED SETTINGS
The trail camera comes with preset manufacturer settings. You
can change the settings to meet your requirements. Please make
sure that the camera is in the SET mode. Once the camera screen
is on, press MENU key to enter/exit the menu. Press the
UP/DOWN key to move the marker, Press the LEFT/RIGHT

12
key to change the setting, and press the OK key to confirm the
change. Always remember to press the OK to save the change.
Otherwise you will lose your new setting.
Parameter
Settings
(Bold =
default)
Description
Mode Camera,
Video,
Cam+Video
Select whether still photos or video
clips are taken. In Cam+Video mode,
the camera can first take photos and
then shoot videos afterward.
Language Multiple
Languages
English/Chinese/French/
Deutsch/Spanish/Portuguese/
Japanese/Russian/Italian
Photo Size
(affects
still photos
only)
20MP
16MP
12MP
8MP
5MP
3MP
Select desired resolution for still
photos from 3 to 20 megapixels.
Higher resolution produces better
quality photos, but creates larger files
that take more of the SD card capacity.
Besides, larger files require longer
time to write to the SD card, which
will slightly slow the shutter speed.
Video Size
(affects
video clips
only)
1920×1080
1280×720
720×480
Select video resolution (pixels per
frame). Higher resolution produces
better quality videos, but creates larger
files that take more of the SD card
capacity.
Picture
No.
(affects
still photos
only)
01 Photo,
02 Photo,
03 Photo
Select the number of photos taken in
sequence per trigger in Camera mode.
Please also refer to the Interval
parameter.
Video
Length
(affects
video clips
AVI 5s,
optional
from 3s to
5m
Videos are in AVI format that can be
played back on most video players.
Notes: Night videos are limited to a
maximum of 30 seconds to conserve

13
only)
the batteries.
Interval
10 seconds,
optional
from 0s to
60m
Select the shortest length of time that
the camera will wait until it responds
to any subsequent triggers from the
PIR sensor after a game is first
detected. During the selected interval,
the camera will not take
pictures/videos. This prevents the SD
card from filling up with too many
redundant images. 0 second means the
motion detection is instant (without
any delay). Notes: this option is
invalid if Time Lapse is “On”
Sensitivity
Level
Normal,
High,
Low
Select the sensitivity ofthe PIR sensor.
The High setting suits indoors and
environments with little interference,
while the Normal/Low suits outdoors
and environments with more
interference. Temperature also affects
the sensitivity. The High setting is
suitable when the ambient temperature
is warm, and the Low setting is helpful
in cold weather.
Notes: this option is invalid if Time
Lapse is “On”
Set
Date/Time mm/dd/yyyy
hh:mm
mm – Month
dd – Day
yyyy – Year
hh – Hour (24h)
mm – Minute
Notes: Use "LEFT/RIGHT" key to
switch parameters, use "UP/DOWN"
to set current date and time.
Date input sequence may change.
Please refer to “Date Format”

14
parameter settings accordingly.
Date
Format
dd/mm/yyyy
yyyy/mm/dd
mm/dd/yyyy
Select date format which will be
shown on the screen and each capture.
Time
Format 24h
12h
Select time format which will be
shown on the screen and each capture.
12h - AM/PM
Date
Stamp
Off
Date
Date/Time
Select Date/Time if you want the date
& time imprinted in every photo.
Select Date if you want the date
imprinted in every photo.
Select Off to stop the date & time
imprinted.
Sound
Recording
On
Off
Select On to enable video with sound
recording.
Timer On
Off
Select On if you only want the camera
to work within a specified time period
every day. For instance, if the starting
time is set at 18:35 and the ending time
at 8:25, the camera will function from
18:35 the current day to 8:25 the next
day. Outside the time period the
camera will not be triggered or take
photos/videos. The time is in 24h
format.
Time
Lapse On
Off
If set On, the camera will
automatically take photos/videos
according to the set interval, regardless
of whether the PIR sensor has detected
any game. This is helpful when
observing cold-blooded animals like
snakes, or the process of flowering,
etc. You can set the “Begin” and
“End” time. Notes: Too small interval
set in the Time Lapse Settings will

15
enable taking more pictures, and can
consume more battery power and then
reduce battery life.
Password
Set
On
Off
Set up a password to protect your
camera from unauthorized users.
Serial No. On
Off
Select On to assign a serial number to
each camera you have. You can use the
combination of 4 digits to record the
location in the photos (e.g. 1234 for
Yellow Stone Park). This helps
multi-camera users identify the
location when reviewing the photos.
Side
Motion
Sensors
On
Off
Select On to activate the side motion
sensors. It brings faster trigger speeds
and helps capture fast moving animals.
When any of the two side motion
sensors detects a motion event, the
camera will be pre-activated. If the
animal enters the detection area of the
center motion sensor within 5 seconds,
the camera will start taking photos or
videos according to the settings,
otherwise the camera will re-enter
standby mode again.
SD Card
Storage
Stop saving
when full
Cycle
storage
Cycle storage means loop recording.
When the SD card is full, new pictures
and videos will overwrite the front of
the SD card and write from scratch.
The default option is stopping saving
when SD card is full.
Format
SD Card Yes
No
All files will be deleted after
formatting the SD card. Highly
recommend you format the SD card if
it has been used previously in other
devices. Caution: make sure wanted

16
files on the SD card have been backed
up first!
Default
Setting Yes
No
Press OK to return all your previous
settings back to the manufacturer
default.
Version Defined Display the version of the camera.
8. MOUNTING AND POSITIONING THE CAMERA
8.1. MOUNTING
After you've set up the camera's parameters to your personal
preferences at home or in your trunk, you're ready to take it
outside and slide the power switch to "ON". When setting up
the camera for scouting game or other outdoor applications, you
must be sure to mount it in place correctly and securely. We
recommend mounting the camera on a sturdy tree with a
diameter of about 6 in. (15cm). To get the optimal picture
quality, the tree should be about 16-17 ft. (5 meters) away from
the place to be monitored, with the camera placed at a height of
2.5*3.5 ft. (0.75-1m). Also, keep in mind that you will get the
best results at night when the subject is within the ideal flash
range, no farther than 65' (20m) and no closer than 10' (3m)
from the camera.
There are two ways to mount the camera: using the provided
adjustable web belt, or the tripod socket.
Using the adjustable strap: illustrates using the strap on the
camera. Push one end of the strap through the two brackets
on the back of the camera. Thread the end of the strap
through the buckle. Fasten the strap securely around the tree
trunk by pulling the end of the strap firmly so there is no
slack left (Figure 8). Note: it is not possible to use a cable
lock (in the upper part of the bracket) and the strap at the

17
same time.
Using the tripod socket: The camera is equipped with a
socket at the bottom end to enable mounting on a tripod or
other mounting accessories with a standard UNC 1/4-20
thread screw (user supplied).
Figure 8: Mounting the Camera
8.2. SENSING ANGLE AND DISTANCE TEST
To test whether the camera can effectively monitor the area you
choose, this test is recommended to check the sensing angle and
monitoring distance of the camera. To perform the test:
Switch the camera to the SET mode.
Make movements in front of the camera at several positions
within the area where you expect the game or subjects to be.
Try different distances and angles from the camera.
If the motion indicator LED light (RED light) blinks, it
indicates that position can be sensed. If it does not blink, that
position is outside of the sensing area. Notes: The red light
will blink only when the motion is within the sensing area of
the central PIR sensor. The central sensor's sensing angle of
view is 60°. Each of the side sensors has a 30° angle of view,
which is only used to accelerate the triggering speed, there is
no RED light blinking whatever each of the side sensors
Table of contents
Other Zopu Scouting Camera manuals