manuals.online logo
Brands
  1. Home
  2. •
  3. Brands
  4. •
  5. ZoraBots
  6. •
  7. Accessories
  8. •
  9. ZoraBots Billy-Billy User manual

ZoraBots Billy-Billy User manual

Other manuals for Billy-Billy

2

Popular Accessories manuals by other brands

Quincy lab 140AE-1 operating manual

Quincy lab

Quincy lab 140AE-1 operating manual

HomePro ZIR000 user manual

HomePro

HomePro ZIR000 user manual

DOL 20SCR Technical user guide

DOL

DOL 20SCR Technical user guide

RAB Smart Task installation manual

RAB

RAB Smart Task installation manual

Kemppi KMS 300 quick guide

Kemppi

Kemppi KMS 300 quick guide

Stearns 57,500 Series Installation and service instructions

Stearns

Stearns 57,500 Series Installation and service instructions

iGuzzini TWILIGHT COPENAGHEN manual

iGuzzini

iGuzzini TWILIGHT COPENAGHEN manual

Adelaide Annexe & Canvas Avan Deluxe installation guide

Adelaide Annexe & Canvas

Adelaide Annexe & Canvas Avan Deluxe installation guide

OHAUS 5000 instruction manual

OHAUS

OHAUS 5000 instruction manual

HOME8 WLS1300 quick start guide

HOME8

HOME8 WLS1300 quick start guide

MAXBOTIX MaxSonar quick start guide

MAXBOTIX

MAXBOTIX MaxSonar quick start guide

ioSmart iSmart56 Installation and user guide

ioSmart

ioSmart iSmart56 Installation and user guide

Focusrite Scarlett 18i8 user guide

Focusrite

Focusrite Scarlett 18i8 user guide

Velleman ED38105 user manual

Velleman

Velleman ED38105 user manual

JumpSport SkyBounce user manual

JumpSport

JumpSport SkyBounce user manual

Prima-Temp PRIYA Instructions for use

Prima-Temp

Prima-Temp PRIYA Instructions for use

Tefcold BC85I-BC85I W user manual

Tefcold

Tefcold BC85I-BC85I W user manual

Vaisala WMS302 user guide

Vaisala

Vaisala WMS302 user guide

manuals.online logo
manuals.online logoBrands
  • About & Mission
  • Contact us
  • Privacy Policy
  • Terms and Conditions

Copyright 2025 Manuals.Online. All Rights Reserved.

ZoraBots
Billy-Billy Manual
Release 1.06
05/03/2018
[email protected]e
+32 (0)59 200 311
COPYRIGHT NOTICE
COPYRIGHT © 2018 Zora Robotics NV all rights reserved.
No part of this document may be used or copied without prior written permission from the copyright
holder. The contents of this document can always be modified without prior notice.
2
This document explains the general procedures when using the Billy-Billy robot and briefly
explains the functionality of the current version of Billy-Billy.
1About this document...........................................................................................................................................................................2
2Concept and mission of Billy-Billy ............................................................................................................................................4
3Contents of the box..............................................................................................................................................................................5
4Preface.......................................................................................................................................................................................................... 6
5Communication...................................................................................................................................................................................... 6
5.1 Microphone.....................................................................................................................................................................................7
5.2 LED-lights ....................................................................................................................................................................................... 8
5.3 Speakers .......................................................................................................................................................................................... 8
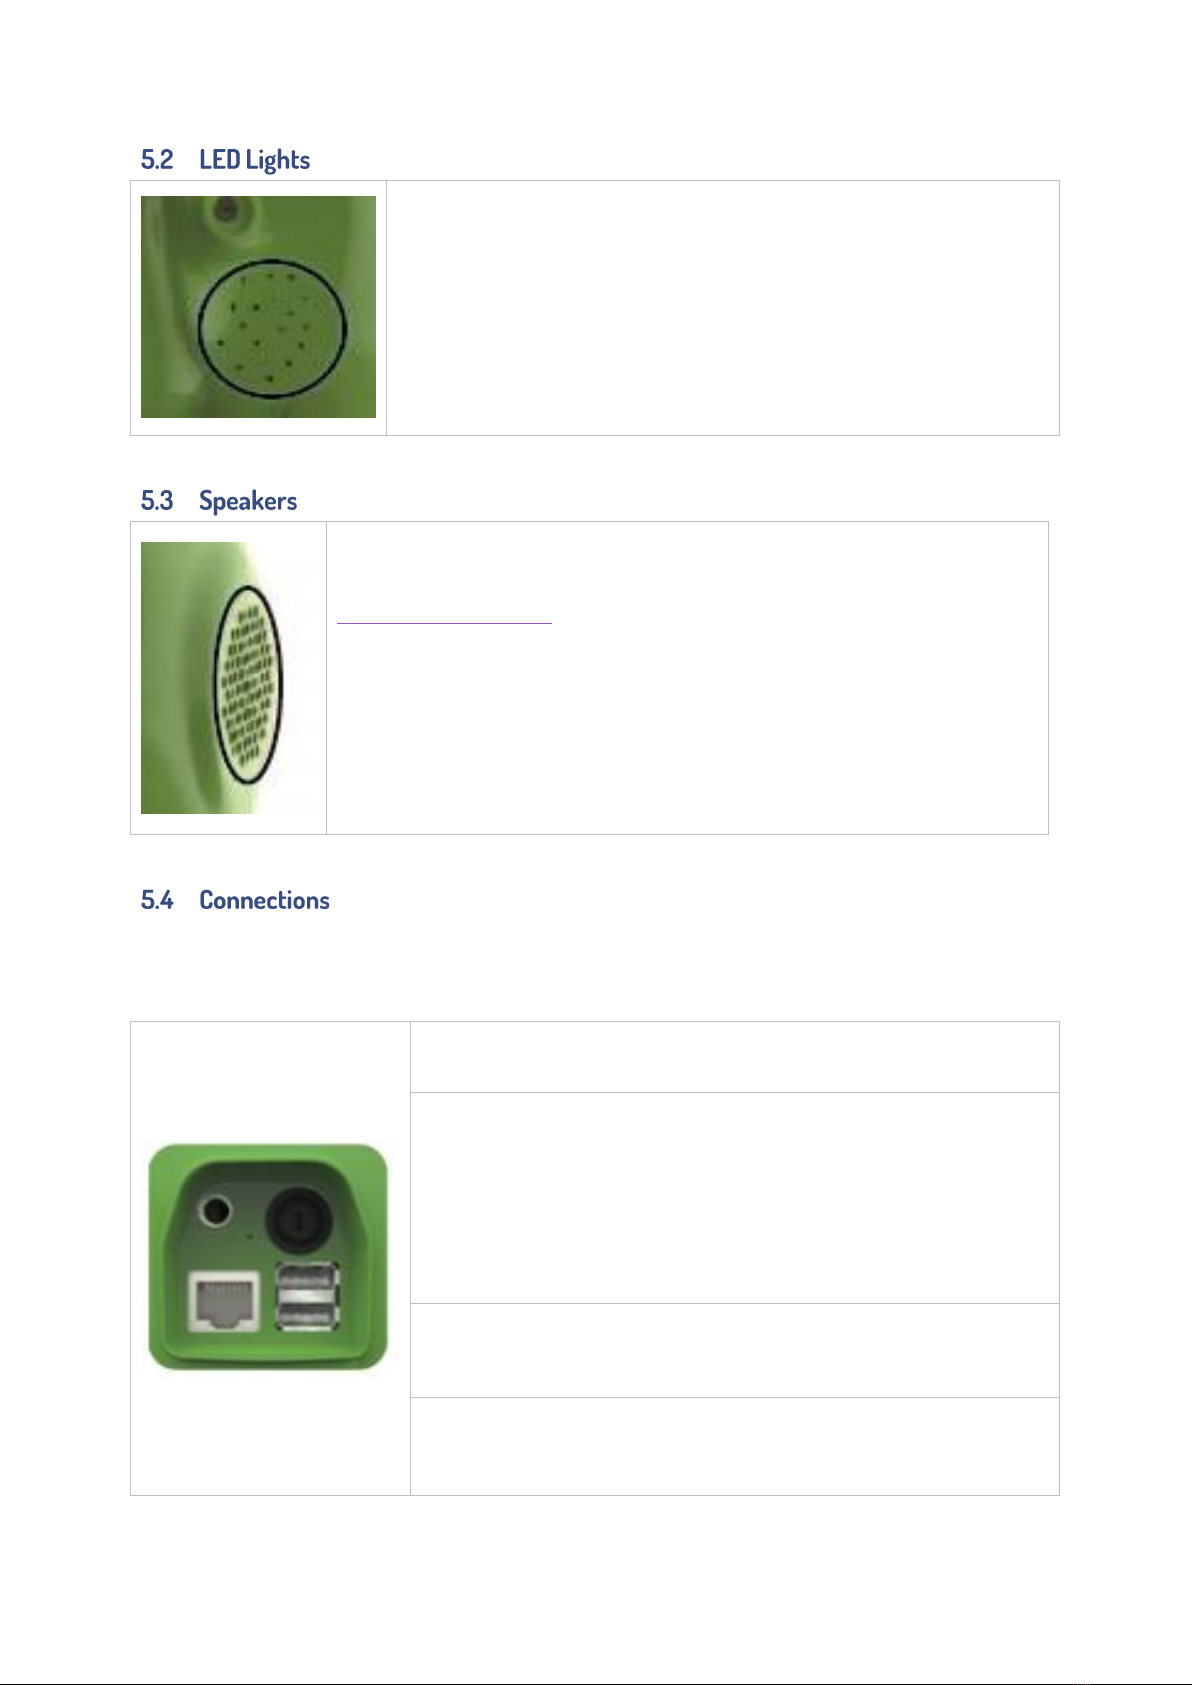
5.4 Connections................................................................................................................................................................................... 8
6Connectivity .............................................................................................................................................................................................. 9
6.1 Connecting to Billy-Billy....................................................................................................................................................... 9
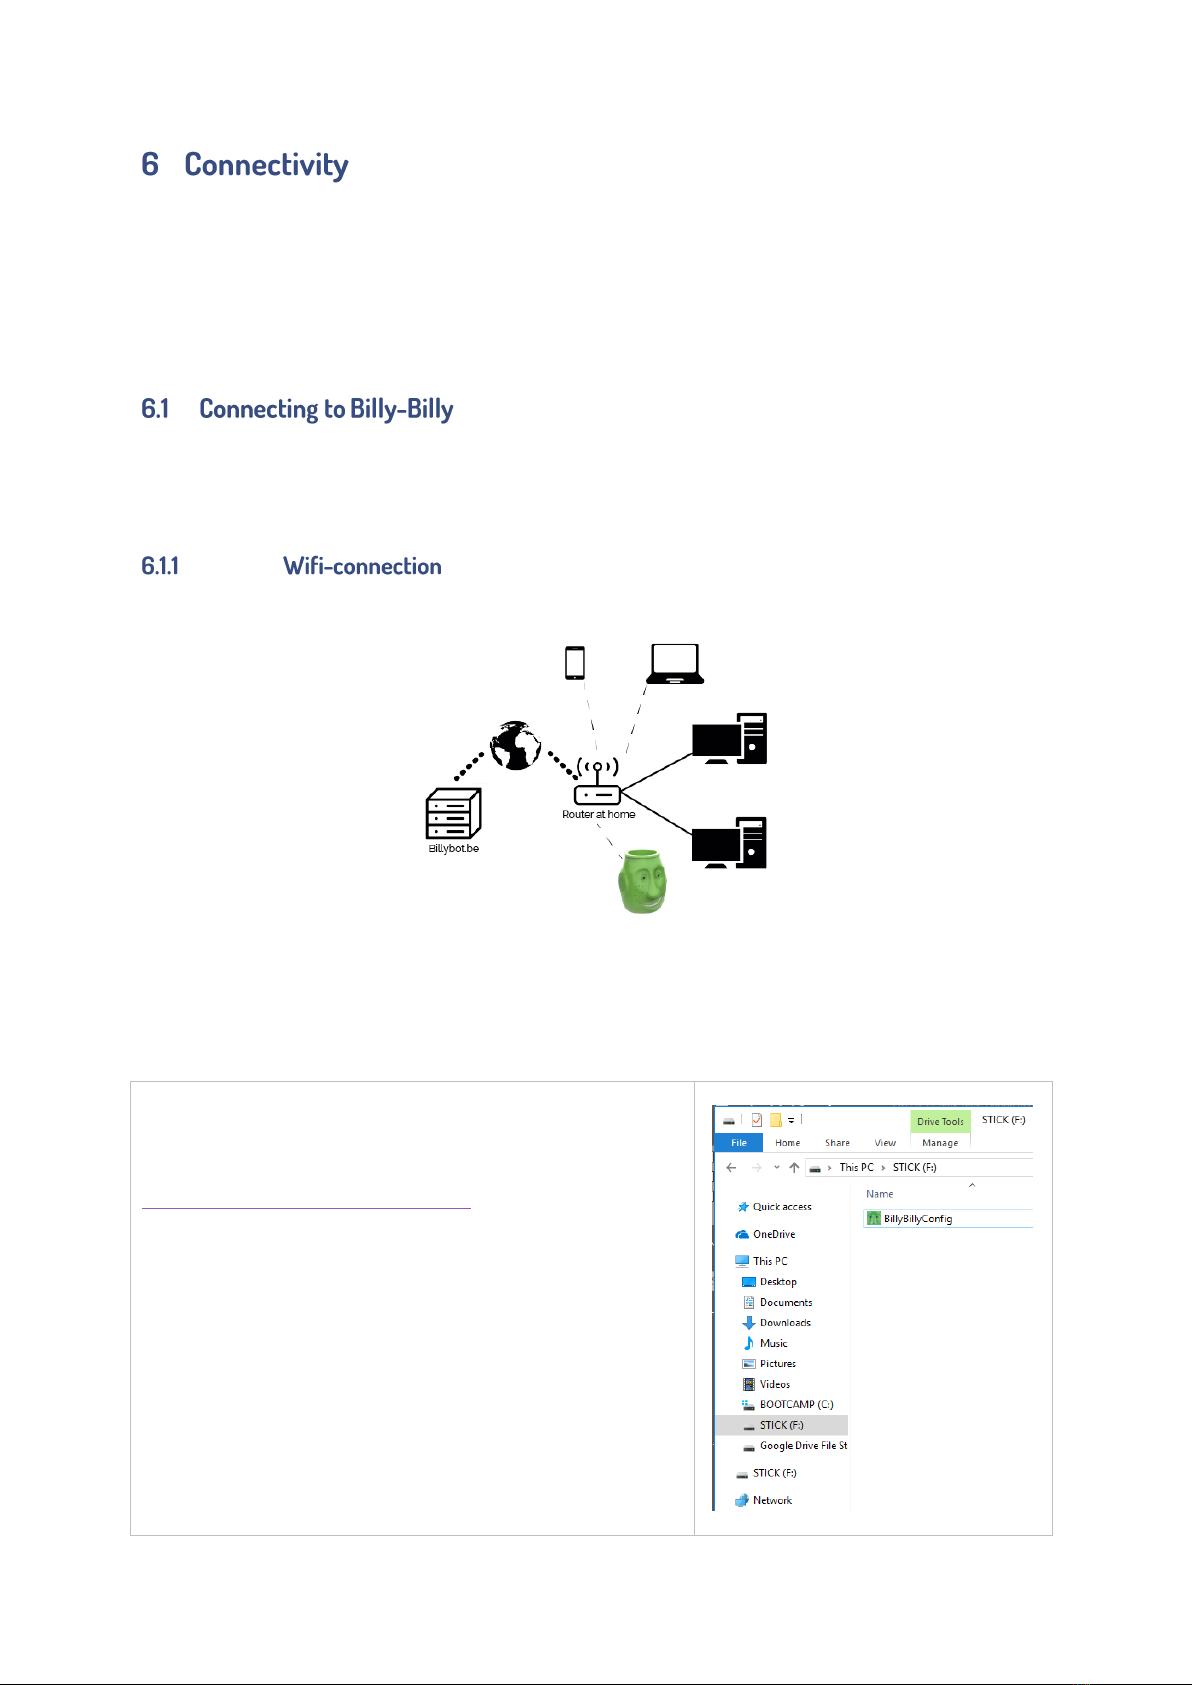
6.1.1 Wifi-connection .................................................................................................................................................................... 9
6.1.2 Connection with cable ................................................................................................................................................... 13
6.2 Local Management ................................................................................................................................................................ 14
6.2.1 Home screen......................................................................................................................................................................... 15
6.2.2 Menu bar.................................................................................................................................................................................. 15
6.2.3 Controls of Billy-Billy.......................................................................................................................................................16
6.2.3.1 Summary of the sensors.......................................................................................................................................16
6.2.3.2 Device settings ............................................................................................................................................................ 17
6.2.3.3 Sending a message.................................................................................................................................................. 17
7Website......................................................................................................................................................................................................18
7.1 Register or log in...................................................................................................................................................................... 19
7.1.1 Register .....................................................................................................................................................................................19
7.1.2 Logging in................................................................................................................................................................................20
7.2 Online management of Billy-Billy ............................................................................................................................... 21
7.2.1 Garden ....................................................................................................................................................................................... 21
7.2.2 Content of a garden......................................................................................................................................................... 21
7.2.3 Online Features................................................................................................................................................................... 21
7.3 Managing gardens..................................................................................................................................................................22
7.3.1 Adding a garden.................................................................................................................................................................23
3
7.3.2 Adjusting the garden.......................................................................................................................................................23
7.3.3 Adding a Billy-Billy to the garden..........................................................................................................................24
7.4 Online management .............................................................................................................................................................25
7.4.1 Homepage..............................................................................................................................................................................25
7.4.2 Status of the plant.............................................................................................................................................................26
7.4.3 Settings for Billy-Billy .....................................................................................................................................................27
7.4.3.1 Device settings ............................................................................................................................................................27
7.4.3.2 Edit name.........................................................................................................................................................................28
7.4.3.3 Update picture.............................................................................................................................................................28
7.4.3.4 Send a message .........................................................................................................................................................28
7.5 Online features..........................................................................................................................................................................29
7.5.1 Account Settings................................................................................................................................................................29
7.5.2 Changing the password................................................................................................................................................29
7.5.3 Calendar .................................................................................................................................................................................. 30
7.5.4 Logging off .............................................................................................................................................................................34
8Sensors.......................................................................................................................................................................................................35
8.1 Sensor for the inner pot ......................................................................................................................................................35
8.2 Light-sensors..............................................................................................................................................................................35
8.3 Temperature-sensor.............................................................................................................................................................35
8.4 Soil moisture-sensors ......................................................................................................................................................... 36
8.5 Time-sensor ............................................................................................................................................................................... 36
9Epilogue.....................................................................................................................................................................................................37
Appendix 1 –Voice commands ...........................................................................................................................................................38
Appendix 2 –Tutorials................................................................................................................................................................................42
Appendix 3 –Technical specifications ...........................................................................................................................................47
4
Thank you very much for your purchase of Billy-Billy. We hope you will have a lot of fun with your
Billy-Billy.
Billy-Billy is an interactive flower pot that was designed to make the lives of elderly people cosier
and more comfortable. With its sensors it captures –among other things –how hot or cold a room
is and the amount of light in the said room. By using this data, Billy-Billy can help elderly people
take care of plants or herbs. Billy-Billy can also easily be connected to the internet to look up the
latest news or the latest weather report. Billy-Billy is an added value not only for the elderly,
(grand)children can also interact with the robot.
By using a shared calendar, Billy-Billy can remind you that the healthcare professional will pay a
visit, or when a family event has been planned. Reading messages aloud is also a possibility. In
short, Billy-Billy will do anything in its power to make life easier.
Zorabots is using Billy-Billy to try to reduce the loneliness of elderly people so people can live
longer at home or to give people in residential care centres a daily activity.
5
Number
Item
Photo
1
Billy-Billy
1
Billy-Billy Inner Pot
1
Power Adapter with European Sockets(*)
1
Bag of Potting Soil
1
Bag of Seeds
1
USB stick with the Manual and Configuration
Software
1
Quick start guide
(*): Billy-Billy can be supplied with other sockets (depending on the region), so the adapter can be
adjusted if needed.
6
A brief explanation of (some) terms used throughout this document:
Pot or Inner Pot
or Flower Pot
The flowerpot that can be inserted into the robot from the top.
Sensors
Hardware designed specifically to collect data.
E.g.: Temperature Sensors measuring the current temperature.
Wake Word or
Wake-Word
The command used to have Billy-Billy listen to a command.
In this case: ‘Billy-Billy’.
Quiet Hours
During the ‘Quiet Hours’ Billy-Billy will remain silent, unless the user specifically
asks a question (1).
LED lights
or LEDs
The lights in Billy-Billy’s cheeks.
Cabled
Connection
A network connection of Billy-Billy and the home router with an UTP cable.
Local
Management
Consulting the sensor data or adjusting (some) settings of Billy-Billy without
using the internet.
(1): This does not apply when inserting or removing the inner pot into/from Billy-Billy.
The robot has the following hardware to receive commands and provide feedback:
7
The microphone is located at the front of the robot (in the right eye)
to ensure a smooth communication.
By speaking to the robot from the front, the best results can be
obtained.
-Wake Word
This term indicates the name of the robot (‘Billy-Billy’). By saying this term aloud, Billy-Billy will
start listening for specific commands.
-LEDs
Once the robot has recognized the ‘wake word’ command, the LEDs in the cheeks will turn blue.
This implies that the robot is listening for the commands.
-Commands
The robot only responds to pre-programmed sentences. For example: ‘Which day are we today?’
or ‘What’s today’s date?’.
Note: Future updates might add new features to this functionality.
-In practice:
The following example has Billy-Billy read out the state of the plant:
Step 1 –Billy-Billy is fully booted, and the
inner pot has been detected.
The cheeks of Billy-Billy light up green.
Step 2 –The robot is turned to the person
asking the question.
1) The user states the command ‘Billy-Billy’.
2) The LEDs in the cheeks light up blue.
3) The command ‘How are you?’ is spoken
Step 3 –The robot answers the question
1) Depending on the type of question, the answer
can take a while (e.g. asking for the weather).
2) The robot replies with the sentence ‘Everything is
ok’ (or something similar).
If the sensors do not detect a safe value (see
chapter 9 - Sensors) the robot will notify you of this
as well.
8
The LED lights installed in the cheeks can light up in a variety of
colours depending on the state of the plant or robot.
For the full range of possible colours, see Appendix 3 –Technical information.
The speakers are located at the side of the head.
The volume of the speakers can be adjusted on the Billy-Billy website
http://www.billybot.be .
Besides the hardware to communicate with humans, Billy-Billy also has the necessary hardware
to communicate with machines and the internet.
These connections can be found at the back of Billy-Billy.
The power connector is located at the top left of this panel.
This is where the power adapter needs to be plugged in.
To the right of the power connector, the power button can be
found. This button is used to power Billy-Billy on and off.
This button has the following functionality:
-Press once: Billy-Billy is safely turned off.
-Keep pressing with some force: Billy-Billy is shut down.
This option should only be used if the first option doesn’t
work. Avoid doing this unless there is no other option.
Below the power adapter, the network plug can be found. This
connection can be used when connecting Billy-Billy to a network
by using a UTP cable.
At the bottom-right, the USB-connections can be found. These
connections can be used to connect to external devices (e.g. a USB
drive with the configuration file for the wireless network).
9
The router at home and the pc have the following properties:
-Cabled connection: This connection always takes priority (a.o. when saying the IP address
and connecting to the website) due to the greater speeds when sending and receiving
data.
This connection works independently from the Wi-Fi connection.
-Router: The router at home must act as an IPv4 DHCP server.
Billy-Billy has the following means to communicate with other devices or the internet:
-Wifi connection
-Network adapter (cable)
This setup has the advantage of wireless internet-access and mobility of Billy-Billy.
-Configuration:
As shown on the picture, both the other devices and Billy-Billy are connected to the same
network. Billy-Billy uses the same settings as the phone to connect to wifi.
-Setting up the connection (Windows)
Step 1 –Start the Program ‘BillyBillyConfig.exe’.
Plug the supplied USB stick into a USB slot of a Windows-
computer or download the program from the website
http://www.billybot.be/downloads.
To download the file, select the option ‘Downloads’ in the
section ‘Info’ at the bottom of the website.
By starting the program BillyBillyConfig.exe from the USB
stick or from the downloaded location, the settings for the
Wi-Fi network can be inputted and saved to an external
file.
10
Step 2 –Enter the Settings for the Selected Wi-Fi
Network.
In the top right corner of the program, the USB
devices that are compatible with Billy-Billy are
shown.
Select the USB-drive to use from this list.
The list on the left side shows the networks found
by the computer.
By selecting the network from the list, the name is
copied to the field titled ‘Wifi network name’.
If the network is not listed, it can be entered
manually in this field.
If the network or the connected USB device are
not detected, the program can search again by
clicking the button marked ‘Refresh’.
Step 3 –Creating the Configuration File.
After filling in the password for the network in the
field marked ‘Password’, the configuration file
needed by Billy-Billy can be generated.
By clicking the button marked ‘Generate File’, the
file is created and stored on the USB drive.
After clicking the OK button in the popup, the USB
stick may be safely removed from the computer.
Step 4 –Checking the File.
When verifying the contents of the USB stick, an extra file will be
visible in the root folder, namely ‘billy-billy.conf’.
This file contains the data needed by Billy-Billy to connect to the
specified network.
Once the files have been checked, the USB drive must be safely
removed from the computer.
Step 5 –Connecting Billy-Billy to the Network.
By plugging the USB stick into Billy-Billy (the protective rubber may
need to be removed from the slot), the generated file can be used to
connect Billy-Billy from the network.
When the cheeks turn blue after saying the wake word ‘Billy-Billy’, the
command “connect to Wi-Fi” can be spoken to have Billy-Billy
connect to the wireless network.