Zte Optik Specification sheet

Get
Started
All you need to know to get going.
Optik

Welcome!
Sprint is committed to developing technologies that give you the ability to get
what you want when you want it, faster than ever before. This booklet introduces
you to the basics of getting started with Sprint and your ZTE Optik tablet.
Visit sprint.com/support for the complete User Guide, along with videos,
tutorials, and community forums for your tablet.
Thank you for choosing Sprint.
Using This Guide
Get Ready − page 1 − Find out
what you need to do before you use
your device the first time, including
activating Sprint service on your device.
Android™ Basics − page 4 − Learn
some basics about how to move
around on your device, use the home
screen, and enter text. If you’re familiar
with Android devices, you can probably
skip these pages (although a refresher
course never hurt anyone).
Use Your Device − page 12 − Take
advantage of your device’s features
and Sprint services, from the basics
(Messaging) to the more advanced
(using Facebook, Qik, and more).
Tools & Resources − page 31 −
Find useful tips for your device and
discover resources and other helpful
Sprint information. For additional
information including the full User
Guide, videos, tutorials, and community
forums, visit sprint.com/support.
Using This Guide
This Get Started guide is designed to help you set up and use your new
ZTE Optik tablet. It’s divided into four sections to help you find the information
you need quickly and easily.

visit sprint.com/support for complete user guide 1
Get Your Device Ready
Your ZTE Optik
Volume KeyPower Key
Front Camera
Headset Jack
Touchscreen
microSD
Card Slot
Speaker SpeakerCharger Jack
Note: For the purposes of this guide, top, bottom, left, and right refer to the device in landscape mode (as
shown above) unless otherwise noted. For example, the Charger Jack is on the “bottom” of the device.
Get Ready
visit sprint.com/support for complete user guide 1
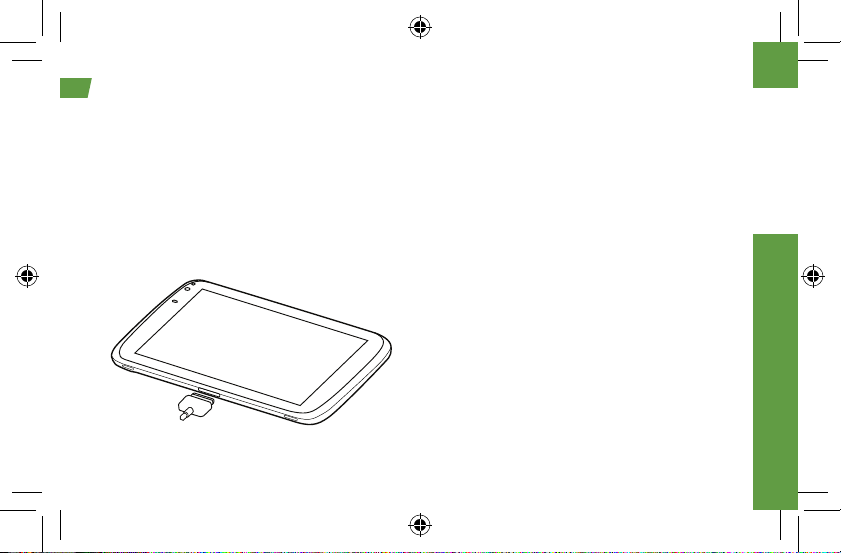
Charge the Battery
1. Insert the larger end of the connection cord into
the charger jack on the bottom of your device.
2. Insert the USB end of the cord into the AC
adapter.
3. Plug the AC adapter into an electrical outlet
and charge for at least three hours.
Turn the Device On
►Press and hold the Power key on the top left
side of the device to turn the device on.
• If your device is activated, it will turn on,
search for Sprint service, and begin the setup
application.
• If your device is not yet activated, see
“Activate Your Device” on page 2 for more
information.
Turn the Device Off
• Press and hold the Power key on the top left
side of the device and then touch OK to turn
the device off.
Get Your Device Ready

visit sprint.com/support for complete user guide 3
2
Activate Your Device
• If you purchased your device at a Sprint Store,
it is probably activated and ready to use.
• If you received your device in the mail, and it is
a new Sprint account or a new device on an
existing account, your device is designed to
activate automatically when you first turn it on.
You will see a Hands Free Activation screen at
startup, and your device will check for updates
after activating. When it’s finished, touch OK to
continue. Your device will reboot and you will
see the Welcome screen.
• If you received your device in the mail and it is
going to be activated on an existing number
(you’re swapping devices), go to sprint.com/
activate and follow the instructions.
• To access Sprint 3G without a contract,
purchase a Data Pass for a day, week, or month.
When you see the Hands Free Activation
screen, touch Next. Select New Customer,
touch Next, and then select No Annual
Commitment and follow the onscreen
instructions.
Note: You can access the Day Pass option from
the Sprint Zone app at any time. Also, whenever
your Day Pass runs out, you can launch your
device browser, select New Customer > Next >
No Annual Commitment, and follow the
instructions to purchase a new Data Pass.
When you have finished, launch the browser and
access an Internet address to confirm your
activation. If your device is still not activated or
you do not have access to the Internet, contact
Sprint Customer Service at 1-888-211-4727 for
assistance.
Activate Your Device
Setup Application
Get Ready
visit sprint.com/support for complete user guide 3
2
The setup application helps you set up various
options and applications, including setting up
your Google™ account.*
Complete the Setup Application
1. When the device is first turned on, you will see
the Hands Free Activation screen, which may
be followed by a PRL Update screen and a
Firmware Update screen. Touch OK after each
of these steps. (Your device may reboot after
activation or updates.)
2. After restart, touch Start to begin.
• Use Google’s location service – Touch the
check marks to select your Google location
options. Touch Next to continue.
• Sign in with your Google Account – Create
or sign in to your Google account. Touch
Sign in and follow the instructions to sign in
or create a new account. Touch Skip to exit
setup without signing in to your Google
account.
• Backup and restore – Choose whether or not
to back up data with your Google account.
3. Touch Done when you have finished. You will
see the home page.
* You do not need to sign up for a Google
account to use your device; however, to
download applications from the Android Market,
you must link your device to a Google account.
Setup Application
visit sprint.com/support for complete user guide 5
4
Move Around Your Device’s Menus
and Screens Using Gestures
Your device’s touchscreen lets you control
everything through various types of touches, or
gestures.
Touch: When you want to press onscreen
buttons, select items such as application and
settings icons, or type, simply touch the screen
with your finger. A light touch works best.
Touch and hold: To open the available options for
an item (for example, a link in a Web page), touch
and hold the item.
Swipe or Slide: To swipe or slide means to
quickly drag your finger vertically or horizontally
across the screen.
Drag: To drag, press and hold your finger with
some pressure before you start to move your
finger. While dragging, do not release your finger
until you have reached the target position.
Flick: Flicking the screen is similar to swiping,
except that you need to swipe your finger in light,
quick strokes. This finger gesture is always in a
vertical direction, such as when flicking the
message list.
Rotate: For most screens, you can automatically
change the screen orientation from portrait to
landscape by turning the device sideways. When
entering text, you can turn the device sideways to
bring up a bigger keyboard. See “Using the
Onscreen Keyboard” for more details.
Note: To enable or disable automatic rotation,
touch Home > Apps> Settings > Screen
and touch the check box to toggle the option.
Android™ Basics: Getting Around Your Device
Android Basics
visit sprint.com/support for complete user guide 5
4
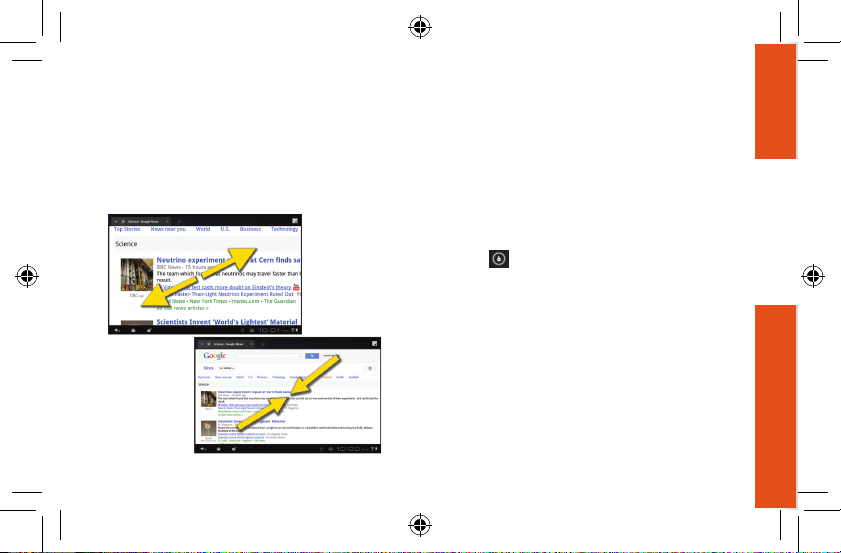
Zoom: “Pinch” the screen using your thumb and
forefinger to zoom out or “spread” the screen to
zoom in when viewing a picture or a Web page.
(Move fingers inward to zoom out and outward to
zoom in.)
Turn the Screen On and Off
• To quickly turn the display screen off, press the
Power key on the top left side of the device.
• To turn the screen on and display the unlock
screen, press the Power key.
Unlock the Screen
►Touch ( ) and drag it to the right to unlock
the screen.

visit sprint.com/support for complete user guide 7
6
Home Screen
Touch Home to display your Home screen.
App Shortcuts
Widget
Notifications & Status
Quick Settings
Recent AppsHome
Back
Widget
Google
Search
Voice Search Customize
Home Screen
Apps
(open Apps list)
Your Home Screen
Other manuals for Optik
1
Table of contents
Other Zte Tablet manuals


Popular Tablet manuals by other brands

Laser
Laser MID-1060 Quick operation guide

MUNBYN
MUNBYN IRT09J Easy setup guide

Motorola
Motorola MC3090R - Win CE 5.0 Professional 520 MHz quick start guide

Dell
Dell Latitude ST Setup and features information

Lenovo
Lenovo IdeaTab S6000L Hardware Maintenance Manual

Venturer
Venturer WT9L11 quick start guide


