3M Elipar DeepCure-S User manual

U1
-
148 x 210 mm
-
44000118156/02
-
SCHWARZ
-
20-115 (kn)
LED Curing Light
Светодиодное устройство для фотополимеризации
стоматологических материалов
Светодиодна лампа за полимеризация
LED svjetiljka za polimerizaciju
Gyors polimerizációt biztosító LED-lámpa
Diodowa lampa do polimeryzacji
Lampă de fotopolimerizare LED
LED Polymerizačná lampa
Polimerizacijska LED luč
LED polymerační lampa
LED Işık Cihazı
LED-valguslamp
Gaismas diodes lampa
Diodinis švitintuvas
Стоматологічна лампа для світлової полімеризації
uk
lt
lv
et
tr
cs
sl
sk
ro
pl
hu
hr
bg
ru
en
Operating Instructions Navodila za uporabo
Инструкция по эксплуатации Návod k použití
Инструкции за експлоатация
Kullanma Talimatları
Upute za upotrebu Kasutusjuhend
Használati utasítás Lietošanas pamācība
Instrukcja użycia Naudojimo instrukcija
Instrucţiuni de utilizare
Інструкції зексплуатації
Návod na použitie
Elipar™
DeepCure-S

U2
-
148 x 210 mm
-
44000118156/02
-
SCHWARZ
-
20-155 (kn)

SEITE 1
-
148 x 210 mm
-
44000118156/02
-
SCHWARZ
-
20-115 (kn)
1
ENGLISH
en
ENGLISH
Elipar™DeepCure-S
LED Curing Light
en
Safety
PLEASE NOTE!
Prior to installation and start-up of the unit, please read
these instructions carefully!
As with all technical devices, the proper function and
safe operation of this unit depend on the user’s
compliance with the standard safety procedures as
well as the specific safety recommendations presented
in these Operating Instructions.
1.
Use of the device is restricted to professional person-
nel in
accordance with the instructions below. The
manu
facturer assumes no liability for any damage
arising from any other or improper use of this device
.
2. Prior to start-up of the unit make sure that the operat-
ing voltage stated on the ident label is compatible
with the available mains voltage. Operation of the unit
at a different voltage may damage the unit.
3. Position the unit so that the power plug is accessible
at all times. The power plug is used to turn the charger
on and off. To disconnect the charger from the mains,
remove the power plug from the electrical outlet.
4. Use only the 3M charger which is provided
with the
unit. The use of any other charger can result
in
damage to the battery.
5. Elipar DeepCure-S may be operated only with the
supplied battery or original 3M Elipar DeepCure-S re-
placement batteries. The use of other batteries can
impair performance or cause damage to the device.
6. CAUTION. Do not stare at source. May be harmful
to the eyes. Restrict exposure to the area of the oral
cavity in which clinical treatment is intended. Protect
patient and user from reflection and intensive scattered
light by taking the appropriate precautions, e.g., glare
shields, goggles, or coverings.
7. CAUTION! As it is the case for all high-intensity light-
curing devices, the high light intensity is accompanied
by heat generation on the exposed surface. This heat
can result in irreversible damage if there is longer
exposure in the proximity of the pulp or soft tissue.
The exposure times given in the manufacturer’s
instructions must be observed exactly to avoid any
such damage.
Uninterrupted exposure times of the same tooth
surface in excess of 20 seconds and direct contact
with oral mucosa or skin must be strictly avoided.
Scientists working in this field are in agreement
that the irritation caused by heat generated during
light curing can be minimized by taking two simple
precautions:
• Polymerization with external cooling from an air
flow
Table of Contents Page
Safety 1
Product Description 2
Indications 3
Technical Data 3
Charger 3
Handpiece 3
Charger and Handpiece 4
Transport and Storage Conditions 4
Installation of the Unit 4
Factory Settings 4
Initial Steps 4
Charger 4
Light Guide/Handpiece 4
Inserting the Battery 4
Battery Charging 5
Operating Status Display of the Charger 5
Power Level Display of the Handpiece 5
Operation 5
Selection of Exposure Time 5
Activating and Deactivating the Light 6
Positioning the Light Guide 6
Removing and Inserting the Light Guide
from/into the Handpiece 6
Measurement of Light Intensity 6
Recommended Cure Techniques with 3M
Adhesives 7
Sleep Mode 7
Acoustical Signals
-
Handpiece 7
Troubleshooting 8
Maintenance and Care 9
Inserting/Removing the Battery 9
Handpiece/Battery Care 9
Reprocessing the Light Guide 9
Cleaning and Disinfecting Charger, Handpiece
and Glare Shield 11
Storage of the Handpiece during Extended
Periods of Non-Use 12
Return of Old Electric and
Electronic Equipment for Disposal 12
Collection 12
Return and Collection Systems 12
Customer Information 12
Warranty 12
Limitation of Liability 12
Glossary of Symbols 13

SEITE 2
-
148 x 210 mm
-
44000118156/02
-
SCHWARZ
-
20-115 (kn)
2
operation can affect the EMC properties of the unit,
the possibility that, under unfavorable conditions,
there will be EMC disruptions cannot be completely
excluded. If you should notice problems in the
operation of this or other units, move the unit to a
dif-
ferent location.The EMC manufacturer’s declara
tion
is listed in the appendix.
18.
CAUTION! Portable high-frequency communication
devices including their accessories should keep a
minimum distance of 30 cm to Elipar DeepCure-S.
Otherwise, the performance characteristics of the
device may be reduced.
19.
Prior to each use of the unit ensure that the emitted
light intensity is sufficient to safely guarantee poly-
merization. Check the light guide and the light guide
mounting port to make sure they are clean. If neces-
sary, the light guide mounting port and the light
guide can be cleaned as described in the section
“Maintenance and Care” (see also the section “Mea-
surement of Light Intensity”).
Please report a serious incident occurring in relation to
the device to 3M and the local competent authority (EU)
or local regulatory authority.
• Polymerization at intermittent intervals (e.g.,
2 exposures lasting 10 seconds each instead of
1 exposure lasting 20 seconds).
8 Elipar DeepCure-S may be operated only with the
supplied light guide or original 3M replacement
and accessory light guide. The light guide must be
seen as an applied part. The use of other light
guides may result in a reduction or increase in the
light intensity. The product’s warranty does not
cover any damage resulting from the use of third-
party light guides.
9. Use only genuine 3M parts when replacing defec-
tive components as directed in these Operating
Instructions. The product’s warranty does not cov-
er any damage resulting from the
use of third-party replacement parts.
10. Should you have any reason to suspect the safety
of the unit to be compromised, the unit must be
taken out of operation and labeled accordingly
to prevent third parties from inadvertently
using a possibly defective unit. Safety may be
compromised, e.g., if the unit malfunctions or is
noticeably damaged.
11. Keep solvents, flammable liquids, and sources of
intense heat away from the unit as they may
damage the plastic housing of the charger, the
seals, or the cover on the operating buttons.
12. Do not allow cleaning agents to enter the unit as
this may short-circuit the unit or cause potentially
dangerous malfunction.
13. Only service centers authorized by 3M Deutsch-
land GmbH may open the unit housing and repair
the device.
14. CAUTION: this device must not be modified with-
out the manufacturer’s permission.
15. Individuals with a history of cataract surgery may
be particularly sensitive to the exposure to light and
should be discouraged from Elipar DeepCure-S
treatment unless adequate safety measures, such
as the use of protective goggles to remove blue
light, are undertaken.
16. Individuals with a history of retinal disease should
seek advice from their ophthalmologist prior to
op-
erating the unit. In operating the Elipar DeepCure-S
unit, this group of individuals must take extreme
care and comply with any and all safety precau-
tions (including the use of suitable light-filtering
safety goggles).
17. This unit has been developed and tested in
accordance with the relevant EMC regulations and
standards. It is in conformity with legal require-
ments. Since various factors such as power supply,
wiring, and the ambient conditions at the place of
Light guide
Handpiece
Charger
Power cord
Glare shield
Product Description
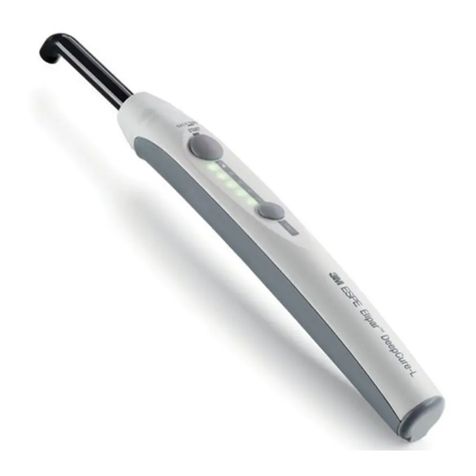
Elipar DeepCure-S is a high-performance LED light
source for polymerization of dental materials. It consists
of a charger and a wireless handpiece powered by a
rechargeable battery.The device is a medical electrical

SEITE 3
-
148 x 210 mm
-
44000118156/02
-
SCHWARZ
-
20-115 (kn)
3
ENGLISH
en
Indications
• Polymerization of light-curing dental materials with
photo initiator for the wavelength range 430
-
480 nm.
-
Most light-curing dental materials
respond to this
light wavelength range. In case of doubt, please
contact the respective manufacturer.
Contraindications
Do not use Elipar DeepCure-S in patients with a
history of photobiological reactions (including
individuals with urticaria solaris or erythropoietic proto-
porphyria) or who are currently on photosensitizing
medication (including 8-methoxypsoralen or
dimethylchlorotetracycline).
Potential Undesirable Side Effects and Complica-
tions
Heat generation can result in pulp or tissue damage.
Unprotected light exposure can result in eye damage.
Refer to section “Safety” for correct handling.
Technical Data
Charger
Operating voltage: 100
-
127 V 50/60 Hz
230 V 50/60 Hz (see rating
plate for factory-set voltage)
Power input: 0.08 A (230 V)
0.16 A (100
-
127 V)
Dimensions: Length: 170 mm
Width: 95 mm
Height: 50 mm
Weight: 650 g
Classification: Protection class II,
Handpiece
Power supply: lithium-ion battery,
nominal voltage 3.7 V
Utilizable wavelength
range: 430
-
480 nm
Wavelength peak: 444
-
452 nm
Light intensity (between
400 and 515 nm): 1470 mW/cm2
-
10%/+20%
(independent of battery power
level)
device in accordance with IEC 60601-1 and is available
as a tabletop device. Wall mounting is not possible.
In comparison with conventional light-curing devices,
Elipar DeepCure-S features excellent beam collimation
and a uniform beam profile, directing more of the light
energy to the restoration being polymerized and
producing a deep, uniform, and complete curing of the
restoration.
The light source is a high-performance light diode
(LED). The beam emerging from the device covers the
light wavelength range of 430 to 480 nm relevant, for
instance, for camphor quinone products and is suitable
for use with the majority of light-curing dental materials,
including materials for fillings, liners, core build-ups,
fissure sealings, temporary restorations, and cements
for indirect restorations.
See the manufacturer’s information for the exposure
time required for the specific dental material.
Settable exposure times:
• 5,10,15, 20 sec
• Continuous mode (120 sec)
• Tack-cure mode (1 sec)
The charger is equipped with an integrated light
intensity meter for the Elipar DeepCure-S.
The unit is shipped with a light guide with10 mm
diameter. It is not permissible to use the light guides of
other units.
The handpiece is equipped with a sleep mode to
minimize the unit’s energy consumption. The hand-
piece switches to sleep mode once it is placed in the
charger or if left unused for approx. 5 minutes outside
the charger.
+These Instructions for Use should be kept for the
duration of product use. The product may only be
used when the product labeling is clearly read-
able. For details on all additionally mentioned
products please refer to the corresponding In-
structions for Use.
Intended Purpose
Intended purpose: curing light for light curing dental
materials.
Intended users: educated dental professionals who
have theoretical and practical knowledge on usage of
dental products.
Patient target group: all patients requiring dental treat-
ment, unless the patient’s condition limits the use.
Clinical benefit: initiates the curing reaction of light cur-
ing dental materials.

SEITE 4
-
148 x 210 mm
-
44000118156/02
-
SCHWARZ
-
20-115 (kn)
4
Light emission area: 60
-
65 mm2(optically active)
Intermittent operation: : The device has been desi-
gned solely for short-term
operation.
Typical operating time at
room temperature (23°C):
7 min, at 40°C ambient tem-
perature: 1min on, 15 min
off (cooling-off period)
Total exposure time
with new, fully
charged battery: typically 120 min
Dimensions: Diameter: 28 mm
Length: 270 mm
Weight: 250 g (incl. light guide)
Charger and Handpiece
Time to charge
empty battery: approx.1.5 h
Operating temperature:
10°C up to 40°C /
59°F up to104° F
Relative humidity: 30% up to 75%
Atmospheric pressure: 700 hPa up to1060 hPa
Total height with handpiece
inserted in the charger: 180 mm
Year of manufacture: see rating plate
Transport and Storage Conditions:
Ambient temperature:
-
20°C up to +40° C /
-
4°F up to +104°F
Relative humidity: 30% up to 75%
Atmospheric pressure: 700 hPa up to 1060 hPa
Subject to technical modification without prior notice.
+40°C
+104°F
–20°C
–4°F
max.
75%
30%
hPa
1060
700
Installation of the Unit
Factory Settings
The factory settings of the unit are as follows:
• 10 sec exposure time
Initial Steps
Charger
EPlease ensure first that the voltage stated on the
rating plate corresponds to the existing main supply
voltage. The rating plate is attached to the bottom of
the unit.
EPlace the charger on a level surface.
E
Connect the power cable of the charger to the power
supply.
-
The green LED on the charger showing that the
unit is ready for operation comes on. This shows
that the unit is ready for operation; please refer
to the section “Operating Status Display of the
Charger.”
Light Guide/Handpiece
ENever place the handpiece in the charger without
the battery inserted in the handpiece!
EPlace the glare shield on the front of the unit.
EAutoclave the light guide prior to first use.
EThen attach the light guide firmly to the handpiece.
Inserting the Battery
ERemove the protective cap from the battery and
keep with the unit packaging.
E
Slowly insert the battery with the thread side towards
the metal housing into the handpiece until it stops.
Screw the battery clockwise by hand until the seal is
pressed firmly against the metal housing. The unit
will not function properly if the battery is not screwed
in completely!

SEITE 5
-
148 x 210 mm
-
44000118156/02
-
SCHWARZ
-
20-115 (kn)
5
ENGLISH
en
EIf the unit does not function properly, remove the
battery and reinsert it as described above.
Battery Charging
E
The unit contains a powerful lithium-ion rechargeable
battery. The battery does not have any memory
effect and can therefore be recharged at any
time by placing it in the charger (see the section
describing the battery power level display on the
handpiece).
EThe battery can also be charged in the charger
independently of the handpiece.
EPlace the handpiece on the charger for approx.
1.5 hours before the first use, in order to charge the
new battery completely for the first time.
-
The status LED showing the operating status of
the charger flashes green during the charging
operation; see below “Operating Status Display
of the Charger”.
Operating Status Display of the Charger
Power Level Display of the Handpiece
Sealing
Status LED Operating status
Handpiece/battery Handpiece/battery
outside the charger
in the charger
Steady green light Charger ready for Charging has
operation been completed
Flashes green –– Battery is being
charged
Steady red light Charge contact Charge contact
pins are wet pins are wet
Flashes alternately Malfunction in the Problem during
red and green charger charging
Power level LED Operating status
Handpiece outside Handpiece in the
the charger charger
Steady green light Battery is charged, Not possible,
handpiece ready handpiece is in
for operation sleep mode
Steady red light Warning for low Not possible,
battery capacity, handpiece is in
remaining capacity sleep mode
adequate typically
for 5 10-sec cycles
Flashes red Battery fully Problem in
discharged, charging, battery
exposure cycle is defective or
will be completed cannot be charged
or, if in continuous
mode, stopped
Operation
Selection of Exposure Time
Status LED showing
operating status
Power level LED
LED showing
exposure times
{
START button
TIME button

SEITE 6
-
148 x 210 mm
-
44000118156/02
-
SCHWARZ
-
20-115 (kn)
6
which enables the defined curing of Protemp Crown
temporary restorations or a light-curing cement
excess (e.g., RelyX Unicem) to enable easy removal.
Positioning the Light Guide
ERotate the light guide into the desired position for
polymerization.
ETo make full use of the light intensity provided, place
the light guide as close to the filling as possible. Avoid
directly contacting the filling material!
-
Keep the light guide clean at all times to obtain full
light intensity.
-
Damaged light guides substantially reduce the
light intensity and must be replaced immediate-
ly, sharp edges may cause serious injury!
Removing and Inserting the Light Guide from/into
the Handpiece
EThe light guide has a magnetic holder. Remove the
light guide from the handpiece by pulling it towards
the front.
EAttach the light guide to the handpiece until it is firmly
in place.
Measurement of Light Intensity
The light intensity of the Elipar DeepCure-S handpiece
can only be reliably determined using the Elipar
DeepCure-S charger! The circular testing area is
located below the scale for the light intensity on
the charger. Measurements carried out using the
Elipar FreeLight, FreeLight 2 or Elipar S10 charger
(predecessors of Elipar DeepCure-S), or another
unit will produce incorrect results due to the different
light sources and the varying arrangement of the
components of the units.
Caution!
EClean the testing area with a wet cloth.
EWithout applying pressure, place the light guide on
the testing area such that the light-emitting opening
of the rod is level with the testing area.
EActivate the lamp by pressing the START button.
-
The number of illuminated LEDs is indicative of
the measured light intensity: 5 LEDs =100%,
0 1 2 3 4 5 6 7 8 9 10
Distance (mm)
Light intensity (%)
100
90
80
70
60
50
Exposure time options: 5,10,15, 20 sec, continuous
mode (120 sec), tack-cure mode.
ESee the instructions for use for the specific dental
material when selecting the exposure time.
EThe indicated exposure times assume that the light
guide is held at the exact position over the material
being polymerized.
EIf the distance between the light guide and the
restoration is increased, the exposure time must be
adjusted accordingly because the light intensity
weakens (see graph).
Testing area
LEDs showing light
intensity
}
Select the exposure time by pressing the TIME button.
-
The selected exposure time is indicated by the
4 green LEDs.
-
Each time the button is briefly pressed, the
setting advances to the next (higher) value.
All 4 green LEDs will be turned on for a setting of
20 sec. Pressing the button again will turn off all
of the LEDs and enable the continuous mode.
-
The display advances through the available
settings, if the button is kept depressed.
-
While exposure is ongoing, the button for
selection of the exposure time is inactive.
Activating and Deactivating the Light
EBriefly press the START button; the light will turn on.
-
The LEDs first indicate the set exposure time;
all 4 LEDs light up for 20 sec. Every 5 sec, as the
time runs down, the LEDs will turn off one at a
time; at 15 sec remaining time, 3 LEDs will still be
on, at 10 sec remaining time 2 LEDs, etc.
-
The LEDs do not come on at all in continuous
mode; an acoustical signal is emitted every
10 seconds.
EIf desired, the light can be turned off by pressing the
START button again before the exposure time is over.
EHolding down the START button activates the tack-
cure mode: the unit emits a single short light pulse

SEITE 7
-
148 x 210 mm
-
44000118156/02
-
SCHWARZ
-
20-115 (kn)
7
ENGLISH
en
4 LEDs = 90%, 3 LEDs = 80%, 2 LEDs =70%,
1 LED = 60%.
E
If the light intensity is below 100% (fewer than 5 LEDs
are ON), check the light guide for contamination or
defects.
EEither: clean the light guide of any contamination.
Or: clean the glare shield on the handpiece; see
“Care” for instructions about both procedures. Or:
replace the defective light guide with a new light
guide. Or: if the measures described above do not
result in any improvement, call 3M Customer Ser-
vice or the appropriate dealer.
Recommended Cure Techniques with 3M Adhe-
sives
• Rotate the light guide into the desired position for
polymerization.
• A barrier sleeve may be used. Note that sleeve can
impact power and irradiance of a curing light. It is
critical to ensure the sleeve is powder free and the
seam is not over the tip of the light guide and that
the sleeve fits well. Intermediate level disinfection
(manual disinfection with ready-to-use disinfectant
wipes) is indicated when a sleeve is used, otherwise
the light guide should undergo high level disinfection
(manual disinfection using disinfectant bath, see
“Reprocessing the Light Guide”).
The following sleeves have been tested:
Sleep Mode
Once the handpiece is placed in the charger, all
internal functions and LEDs are automatically turned
off as the handpiece switches to sleep mode. This
reduces the power consumption of the battery to a
minimal level. Outside the charger, the handpiece
is also switched to sleep mode, if it is not used for
approx. 5 min.
ETo terminate the sleep mode press the START
button.
-
The sleep mode termination signal (two short
audible signals) is emitted indicating that the
handpiece is ready for operation; the handpiece
displays the latest selected exposure mode and
time settings.
Acoustical Signals
-
Handpiece
An acoustical signal is emitted
• every time a button is pressed,
• every time the light is turned ON,
• 1time after 5 sec exposure time, 2 times after 10 sec,
3 times after 15 sec.
Exception: in continuous mode; an acoustical signal
is emitted every 10 seconds.
Two acoustical signals are emitted
• every time the sleep mode is terminated by pressing
the START button,
• every time the light is turned OFF.
A 2 sec-error signal is emitted, if
• the handpiece over-heats,
• the battery lacks sufficient charge.
The acoustical signals from the handpiece can be
turned off (except for the 2-sec error signal).
Follow these instructions to turn them off. Put the
handpiece in sleep mode, e.g., by setting it in the
charger. Take the device from the charger; press
first the TIME button, then the START button.
This changes the sleep mode of the handpiece back
to active and the status “Acoustical signals activated”
to “Acoustical signals deactivated”. The acoustical
signals can be reactivated by following the same
procedure.
Sleeve Impacts
Power or
Irradiance
Cure Sleeve®Tip Covers (short) – Kerr No
Complete Curing Light Sleeves-Demi
– Kerr No
TIDIShield™ Custom Fit Curing Light
Sleeves – TIDI Products No
SmartLite®Max Lens Cover Sleeve –
Dentsply No
Curelastic™ Cure-Light Sleeve
(Steri-Shield) Yes

SEITE 8
-
148 x 210 mm
-
44000118156/02
-
SCHWARZ
-
20-115 (kn)
8
Error Cause
ESolution
During light emission
in continuous mode,
an error signal sounds
for 2 sec, the emission
is stopped, and the
handpiece changes
to sleep mode.
The LED showing the
operating status in
the charger glows red
steadily.
The LED showing the
operating status in the
charger flashes alter-
nately red and green.
The handpiece is not
in the charger.
The LED showing the
operating status in the
charger flashes alter-
nately red and green.
The handpiece is in
the charger.
The LED showing the
operating status in
the charger does not
come on although
the plug has been
connected to an
electrical outlet.
The light intensity is
too low.
The information about inter-
mittent operation under the
header “Technical Data
-
Handpiece” has not been
observed. The handpiece
has become overheated in
the course of use. The hand-
piece can be used again
once it has cooled down.
EAllow the handpiece to
cool for 3 minutes, then
start the next exposure
by pressing the START
button.
The charge contact pins in
the handpiece or the charger
are wet.
EDry the charge contact
pins. Be careful not to
bend the flexible charge
contact pins in the
charger.
Charger is defective.
EHave the charger
repaired.
Malfunction during charging.
EThe battery is damaged.
EReplace the battery.
Power outlet carries no
voltage.
EUse a different power
outlet.
Charger is defective.
EHave the charger
repaired.
EClean the light guide and
the protecting glass in the
light guide mounting hole
(please refer to “Cleaning
the Light Guide”).
Troubleshooting
Error Cause
ESolution
The charge level
display on the
handpiece glows
red steadily.
The power level
display of the hand-
piece flashes red.
The ongoing exposure
is interrupted (light off
signal is emitted) fol-
lowed by a 2 sec-error
signal; the handpiece
switches to “sleep”
mode and resists fur-
ther activation.
The power level
display of the hand-
piece flashes red
while the handpiece
is in the charger.
The handpiece has
not been used for a
long time and now it
cannot be turned on.
The light emission
does not start when
the START button is
pressed; an error
signal sounds for
2 sec.
The remaining battery charge
is adequate only for typical 5
10-sec exposure cycles.
EPlace the handpiece in
the charger and re-charge
the battery.
The battery lacks sufficient
charge.
EPlace the handpiece in
the charger and re-charge
the battery.
Charging problem.
The battery is defective
or at the end of its useful
life.
EReplace the battery.
There is not enough charge
in the battery to turn on the
handpiece.
EPlace the handpiece in
the charger and re-charge
the battery.
The information about inter-
mittent operation under the
header “Technical Data
-
Handpiece” has not been
observed.
The handpiece has become
overheated in the course
of use. The handpiece can
be used again once it has
cooled down.
EAllow the handpiece to
cool for 3 minutes, then
start the next exposure
by pressing the START
button.

SEITE 9
-
148 x 210 mm
-
44000118156/02
-
SCHWARZ
-
20-115 (kn)
9
ENGLISH
en
Maintenance and Care
The Elipar DeepCure-S unit is maintenance-free.
No periodic maintenance is required. See the informa-
tion contained in this chapter to secure problem-free
operation.
Inserting/Removing the Battery
Never place the handpiece in the charger without the
battery inserted in the handpiece!
Use 3M batteries only! The use of other manufacturer
batteries or non-rechargeable batteries/primary
batteries is a potential hazard and may damage the
unit.
ERemove the battery from the handpiece by turning
it counter-clockwise as shown by the direction of the
arrow on the underside of the handpiece.
EInsert the (new) battery into the handpiece and turn
it clockwise until the seal is firmly pressed against
the metal housing.
EPlace the handpiece in the charger for 1.5 hours
in order to fully charge the new battery for the first
time.
-
The LED showing the operating status on the
charger flashes green; see also “Operating Status
Display of the Charger”.
Handpiece/Battery Care
EUse only the 3M charger which is provided with the
unit; failure to do so could lead to damage to the
battery!
EDo not immerse the battery in water or incinerate!
Please also observe the chapter on “Safety”.
Reprocessing the Light Guide
The light guide is not sterile when delivered and must
be reprocessed before being used for the first time
and after each patient use.
Follow manufacturer’s instructions for preparation,
temperatures, contact time and rinsing off the clean-
ing1and disinfecting solution2exactly.
An enzymatic detergent should be used as the clean-
ing solution.
Material Resistance
Make sure that the cleaning and disinfectant agents
you have chosen do not contain any of the following
materials:
-
Organic, mineral, and oxidizing acids (minimum
acceptable pH value 5.5)
-
The pH value of the cleaning and disinfecting
solution should be between pH 7 and 11
-
Oxidation agents (e.g., hydrogen peroxide)
-
Halogens (chlorine, iodine, bromide)
-
Aromatic/halogenized hydrocarbons
Observe the manufacturer’s information about the
cleaning and disinfecting agents.
The light guide must not be exposed to temperatures
higher than 135 °C (275 °F).
The light guide has been tested for up to 500 steriliza-
tion cycles.
Limitations on Reprocessing
This medical device is safe to use if it is reprocessed
according to these instructions and no visible damage
is seen.
Inspect the device carefully before each use and dis-
card if there is any damage.
Point of use / Pre-Treatment
The contaminated light guide must be placed in an
approved, sealed container during transport from the
point of use to the reprocessing area.
The pre-treatment must be carried out before either
automatic or manual cleaning and disinfecting. Imme-
diately after using (within a maximum of 2 hours),
remove gross contaminations from the light guide.
For this, rinse the light guide thoroughly under running
water (drinking water quality as a minimum) for at least
10 seconds.
Use a soft brush or a soft cloth to manually remove
any remaining contamination. Remove polymerized
composite with alcohol; a plastic spatula may help in
removing the material. Do not use any sharp or point-
ed tools to protect the surface of the light guide from
scratching.
Error Cause
ESolution
The dental material
does not cure
completely.
The light guide cannot
be attached to the
handpiece.
EClean the light guide and
the protecting glass in the
light guide mounting hole
(please refer to “Cleaning
the Light Guide”).
ECheck to see that the
correct light guide has
been attached.
EThe light guide is not
designed for use with the
Elipar DeepCure-S.

SEITE 10
-
148 x 210 mm
-
44000118156/02
-
SCHWARZ
-
20-115 (kn)
10
Cleaning and Thermal Disinfecting (Automated
Washer-Disinfectors / CDD (Cleaning and Disinfec-
tion Device))
EAfter the light guide has been pre-treated, place it in
the wire or sieve basket of the washer-disinfector.
Make sure that the devices do not touch one anoth-
er in the washer-disinfector.
ERemove the light guide from the washer-disinfector
unit at the end of the drying cycle and store it under
low germ count conditions.
EExamine the light guide for visible impurities. If any
impurities are visible, repeat the cycle in the wash-
er-disinfector.
Automated washer-disinfectors that meet the
following requirements are suitable for use:
• The device generally has a certified effectiveness in
accordance with ISO 15883. The washer-disinfector
is regularly serviced and tested.
• If available, use a tested cycle for thermal disinfec-
tion (A0 value > 600 or, for older devices, at least 5
min at 90 °C/194 °F).
• The water used for rinsing is minimum drinking wa-
ter quality. Use low-germ and low-endotoxin water
for final rinsing.
• The air used for drying should be filtered (oil-free,
with low microbiological and particulate contamina-
tion).
Note: The evidence of suitability for automatic cleaning
and disinfection took place using the Miele G7336 CD
washer-disinfector (Gütersloh) and the cleaning agent
Thermosept RKN-zym (Schülke & Mayr). The program
D-V-THERMO0905, without drying time was used un-
der worst case conditions.
Cleaning and disinfection of the light guide by
wiping is only permitted in combination with a cor-
responding protective sleeve
Manual Cleaning
EClean the light guide after every application for 30
seconds with ready-to-use disinfectant wipes (e.g.,
CaviWipes™ based on the active substances alco-
hols and quaternary compounds (QAV)) or equiva-
lent cleaning agents.
EFollow the cleaning agent manufacturer’s directions
for use.
EClean with the wipes until no contamination is visible.
EThen rinse with water (drinking water quality as a
minimum) and dry with a soft, lint-free cloth.
Manual Disinfection (Intermediate Level Disinfection)
EAn intermediate level disinfection is possible only if
the light guide is covered with a protective sleeve
during use.
EDisinfect the light guide with ready-to-use disinfec-
tant wipes (e.g., CaviWipes™ based on the active
substances alcohols and quaternary compounds
(QAV)) or equivalent disinfection agents. Follow the
disinfection agent manufacturer’s directions for use,
observing in particular the contact times.
EThen rinse with water (drinking water quality as a
minimum) and dry with a soft, lint-free cloth.
Manual Cleaning and Disinfection the Light Guide
by Immersion Bath
Manual Cleaning
EA neutral enzymatic cleaning agent is recommend-
ed (e.g., Cidezyme/Enzol from Johnson & John-
son).
EPlace the light guide for the specified application
time into the solution, making sure that it is com-
pletely covered.
ECleaning takes place in the immersion bath with a
soft brush for at least 5 minutes.
EThen remove the light guide from the solution, thor-
oughly rinse with low-germ-count water (drinking
water quality as a minimum), and dry with a lint-free
cloth.
Manual Disinfection (High Level Disinfection)
EA disinfecting agent containing o-Phthalaldehyde
(e.g., Cidex OPA by Johnson & Johnson) is recom-
mended. It is compatible with the light-curing de-
vice.
ETo disinfect, place the cleaned light guide for the
specified application time (≥ 12 min) into the solu-
tion, making sure that it is completely covered.
EThe instruments in the disinfection bath must not
touch each other during this process.
Cleaning
steps Parameters
Pre-rinse Temperature: 10 ° ± 2 °C
Time: 1 min
Cleaning
Cleaning temperature: 45 ° ± 2 °C
Time: 5 min
Cleaning solution: Thermosept
RKN-zym
Concentration: 0.3% (3 ml/l)
Final rinse Temperature: 10 ° ± 2 °C
Time: 2 min
Thermal
disinfection
Temperature 90 ° ± 2 °C
Time: 5 min

SEITE 11
-
148 x 210 mm
-
44000118156/02
-
SCHWARZ
-
20-115 (kn)
11
ENGLISH
en
EThen remove the light guide from the solution, thor-
oughly rinse with low-germ-count water (drinking
water quality as a minimum) for at least 3 minutes,
and dry with a lint-free cloth.
EThen check the light guide (see “Check”).
1Cleaning agent Thermosept RKN-zym (Schülke &
Mayr) for the washer-disinfector and Cidezyme®/
Enzol®and CaviWipes™ were used for manual
cleaning.
2Cidex OPA, ready-for-use solution, was used for vali-
dation of the high level disinfection and CaviWipes™
for validation of intermediate level disinfection.
Packaging for Sterilization
Package the light guide in single wrapped sterilization
pouches (one-way packaging or double packaging).
Sterilization
Effective cleaning and disinfection are absolutely es-
sential requirements for effective sterilization.
A fractionated vacuum procedure (at least 3 vacuum
stages) or a gravity procedure (with adequate product
drying) must be used for the sterilization. The use of
the less effective gravity procedure is permissible sole-
ly if the fractionated vacuum procedure is unavailable.
The user is solely responsible for selection of the pa-
rameters required for the gravity procedure; the user
must therefore calculate or validate these parameters
in accordance with the loading configuration. The dry-
ing time actually required is also directly dependent on
parameters that are in the sole responsibility of the us-
er (loading configuration and density, sterilizer condi-
tion, etc.) and must consequently be determined by
the user.
• Steam sterilizer in conformity with DIN EN
13060/DIN EN 285 or ANSI AAMI ST79 (for USA:
FDA clearance)
• Maximum sterilization temperature 135 °C (275 °F)
• The following cycles were validated for the light
guide:
Check
Before using the light guide again, check it for dam-
aged surfaces, discoloration, and contamination; do
not use damaged light guides. If the light guide is still
contaminated, repeat all reprocessing steps.
Cleaning and Disinfecting Charger, Handpiece and
Glare Shield
• Cleaning and disinfecting solutions must not enter
the unit.
• Wipe the surfaces with ready-to-use disinfectant
wipes* (e.g., CaviWipes™ based on the active sub-
stances alcohols and quaternary compounds (QAV)
or equivalent disinfection agents). Subsequently in-
spect the surfaces for visible impurities. If any impu-
rities are visible, repeat the cleaning procedure.
• Do not use solvents or scouring agents, as they
may damage the device components.
• Wipe the device surfaces with a tuberculocidal dis-
infectant wipe* for disinfection and keep it wet ac-
cording to the disinfection agent manufacturer’s di-
rections for use, particularly observing the contact
time.
• Disinfectants must not be sprayed directly onto the
device surface.
• Wipe the device surfaces with a soft cloth moist-
ened with water (drinking water quality as a mini-
mum) and dry with a soft, lint-free cloth. If you do
not rinse well with water, the components will be
damaged.
• If necessary, ask the manufacturer of the disinfec-
tant if its constant use will damage plastic surfaces.
Clean the glare shield with a soft and fluff-free cloth.
Beware of scratches!
Ensure that the charge contact pins stay dry and are
not touched by any metallic or greasy parts. Dry up
necessarily damp contact pins. Do not bend the
charge contact pins during drying. Damp charge con-
tact pins cause an operating error (malfunction mes-
sage: the LED showing the operating status of the
charger glows red steadily).
*CaviWipes™, Metrex, were used for the validation of
the cleaning and disinfection procedure.
Fractional
prevacuum Gravity
displacement
Tempera-
ture 132 °C
(270 °F) 134 °C
(273 °F) 121 °C
(250 °F)
Sterilization
time 4 min 3 min 20 min
Drying time 30 min 30 min 30 min

SEITE 12
-
148 x 210 mm
-
44000118156/02
-
SCHWARZ
-
20-115 (kn)
12
Storage of the Handpiece during Extended Periods
of Non-Use
EIf the handpiece is not to be used for an extended
period of time
-
e.g., during vacation
-
fully charge
the battery prior to departure or keep the handpiece
inserted in the operational charger. A safety switch
within the battery prevents a total discharge.
EDischarged or nearly discharged batteries must be
recharged as soon as possible.
Return of Old Electric and
Electronic Equipment for Disposal
Collection
Users of electric and electronic equipment are required
to collect their old equipment separately from other
waste in accordance with the regulations of the specific
country. Old electric and electronic equipment must not
be disposed of with unsorted household waste.This
separate collection is a prerequisite for recycling and
reprocessing as an important method for preserving
environmental resources.
Return and Collection Systems
When your Elipar DeepCure-S is no longer usable,
do not dispose of the device with household waste.
3M Deutschland GmbH has set up special disposal
facilities to handle the equipment. Details about the
procedure for the specific country can be obtained
from the pertinent 3M subsidiary.
Customer Information
No person is authorized to provide any information
that deviates from the information provided in this
instruction sheet.
Warranty
3M Deutschland GmbH warrants this product will
be free from defects in material and manufacture.
3M Deutschland GmbH MAKES NO OTHER
WARRANTIES INCLUDING ANY IMPLIED
WARRANTY OF MERCHANTABILITY OR FITNESS
FOR A PARTICULAR PURPOSE. User is responsible
for determining the suitability of the product for
user’s application. If this product is defective within
the warranty period, your exclusive remedy and
3M Deutschland GmbH’s sole obligation shall be
repair or replacement of the 3M Deutschland GmbH
product.
Limitation of Liability
Except where prohibited by law, 3M Deutschland GmbH
will not be liable for any loss or damage arising from
this product, whether direct, indirect, special, incidental
or consequential, regardless of the theory asserted,
including warranty, contract, negligence, or strict liability.

SEITE 13
-
148 x 210 mm
-
44000118156/02
-
SCHWARZ
-
20-115 (kn)
13
ENGLISH
en
Symbol Glossary
Information valid as of August 2020
Reference Number
and Symbol Title Symbol Description of Symbol
ISO 15223-1
5.1.1
Manufacturer
Indicates the medical device
manufacturer as defined in EU
Directives 90/385/EEC,
93/42/EEC and 98/79/EC.
ISO 15223-1
5.1.3
Date of Manufacture
Indicates the date when the
medical device was manufac-
tured.
ISO 15223-1
5.1.5
Batch code
Indicates the manufacturer's
batch code so that the batch or
lot can be identified.
ISO 15223-1
5.1.6
Catalogue number
Indicates the manufacturer's
catalogue number so that the
medical device can be identi-
fied.
ISO 15223-1
5.1.7
Serial number
Indicates the manufacturer's
serial number so that a specific
medical device can be identi-
fied.
ISO 15223-1
5.3.7
Temperature limit
Indicates the temperature limits
to which the medical device can
be safely exposed.
ISO 15223-1
5.3.8
Humidity limitation
Indicates the range of humidity
to which the medical device can
be safely exposed.
ISO 15223-1
5.3.9
Atmospheric
pressure limitation
Indicates the range of atmo-
spheric pressure to which the
medical device can be safely
exposed.
ISO 15223-1
5.4.4
Caution
Indicates the need for the user to
consult the instructions for use
for important cautionary informa-
tion such as warnings and pre-
cautions that cannot, for a vari-
ety of reasons, be presented on
the medical device itself.
CE Mark
Indicates conformity to Euro-
pean Union Medical Device
Regulation or Directive.
Medical Device
Indicates the item is a medical
device.
Follow instructions
for use
To signify that the instructions
for use must be followed.
Reference Number
and Symbol Title Symbol Description of Symbol
Rx Only Indicates that U.S. Federal Law
restricts this device to sale by or
on the order of a dental profes-
sional. 21 Code of Federal
Regulations (CFR) sec.
801.109(b)(1).
Type B applied part To identify a type B applied part
complying with IEC 60601-1.
Class II equipment
To identify equipment meeting
the safety requirements for
Class II equipment per IEC
61140.
Use Indoors
Indicates medical device be
used indoors
Battery
Battery power level.
PAP 20/21
Indicates paper material is
recyclable.
Recycle electronic
equipment DO NOT throw this unit into a
municipal trash bin when this
unit has reached the end of its
lifetime. Please recycle.
Green Dot Indicates a financial contribu-
tion to national packaging re-
covery company per European
Directive No. 94/62 and corre-
sponding national law. Packag-
ing Recovery Organization Eu-
rope.

SEITE 14
-
148 x 210 mm
-
44000118156/02
-
SCHWARZ
-
20-115 (kn)
14

SEITE 15
-
148 x 210 mm
-
44000118156/02
-
SCHWARZ
-
20-115 (kn)
15
ru
РУССКИЙ
Elipar™DeepCure-S
Светодиодное устройство для
фотополимеризации
стоматологических материалов
ru
Безопасность
ВНИМАНИЕ!
Перед тем как начать использование устройства,
внимательно прочтите эту инструкцию!
Как илюбой другой электротехнический прибор, это
устройство будет работать надёжно ибезопасно
только при соблюдении как общих правил техники
безопасности, так испецифических инструкций по
безопасности, представленных вданной инструкции
по эксплуатации.
1. Пользоваться устройством разрешается только
профессионалы всоответствии сприведенной
ниже инструкцией. Производитель не несет ника-
кой ответственности за вред здоровью иимуще-
ству, возникший вследствие использования
данного устройства не по назначению.
2. Перед тем как включить устройство впервый раз,
убедитесь, что указанное на табличке стехниче-
скими данными рабочее напряжение совместимо
симеющимся напряжением сети. Использование
устройства при другом напряжении может приве-
сти кего поломке.
3. Разместить устройство так, чтобы влюбой мо-
мент имелся доступ кэлектрической вилке. Элек-
трическая вилка используется для включения и
выключения зарядного устройства. Для того что-
бы отключить зарядное устройство от питающей
сети, выньте электрическую вилку из электриче-
ской розетки.
4. Использовать только идущую вкомплекте сустрой-
ством зарядку компании 3M. Использование какого-
либо другого зарядного устройства может приве-
сти кповреждению аккумуляторной батареи.
5. Elipar DeepCure-S разрешается эксплуатировать
только сидущей вкомплекте батареей или ориги-
нальными запасными батареями фирмы 3M для
Elipar DeepCure-S. Использование других батарей
может ухудшить производительность или привести
кповреждению устройства.
6. ВНИМАНИЕ! Не смотреть непосредственно на
источник света. Существует опасность причине-
ния вреда глазам. Ограничить зону, защитить
пациента ипользователя от отраженного иинтен-
сивного рассеянного света
путем принятия соот-
ветствующих мер (например,
антибликовый щи-
ток, очки или покрытия).
7. ПРЕДУПРЕЖДЕНИЕ! Так же, как идля всех вы-
сокоинтенсивных светополимеризирующих
устройств, высокая интенсивность света
сопро-
вождается тепловыделением на облучаемой
по-
верхности. Это тепло вслучае длительного воз-
действия вблизи пульпы или мягких тканей может
Содержание Страница
Безопасность 15
Описание изделия 17
Показания 18
Технические данные 18
Зарядное устройство 18
Ручной блок 18
Зарядное устройство иручной блок 18
Условия перевозки ихранения 18
Ввод устройства вэксплуатацию 19
Заводские настройки 19
Начальные шаги 19
Зарядное устройство 19
Световод/Ручной блок 19
Установка аккумулятора 19
Зарядка аккумулятора 19
Индикатор рабочего состояния
зарядного устройства 20
Индикатор уровня мощности ручного блока 20
Работа 20
Выбор времени полимеризации 20
Включение ивыключение излучения 21
Позиционирование световода 21
Извлечение иустановка световода
вручном блоке 21
Измерение интенсивности света 21
Рекомендуемая техника отверждения с
адгезивами фирмы 3M 22
Дежурный режим 22
Звуковые сигналы – ручной блок 22
Поиск иустранение неисправностей 23
Техническое обслуживание иуход 24
Установка/удаление аккумулятора 24
Уход за ручным блоком/аккумулятором 24
Обработка световода 25
Очистка идезинфекция зарядного
устройства, ручного блока изащитного
щитка 27
Хранение ручного блока во время
длительных нерабочих периодов 28
Возврат электрических иэлектронных
отслуживших свой срок приборов на
утилизацию 28
Сбор 28
Системы возврата исбора 28
Информация для покупателя 28
Гарантийные обязательства 28
Ограничение ответственности 29
Пояснение условных обозначений 29

SEITE 16
-
148 x 210 mm
-
44000118156/02
-
SCHWARZ
-
20-115 (kn)
16
13. Открывать ипроизводить ремонт устройства
может только сервисный центр, уполномочен-
ный
компанией 3M Deutschland GmbH.
14. ВНИМАНИЕ: Запрещается внесение изменений
вданное устройство без получения на то разре-
шения производителя.
15. Лица судаленной катарактой могут проявлять
частичную чувствительность кизлучению све-
та и, поэтому, не должны допускаться клече-
нию спомощью Elipar DeepCure-S без необхо-
димых мер безопасности, как, например,
защитные очки для устранения голубого света.
16. Лица, имеющие ванамнезе болезни сетчатки,
перед началом лечения должны предоставить
заключение от своего офтальмолога. Используя
Elipar DeepCure-S на таких группах больных,
следует особо тщательно придерживаться всех
мер безопасности (вт.ч. пользоваться
соответствующими светофильтрирующими
защитными очками).
17.
Это устройство было разработано ипроверено в
соответствии ссоответствующими положения-
ми
истандартами по ЭМС. Оно соответствует
всем требованиям закона. Если такие факторы
как электропитание, электропроводка иусло-
вия окружающей среды на месте работы могут
повлиять на характеристики ЭМС устройства,
то,
возможно, что при неблагоприятных усло-
виях невозможно полностью исключить нару-
шения
ЭМС. Вслучае обнаружения неполадок в
работе
данного или других устройств необходи-
мо переставить устройство вдругое место.
Декларация производителя по ЭМС приведена
вприложении.
18.
ВНИМАНИЕ! Портативные высокочастотные
устройства связи, включая их принадлежности,
должны находиться на расстоянии не менее 30
см от Elipar DeepCure-S. Впротивном случае ра-
бочие характеристики устройства могут быть за-
нижены.
19. Перед каждым использованием устройства убе-
дитесь, что интенсивность излучаемого
света
достаточна для успешной полимеризации.
Для
этого проверьте чистоту световода икрепления
световода. Вслучае необходимости можно про-
извести очистку световода икрепления свето-
вода, как описано вглаве «Техническое обслу-
живание иуход»(смотрите также раздел
«Измерение интенсивности света»).
Осерьезных инцидентах сизделием сообщайте
компании 3Миместному компетентному органу
(ЕС) или местному органу государственного регу-
лирования иконтроля.
привести ких необратимому поражению. Во из-
бежание такого поражения необходимо вточ-
ности соблюдать время облучения, указанное в
инструкции по эксплуатации производителя.
Необходимо строго избегать превышение
20 се-
кундного непрерывного времени облучения
на
одной поверхности зуба инепосредственного
контакта со слизистой оболочкой полости рта
или кожей. Работающие вэтой области ученые
пришли квыводу, что вызываемое во время
светоотверждения тепловыделением раздра-
жение можно свести кминимуму, приняв две
простые меры предосторожности:
Oполимеризация свнешним охлаждением по-
током воздуха
Oполимеризация спрерывистыми временными
интервалами (например, 2 облучения по 10
секунд каждое вместо 1 облучения продол-
жительностью 20 секунд).
8. Elipar DeepCure-S может эксплуатироваться толь-
ко сидущим вкомплекте световодом или ориги-
нальным световодом 3M из комплекта запчастей
ипринадлежностей. Световод должен рассмат-
риваться как рабочая часть устройства. Исполь-
зование других световодов может привести к
уменьшению или увеличению интенсивности све-
та. Вгарантию изделия не входят какие-либо по-
вреждения, возникшие врезультате использова-
ния световодов других производителей.
9. При замене поврежденных элементов исполь-
зовать исключительно оригинальные
части
фирмы-производителя 3M, согласно
данной ин-
струкции по эксплуатации. Вгарантию
изделия
не входят какие-либо повреждения, возникшие
врезультате использования запасных частей
других производителей.
10. Вслучае возникновения каких-либо подозрений
вбезопасности устройства необходимо его вы-
ключить иустановитьтабличку во избежание
его эксплуатации другими лицами. Безопасность
может оказаться под угрозой, если устройство,
например, функционирует неправильно или
имеет внешние признаки повреждений.
11. Устанавливать устройство подальше от раство-
рителей, легковоспламеняющихся жидкостей, а
также источников сильного нагревания, так как
это может разрушить пластмассовый корпус за-
рядного устройства иповредить рабочие кнопки.
12. Не позволять моющим средствам проникать в
устройство, так как это может привести кко-
роткому замыканию устройства или
потенци-
ально опасному нарушению нормальной
работы.

SEITE 17
-
148 x 210 mm
-
44000118156/02
-
SCHWARZ
-
20-115 (kn)
17
ru
Описание изделия
Elipar DeepCure-S представляет собой источник
вы-
сокоинтенсивного света СИД для полимеризации
стоматологических материалов. Устройство состоит
из зарядного устройства ибеспроводного ручного
блока, питаемого от аккумуляторной батареи.
Устройство представляет собой медицинское элек-
трическое устройство всоответствии сIEC 60601-1
идоступно вкачестве устройства
настольного ти-
па. Настенный монтаж невозможен.
По сравнению собычными светополимеризирую-
щими устройствами Elipar DeepCure-S отличается
великолепной коллимацией луча иоднородным про-
филем луча, направляющим больше световой энер-
гии на полимеризуемую реставрацию иосуществ-
ляющим глубокое, однородное иполное
отверждение реставрации.
Источником света вустройстве служит высоко-
производительный светоизлучающий диод (СИД).
Испускаемый устройством луч имеетдлину волны в
диапазоне от 430 до 480 нм
(соответствующий диа-
пазон, например, для изделий
из камфарахинона) и
наиболее эффективен для использования со свето-
отверждаемыми стоматологическими материала-
ми, включая материалы для пломб, виниров, над-
строек культи, фиссурных герметиков, временных
реставраций ицементов для непрямых реставра-
ций.
Информацию онеобходимом времени полимериза-
ции для определенного стоматологического мате-
риала см. винструкции по применению производи-
теля.
Устанавливаемое время полимеризации:
O5, 10, 15, 20 сек
OНепрерывный режим (120 сек)
OФункция прерывистой полимеризации
(tack cure, 1 сек)
Зарядное устройство оборудовано встроенным
фотометром для измерения интенсивности света
Elipar DeepCure-S.
Устройство поставляется со световодом
диаметром
10 мм. Запрещается использовать
светодиоды других устройств.
Уручного блока для уменьшения
энергопотребления имеется дежурный режим.
Ручной блок переключается вдежурный режим,
как только он помещается взарядное устройство
или не используется втечение около 5 минут, не
находясь взарядном устройстве.
+Данную инструкцию по применению следует
хранить на протяжении всего периода исполь-
зования продукта. Изделие разрешено кис-
пользованию только, если маркировка изде-
лия хорошо читаема. Вотношении всех других
упомянутых продуктов, пожалуйста, обращай-
тесь ксоответствующей инструкции по приме-
нению.
Предполагаемая область применения
Предполагаемая область применения: устройство
фотополимеризации для светоотверждаемых сто-
матологических материалов.
Предполагаемые пользователи: квалифицирован-
ные стоматологи, обладающие теоретическими и
практическими знаниями по использованию сто-
матологической продукции.
Целевая группа пациентов: все пациенты, нуж-
дающиеся встоматологическом лечении, за ис-
ключением тех пациентов, для которых имеются
ограничения на использование продукта.
Клиническая польза: вызывает реакцию полиме-
ризации светоотверждаемых стоматологических
материалов.
Показания
O
Полимеризация стоматологических материалов,
чувствительных кдиапазону длины волны
430–480 нм.
Световод
Ручной блок
Зарядное устройство
Сетевой шнур
Защитный щиток

SEITE 18
-
148 x 210 mm
-
44000118156/02
-
SCHWARZ
-
20-115 (kn)
18
– Большинство светоотверждаемых
стоматологических материалов отвечают на
этот диапазон волн. Вслучае сомнений, по-
жалуйста, свяжитесь ссоответствующим
производителем.
Противопоказания
Не применяйте Elipar DeepCure-S на пациентах,
подверженных фотобиологическим реакциям
(включая тех, кто подвержен аллергии на солнце
или эритропоэтической протопорфирии), или тех,
кто внастоящий момент находится под действием
фотосенсибилизирующих медикаментов (включая
8-метоксипсорален или диметилхлоротетрацик-
лин).
Потенциальные нежелательные побочные
эффекты иосложнения
Выделение тепла может привести кповреждению
пульпы или тканей. Воздействие света при отсут-
ствии защиты может привести кповреждению
глаз.
Для обеспечения правильного обращения обрати-
тесь кразделу «Безопасность».
Технические данные
Зарядное устройство
Рабочее напряжение: 100–127 В50/60 Гц
230 В50/60 Гц
(см. заводскую табличку,
где напряжение указано
заводом-изготовителем)
Номинальная мощность:
0,08 A (230 B)
0,16 A (100–127 В)
Размеры: Длина: 170 мм
Ширина: 95 мм
Высота: 50 мм
Вес: 650 г
Классификация: степень защиты II,
Ручной блок
Электропитание: ионно-литиевая
аккумуляторная батарея,
номинальное напряжение
3,7 В
Пригодный для
использования диапазон
длины волны: 430–480 нм
Пик длины волны: 444–452 нм
Интенсивность света
(между 400 и515 нм): 1470 мВт/см2–10%/+20%
(взависимости от уровня
мощности аккумуляторной
батареи)
Область светового
излучения: 60–65 мм2
(оптически активно)
Переменный режим
работы: Устройство было
разработано
исключительно для
краткосрочной работы.
Обычное время работы
при комнатной
температуре (23 °C): 7 мин,
при температуре
окружающей среды 40 °C:
1 минута вкл., 15 минут
выкл. (время охлаждения)
Общее время облучения
сновой, полностью
заряженной аккумуляторной
батареей: обычно 120 мин.
Размеры: Диаметр: 28 мм
Длина: 270 мм
Вес: 250 г(включая световод)
Зарядное устройство иручной блок
Время, необходимое для
заряда пустой
аккумуляторной батареи: прим.1,5 ч
Рабочая температура: 10 °C до 40 °C /
59 °F до 104 °F
Относительная
влажность воздуха: 30% до 75%
Атмосферное давление: 700 до 1060 гПа
Общая высота ручного
блока, поставленного в
зарядное устройство: 180 мм
Год изготовления: см. заводскую табличку
Условия перевозки ихранения:
Диапазон температуры
окружающей среды:
-
20 °C до +40 °C /
-
4 °F до +104 °F
+40°C
+104°F
–20°C
–4°F
Table of contents
Languages:
Other 3M Dental Equipment manuals
Popular Dental Equipment manuals by other brands

Durr Dental
Durr Dental VistaScan Perio Plus Installation and operating instructions

DentaSonic
DentaSonic IPR-EVO manual

Nevadent
Nevadent SMD 24 A1 Operating instructions and safety instructions

KaVo
KaVo GENTLEray 982 Bleaching Operating instruction

Komet
Komet KomDrive user manual

Veloce
Veloce VLE15 instruction manual