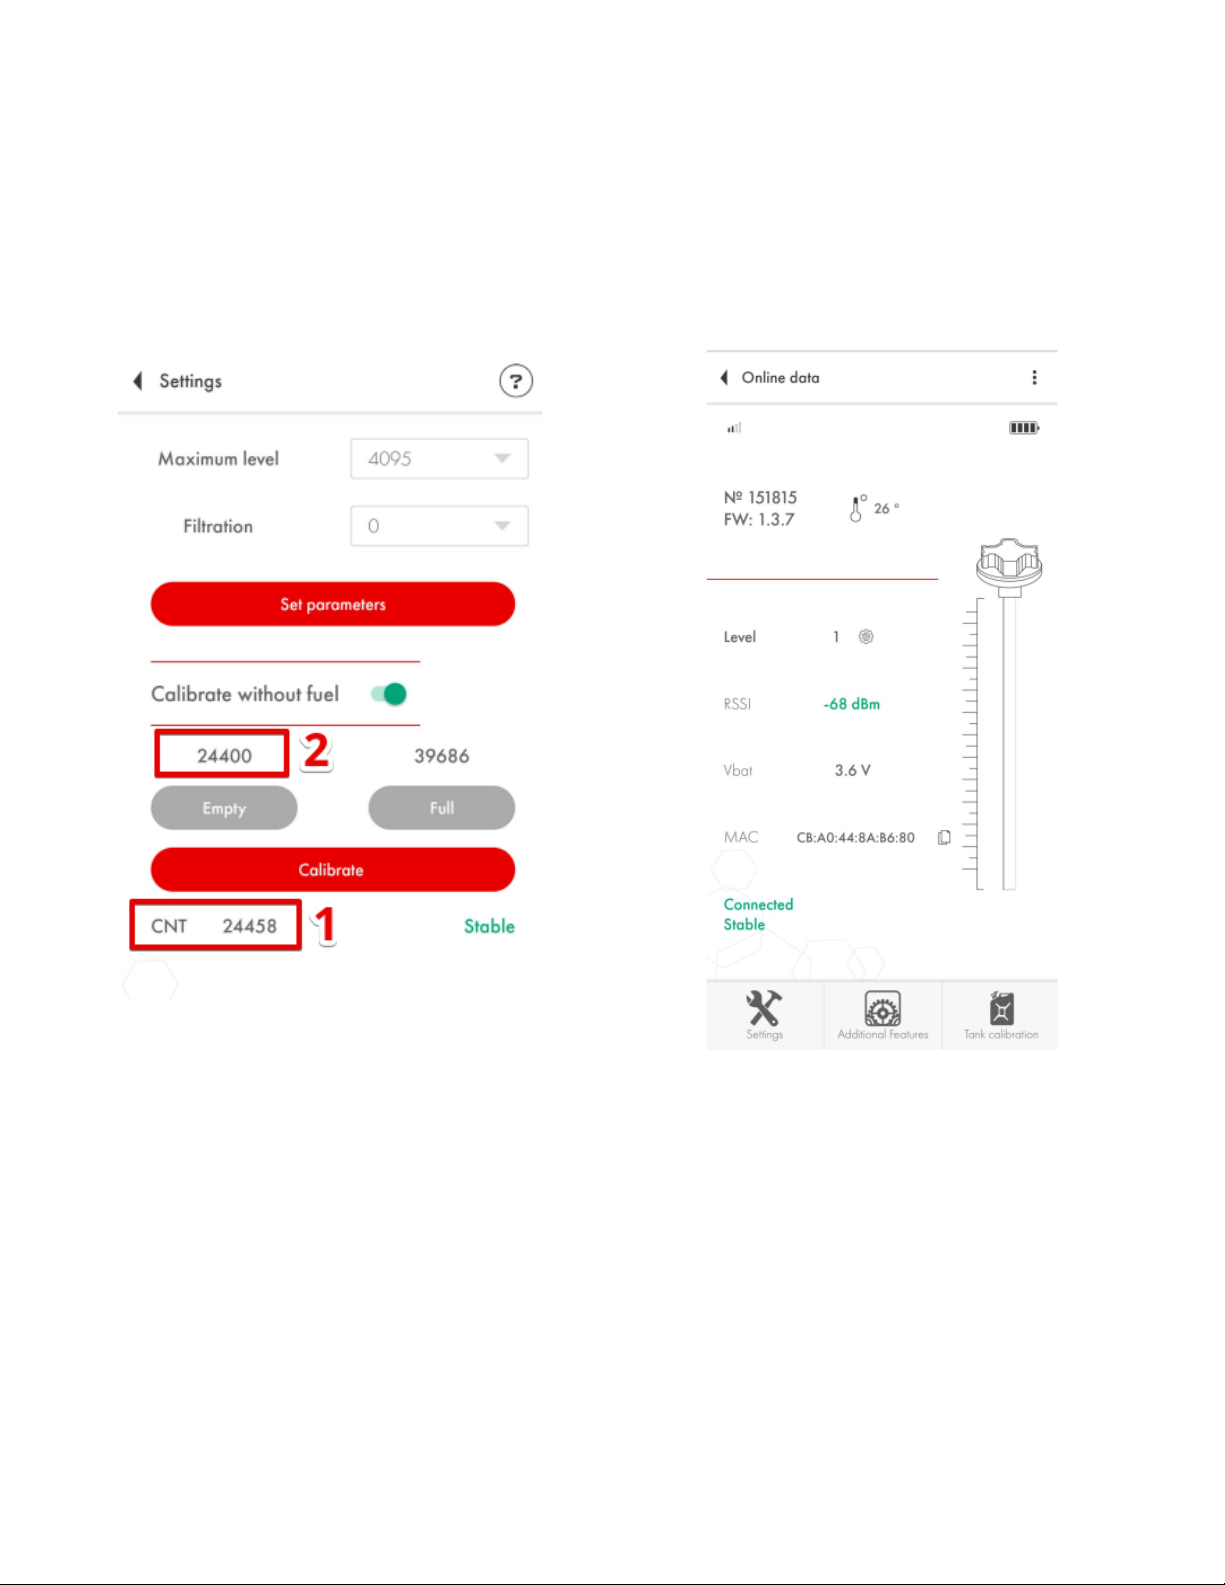
Sensor’s main parameters and readings
On the main screen of the sensor you can see the following parameters:
1) The serial number of the sensor
2) Version of the firmware (hereinafter - FW) installed on the sensor
3) The temperature measured by the sensor
4) The level reading - fuel level reading as a value from 1 to 1023 or from 1 to 4095 range; this is
not a reading in liters but more on that later
5) RSSI - Received Signal Strength Indicator that shows how well your smartphone receives the
data from the sensor; this parameter is NOT transmitted by the sensor but is calculated by the
device that receives the data from it;
6) Vbat or sensor’s battery charge (3.5V or more means that the battery is fully charged; 3.2V or
lower voltage means that the battery is discharged and has to be replaced);
7) The MAC address of the sensor is used to pair the sensor with the compatible trackers;
Fig. 6 Sensor’s main screen (Android)
Fig. 7 Sensor’s main screen (iOS)