manuals.online logo
Brands
  1. Home
  2. •
  3. Brands
  4. •
  5. Access Dinghies
  6. •
  7. Boat
  8. •
  9. Access Dinghies Liberty Use and care manual

Access Dinghies Liberty Use and care manual

Other Access Dinghies Boat manuals

Access Dinghies access 2.3 Use and care manual

Access Dinghies

Access Dinghies access 2.3 Use and care manual

Popular Boat manuals by other brands

Windworks 38' Catalina Reference notes

Windworks

Windworks 38' Catalina Reference notes

J 105 owner's manual

J

J 105 owner's manual

GELEX G500 light user manual

GELEX

GELEX G500 light user manual

Monterey Boats Sport Yacht 330 owner's manual

Monterey Boats

Monterey Boats Sport Yacht 330 owner's manual

PURSUIT OS 335 owner's manual

PURSUIT

PURSUIT OS 335 owner's manual

Boston Whaler CONQUEST 345 owner's manual

Boston Whaler

Boston Whaler CONQUEST 345 owner's manual

Jeanneau SUN ODYSSEY 41 DS owner's manual

Jeanneau

Jeanneau SUN ODYSSEY 41 DS owner's manual

Meridian 490 Pilothouse owner's manual

Meridian

Meridian 490 Pilothouse owner's manual

Advanced Elements AdvancedFrame Expedition AE1009 owner's manual

Advanced Elements

Advanced Elements AdvancedFrame Expedition AE1009 owner's manual

Robo Marine Indonesia GEOMAR user manual

Robo Marine Indonesia

Robo Marine Indonesia GEOMAR user manual

Swallow Boats BayRaider owner's manual

Swallow Boats

Swallow Boats BayRaider owner's manual

X SHORE EELEX 8000 owner's manual

X SHORE

X SHORE EELEX 8000 owner's manual

Crivit DINGHY Instructions for use

Crivit

Crivit DINGHY Instructions for use

Mercury Sport 220/240 manual

Mercury

Mercury Sport 220/240 manual

Marquis 720 FLY owner's guide

Marquis

Marquis 720 FLY owner's guide

Sportime Seestürmer user manual

Sportime

Sportime Seestürmer user manual

Sportime Seestürmer user manual

Sportime

Sportime Seestürmer user manual

Raymarine ST70 Instrument User reference handbook

Raymarine

Raymarine ST70 Instrument User reference handbook

manuals.online logo
manuals.online logoBrands
  • About & Mission
  • Contact us
  • Privacy Policy
  • Terms and Conditions

Copyright 2025 Manuals.Online. All Rights Reserved.

Page 1
Access Dinghies
LIBERTY
OPERATIONS &
SAFETY MANUAL
Page 2
Items included with your Liberty
1. Liberty 11. Foresail (Jib)
2. Main Mast 12. Bobbin
3. Fore Mast 13. Mainsheet
4. Boom 14. Outhaul
5. Centreboard 15. Traveller
6. Rudder s x 2 16. Painter
7. Rubber Box x 2 17. Jib Sheet with clew sheave
8. Rudder Box Pin x 2 18. Jib strut downhaul
9. Installed reefing system 19. Jib Strut and Claw
10. Mainsail 20. Boom vang
ITEMS WITH SERVO ASSIST
Installed: Plus:
main sheet winch Batteries x 2,
jib sheet winch Battery Y Connector,
helm winch Battery Charger (if 240V),
control box Controller
rubber bungs Controller holder
General info on Personal Floatation Devices (PFD’s)
There are many types and variety of buoyancy aids available, manufactured to different sets of stan-
dards. The PFD is a personal item of safety equipment, designed specifically to assist in preserving a
person’s life when in the water. Some PFD’s provides buoyancy to help you float with your head
above the water.
All sailors and volunteers should wear a PFD at all times whilst on, or near water.
PFD’s are subject to normal wear and tear. Each one should be checked regularly and if in doubt
about its serviceability it should be replaced. If they become wet from salt water they should be
hosed down with fresh water and allowed to dry.
PFDs and Children
A properly designed PFD of the correct size will keep a child’s mouth and nose clear of the water. A
child should be taught how to put on the device and should be allowed to try it out in the water. It is
important that the child feels comfortable and knows what the PFD is for and how it functions.
Liberty Specifications
Length 3.6 metres (12 ft)
Beam 1.35 metres (4’5”)
Draft 1 metre (3’6”)
Boat Weight 72 kg (160 lbs)
Centreboard Weight 72 kg (160 lbs)
Sail Plan Mainsail & free standing, self tacking Jib
Sail Area (total) 7.35 sq. m (79 sq.ft)
Mast 5.6 metre (18’4”)
Safe Working Load 120 kg + 30 kg luggage (264 lbs + 66 lbs luggage)
Page 3
PART ONE : LIBERTY SPECIAL FEATURES
1. The Liberty has 2 rudders which give direc-
tional control at even extreme angles of heel.
2. There is the option of
fitting a boom with a 3 part
manual mainsheet, rigged as
per the 303W, (fig 2)
or a 2 part double ended
mainsheet (fig 3), one end go-
ing to a servo assist sheet
winch and the other through
a conventional swivel/
deadeye/camcleat for manual
operation, (fig 4)
Both these ends pass through
a double block attached to
the boom about 400mm back
from the mast. (see fig 4)
3. A boom vang is fitted which prevents the
boom skying when running in fresh to strong
winds. (see fig 4)
Fig 1
Fig. 2
Fig. 3
Fig. 4
Page 4
4. The mainsail outhaul primarily cleats at the boom, (fig 5) but passes thru a deckeye
just behind the main mast, down to the console and turns through the boom vang/outhaul
double becket block and back to the central of the 3 clamcleats on the port side of the
console. (fig 6)
5. The jib is self tacking with a diagonal strut
between the clew and a claw at the mast which
holds the jib flat and prevents twisting as the
sheet is eased. (fig 7, view)
6. The jib sheet is 2 part which gives the option
of one end going to a servo assist winch and the
other down to the camcleat on the starboard side
of the consol for manual operation. (fig 8 shows
the jib sheet winch behind mast, jib sheet and cam-
cleat).
Fig. 5 Fig. 6
Fig. 7
Fig. 8
Page 5
7. The Liberty has a solid seat designed to take cushions and padding to suit individual
needs. The adjustable backrests are available in short and long versions. Thoracic sup-
ports, headrests and various types of seat belts are available. (fig 34 & 35)
If fig 34 is in B&W the yellow cross over shoulder straps will be hard to see.
PART TWO : RIGGING THE LIBERTY
1. STEPPING THE MAINMAST, FITTING THE BOOM.
1.1 With the sail rolled and tied up, bob-
bin in place tied to the tack of the sail (fig
9), carefully step the mainmast making sure
the foot is firmly in the step.
Fig. 34 Fig. 35
Fig. 9
Page 6
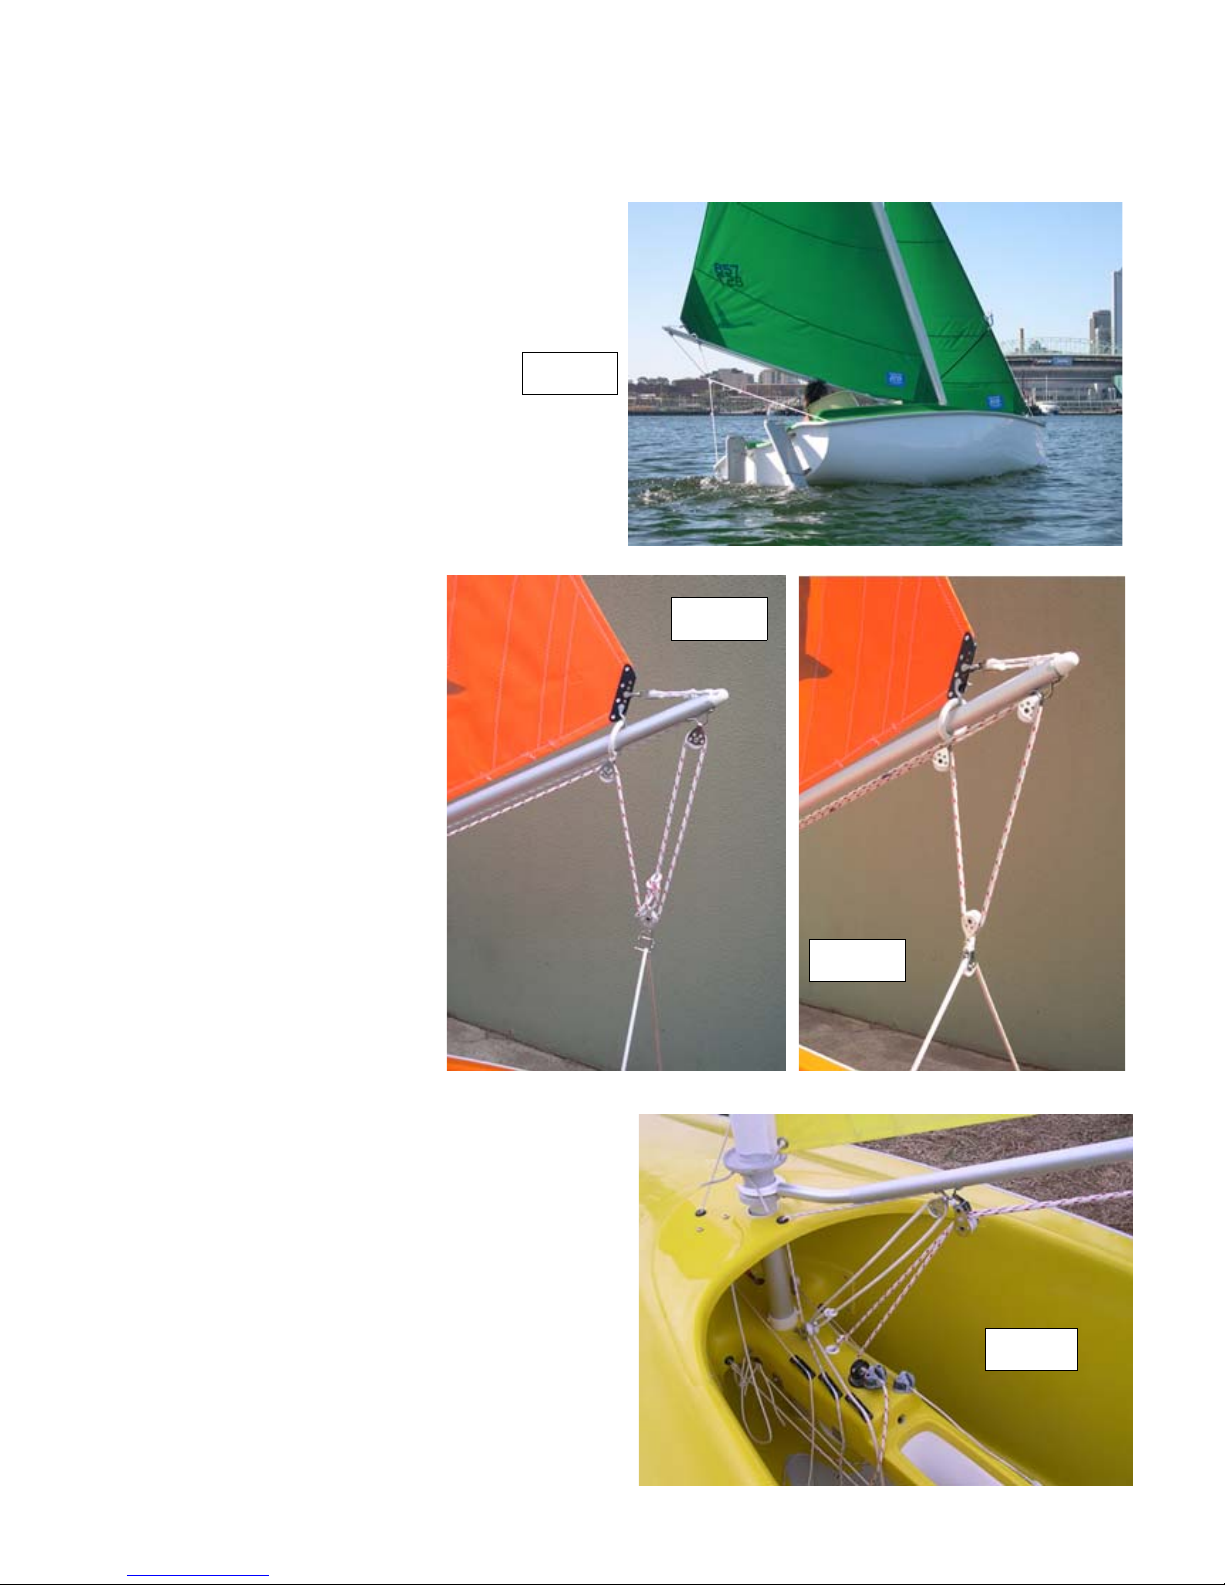
1.2 Take the boom, free its outhaul and
sheet, pull the outhaul block and traveling
ring as far forward as it will go, then
shackle the traveling ring onto the lowest
hole of the clew board, and shackle the
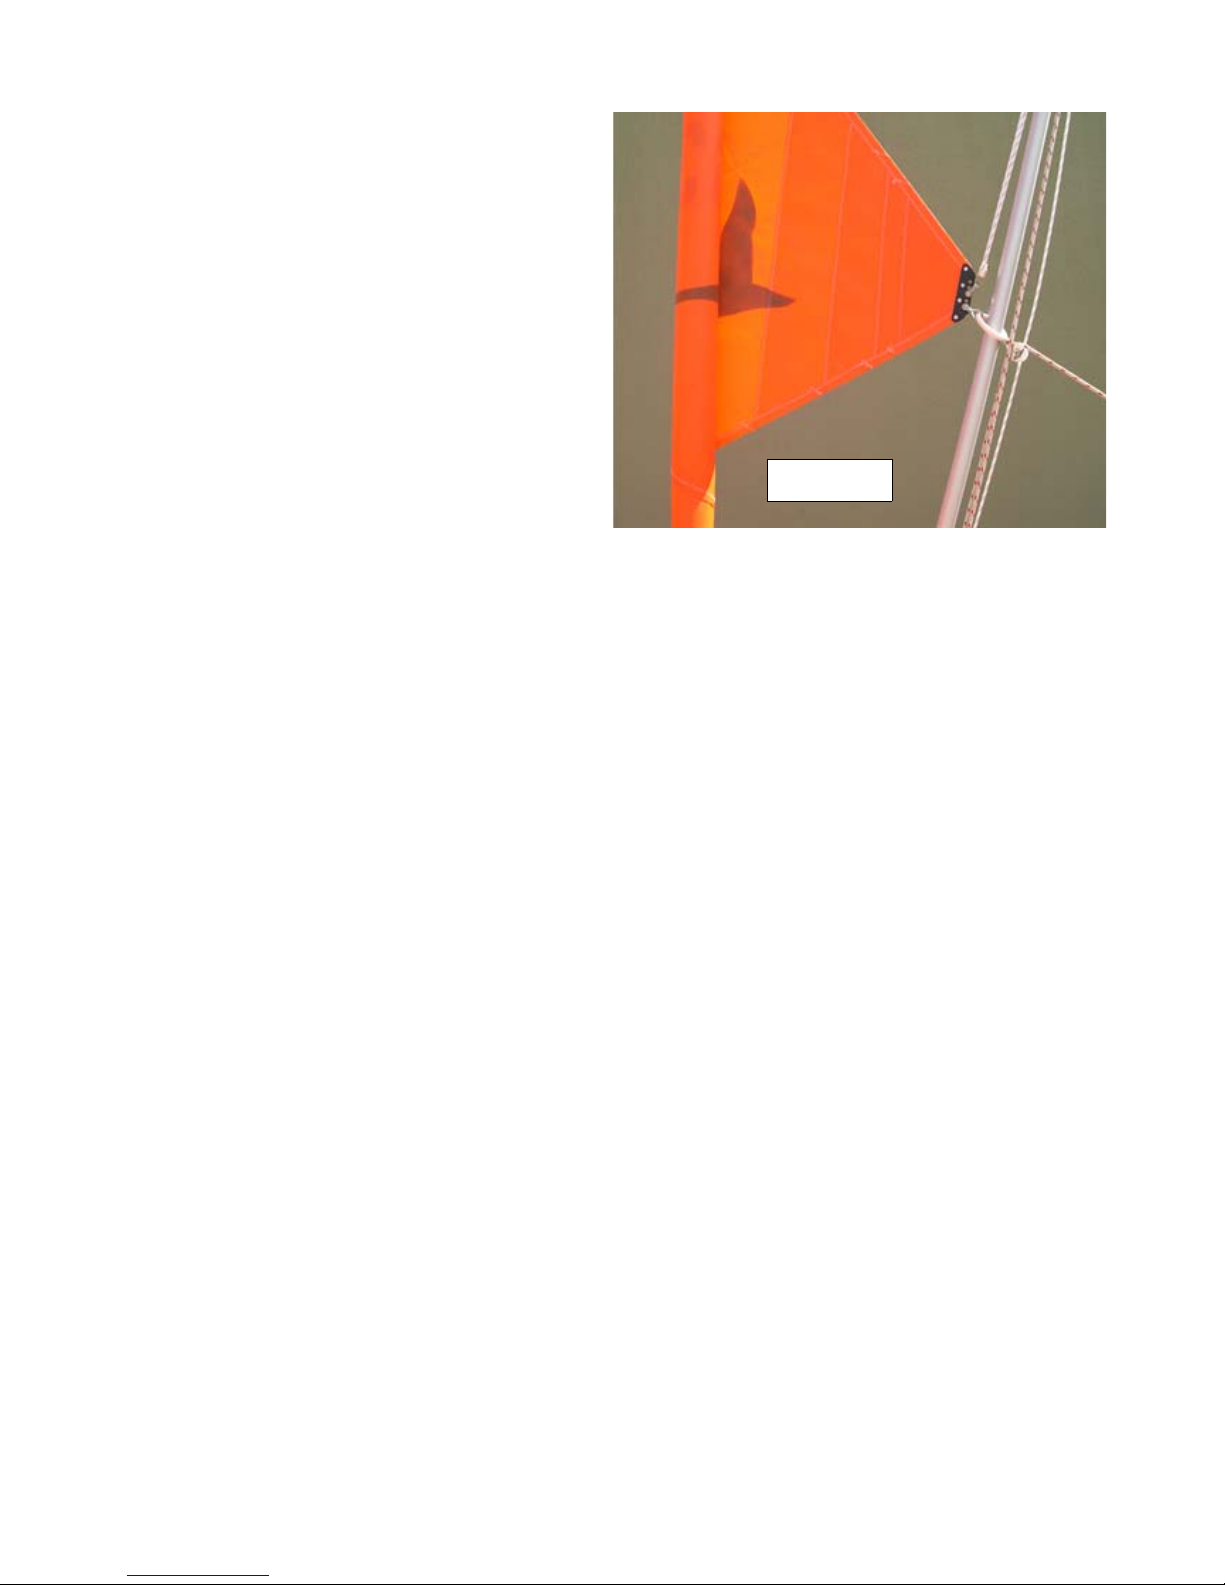
outhaul to the central hole of the clew
board. (fig 10)
1.3 Unroll the mainsail (about 5 turns) un-
til the rowlock at the front end of the
boom can be pushed onto the bobbin.
1.4 Then pull the sail out tight with the
outhaul. Cleat the outhaul on the boom.
(see fig 5—page 4)
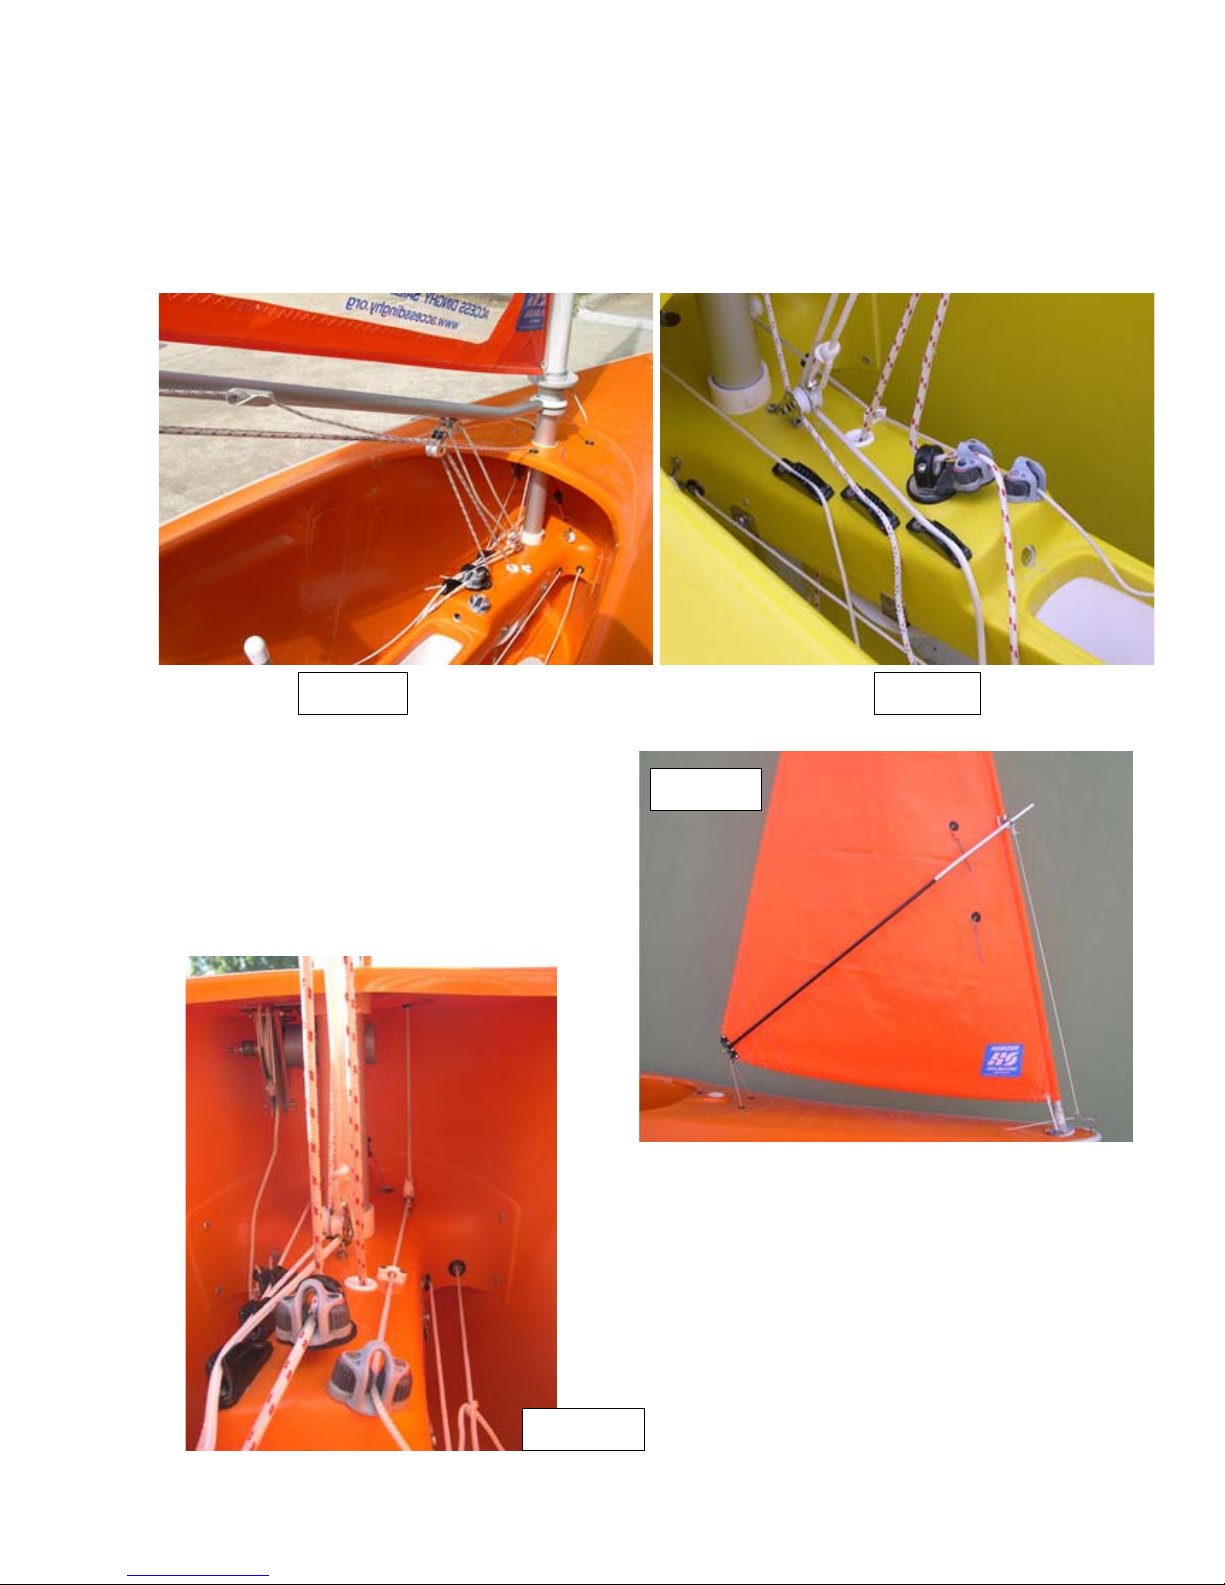
1.5 Run the outhaul through the deck eye in the cowling just aft of the main mast, down
through the deadeye on the console just aft of the mast, then back to the black clam cleat
on the console port side. Pull on the outhaul, but cleat it at the white clam cleat on the
starboard side of the boom. (see fig 4—page 3)
1.6 Pass the boom vang through its block on the boom and back through its block on the
console just aft of the mast and cleat it at the furthest aft of the 3 black clamcleats on the
port side of the console. Do not over tension the boom vang, it is there to prevent the
boom skying when running downwind in fresh to strong winds, not to flatten the mainsail
when going to windward. (see fig 4– page 3
1.7 If the boat is to be sailed manually, and has a 3 part sheet fitted to the boom, use the
following procedure.
a) Unravel the sheet, clear any twists and shackle its block onto the traveler and rig as per
fig 2—page 3.
b) Pass the live end of the sheet through the deadeye and camcleat on the console and tie
a figure of eight knot in its end.
1.8 If the boat is to be sailed servo assist and has the sheet on its winch and a bare boom,
unravel the mainsheet which comes up through the console from the sheet winch then:
(as per figs. 3 & 4—page 3)
a) pass its end through the right side of the double block on the boom,
b) then through the plastic guide ring half way along the boom,
c) then through the first of the blocks towards the end of the boom,
d) then down and through the block on the traveler,
e) then back up and through the block at the end of the boom,
f) then again through the plastic guide ring, and then through the right side of the
double block,
g) and then down through the fairlead and cam cleat on the centre of the console.
h) tie a stopper knot in its end. If there was not enough rope for this operation
set up the servo assist electrics and feed out sufficient rope. (see 3.1 on page 9)
Fig. 10
Page 7
1.9 Rotate the mast to fully unroll the sail, haul in on the outhaul and cleat it, pull the
starboard reefing line till its knot is as far as it will go on the port side, then tighten the
reefing drum clamp. (the reefing drum clamp is under the console and as per fig 11). If full
sail is not needed at this time release the outhaul and pull the port side reefing line till its
knot stops stops at the starboard side, cleat the reefing line on the port side aft of the
console, then haul on and cleat the outhaul. (fig 12, reefing lines)
2. STEPPING THE FOREMAST.
2.1 Before stepping the mast, unroll the
sail, fit the claw and strut, then attach the
strut to the claw with the stainless steel
spring hook.
(as per fig. 7– page 4; fig. 9—page 5 &
fig. 13)
Fig. 11 Fig. 12
Fig. 13
Page 8
2.2 At the bow pull the port side jib reef-
ing line till its knot is at its stop hard up
on the port side of the console in the
cockpit. (see fig 12– page 7, reefing lines)
2.3 Unhook the jib reefing line tension
shock cord hook (located on back bulk-
head behind the seat) and set up the reef-
ing line in a loop to complete a full turn
around the foremast reefing drum. (fig 14,
view of loop)
2.4 Step the mast, fit the reefing line and
re-tension the shockcord. (fig 15)
2.5 Presuming the jib sheet block is shackled to the bottom hole of the clewboard, feed
the sheet through the block and down through the deckeye to the turning block, then
thru the deadeye and the cam cleat, then tie a stopper knot in its end. (see fig. 8—page 4
& fig. 9—page 5).
2.6 At the bow is the Jib Strut Downhaul, free it and attach its plastic hook to the lug on
the front of the claw. (fig 13—page 7).
2.6 Pull in on the downhaul (located on the left side of the console) and cleat it on most
forward of the 2 black (3 on 2004 Worlds model) clamcleats. (fig 6 on page 4)
2.7 Check the manual operation of the jib sheet located at the cam cleat on the right side
of the console.
Fig. 14
Fig. 15
Page 9
2.8 To furl the jib, remove the strut, unhook the
downhaul, slide the claw to the base of the mast
then pull the port jib reefing line to completely roll
up the sail. (fig 16)
If fig. 16 is in B&W it may be hard to see the orange
sails rolled around the mast.
2.9 Its OK to roll 1 to 3 turns on the foremast to
reef for strong winds, but for furling do as per 2.8.
3. SETTING UP MAIN & JIB SHEETS.
3.1 If sheet winches are fitted and the boat is to be sailed manually, it will be necessary to
run all but about half a metre of sheet out of the winches to leave all the sheet available
for manual operation. Read carefully below (3.2 to 3.8) and PART THREE for an under-
standing of the Servo Assist System.
3.2 Presuming the boat is servo assist
equipped it will be necessary to set up
the main and jib sheet winches to
work in sync. Commence by installing
the batteries and connecting the joy-
stick. (fig 17 showing battery with Y
connector going forward around front
of the centreboard case to second bat-
tery).
See fig 26 on page 10 for a typical joy-
stick controller. Plug the joystick into
the 9 way yellow connector on the
lead below the helm winch drum be-
hind the seat starboard side.
(fig 21 on page 13)
3.3 On the joystick box is a push button switch (Main Only Switch or MO Switch) which
disconnects the jib sheet winch to allow the main sheet to be fine tuned independently. A
red light is on when the MO Switch is activated. Press the button again to operate both
winches together. This function can be used to set up the sheets so both main and jib are
correctly set for windward work.
Fig. 16
Fig. 17
Page 10
3.4 Both main and jib sheets are double ended, one end going to a servo assist winch, the
other to a cleat for manual operation. When sailing servo assist both sheets should be
cleated with about half a metre free outside the cleat. There should be a stopper knot in
the end of the sheet outside the camcleats. (see fig 4—page 3, figs. 5 & 6 —page 4)
3.4 Presuming the servo assist gear is
installed correctly with battery and
joystick attached, wind in on both
sheets (pull joystick back) until either
main or jib is in hard enough to simu-
late being hard on the wind. Be care-
ful not to over sheet either sail. (fig
17– page 9, battery with “Y” connec-
tor & fig 26 typical joystick).
3.5 For this exercise the mainsail is correctly set when the sheet is in hard and the main-
mast begins to bend aft, while the jib should be around 15 degrees off the centerline.
That is the clew should be about 200mm outboard from the mainmast.
3.6 If the jib sheets in hard first, press the MO switch to disengage the jib sheet winch
and use the joystick to further adjust the main sheet.
3.7 If the main sheets in first, either:
(a) un-plug the main sheet winch (the white plug is under the console on the
starboard side of the centerboard case) and then using the joystick wind in
more on the jibsheet, or
(b) press the MO switch to disengage the jib sheet winch and use the joystick to
let out the main sheet only, then re-engage both winches and haul in both
sheets, repeat until the jib is correctly set. It is very easy to over sheet the jib
so beware.
3.8 If you wish to sail the boat manually and adjust the sheets by hand, reverse the
process and wind the rope out of the winches leaving a tail of about half a meter
outside the winches. This will leave the full length of the sheets available for manual
operation.
4. REEFING THE MAINSAIL: (reducing sail area)
4.1 Pull on the port reefing line to reduce sail area
4.2 Pull the Starboard line to increase sail area.
Fig. 26