manuals.online logo
Brands
  1. Home
  2. •
  3. Brands
  4. •
  5. Access Lighting
  6. •
  7. Spotlight
  8. •
  9. Access Lighting 20785LED User manual

Access Lighting 20785LED User manual

IMPORTANT
Before assembling your access lighting fixture, please make sure that
you carefully read through these instruction sheets. Consider having
your fixture installed by a qualified licensed electrician.
NOTE: The important safeguards and instructions that appear in this
manual are not meant to cover all possible conditions and situations
that may occur. It must be understood that common sense, caution and
care, are factors that can’t be built into any product. These factors must
be supplied by the person(s) caring for and operating the fixture.
STEP BY STEP INSTRUCTIONS
Before starting your installation disconnect the Power by turning off the
Circuit Breaker or by removing the fuse at the fuse box. Just turning the
light off at the light switch is not sufficient to prevent electrical shock.
PREPARE FIXTURE AND MOUNT
CROSSBAR PLATE
If there is an existing fixture remove it.
Expose the supply wires from the J-box.
Mount the crossbar plate to the J-box with the supplied
screws.
1
GENERAL INFORMATION
All electrical connections must be in accordance with all ordinances,
Local and National Electrical Codes. These fixtures are intended for
mounting to a standard 4” x 2 1/2”metal octagon outlet box. The box
must be directly supported by the building structure and U.L. Recognized.
WHAT YOU NEED
• Screwdriver
• Wire Cutters
• Wiring Supplies as Specified
by Electrical Code
INSTALLATION INSTRUCTIONS
WHAT WE PROVIDE
• Mounting Hardware
• Crossbar Plate
• Gasket
• LED
COLLECTION
1
CERTIFICATION: ETL WET
NO. 20785LED
20785LED
APPLICATION MODEL NO.
OUTDOOR
GUARDIAN
2
4
2
CERTIFICATION: ETL WET NO.
20785LED
3
MAKE WIRE CONNECTIONS
Gently pull the supply wires through the hole in the
gasket. Connect the black supply wire to the black
fixture wire. Secure with the supplied wire nuts.
Connect the white supply wires to the white
fixture wire. Secure with the supplied wire nuts. Either
wrap the green wire around one of the protruding screws
or connect it to the supply ground wire. Secure all wires
with electrical tape (not supplied).
Tuck all wires carefully into the J-Box.
MOUNT FIXTURE TO CROSSBAR PLATE
Position the fixture over the crossbar plate.
Align the holes in the centre of the crossbar plates
and secure with the supplied screw and rubber cover.
Adjust the light angle by knob
.
Adjust the motion sensor range by screw
RESTORE THE ELECTRICITY AND
CHECK THE OPERATION OF YOUR
NEW ACCESS FIXTURE
Adjustment Knobs
motion sensor
screw
WHAT YOU NEED
• Screwdriver
• Wire Cutters
• Wiring Supplies as Specified
by Electrical Code
Note:
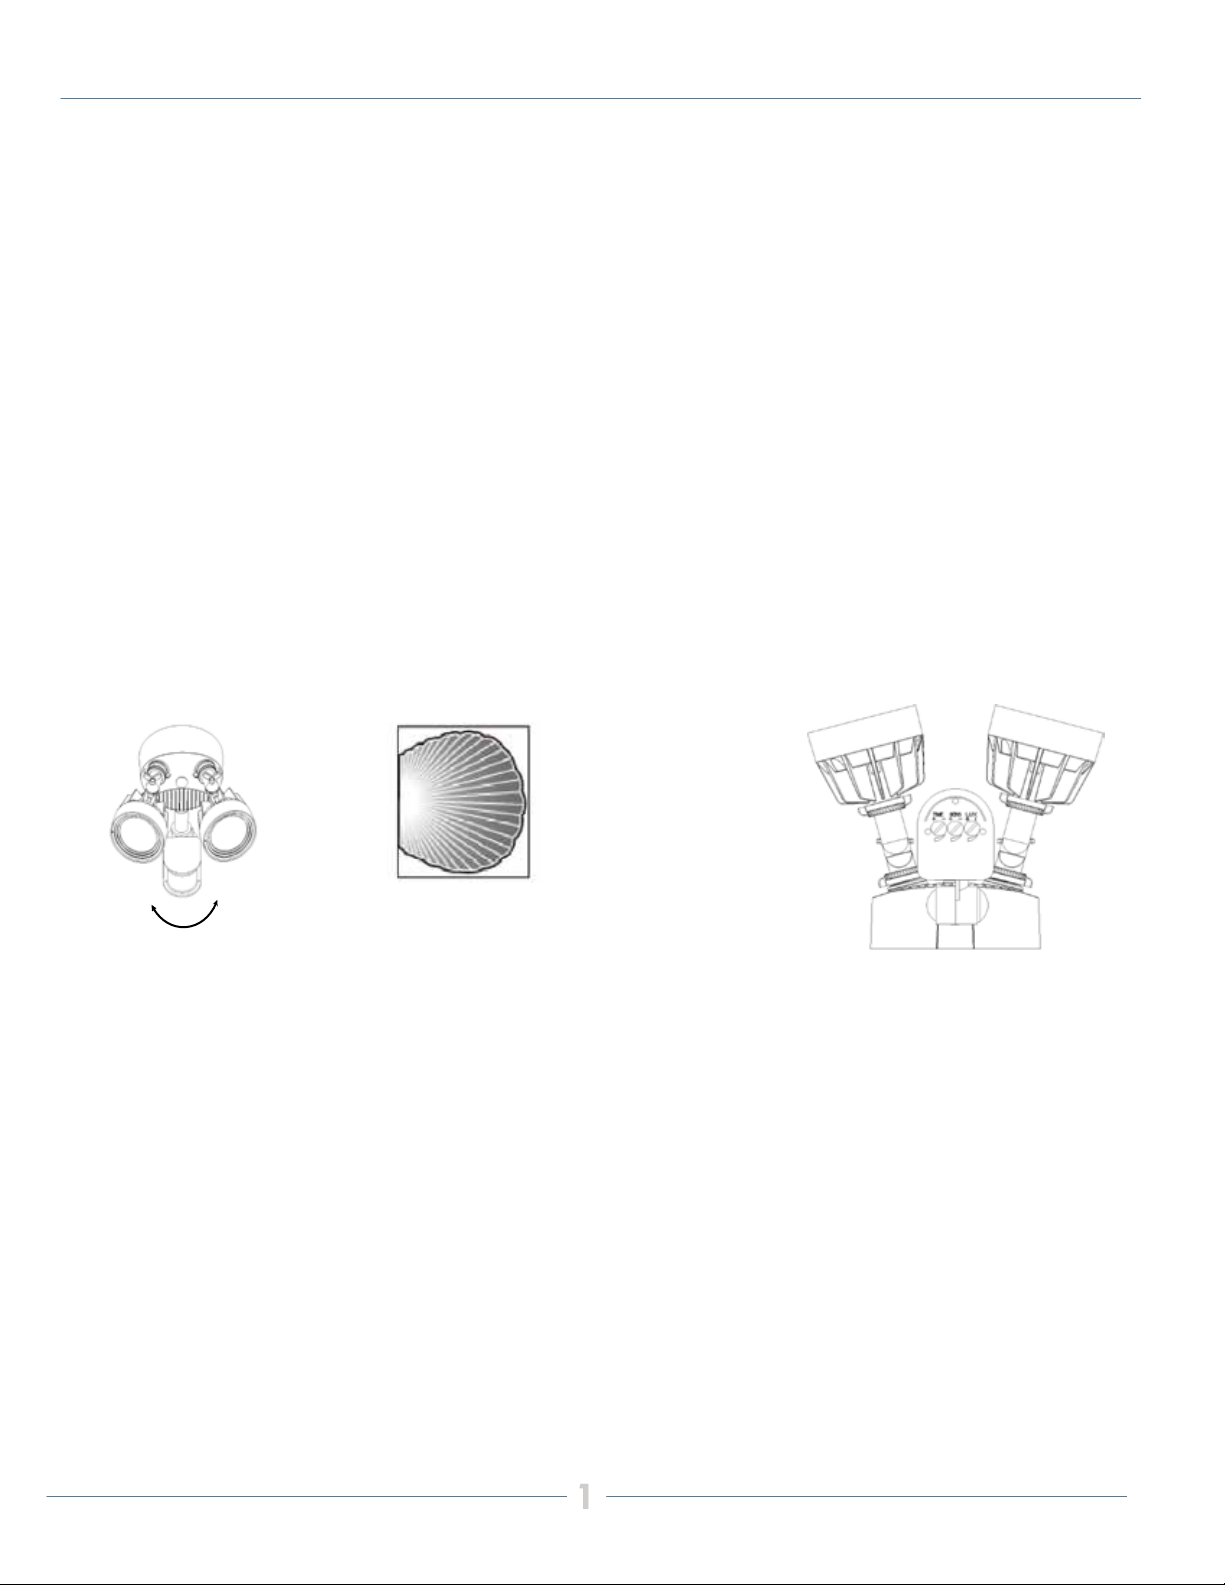
- Lamp heads must be positioned above motion sensor head and controls on motion sensor must face the ground.
- Aim lamp heads and install optional visors
- Aim lamp heads at least 20º down below horizontal in order to prevent water from accumulating inside lens.
- Apply silicone caulking(not included) around the perimeter of the fixture where it contacts the mounting surface for moisture
seal.
- After installing your motion activated light you are ready to set/aim the motion sensor. Make sure the wall switch is in ON
position
- Do NOT use with dimmers or timers or on multiple switch circuits.
- Do NOT Install on the same circuit with an electric motor(i.e. Appliances, HVAC equipment, washer/dryer garage door openers,
etc.)
SENSITIVITY DATA:
Time setting: Min 5sec Max 9min±1min;
Detection angle:180°;
Detection range:12m (22~24℃);
Light-control:<10LUX~2000LUX;
TEST
1. After installation, please turn anti-clockwise the sensitivity knob(SENS) to the end and turn
anti-clockwise the time knob(TIME) to the end before you switch on the power.
Turn the light-control knob(LUX) clockwise to the maximum value.
2. Switch on the power, the light can be on after 30ses. After it turns off, make it sense again after 5sec.
3. If all are under good condition, with time adjustment knob the light period can be adjusted according
to you desire, with light-contorl knob ambient-light can be adjusted,with sensitivity adjustment knob
the detection distance can be adjusted.
Note
Avoid installing it under the sunshine or air stream and temperature alter obviously.
Avoid impacting the lens device with sharp things and coarse pollutant.
1
CERTIFICATION: ETL WET NO.
20785LED
180°
Correct moving orientation
12m

Popular Spotlight manuals by other brands

Seto EUROLITE II Instructions for use

Seto

Seto EUROLITE II Instructions for use

Ayra IntenZ CB040 user manual

Ayra

Ayra IntenZ CB040 user manual

EXALite EXL-IP65 user manual

EXALite

EXALite EXL-IP65 user manual

Vector VECTORLITE VEC118S owner's manual

Vector

Vector VECTORLITE VEC118S owner's manual

EINHELL 4514146 operating instructions

EINHELL

EINHELL 4514146 operating instructions

Varytec LED Theater Spot 100 3000K user manual

Varytec

Varytec LED Theater Spot 100 3000K user manual

Larson Electronics GL-9950 Instruction guide

Larson Electronics

Larson Electronics GL-9950 Instruction guide

Dialighting IS50-MH user manual

Dialighting

Dialighting IS50-MH user manual

Philips Vari-lite VL3015LT Service manual

Philips

Philips Vari-lite VL3015LT Service manual

Black & Decker BSL100-LA instruction manual

Black & Decker

Black & Decker BSL100-LA instruction manual

Wagan Brite-Nite Mini Spotlight user manual

Wagan

Wagan Brite-Nite Mini Spotlight user manual

Husky HSK141HD Owner's manual & warranty

Husky

Husky HSK141HD Owner's manual & warranty

NANLITE FS-300B user manual

NANLITE

NANLITE FS-300B user manual

Peak PKC01CB owner's manual

Peak

Peak PKC01CB owner's manual

Qbeam MAX MILLION Owner's manual & operating instructions

Qbeam

Qbeam MAX MILLION Owner's manual & operating instructions

XanLite SEL345CCT user manual

XanLite

XanLite SEL345CCT user manual

Lucci Fresco SENTINEL 240735 installation instructions

Lucci Fresco

Lucci Fresco SENTINEL 240735 installation instructions

Larson Electronics HID-A1830-WA manual

Larson Electronics

Larson Electronics HID-A1830-WA manual

manuals.online logo
manuals.online logoBrands
  • About & Mission
  • Contact us
  • Privacy Policy
  • Terms and Conditions

Copyright 2025 Manuals.Online. All Rights Reserved.