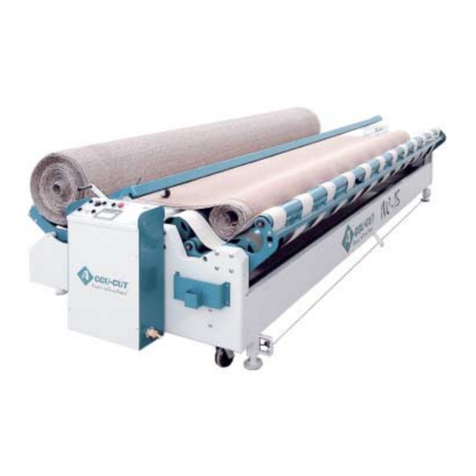
Accu-Cut MARK IV User manual

AccuCut®
User’s Manual
AccuCut®Manual del usuario
For MARK IV™and MARK III™
Roller Die Cutting Machines
Para máquinas troqueladoras con
rodillo MARK IV™y MARK III™
IMPORTANT: EVERY ACCUCUT MACHINE USER SHOULD READ THIS MANUAL BEFORE OPERATION!
PLACE MANUAL NEAR MACHINE FOR EASY REFERENCE.
IMPORTANTE: TODOS LOS USUARIOS DE LA MÁQUINA ACCUCUT DEBEN LEER ESTE MANUAL ANTES DE UTILIZARLA.
COLOQUE EL MANUAL CERCA DE LA MÁQUINA PARA FACILITAR SU CONSULTA.
ITEM 109610M

CONSERVE ESTAS IMPORTANTES
INSTRUCCIONES DE SEGURIDAD
ADVERTENCIA: Al emplear dispositivos de corte siempre se deben
seguir ciertas precauciones básicas, incluyendo las siguientes:
1. Lea todas las instrucciones antes de usar la máquina.
2. No toque las piezas en movimiento.
3. Solamente use piezas recomendadas o vendidas por el fabricante.
SAVE THESE IMPORTANT
SAFETY INSTRUCTIONS
WARNING: When using cutting devices, basic precautions should alway
be followed, including the following:
1. Read all the instructions before using the machine.
2. Do not contact moving parts.
3. Only use parts recommended or sold by the manufacturer.

AccuCut User’s Manual
TABLE OF CONTENTS 1
Table of Contents
Installation Instructions: Setup of Machine and Die Center ..............................................................2
Where to Place Machine ........................................................................................................................2
Where to Position Die Tray......................................................................................................................2
How to Store Dies ..................................................................................................................................2
How to Organize Dies ............................................................................................................................2
Parts of an AccuCut®Machine ............................................................................................................3
Parts of an AccuCut®Die ....................................................................................................................3
Cutting Materials & Layers ..................................................................................................................4
How to Place Paper or Other Material on an AccuCut®Die ..............................................................5
Machine Warranty ................................................................................................................................5
Operating Instructions..........................................................................................................................6
How to Place Dies in the MARK III™Die Tray ....................................................................................6
How to Place Dies in the MARK IV™Die Tray ....................................................................................7
User-Maintenance Instructions............................................................................................................8
Replacement Parts ................................................................................................................................8
How to Replace the AccuCut®Roller......................................................................................................8
How to Clean Dies..................................................................................................................................9
Cleaning the AccuCut®Machine ..........................................................................................................10
Troubleshooting ..................................................................................................................................11
AccuCut Customer Service................................................................................................................14
Para instrucciones en español ..........................................................................................................15
AccuCut Customer Service
Hours: 8:00 a.m. – 5:00 p.m. CST, Monday – Friday
Toll Free Tel: 800-288-1670 • Tel: 402-721-4134
Toll Free Fax: 800-369-1332 • Fax: 402-721-2845
©2006 AccuCut
To Begin Using Your AccuCut®Machine Immediately:
To begin cutting, simply lift the machine out of the box, place die tray on white rollers,
position a die in die tray FOAM SIDE UP with material to cut on top of die—and begin
cutting. Your new AccuCut machine is ready to use right out of the box! No assembly,
shimming, testing or cutting height adjustment needed. Questions? Contact AccuCut’s friendly
Customer Service Center (see below), or visit AccuCut online at www.accucut.com. Have fun!
Please place this manual near your machine, and require all users to review it. Educate all users
about the machine’s features to help avoid damage to machine or dies.

INSTALLATION INSTRUCTIONS: SETUP OF MACHINE AND DIE CENTER
2
Installation Instructions:
Setup of Machine and Die Center
To set up your AccuCut®system for immediate use,
simply remove machine and die tray from box,
place machine in an appropriate location, then
position die tray in machine. Voila! Grab a die, and
you are ready to cut. No assembly! No shimming,
testing or adjustment needed!
Where to Place Machine
Place AccuCut machine on a sturdy table or
counter, with the machine positioned at least waist
high for most users. If table or counter is too low,
put machine on an AccuCut riser (Figure 1).
Where to Position Die Tray
Place die tray on top of white rollers, where it will
remain at all times—both during cutting and while
machine is not in use (Figure 2).
How to Store Dies
For safety and protection of dies, always store dies
in cases. Position AccuCut die storage cases on
tabletops and countertops near the machine. Some
AccuCut storage cases fit into carrying bags for
easy mobility and protection (Figure 3).
Never stack dies on tabletops or floors. Always
store dies away from unsupervised access
of children.
How to Organize Dies
As your die collection increases, you’ll want a
method of organization for easy die identification
and storage. Many AccuCut machine owners mark
dies with consecutive numbers as they are
purchased, then store in cases numerically
(Figure 4). Cut a sample shape of each die and
display the shapes on a board or in a binder, along
with the die number, for easy location of dies.
Figure 2: Place die tray on white rollers.
Figure 4: Number dies in
cases for easy reference.
Figure 1: AccuCut Riser (Item PA800Y)
Figure 3:
AccuCut Carrying Bag
(Item BAG100)
WARNING:
SAFETY GUARD MUST BE IN PLACE
DURING OPERATION. KEEP HANDS
AND FINGERS CLEAR OF ROLLER OR
SERIOUS BODILY INJURY CAN OCCUR.

AccuCut User’s Manual
PARTS OF AN ACCUCUT MACHINE & DIE 3
Parts of an AccuCut®Machine
(NOTE: Parts shown are found on both the AccuCut MARK IV™machine and the MARK III™machine.
Both machines have a lifetime warranty.)
Parts of an AccuCut®Die
(Features shown are found on AccuCut dies of all sizes. Wood dies have a three-year warranty. Some
AccuCut dies are made using see-through acrylic instead of wood. These dies are called Clear Cuts™
dies and have a two-year warranty.)
Top Roller (black polyurethane). As a die
passes under the top roller, the roller
presses paper or other cutting material into
the die’s blades. The blades cut through the
paper and into the roller. Replace roller
once a year with average use.
Die Tray. The
MARK IV tray
carries as many
as five large-sized
dies at once
under roller
during cutting.
Laser-cut holes or
channels in the
die tray allow for
flexing of the tray
as pressure is
exerted during
cutting. Replace
once a year with
average use.
Safety Guard. Won’t allow items
thicker than 1⁄8" to go between roller
and die. To remove safety guard for
roller cleaning, simply squeeze
gently and lift. Wipe roller to
remove small bits of paper.
Replace guard by squeezing
gently and lowering into
place, making sure edges
slide inside of pins.
Safety guard must
be in place
when operating
machine.
Handle. Turn handle in the
direction you want the die to go—
machine cuts from both directions!
“Roller Replacement” Sticker.
Lists steps for replacing roller.
“How to Operate”
Sticker. Lists steps
for operating machine.
Die Design. A
laser machine cuts
a channel into the
die’s base in the
shape of the
desired design.
Wood or Acrylic Base. Most dies are
made with wood bases. Clear Cuts™
see-through acrylic dies allow you to
position the die design easily over a
photo, words or artwork.
Steel-Rule Blade.
After the steel blade is
bent into the shape of
desired design, it is
inserted into the
laser-cut channels in
the die’s base. The
strong and durable steel-
rule blade cuts through
many layers of paper or
other cutting material.
Good for one million cuts!
Rubber Foam.
To protect users
from the sharp
steel-rule blade,
rubber foam is
glued to the die
base around the
blades.
Die Label.
A label on each die lists
the die’s item number with a
size designator, die name,
bar code and a small image
of the shape.
Machine
I.D. Plate.
Machine serial
number is located
on this plate.

CUTTING MATERIALS & LAYERS
4
Cutting Materials & Layers
Here’s What You Can Cut with an AccuCut®Machine!
NOTE: Numbers of layers listed are estimates only and depend on actual thickness of materials. To
determine actual number of layers, start with one layer and test the cut, then add one layer at a time,
testing cut again each time. When blade no longer cuts all the way through a stack of material, remove
a layer or two and proceed with cutting.
Recommended Number of Layers
Lightweight Paper 6-8 4-6
Construction Paper 4-6 4
Laminated Paper 31-2
Cardstock 3-4 2-3
3-D Plastic 1-2 1
Poly Foam 2 1
Mat Board 1 1
Sponge 1 1
Flexible Magnetic
Sheets 2 1
Cling Vinyl 2-4 2
Fabric 6 4
Simple Die Designs:
Simple outlines, no extra embellishments such
as perforation or punches.
Intricate Die Designs:
Detailed outlines or extra embellishments
such as perforation or punches.
Material

AccuCut User’s Manual
HOW TO PLACE PAPER OR OTHER MATERIAL ON AN ACCUCUT DIE 5
How to Place Paper or Other Material
on an AccuCut®Die
Die: Foam Side Up
Paper: Pattern Side Down
Always remember to cut with the die FOAM SIDE UP in the die tray. Any other method of operation
will result in damage to dies and machine. Also, cut with pattern side of the paper or other cutting
material facing down onto the die.
Figure 2: You will be able to cut more shapes from a
sheet of paper if you place paper so it just covers design,
not entire surface of die.
Figure 1: Place paper on die with pattern side down.
Figure 3: Placing paper with pattern side down is especially important
when cutting letters or words, so the pattern will be on the correct side.
Lifetime Warranty
All models of AccuCut®Roller Die Cutting Machines are covered by a lifetime warranty
against all defects in material or workmanship. Rollers and die trays are consumable parts and
not covered by the warranty.

OPERATING INSTRUCTIONS
6
Operating Instructions
Look for the “How to Operate” sticker on the side of your AccuCut MARK IV™machine for easy step-by-step
instructions! (See page 3 for location of sticker.) Here’s how the AccuCut machine works…
Three Easy Steps for Perfectly Cut Letters and Shapes
HINT: For best cutting results, position die at a slight angle to the roller. This creates diagonal pressure, much
like scissors, and makes cutting easy!
STEP 1
Place die completely inside the tray
with FOAM SIDE UP. It is often
helpful to angle die slightly in the
tray. Place material on top of die.
STEP 2
Push die and tray until die meets
roller. Turn handle in the direction
you want die and tray to go
through the machine. Pressure is
preset, so there is no guessing
how hard to press.
STEP 3
Remove die-cut shape. Place new
material on top of die and roll
through machine from the opposite
direction. No handling of die
between cuts. Replace roller and
tray once a year. Call 800-288-1670
or visit www.accucut.com.
One Die at a Time Mini, Small, Large
Die Capacity: 2
Long Cut
Die Capacity: 1
Extra Long Cut
Die Capacity: 1 (with extended
tray, Item 406104)
WARNING: SAFETY GUARD MUST BE IN PLACE DURING OPERATION. KEEP
HANDS AND FINGERS CLEAR OF ROLLER OR SERIOUS BODILY INJURY CAN OCCUR.
How to Place Dies in the MARK III™Die Tray
For best results, place each size of AccuCut die into the machine’s die tray as shown below. Make sure dies
lie completely inside of die tray—not on top of any edge of the die tray. Always place dies in die tray with
FOAM SIDE UP.

AccuCut User’s Manual
HOW TO PLACE DIES IN THE MARK IV DIE TRAY 7
One Die at a Time
Moving dies
to different
locations in
the tray for
cutting helps
extend the
life of both
roller and
tray. Cutting
in different
positions
wears the roller evenly and helps distribute stress
on the tray, making the tray last longer.
Long Cut Dies
Angle long
cut dies for
best results.
DO NOT
allow long
die to rest
on lip of the
die tray as
you cut!
Jumbo Dies
When cutting
lightweight
paper, place
one hand
lightly on top of
paper as you
roll die and
paper through
machine.
Mini, Small, Large Dies
Place mini,
small or
large dies in
the die tray
side-by-side
as shown,
two
horizontally
and three
vertically.
(Die boards
for all three of these sizes
are exactly the same.)
Extra Long Cut Dies
Place XLC
die at a
slight angle
for most
efficient cut.
Super-Jumbo Dies
Many super-
jumbo shapes
are designed
for cutting on a
fold. Cut the
shape from a
folded piece of
paper, then
open to get a
shape twice the
size of die
design!
Die Capacity: 5
How to Place Dies in the MARK IV™Die Tray
For best results, place each size of AccuCut®die into the machine’s die tray as described below. Make sure
dies lie completely inside of die tray—not on top of any edge of the die tray. Always place dies in die tray
with FOAM SIDE UP. Experiment with placement when cutting dies of varying sizes at the same time.
Die Capacity: 1
Die Capacity: 2
Die Capacity: 1
Die Capacity: 2

User-Maintenance Instructions
An AccuCut machine is easy to maintain. To keep it cutting efficiently, simply replace two parts periodically, and
keep dies free of lint and scraps. It couldn’t be simpler!
Replacement Parts
The roller applies even, preset pressure directly onto the die, causing the blade in the die to cut up through the
paper and into the roller. That pressure causes eventual wear of two consumable machine parts: the roller and
the die tray.
How to Replace the AccuCut Roller
Look for the “How to Replace Roller” sticker on the side of your machine for easy reference while replacing
roller. (See page 3 for location of sticker.)
USER-MAINTENANCE INSTRUCTIONS
8
STEP 1
Remove Safety Guard & Cover Plate
Grasp and squeeze safety guard with
both hands and lift straight up. Use
the 3⁄32" hex wrench to remove the
two screws in the metal cover plate
without the handle. Set screws aside
and remove cover plate.
STEP 2
Remove Old Roller & Install New Roller
Pull roller out and discard. Slide
new roller in and set into position
by fitting metal shaft into opening
on opposite side of machine. Rotate
roller until it locks into end of shaft
and the handle turns with the roller.
STEP 3
Replace Cover Plate & Safety Guard
Make sure sides of guard slide inside
locking pins. Replace roller and tray
once a year, depending on use. To order,
call AccuCut Customer Service at
800-288-1670/402-721-4134.
The roller is cut repeatedly
by the blades. It eventually
turns white and wears
away incrementally in the
areas where you do the
most cutting.
(MARK III™Item 404311;
MARK IV ™Item 404310)
The die tray, which receives
the pressure of cutting,
eventually becomes slightly
warped. This happens for
most users after a year or
more of use.
(MARK III™Item 406102;
MARK IV ™Item 406100)
Replace roller and die tray when…
• You are not able to cut the number of layers of paper and other materials listed on page 4.
• The roller has turned light gray or white.
• The tray bows in the middle or makes a popping sound when a die is rolled through machine.
WARNING: SAFETY GUARD MUST BE IN PLACE DURING OPERATION. KEEP
HANDS AND FINGERS CLEAR OF ROLLER OR SERIOUS BODILY INJURY CAN OCCUR.

AccuCut User’s Manual
USER-MAINTENANCE INSTRUCTIONS (CONT’D) 9
DIE PICK
USING LINT ROLLER TO CLEAN A DIE
USING PICK TO CLEAN A DIE
Wood dies have a three-year warranty. Some
AccuCut dies are made using see-through acrylic
instead of wood. These dies are called Clear Cuts™
dies and have a two-year warranty.
User-Maintenance Instructions (cont’d)
Cleaning Dies
AccuCut dies make as many as a million cuts! To keep dies in good working order, keep blade and
foam free from lint and scraps. A die pick is provided with your machine especially for this purpose.
Keep the surface of the foam clean by rolling off lint and tiny scraps with an adhesive-style clothes
brush or lint roller.
To keep dies clean, use die pick gently to remove scraps
caught in tight areas between blades.
Remove lint and tiny scraps from surface of foam with a
purchased clothes brush or lint roller.
This is a die pick (Item PA710). Keep die pick in
protective sleeve when not using.
NOTE: To care for
AccuCut dies, store
properly. See page 2
for storage tips.

USER-MAINTENANCE INSTRUCTIONS (CONT’D)
10
TOP ROLLER
Step 1: Removing Safety Guard
Step 3: Replacing Safety Guard
Step 2: Wiping Roller
BOTTOM ROLLERS
Spray and Wipe
User-Maintenance Instructions (cont’d)
Cleaning the AccuCut Machine
To clean top roller, first gently squeeze and lift safety
guard.
Spray white rollers with Bio-T®Foamaxx Cleaner
(Item TSC1040), or another all-purpose cleaner, then
wipe clean.
Wipe top roller with a clean, dry rag—or brush away
small scraps.
Replace safety guard by squeezing gently and lowering
into place, making sure edges slide inside of pins.
Pin

AccuCut User’s Manual
TROUBLESHOOTING 11
Troubleshooting
Although operation of the AccuCut®machine is simple, you might experience one of the situations
described below. This troubleshooting guide is designed to offer immediate help. If you still
experience problems after trying the solutions below, please call AccuCut Customer Service at
800-288-1670/402-721-4134. Hours: 8:00 a.m. – 5:00 p.m. CST, Monday – Friday.
PROBLEM:
Blades are not cutting all the
way through paper or other
material as you roll it through
the machine.
SOLUTION 1:
You might be cutting too many layers at once.
Remove a layer or more and try cutting again
(Figure 1). Different materials require
different numbers of layers for successful
cutting (see “Cutting Materials & Layers”).
SOLUTION 2:
If design of die is intricate, try rolling back
over a detailed section of design until the
complete cut is made.
SOLUTION 3:
One of the blades in the die might be parallel with roller, causing roller to “jump” over blade. Try
angling die slightly in die tray to create diagonal pressure, much like scissors.
SOLUTION 4:
Roller and die tray might need to be replaced.
HINT: Blades in the die will remain sharp for one million cuts, averaging 7-10 years of use! Blades
cannot be sharpened. If you have tried all four solutions and the blades still are not cutting all the way
through paper or other material, the die might have reached its cutting capacity. If so, it must be
replaced. If the die still is under AccuCut’s three-year warranty, it can be replaced at no charge.
(Continued on next page.)
Figure 1: Remove layers if blades do not cut all the way
through material.

TROUBLESHOOTING (CONT’D)
12
Troubleshooting (cont’d)
PROBLEM:
Die will not go under roller
or is stuck under roller and
won’t move.
SOLUTION 1:
Make sure you are turning handle in the
direction you want the die to go. Turn handle
clockwise to roll die and die tray to the right.
Turn handle counterclockwise to roll die and die
tray to the left.
HINT: Push die against the roller until it “grabs”
the die and pulls die through the machine
(Figure 1).
SOLUTION 2:
Make sure die is not resting on top of edge of die tray. DO NOT force die through machine. Gently back
out die from under the roller by turning handle the opposite way and pulling die tray in the same direction.
If this is not possible, call AccuCut Customer Service as soon as possible for further assistance.
SOLUTION 3:
If using a new roller, it may need to be “roughed up” in order to grab slick-surfaced cutting material, such
as laminated paper. To rough up roller, roll die back and forth through machine repeatedly without paper
or other material on the die.
PROBLEM:
Die blades are not flush
with the back of die.
SOLUTION 1:
Although this does not hinder cutting, you can use a
rubber or wooden mallet to tap blade back in so it is
flush with die board back (Figure 2).
HINT: Blades will never fall out of die. Bridges in
the die hold the blade in place. (See “Parts of an
AccuCut Die”.)
(Continued on next page.)
Figure 1: Push material against roller to begin cutting.
Figure 2: If blades are not flush with back of die, it’s
okay to tap them back into place.

AccuCut User’s Manual
TROUBLESHOOTING (CONT’D) 13
Troubleshooting (cont’d)
PROBLEM:
The handle is loose or has come off.
SOLUTION 1:
If handle is loose, tighten the bolt that holds handle
on (Figure 1). Use the 5⁄32" hex wrench that came with
the machine.
SOLUTION 2:
If handle has fallen off, call AccuCut Customer Service
and order a FREE handle repair kit—800-288-1670/
402-721-4134. Be prepared to give the customer service
representative your machine’s serial number. You will
find the serial number on a metal plate under the white
rollers. (See “Parts of an AccuCut Machine”.)
PROBLEM:
Fabric or felt is getting
stuck to the roller.
SOLUTION 1:
Since the roller has a rough exterior from die blades
cutting up into it, the fibers of fabric or felt can stick to
the roller easier than less fibrous materials such as
paper (Figure 2). To avoid this, place a piece of scrap
paper over the fabric or felt before cutting.
SOLUTION 2:
Remove safety guard, then remove pieces of
material stuck to roller. To remove safety guard,
simply squeeze gently and lift off. Replace guard
by squeezing gently and lowering into place,
making sure edges slide inside of pins.
Bolt
Felt Shape
Figure 1: Tighten bolt on handle.
Figure 2: Fibrous materials can stick to the roller.

ACCUCUT CUSTOMER SERVICE
14
AccuCut
Anytime—
on the Web!
Visit www.accucut.com
anytime day or night for the
latest AccuCut product
information, a regularly
updated library of project
ideas—and, best of all,
convenient, secure online
ordering in the AccuCut store.
www.accucut.com
AccuCut Customer Service
Address: 1035 E. Dodge Street
Fremont NE, 68025
Hours: 8:00 a.m. – 5:00 p.m.
CST, Monday – Friday
Toll-Free Tel: 800-288-1670
Tel: 402-721-4134
Toll-Free Fax: 800-369-1332
Fax: 402-721-2845
E-Mail: [email protected]
Web Site: www.accucut.com
Thank you for your AccuCut order! If you have
further questions, or need assistance with any
aspect of roller die-cutting and your AccuCut
system, please call, e-mail, fax or visit us online
at the following contact numbers and addresses.

Manual del usuario de AccuCut
ÍNDICE 15
Índice
Instrucciones de instalación: Preparación de la máquina y del centro para troquel ....................16
Dónde colocar la máquina .............................................................................................................. 16
Dónde colocar la bandeja del troquel ..................................................................................................16
Cómo almacenar los troqueles ............................................................................................................16
Cómo organizar los troqueles ..............................................................................................................16
Piezas de una máquina AccuCut®....................................................................................................17
Piezas de un troquel AccuCut®..........................................................................................................17
Materiales de corte y capas ..............................................................................................................18
Cómo colocar el papel u otro material en un troquel AccuCut®......................................................19
Garantía de la máquina......................................................................................................................19
Instrucciones de funcionamiento ......................................................................................................20
Cómo colocar troqueles en la bandeja para troqueles MARK III™..................................................20
Cómo colocar troqueles en la bandeja para troqueles MARK IV™..................................................21
Instrucciones de mantenimiento por parte del usuario ..................................................................22
Piezas de repuesto ..............................................................................................................................22
Cómo reemplazar el rodillo AccuCut®..................................................................................................22
Cómo limpiar los troqueles ..................................................................................................................23
Limpieza de la máquina AccuCut®........................................................................................................24
Resolución de problemas ..................................................................................................................25
Atención al cliente de AccuCut ........................................................................................................28
Atención al cliente de AccuCut
Horario: De lunes a viernes, 8:00 a.m. – 5:00 p.m., horario central de EE.UU.
Teléfono gratuito: 800-288-1670 • Teléfono: 402-721-4134
Fax gratuito: 800-369-1332 • Fax: 402-721-2845
©2006 AccuCut
Para empezar a usar su máquina AccuCut®inmediatamente:
Para comenzar a cortar, simplemente levante la máquina para sacarla de la caja, coloque la
bandeja de troqueles sobre los rodillos blancos, coloque un troquel en la bandeja CON EL
LADO DE ESPUMA HACIA ARRIBA con el material que se va a cortar encima del troquel
y empiece a cortar. ¡Su nueva máquina AccuCut está lista para que la pueda usar en cuanto la
saque de la caja! No es necesario armarla, calzarla, probarla ni ajustar la altura de corte.
¿Tiene preguntas? Póngase en contacto con el Centro de atención al cliente de AccuCut (vea
la información que sigue) o visite AccuCut en la página de Internet www.accucut.com.
¡Diviértase!
Guarde este manual cerca de la máquina y haga que todos los usuarios lo revisen. Enseñe a
todos los usuarios las funciones de la máquina para evitar que se dañe la máquina o
los troqueles.

Para preparar su sistema AccuCut®y poderlo usar
inmediatamente, simplemente saque la máquina y la
bandeja para troqueles de la caja, coloque la máquina en
una ubicación apropiada y después coloque la bandeja
para troqueles en la máquina. ¡Listo! Agarre un troquel y
está listo para empezar a cortar. ¡Sin necesidad de armarla!
¡Sin necesidad de calzarla, probarla ni ajustarla!
Dónde colocar la máquina
Coloque la máquina AccuCut sobre una mesa o mostrador
resistente con la máquina por lo menos a la altura de la
cintura para la mayoría de los usuarios. Si la mesa o el
mostrador son demasiado bajos, ponga la máquina sobre
un soporte AccuCut (figura 1).
Dónde colocar la bandeja del troquel
Coloque la bandeja para troqueles sobre los rodillos blancos,
donde estará en todo momento, tanto al estar cortando como
cuando no se está usando la máquina (figura 2).
Cómo almacenar los troqueles
Para la seguridad y protección de los troqueles,
guárdelos siempre en estuches. Coloque los estuches de
almacenamiento de troqueles AccuCut sobre mesas o
mostradores cercanos a la máquina. Algunos estuches
AccuCut caben dentro de bolsas que hacen más fácil su
movilidad y la protección (figura 3).
Nunca apile troqueles sobre mesas o pisos. Guarde
siempre los troqueles lejos de áreas a las que los niños
tengan acceso sin supervisión.
Cómo organizar los troqueles
A medida que aumente su colección de troqueles, usted
deseará tener un método para organizarlos que permita su
fácil identificación y almacenamiento. Muchos propietarios
de máquinas AccuCut marcan los troqueles con números
consecutivos a medida que los compran, después los
guardan en estuches por orden numérico (figura 4).
Corte una figura de muestra con cada troquel y ordene
las figuras en un tablero o en un archivador junto con su
numero de troquel correspondiente, para ubicar los
troqueles con facilidad.
Figura 1: Soporte AccuCut (Artículo PA800Y)
16 INSTRUCCIONES DE INSTALACIÓN: PREPARACIÓN DE LA MÁQUINA Y DEL CENTRO PARA TROQUEL
Figura 2: Coloque la bandeja para troqueles sobre los
rodillos blancos.
Figura 4: Numere los troqueles
en estuches para fácil referencia.
Figura 3: Bolsa
AccuCut (Artículo
BAG100)
Instrucciones de instalación: Preparación de la
máquina y del centro para troquel
ADVERTENCIA:
DURANTE EL USO, LA PROTECCIÓN DE
SEGURIDAD DEBE ESTAR EN SU LUGAR.
MANTENGA LAS MANOS Y LOS DEDOS ALEJADOS
DEL RODILLO O, DE LO CONTRARIO, SE PUEDEN
PRODUCIR LESIONES CORPORALES GRAVES.

Piezas de una máquina AccuCut®
(NOTA: las piezas que se muestran se encuentran tanto en la máquina AccuCut MARK IV™como en la
MARK III™. Ambas máquinas tienen una garantía de por vida.)
Piezas de un troquel AccuCut®
(Las características que se muestran se encuentran en los troqueles AccuCut de todos los tamaños. Los
troqueles de madera tienen una garantía de tres años. Algunos troqueles AccuCut se fabrican con
acrílico transparente en lugar de madera. Estos troqueles se llaman Clear Cuts™ y tienen una garantía
de dos años).
17
Manual del usuario de AccuCut
PIEZAS DE UNA MÁQUINA y UN TROQUEL ACCUCUT
Rodillo superior (poliuretano negro). A medida
que el troquel pasa por debajo del rodillo superior,
el rodillo presiona el papel u cualquier material
que se desee cortar contra las cuchillas del
troquel. Las cuchillas cortan a través del papel
contra el rodillo. Cambie el rodillo una vez al año
si se usa normalmente.
Bandeja para troqueles.
La bandeja
MARK IV puede
llevar hasta cinco
troqueles grandes
a la vez debajo del
rodillo durante el
corte. Los agujeros
o canales cortados
con láser de la
bandeja para
troqueles permiten
que la bandeja se
flexione cuando se
ejerce presión durante
el corte. Cámbiela una
vez al año si se usa
normalmente.
Protección de seguridad. No permite que los
artículos con un grosor de más de 1/8 pulgada
(0.3 cm) pasen entre el rodillo y el troquel.
Para quitar la protección de seguridad
para limpiar el rodillo simplemente
apriete ligeramente y levántela.
Pase un paño por el rodillo para
eliminar los trocitos de papel.
Vuelva a colocar la protección
apretándola ligeramente y
bajándola a su posición,
asegurándose de que los
bordes se deslizan
entre los pasadores.
Durante el uso
de la máquina
la protección
de seguridad
debe estar en su lugar.
Manija. Gire la manija en la dirección en
la que quiera que vaya el troquel;
¡la máquina corta en ambas direcciones!
Calcomanía de “Cómo
utilizarla”. Presenta una
lista de pasos para utilizar
la máquina.
Diseño del troquel.
Una máquina láser
corta un canal en la
base del troquel con la
forma del diseño
deseado.
Base de madera o de acrílico. La mayoría
de los troqueles se fabrican con bases de
madera. Los troqueles transparentes de
acrílico Clear Cuts™ le permiten colocar
fácilmente el diseño del troquel
sobre fotos, palabras
o dibujos.
Cuchilla de acero.
Después de darle la
forma del diseño deseado
a la cuchilla de acero, se
inserta en los canales
cortados con láser en la
base del troquel. La fuerte
y duradera cuchilla de
acero corta a través de
muchas capas de papel o
de otro material que se
quiera cortar. ¡Sirve para
un millón de cortes!
Espuma de
caucho.
Para proteger a
los usuarios de la
afilada cuchilla de
acero, se pega
espuma de
caucho a la base
del troquel
alrededor de las
cuchillas.
Etiqueta para troquel.
En cada troquel hay una
etiqueta que incluye el
número de artículo,
junto con una designación de
tamaño, nombre del troquel,
código de barras y una
pequeña imagen de la figura.
Placa de identificación de la
máquina. El número de serie de la
máquina se encuentra en esta placa.
Calcomanía “Cambio del rodillo”.
Presenta una lista de pasos para
cambiar el rodillo.

18 MATERIALES DE CORTE y CAPAS
Materiales de corte y capas
¡Esto es lo que puede cortar con una máquina AccuCut®!
NOTA: Los números de capas que se incluyen son solamente estimaciones y dependen del verdadero
grosor de los materiales que se van a cortar. Para determinar el número de capas real, comience con una
capa y pruebe el corte, después añada capas de una en una, probando el corte cada vez. Cuando la cuchilla
ya no corte una pila de material atravesándola completamente, quite una capa o dos y proceda con el corte.
Número de capas recomendado
Papel ligero 6-8 4-6
Papel escolar de
colores 4-6 4
Papel laminado 31-2
Cartón 3-4 2-3
Plástico 3-D 1-2 1
Poliespuma 2 1
Cartulina 1 1
Esponja 1 1
Láminas magnéticas
flexibles 2 1
Vinilo de adhesión 2-4 2
Tela 6 4
Diseños sencillos de troqueles:
Bordes sencillos, sin adornos adicionales
como perforaciones o picaduras.
Diseños complejos de troqueles:
Bordes detallados o adornos adicionales
como perforaciones o picaduras.
Material
This manual suits for next models
1
Table of contents
Languages:
Other Accu-Cut Cutter manuals