AccuLine 40-6540 User manual

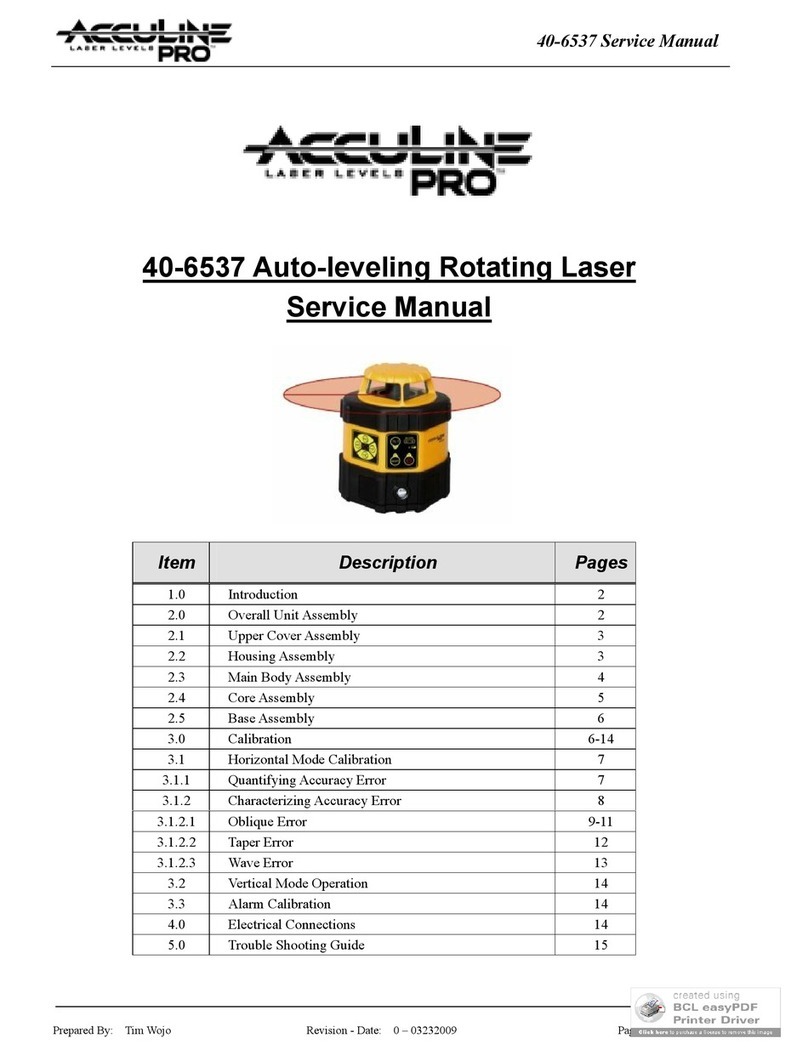
40-6540 Automatic Rotating Laser
Service Manual
Contents
Item Description Pages
1.0 Introduction 2
2.0 Overall Instrument Dis-assembly 2-3
2.1 Core module Dis-assembly 3-4
2.1.1 Rotating Head/Prism Dis-Assembly 4
2.1.2 Shaft Coupling Module Dis-Assembly 4
2.1.3 Y-axis level module Dis- Assembly 4
2.1.4 Y-axis level module Dis- Assembly 4
2.1.5 Alarm Board Removal/Replacement 4
2.2 Vertical Mounting Bracket Dis-Assembly 5
3.0 Schematic Diagram 6
4.0 Calibration 6-12
4.1 Horizontal Mode Operation 7
4.1.1 Quantifying Accuracy Error 7
4.1.2 Characterize the type of error 8
4.1.2.1 Oblique/Inclination Error 9
4.1.2.1.1 Fine calibration via Remote control 9-10
4.1.2.2 Taper/Cone Error 11
4.2 Vertical Mode Calibration 11
4.2.1 Z-axis calibration 12
4.3 Alarm Adjustment 12
5.0 Troubleshooting Guide 13

Prepared By: Tim Wojo Revision - Date: 0 – 20080430 Page 2 of 13
40-6540 Service Manual
1.0 Introduction
40-6540 rotating laser is a highly accurate instrument. Out side of a
few customer adjustments (outlined in the owners manual), all
adjustments/service operations are internal to the instrument and to
be performed only by authorized service personnel. Authorized
personnel should adhere to the guidelines described within this
service manual for all repairs and/or service work. This manual is
written with the assumption that a unit is disassembled or
assembled from start to finish. In reality, only component parts or
modules would be replaced during a repair. Given this,
procedures discussed in this manual should be adjusted according to
the repair being made.
2.0 Overall Unit Disassembly
1. Using Phillips screw driver, remove 4 screws (7) from the bottom of the housing module (1)
2. To remove housing module (1), remove plastic grommets (6) from screw holes (7) and fold back rubber corners,
exposing main base seal.
Item JLT Part # Description Qty
1 AP1785 Main housing 1
2 AP1786 Key Pad Circuit Board Assembly 1
3 AP1787 Main Control Board 1
4 AP1022 M3 x 6 cross plate screws 2
5 AP1788 Base Assembly 1
6 AP1762 Plastic Grommets 4
7 AP1530 M3×25 crosshead plate screws 4
8 AP1677 ST2.9 x 8 Self Tapping Cross Plate
screw
2
9 AP1767 Battery Circuit board 1
10 AP1789 Battery Cover Gasket 1
11 AP1763 Battery Cover 1
12 AP1026 M2.9 x 13 Cross Plate Self taping
screws
4
13 AP1790 Core Module 1
14 AP1451 ST2.2 x 6 Self Tapping Cross Plate
screw
2
15 AP1782 #3 PCB Outlet Circuit board 1 Fig 1

Prepared By: Tim Wojo Revision - Date: 0 – 20080430 Page 3 of 13
40-6540 Service Manual
Because the gasket material can take a set over time, it may be necessary to apply force in order to separate the
housing module (1) from the base (5)
Once loose, pay specific attention not to damage any of the wires and connectors from the keypad assembly (2)
and the main control board assembly (3)
3. Carefully disconnect socket connectors from the keypad assembly (2) and the main control board assembly (3)
4. Using Phillips screw driver, remove 2 screws (14) and remove 3# PCB (15) from housing module.
5. Using Phillips screw driver, remove 5 screws (14) and remove 5# PCB (2) from housing module.
6. Using Phillips screw driver, remove 2 screws (4), disconnect the sockets and the take off 1# PCB (3).
7. Using Phillips screw driver, remove 4 screws (12) and then remove the core module from the base.
8. Using Phillips screw driver, remove 2 screws (8) and remove 4# PCB (9)
2.1 Core Module Disassembly (AP1790)
Item JLT Part # Description Qty
13-1 AP1791 M2 x 22 Cross Plate Screw 2
13-2 AP1792 Cover Board 1
13-3 AP1793 Rotating head 1
13-4 AP1794 Prism 1
13-5 AP1795 Prism Head 1
13-6 AP1796 M3 x 6 Inner Hex Set Screw 1
13-7 AP1493 M2.5 x 8 Cross Plate Screw 4
13-8 AP1582 M2.5 Washer 4
13-9 AP1513 M3 x 8 Cross Plate Screw 4
13-10 AP1516 M3 Washer 4
13-11 AP1797 Shaft Coupling Module 1
13-12 AP1464 M2 x 6 Cross Plate Screw 2
13-13 AP1798 Alarm Adjusting Module 1
13-14 AP1799 Laser/ Motor Module 1
13-15 AP1800 X Direction Leveling Module 1
13-16 AP1801 Bottom Plate 1
13-17 AP1491 M2 x 8 Cross Plate Screw 6
13-18 AP1802 M2 Washer 6
13-19 AP1513 M3 x 8 Cross Plate Screw 4
13-20 AP1516 M3 Washer 4
13-21 AP1804 M3 x 6 Spacer 2
13-22 AP1805 #2 Alarm Circuit Board 1
13-23 AP1511 M3 x 12 Cross Plate Screw 2
13-24 AP1516 M3 Washer 2
13-25 AP1806 Y Direction Leveling Module 1
13-26 AP1807 Support Shaft 4
13-27 AP1808 Optical Wedge 1
Fig 2

Prepared By: Tim Wojo Revision - Date: 0 – 20080430 Page 4 of 13
40-6540 Service Manual
2.1.1 Rotating Head/Prism Disassembly (AP1793/AP1795)
1. Using a Phillips screw driver, remove 2 screws (13-1) from 13-5 and gently lift off 13-2 and 13-3.
2. Using a Phillips screw driver, remove 4 screws/washers (13-9, 13-10) from 13-26 and gently lift off 13-11
2.1.2 Shaft Coupling Module Disassembly (AP1797)
3. Using a 1.5 mm Allen Wrench, loosen set screw
located on the top side of the gimbal assembly
pictured to the right.
4. Using a flat screw driver, remove 2 inner screws that
connect the gimbal assembly to the laser/motor
assembly (13-14). Reference the picture to the
right.
5. Due to the nature of the laser/motor assembly (13-14)
and the fact that the x, y, and z level indicators are
factor calibrated, no further disassembly instructions
are provided.
If any component of this assembly is suspect,
the entire assembly should be replaced.
2.1.3 X Direction Leveling Module Disassembly (AP1800)
6. Remove X direction leveling module (13-15) by removing the 3 cross head screws located on the bottom side of
13-16 Bottom Plate.
Due to the mechanical nature of this assembly, some of the components can become worn and may require
period lubrication and/or readjustment (i.e. gear, shaft, motor, etc.)
In the event that the unit is damaged due to being dropped, all bent or damaged components should be replaced
as this assembly is integral to the self leveling of the device.
2.1.4 Y Direction Leveling Module Disassembly (AP1806)
7. Remove Y direction leveling module (13-25) by removing the 3 cross head screws located on the bottom side of
13-16 Bottom Plate.
Due to the mechanical nature of this assembly, some of the components can become worn and may require
period lubrication and/or readjustment (i.e. gear, shaft, motor, etc.)
In the event that the unit is damaged due to being dropped, all bent or damaged components should be replaced
as this assembly is integral to the self leveling of the device.
2.1.5 Alarm Board Removal/Replacement (AP1805)
1. Using a Phillips screw driver, remove 2 screws/washers (13-23, 13-24) from 13-16 and gently remove circuit board
from assembly.
Gimbal Assembly

Prepared By: Tim Wojo Revision - Date: 0 – 20080430 Page 5 of 13
40-6540 Service Manual
2.2 Vertical Mounting Bracket Disassembly (40-6850)
3.0 Schematic Diagram
The schematic diagram shows function blocks and
general wire connections. It does not detail operation
Assembly of the mounting bracket is very straight forward,
therefore this service manual only lists replacement parts and doesn’t detail out assembly instructions.
Fig 3
Item JLT Part # Description Qty
16-1 AP1809 Set Shaft 1
16-2 AP1810 Bracket Side Plate 1
16-3 AP1811 M4 Hexagon Nut 4
16-4 AP1812 Adjusting Shaft 2
16-5 AP1813 Adjusting Knob 2
16-6 AP1814 M4 x 12 Cross Plate Screw 4
16-7 AP1513 M3 X 8 Cross Plate Screw 1
16-8 AP1815 Locking Knob 1
16-9 AP1816 Locking Gasket 1
16-10 AP1817 Bracket Base Board 1
16-11 AP1818 Locking Bolt 1

Prepared By: Tim Wojo Revision - Date: 0 – 20080430 Page 6 of 13
40-6540 Service Manual
3.0 Schematic Diagram
4.0 Calibration
Calibration is a process that is used to correct for accuracy and/or functional errors above and beyond those stated in
published specifications. While Manual-leveling, Self-leveling, and Automatic-leveling (motor driven) devices have
different mechanisms that require calibration, there are similarities with optics that is consistent regardless of the leveling
mechanism. This section of the service manual discusses calibrations specific to the 40-6535. Each item discussed is
shown below.
4.1 Horizontal Mode Operation 4.1.2.2 Taper/Cone Error
4.1.1 Quantifying Accuracy Error 4.2 Vertical Mode Operation
4.1.2 Characterize the type of error 4.2.1 Calibration
4.1.2.1 Oblique/Inclination Error 4.3 Alarm Adjustment
4.1.2.1.1 Fine calibration via Remote control
3#
4#
Y
X
+
5#
Z
1#
X
Y
2#
Alarm Board
Main Control Board
Key Pad Board
Outlet Board
Battery Board
X and Y axis Leveling
servo-motors (located on
Leveling Module)
X, Y, and Z axis Leveling
sensors (located on 13-14)
Motor/Laser Assembly
Center detection
rod for alarm board

Prepared By: Tim Wojo Revision - Date: 0 – 20080430 Page 7 of 13
40-6540 Service Manual
4.1. Horizontal Mode Operation
In this mode of operation, the instrument is self-leveling, where by a major factor of accuracy is how well the
leveling compensator is balanced. Different types of errors require different methods of calibration. These
errors are easily characterized by placing the instrument on a flat surface following the guidelines below, and
running the instrument with the rotating head continuously rotating 360°.
4.1.1. Quantifying Accuracy Error
Establish the set up shown in the following drawing.
1. Place the instrument for test on the test stand (preconfigured from the illustration above) with handle facing
the far target .
2. Power the laser and function in full rotation mode (head rotates 360°)
3. Note the errors in all four quadrants of the instrument as read on the far target (i.e. x axis A = 0° and B =
180°, y axis C = 90° and 270°)
You should end up with 4 numbers
A (0°) = _____
B (180°) = ______
C (90°) = ______
D (270°) = ______
4. Since all of the errors are referenced against “0” on the far target, essentially the largest number from the
data collected (A – D) / the distance should be equal to or less than the published specification for the
product. If not, characterize the error and determine method of calibration as defined by section 4.1.2 of
this document.
(大于20米) (大于20米)
检测台
标靶
L (>20m) L (>20m)
Testing platform
Fig 4
0
激光扫描线
标靶
Laser Line
Reference Line
(Known Height)
Far Target placed on wall at least 10m (33ft) from Test
Stand, where “0” corresponds to them same height as
“0” on the target next to the aperature of the instrument.
Accuracy (A) = Difference between laser line
height and reference line height, divided by the
distance that the laser is from the wall (L)
Instrument for test (laser spinning 360° rotation)
Near Target placed within 0.3m (12”) of
instrument. Note that “0” of the target
corresponds to the height of laser line at the
aperature of the instrument.

Prepared By: Tim Wojo Revision - Date: 0 – 20080430 Page 8 of 13
40-6540 Service Manual
4.1.2. Characterize the type of error
Use the following rules to determine what type of accuracy error the instrument for test has, and reference the
stated section to adjust for it. Note that the unit my have a combination of different types of errors to adjust for, in
which case, multiple calibration must be performed.
A=0 & B=0 C=0 & D=0
Yes
Yes Section 4.1.2.1
Oblique Error
A and B <> 0 but
A + B = 0
No
No
A and B <> 0 but
A = B
No
Section 4.1.2.2
Taper/Cone
Error
Yes
Yes
No
C and D <> 0 but
C
+
D
= 0
C and D <> 0 but
C
=
D
No
No
Yes
Yes
Yes
Yes
Accuracy is beyond
published specification
A and B <> 0 and
A + B <> 0
Section 4.1.2.1
Oblique Error
Section 4.1.2.2
Taper/Cone
Error
C and D <> 0 and
C + D <> 0
Accuracy meets published
specification
1
No
No
1
Section 4.1.2.3
Wave Error
A = B <>C=D
No Yes

Prepared By: Tim Wojo Revision - Date: 0 – 20080430 Page 9 of 13
40-6540 Service Manual
4.1.2.1 Qblique/Inclination error
This type of error occurs when leveling compensator does not hang straight (as
illustrated to the right), i.e. is not properly balanced. When the laser spins, it
actually rotates on a plain that is not level, i.e. perfectly horizontal whose rotating
axis is not plumb. So value A on the left target does not has the same sign as that
on the right target, like, A0°=+2, A180°= -2. A number of factors can cause this situation to exist.
Normal use – Depending upon how careful the user is with the instrument, finely tuned adjustments can be
altered by very large changes in temperature, vibrations (due to handling and transportation)
Shock – The instrument was dropped and components of the leveling system have either been damaged or
came out of alignment. If defective components are present, they will need to be repaired or replaced
prior to the calibration procedures defined below being initiated.
Depending upon the magnitude of the error (±5mm or 0.2”), only fine adjustments need to be made. Larger
errors (>5mm or 0.2”) require coarse adjustment to get close, the fine adjustment to bring the unit within
specification.
Note: Only fine adjustments are discussed in this document. Coarse adjustments are integral to the core
module and are factory adjusted. Units that have defective core modules, or core modules that need
coarse calibration should be replaced by the service technician and the defective part sent back to the
factory for repair/recalibration.
4.1.2.1.1. Fine Calibration via Remote Control
1. Access calibration mode by simultaneously pressing the “Power” key and the
“Tilt” key.
2. While continuing to hold the “Tilt” key, release the “Power” key.
When releasing the “Power” key, all red LED’s on the unit’s keypad
display with light up. After about 10 seconds, all LED’s, except the
power LED will go off.
3. Release the “Tilt” key.
Note that the rotating head of the laser is not rotating but the laser is flashing. The unit is now in
calibration mode and all other operations will be performed with the unit’s remote control.
Power Key
Tilt Key

Prepared By: Tim Wojo Revision - Date: 0 – 20080430 Page 10 of 13
40-6540 Service Manual
4. Open the lower cover of the remote control to access the operation panel
for the calibration.
Multiple presses of the “X/Y” key toggles calibration control
between the X-axis, Y-axis, and Z-axis (as indicated via the x, y, and
z Calibrater LED’s located on the instruments keypad. See below
Once the desired axis has been selected, the “UP Arrow” and “Down Arrow” keys are used to adjust
the position of the laser plane.
X-axis Calibration
1. Place the unit into calibration mode as discussed above.
2. Position the unit so that the X axis directing to the two targets.
3. Press “X/Y” key on the remote control to toggle calibration control to the X-axis
4. Press the “UP Arrow” and “Down Arrow” keys, respectively to adjust the laser height to coincide with the
zero position of the target
5. Press the “Enter” key on the remote control to accept the calibration value, noting that the status indicator
goes “off”
6. After calibration is completed, make sure to power off the unit and then power on again to activate the
calibration.
Y-axis Calibration
1. Place the unit into calibration mode as discussed above.
2. Position the unit so that the Y axis directing to the two targets.
3. Press “X/Y” key on the remote control to toggle calibration control to the X-axis
4. Press the “UP Arrow” and “Down Arrow” keys, respectively to adjust the laser height to coincide with the
zero position of the target
5. Press the “Enter” key on the remote control to accept the calibration value, noting that the status indicator
goes “off”
6. After calibration is completed, make sure to power off the unit and then power on again to activate the
calibration.
Once calibration is complete re-verify accuracy as directed in sections 4.1.1 and 4.1.2, and repeat as necessary.
Status Indicator

Prepared By: Tim Wojo Revision - Date: 0 – 20080430 Page 11 of 13
40-6540 Service Manual
4.1.2.2 Taper/Cone error
Taper error results when the prism base module does not reflect the
laser light exactly 90° (i.e. non-perpendicularity between the rotating
line and the rotating axis). The end result is a laser rotating surface
that is not a plane, but a tapered one as shown in the figure to the right.
The value A in the left target shares the same symbol as the one in the
right target during the check, that is, A0°=+2 and A180°= +2. The error is
removed by adjusting the optical wedge of the laser output window to
make the rotating laser beam and rotating axis plumb beam. The details are listed as follows:
a. Remove the top cover as discussed in section 1 of this document
b. Screw the wedge out of its base with special spanner as shown in the figure to the right.
c. Adjust the laser to the zero position of the target.
Note: Only one direction (X or Y) is necessary for the adjustment.
4.2 Vertical Mode Operation
In this mode of operation, rotating laser surface is a plumb plane, and meanwhile the laser line projected from
the top is in horizontal situation. To check whether the plane is plumb, we just need to check whether the
beam is horizontal. This is done by doing the following:
a) Put the unit in horizontal mode. Power on the unit and have it self-leveled.
b) Check whether the laser beam is horizontal by using auto level.
c) If the horizontal accuracy exceeds the range, it needs the calibration.
光楔
Fig 13
Wedge
激光线
Laser beam

Prepared By: Tim Wojo Revision - Date: 0 – 20080430 Page 12 of 13
40-6540 Service Manual
4.2.1. Z-axis Calibration
1. Place the unit into calibration mode as discussed above.
2. Position the unit so that the Z axis directing to the two targets.
3. Press “X/Y” key on the remote control to toggle calibration control to the X-axis
4. Press the “UP Arrow” and “Down Arrow” keys, respectively to adjust the laser height to coincide with
the zero position of the target
5. Press the “Enter” key on the remote control to accept the calibration value, noting that the status indicator
goes “off”
6. After calibration is completed, make sure to power off the unit and then power on again to activate the
calibration.
4.3. Calibration for sound alarming range
If the alarm range is obviously biased, one side exceeds 4.5 degree and other side is much less than 4.5 degree, it needs the
calibration.
Calibration method is as following:
a) Remove the top cover and the shell module
b) Put the unit on the leveling platform, turn on the unit to have it self-leveled and turn it off then.
c) Adjust the touching staff to the circle center of the touching ring on the alarming part.
d) Assemble the housing and the top cover on.
Touching point of alarming
part

Prepared By: Tim Wojo Revision - Date: 0 – 20080430 Page 13 of 13
40-6540 Service Manual
5.0. Troubleshooting Guide
No. Symptom Cause Repair method
Low battery Replace batteries or charge NiMH battery-pack
Damaged power adapter Replace power adapter
Damaged on/off switch Key pad PCB
1 Cannot power on
Defective outlet or battery PCB Replace outlet or battery PCB
2 Cannot power off Defective 2# PCB Replace 2# PCB
Low battery for remote control Replace remote control battery
3No response of
remote control Damaged receiving tube Replace receiving tube
Damaged laser driving Replace Main Control PCB
4 No Laser Damaged laser diode Send back to factory for maintenance
Defective Main Control PCB Replace Main Control PCB
5Cannot rotate
Low rotating speed Loose/defective motor gear Service motor gear
Too big or too small clearance
between worm wheel and worm Adjust clearance between worm wheel and worm
Loosen adjustment part Replace adjustment part
Out-of-range without alarm Wipe alarm staff and alarm ring by alcohol
6Cannot self-leveled
after powered on
Damaged motor driving Replace 1# PCB
7Unlighted panel
LED Damaged LED Replace Keypad PCB
8
Cannot self-leveled
but alarm Memorization error
1.Turn on the unit
2.Press keys of and at the same time
3.Release the
key but keep pressing key
until power indicator LED turn off.
4.Turn on the unit again to take precision calibration
9
Lighted charging
LED all the time
(without adaptor)
Damaged charging socket Replace Outlet PCB
Alarm board is loose Re-adjust the alarm board
The connecting line of the alarm
board is loose Re-weld or replace the connecting line
10
No alarm if titled
beyond tolerance
1# main circuit board is broken Replace 1# main circuit board
The beeper is broken Replace the beeper
11 No buzzer if titled
beyond tolerance. 1# main circuit board is broken Replace1# main circuit board
Table of contents
Other AccuLine Measuring Instrument manuals