IMPORTANT
Inspecter le produit avant de procéder à l'installation.
La garantie sera invalide si le produit a été installé avec des défauts apparents.
ATTENTION
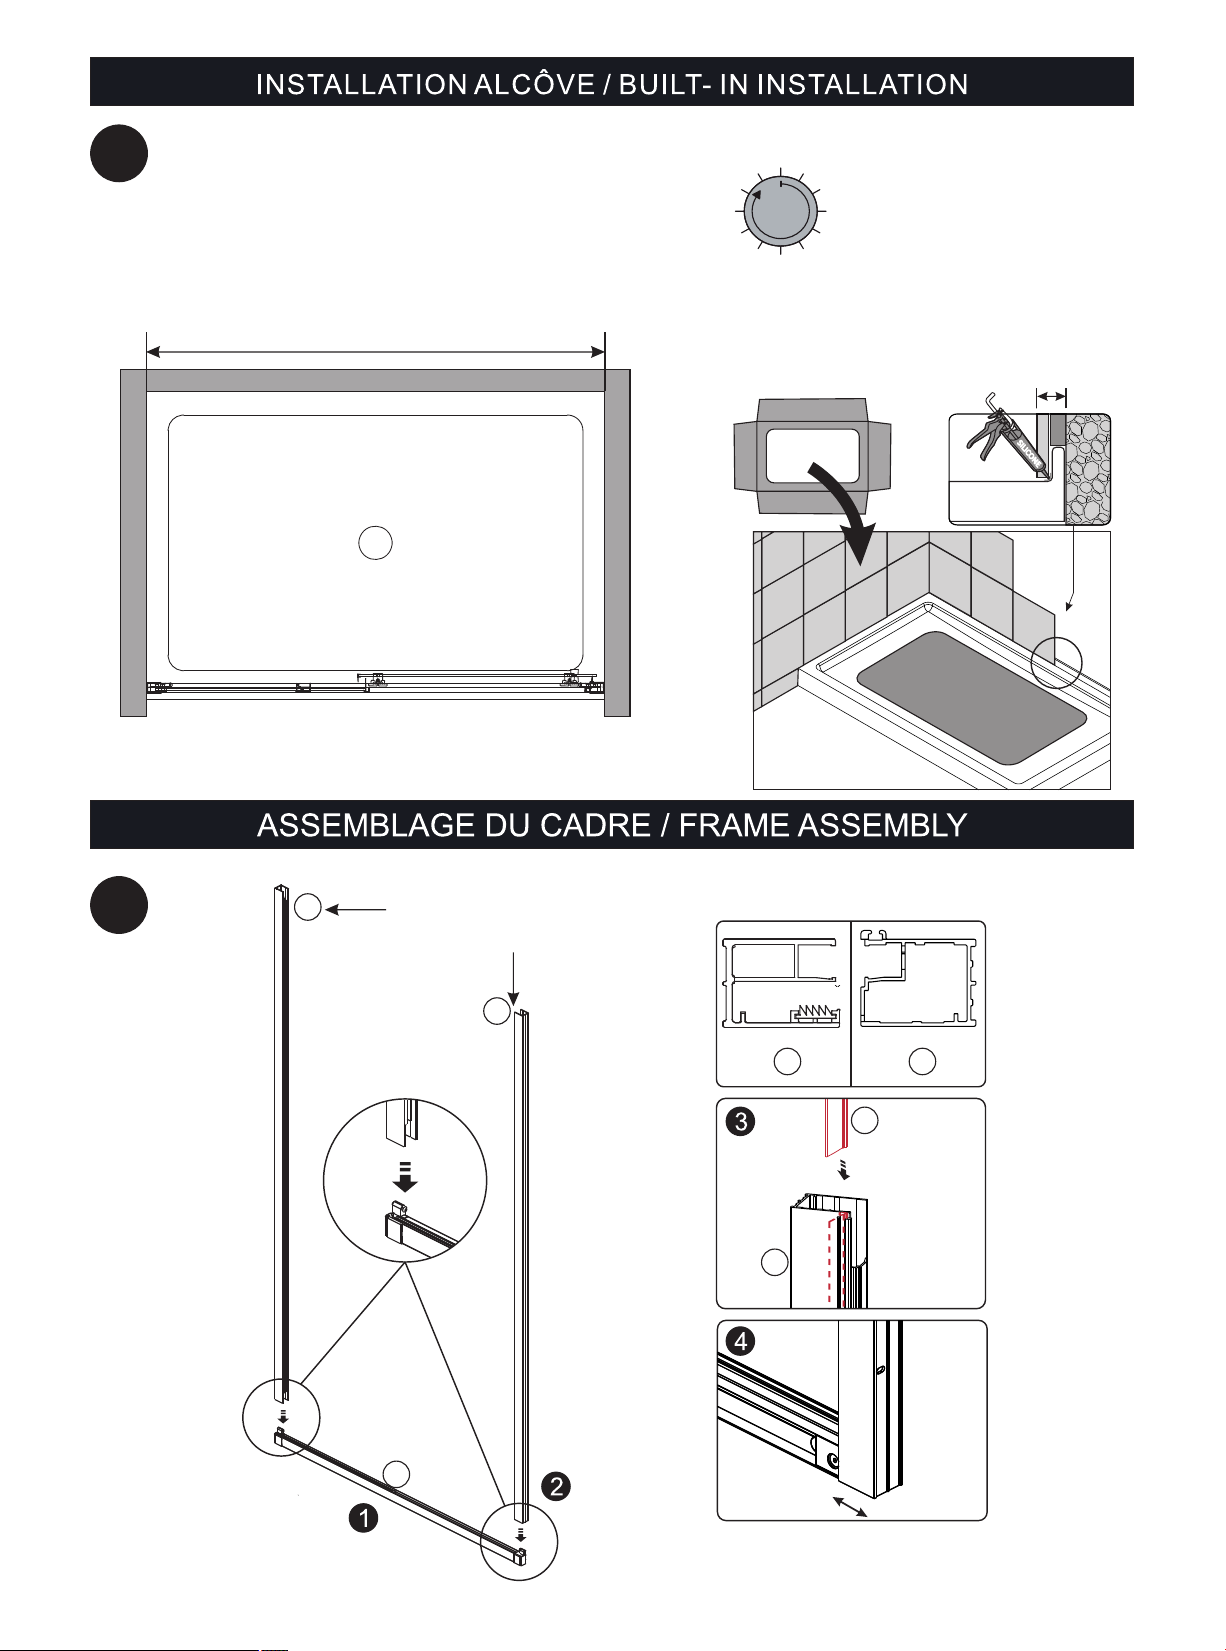
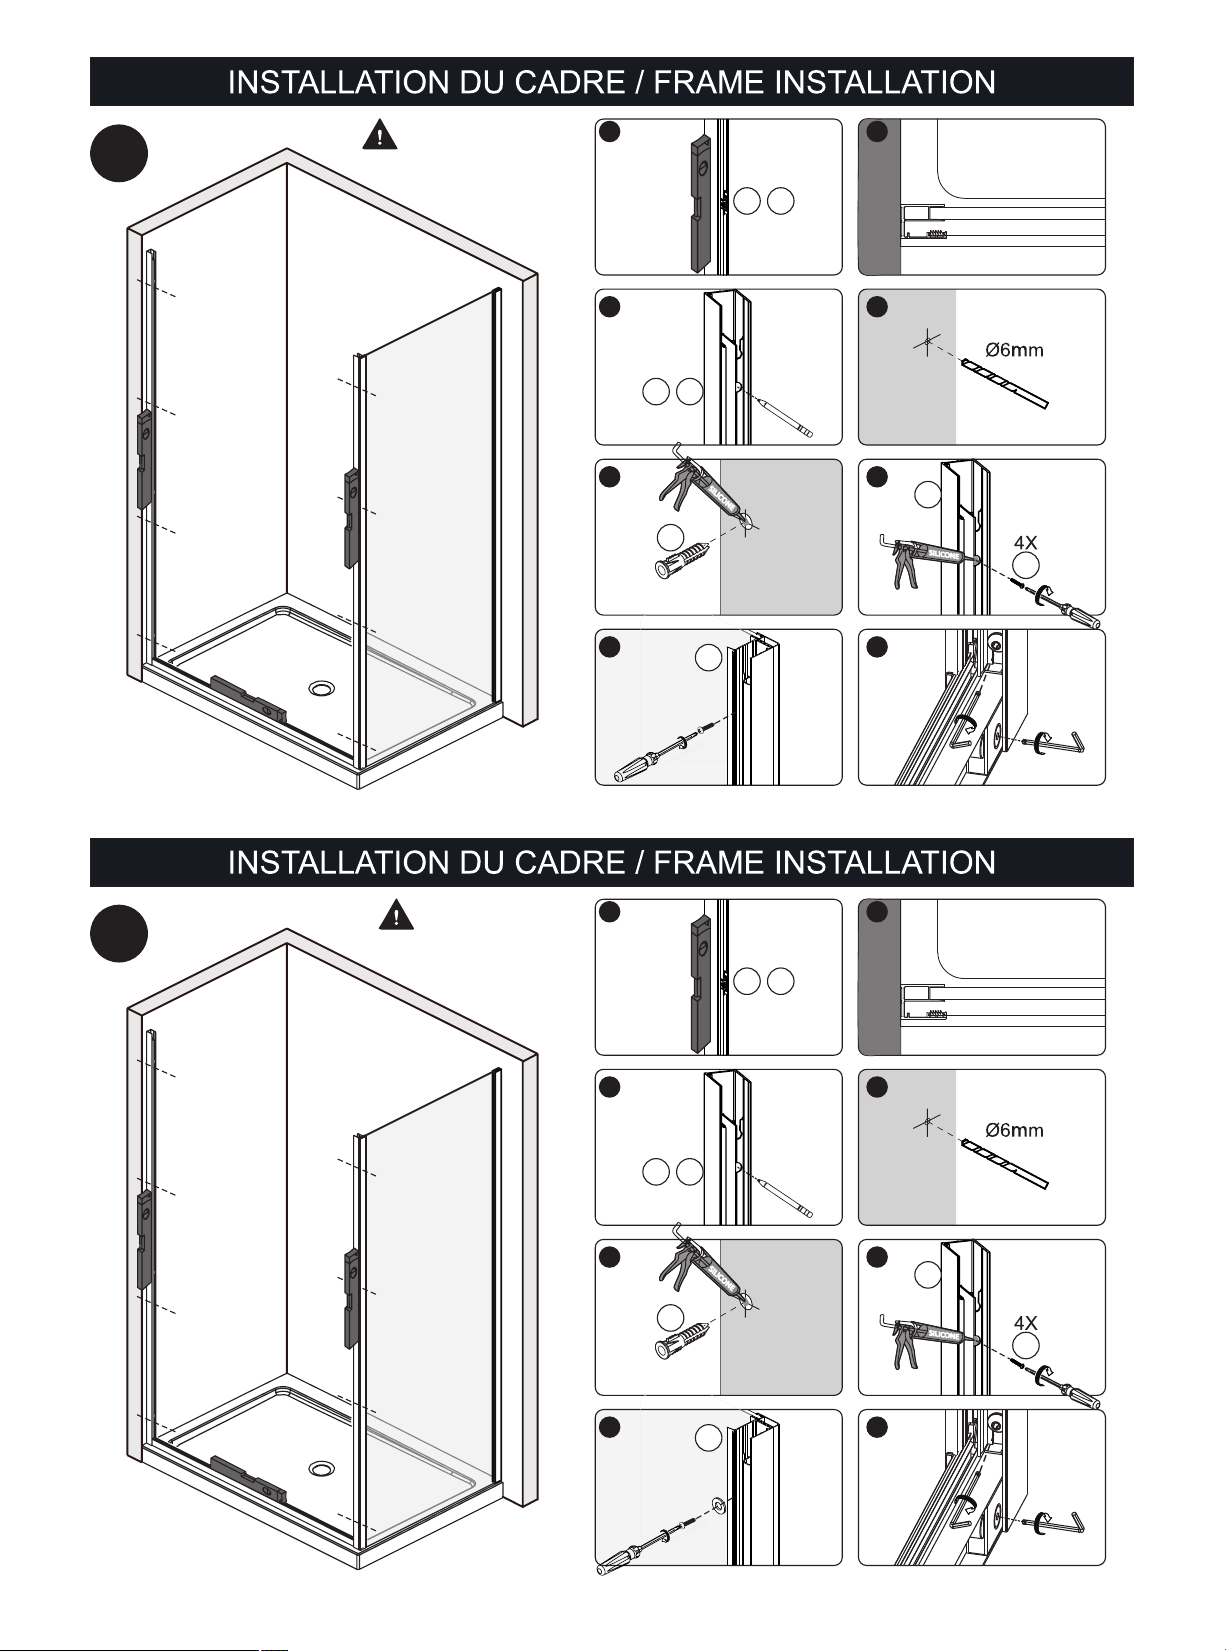
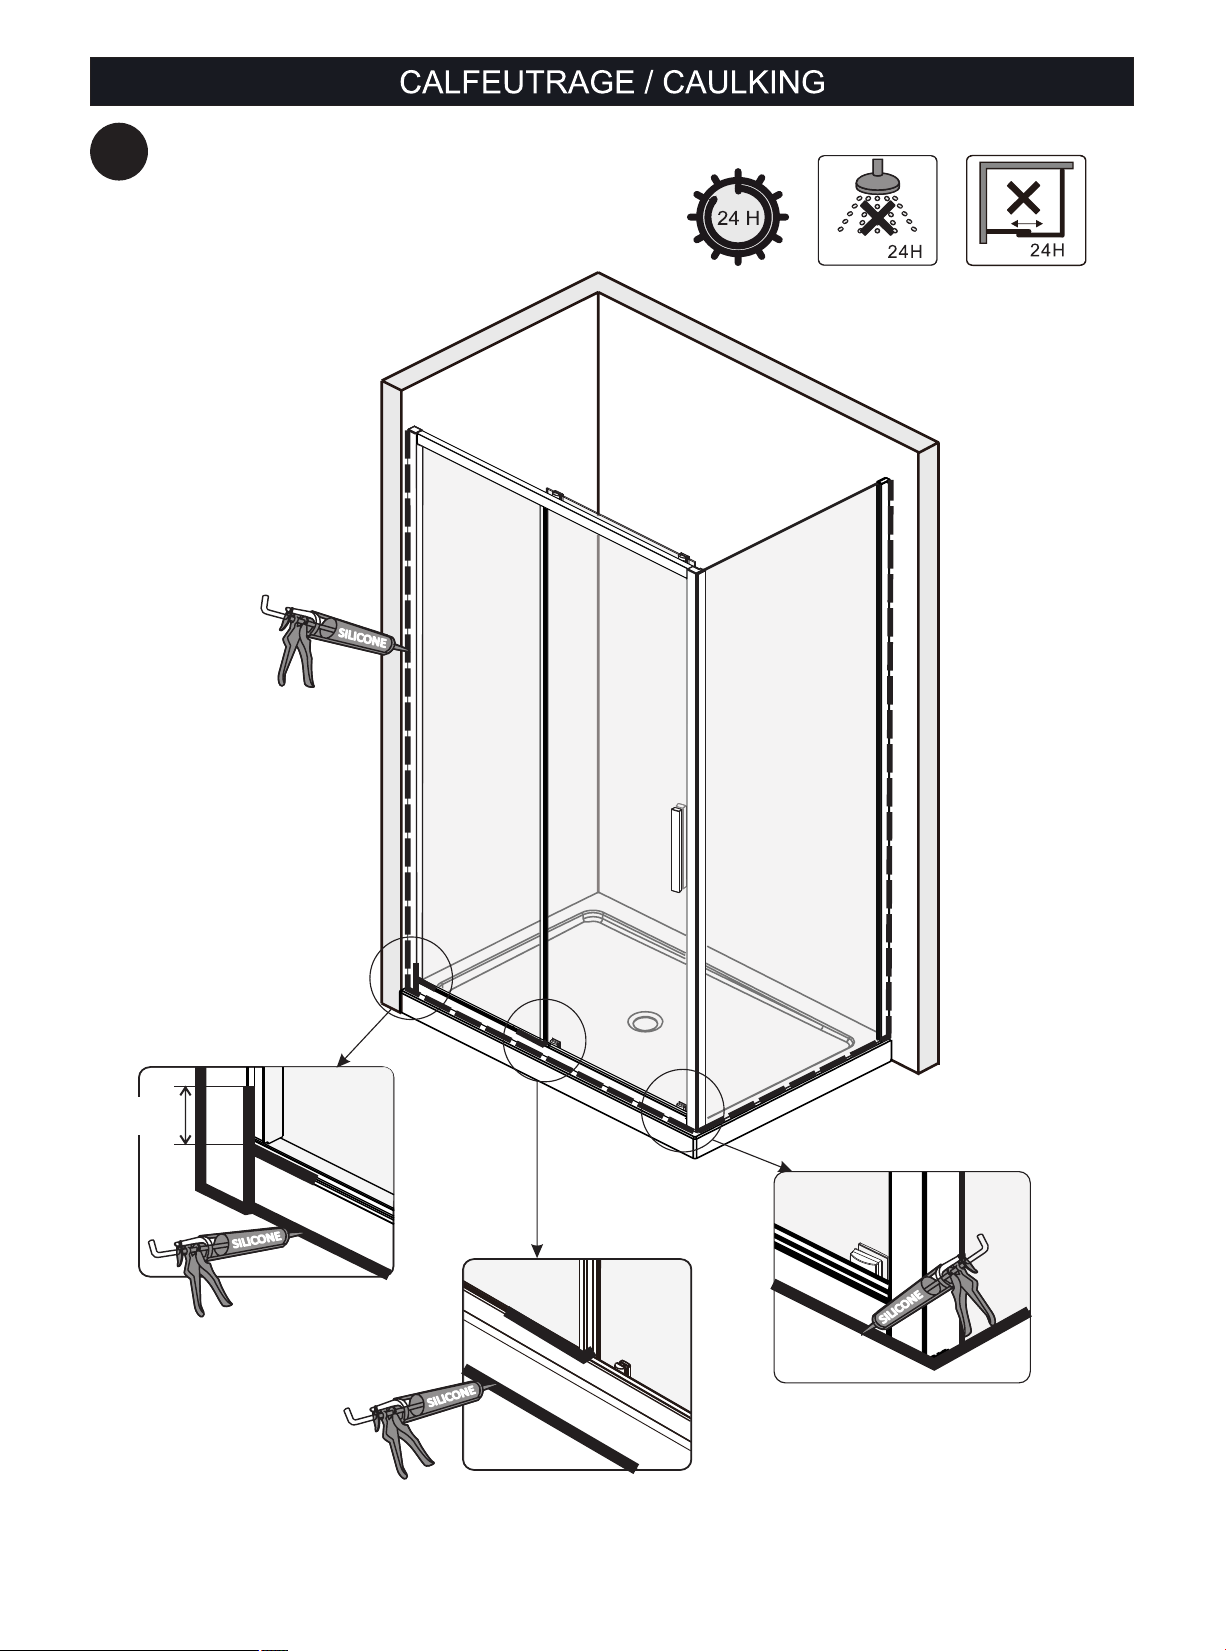
Lors de l’installation.l'application de silicone doit être à l'extérieur de la douche, car si appliqué
à l'intérieur, cela peut causer des fuites d'eau!
Veuiller lire attentivement ce manuel d’instruction avant de commencer l’installation.
Conserver ce manuel pour référence ultérieure.
IMPORTANT
Thoroughly inspect your product before proceeding with the installation.
The warranty will be void if the productis installed with a conspicuous defect.
CAUTION
To prevent leaks, silicone must be applied on the outside of the shower and not on the inside!
Read all instructions carefully before starting the installation.
Save this manual for future reference.
MANUEL D’INSTALLATION / INSTALLATION MANUAL
L'ENTRETIEN DE VOTRE DOUCHE
Ne jamais utiliser de poudre ou de
tampon à récurer .Il suffit de nettoyer
la porte avec une solution d'eau et
vinaigre, 1 once vinaigre pour 5 onces
d’eau.Vous pouvez utiliser un détergent
doux mais aucun produit à base
d'ammoniaque cela pourraitendommager
la surface de la vitre.
THE MAINTENANCE OF YOUR
SHOWER
Never use of powder or scouring pads.
Simply clean the door with a solution of
water and vinegar,1 to 5.You can use a
mild detergent but never use ammoniac,
it could damage the glass surface.
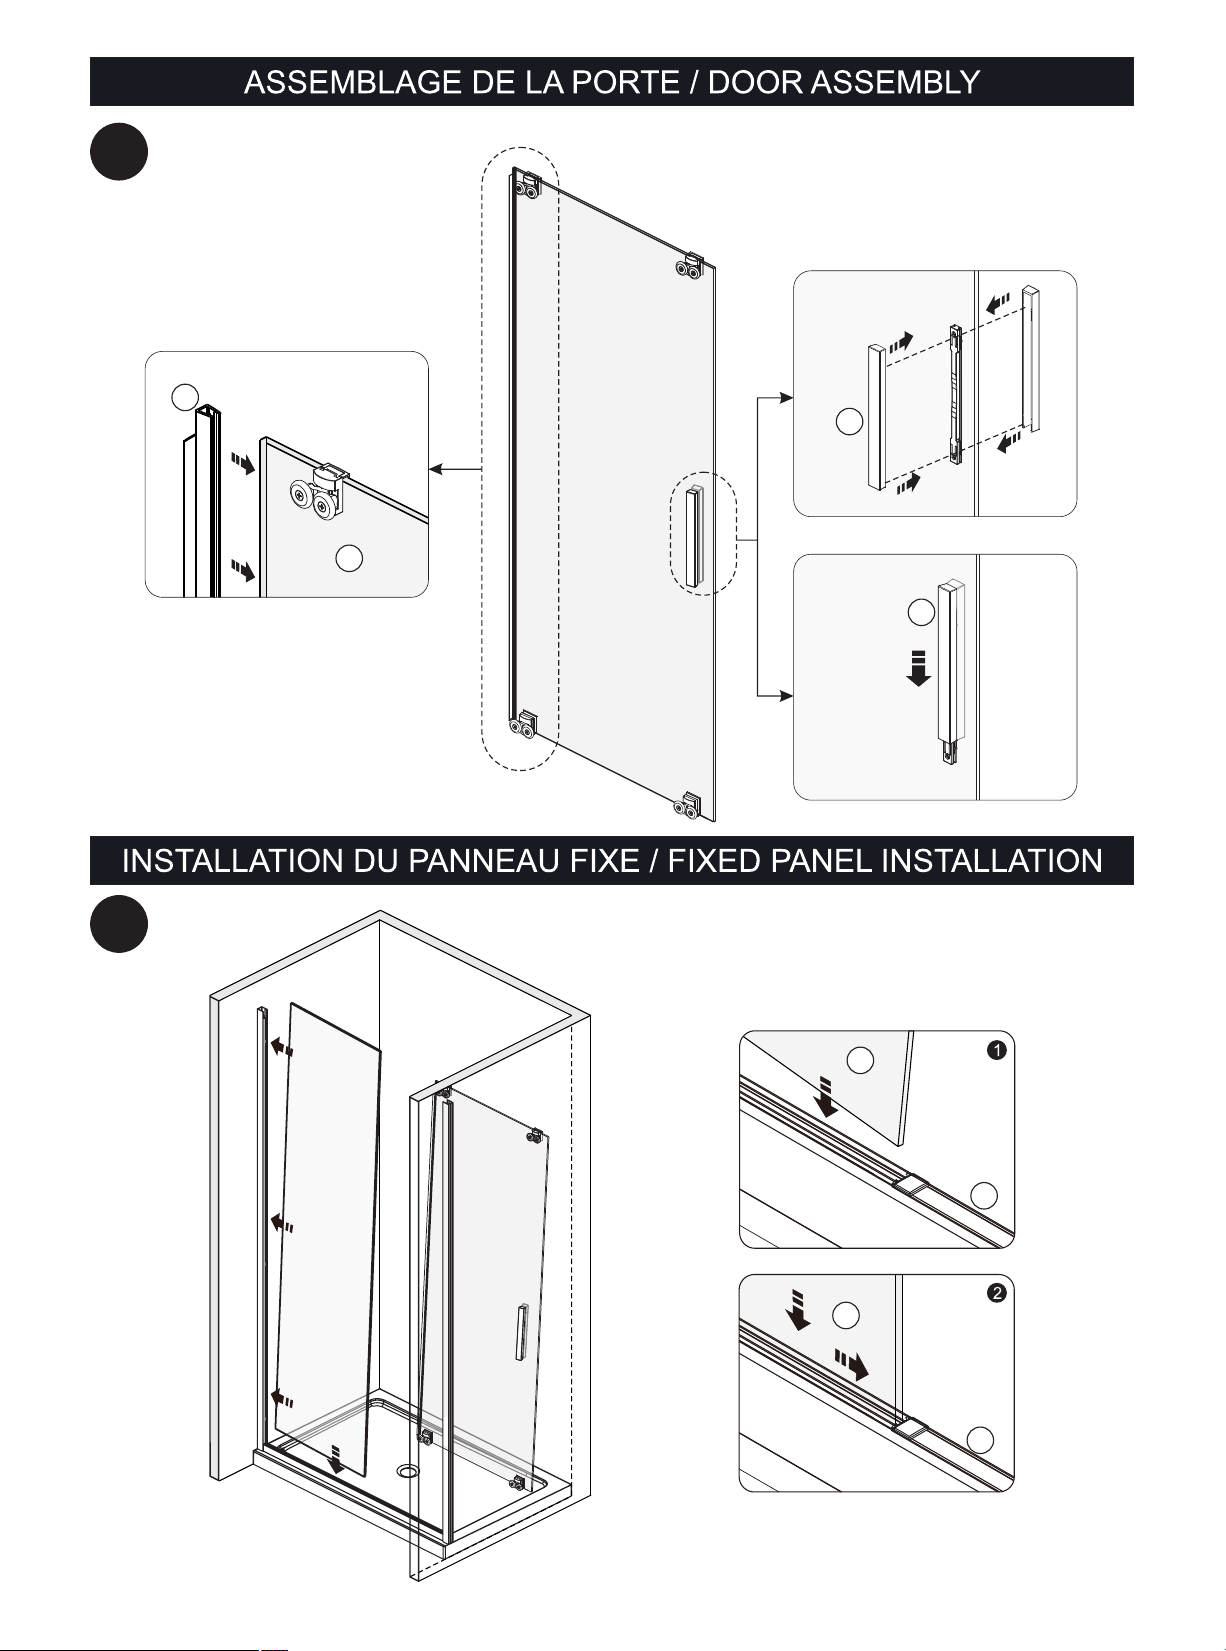
PORTE REVERSIBLE
La porte doit être du même côté que le
panneau de retour.
The door must be the same side as
the side pannel.
REVERSIBLE DOOR
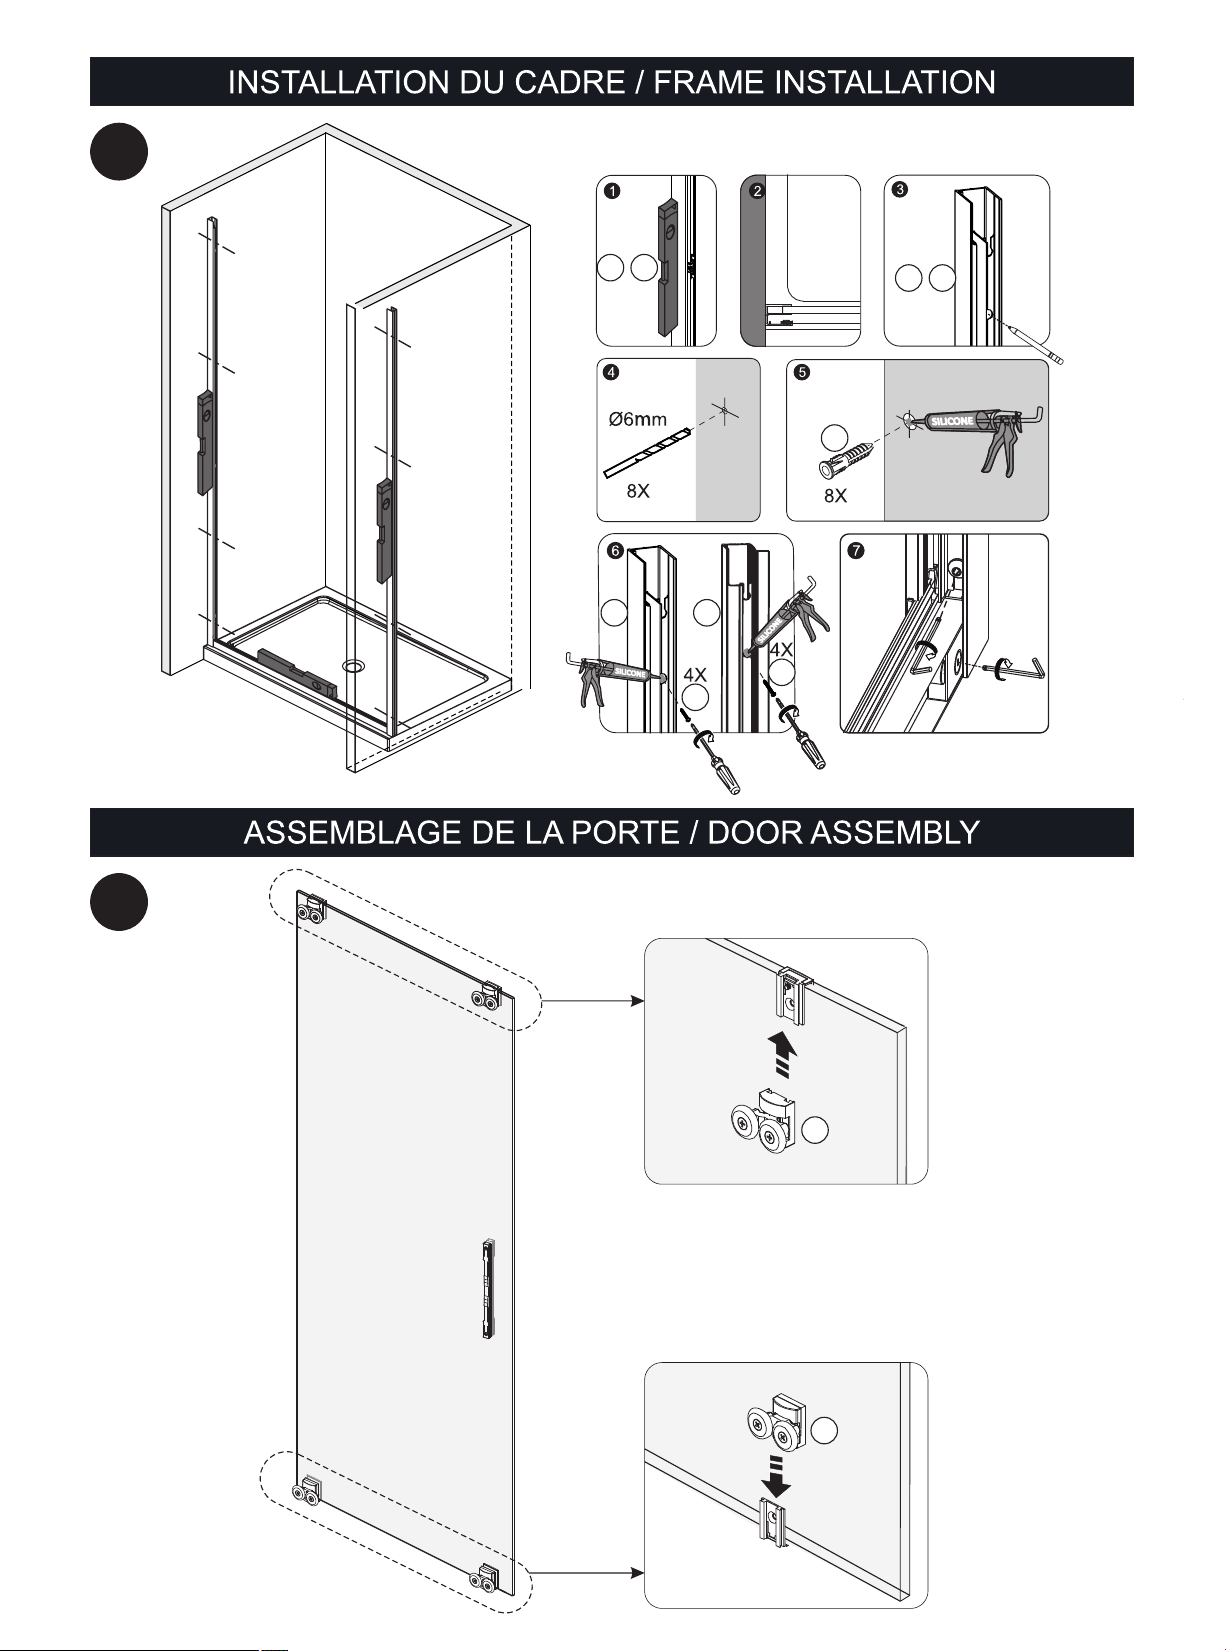
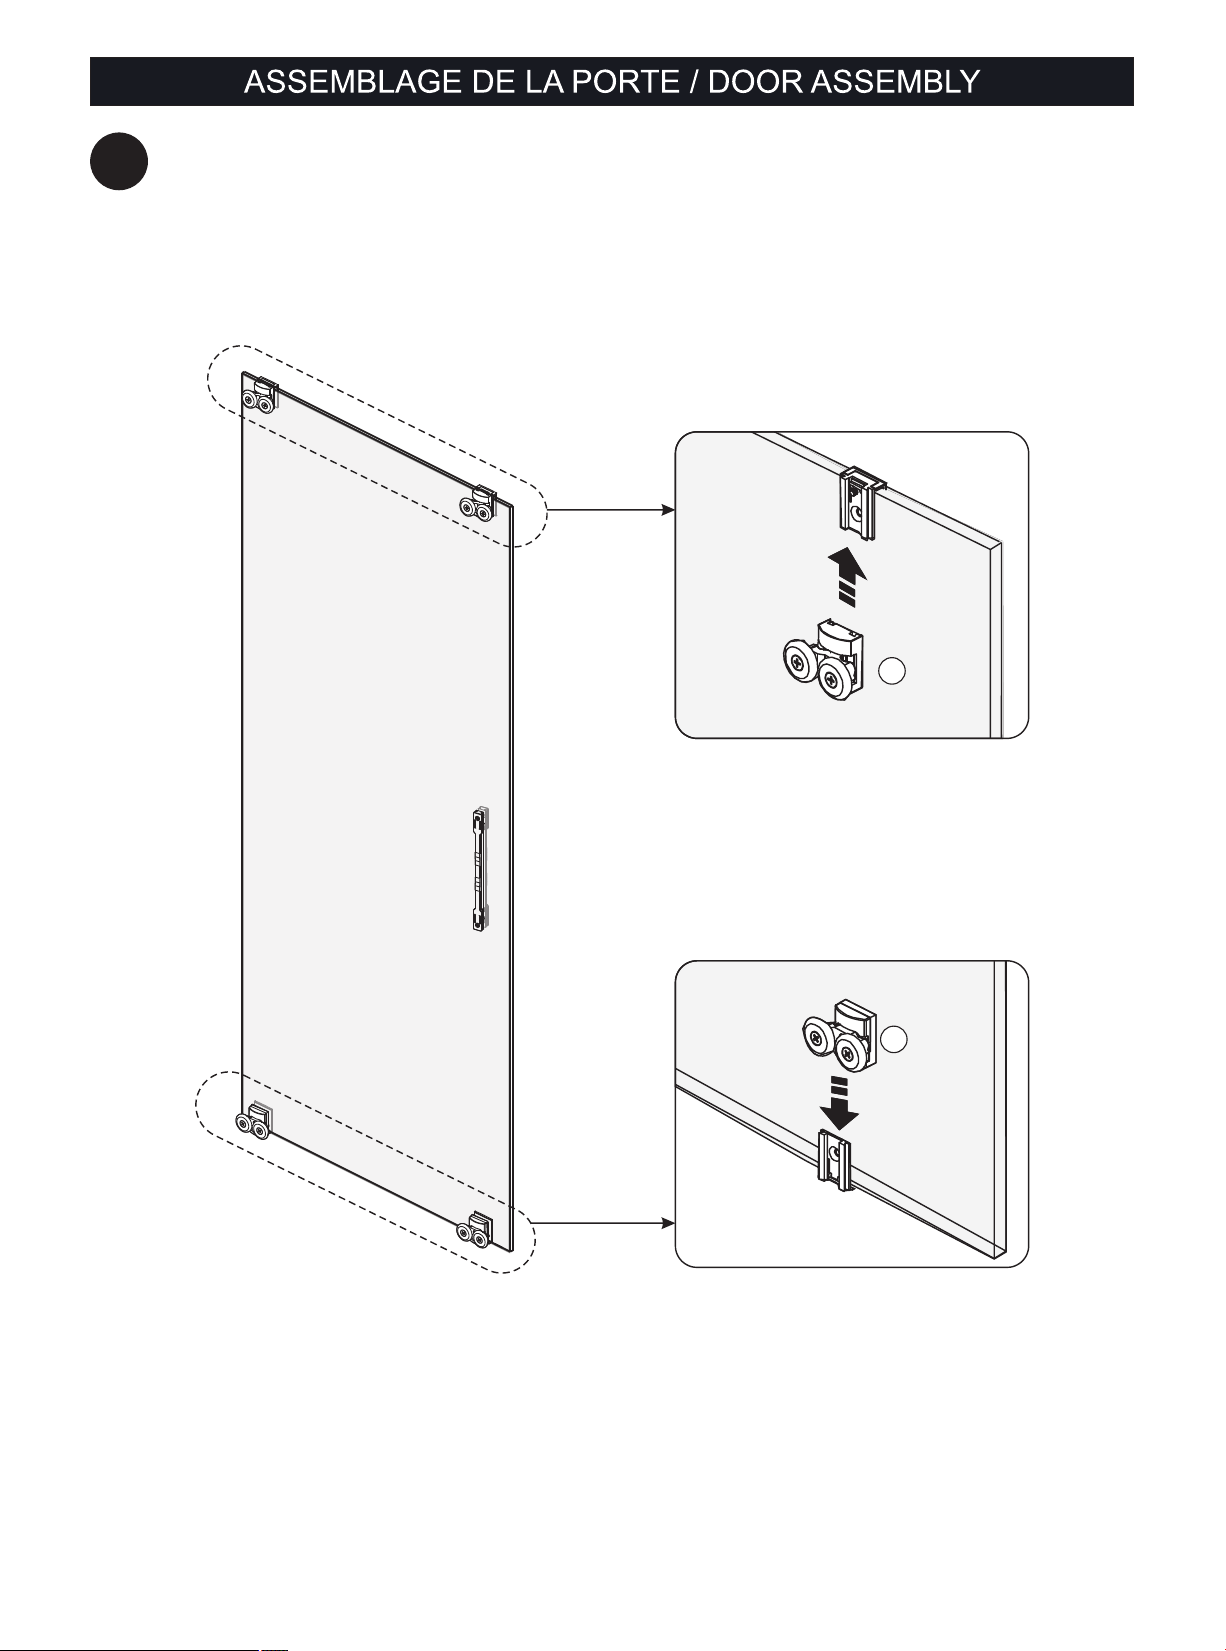
Les instructions montrés au manuel sont
pour le montage de la porte droite.
The instructions shown in the manual
is for the installation of the right door.
Nix48
Nix 60
(Nix 62)
(Nix 57)
81, Theodore-Viau,
Terrebonne, Québec, Canada, J6Y 0J8
Tel: 1-855-492-4242 450-704-2323
Fax: 1-866-735-6885
service@zittagroup.com www.acryline.ca
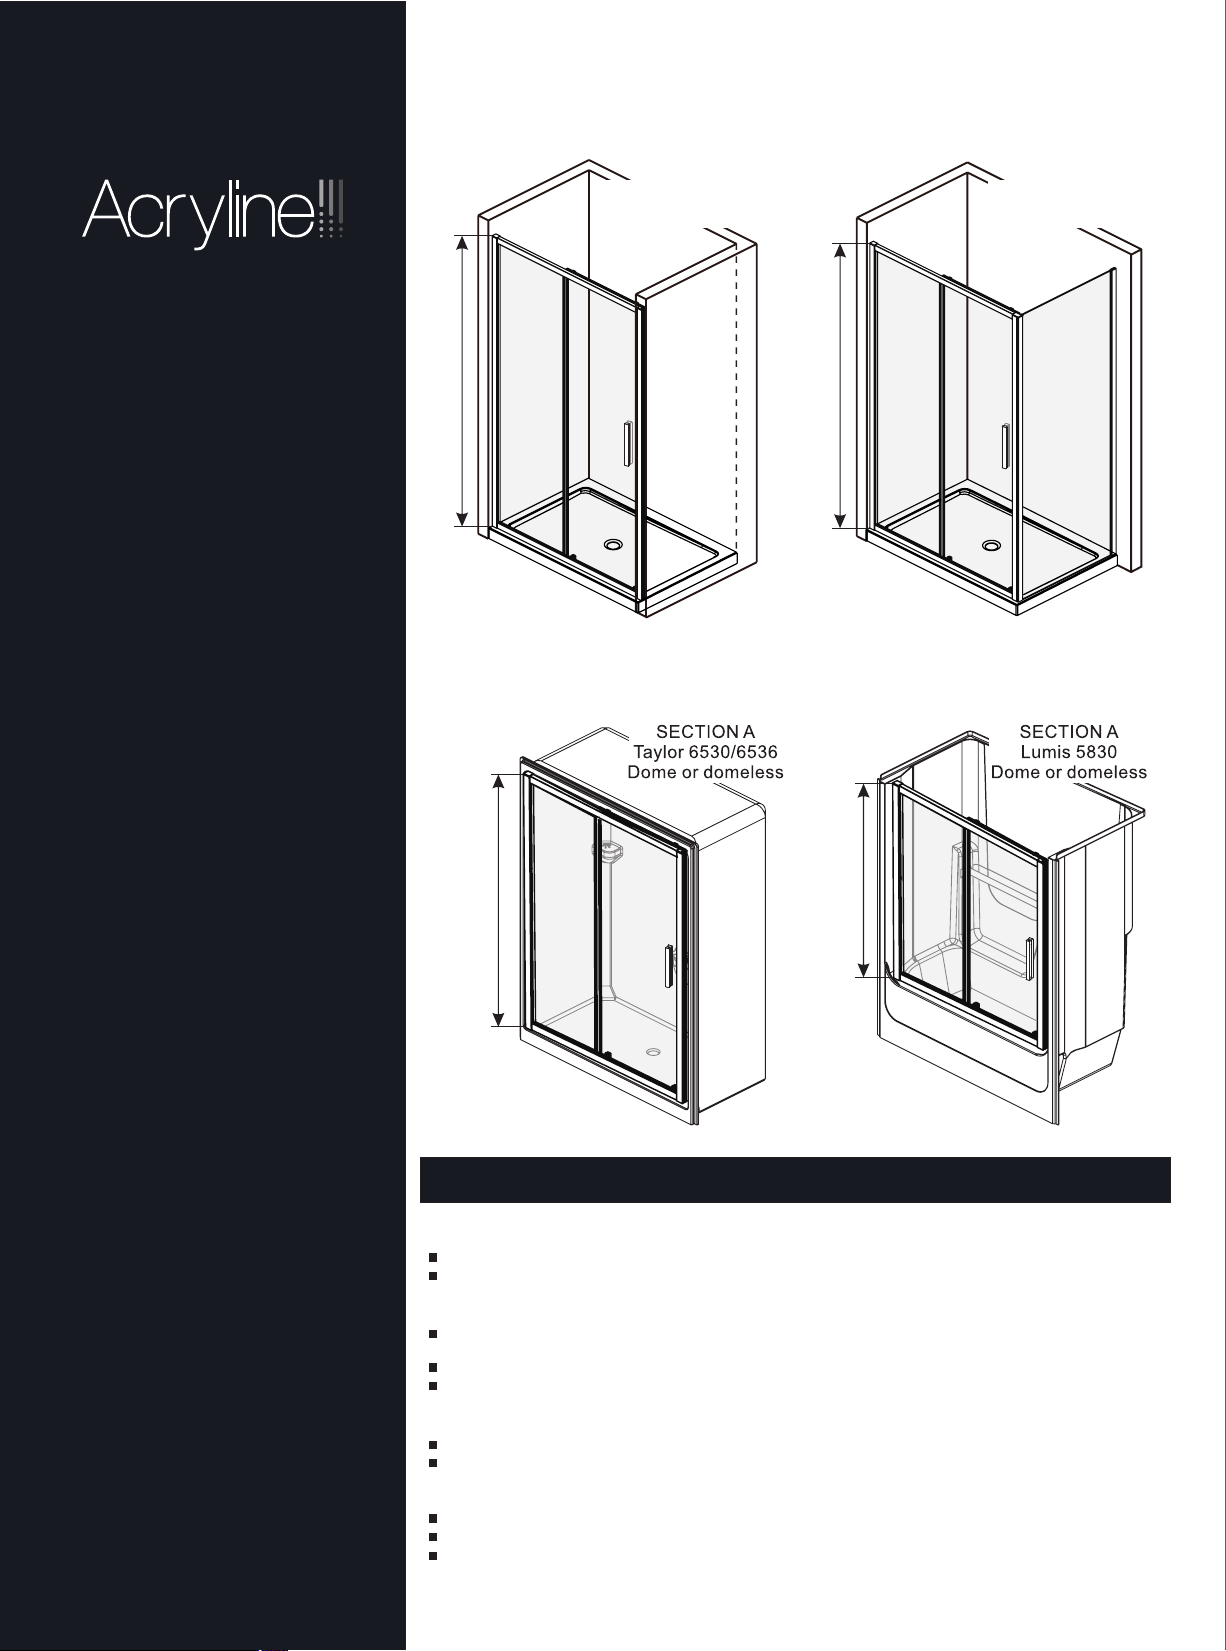
(74") (1880mm)
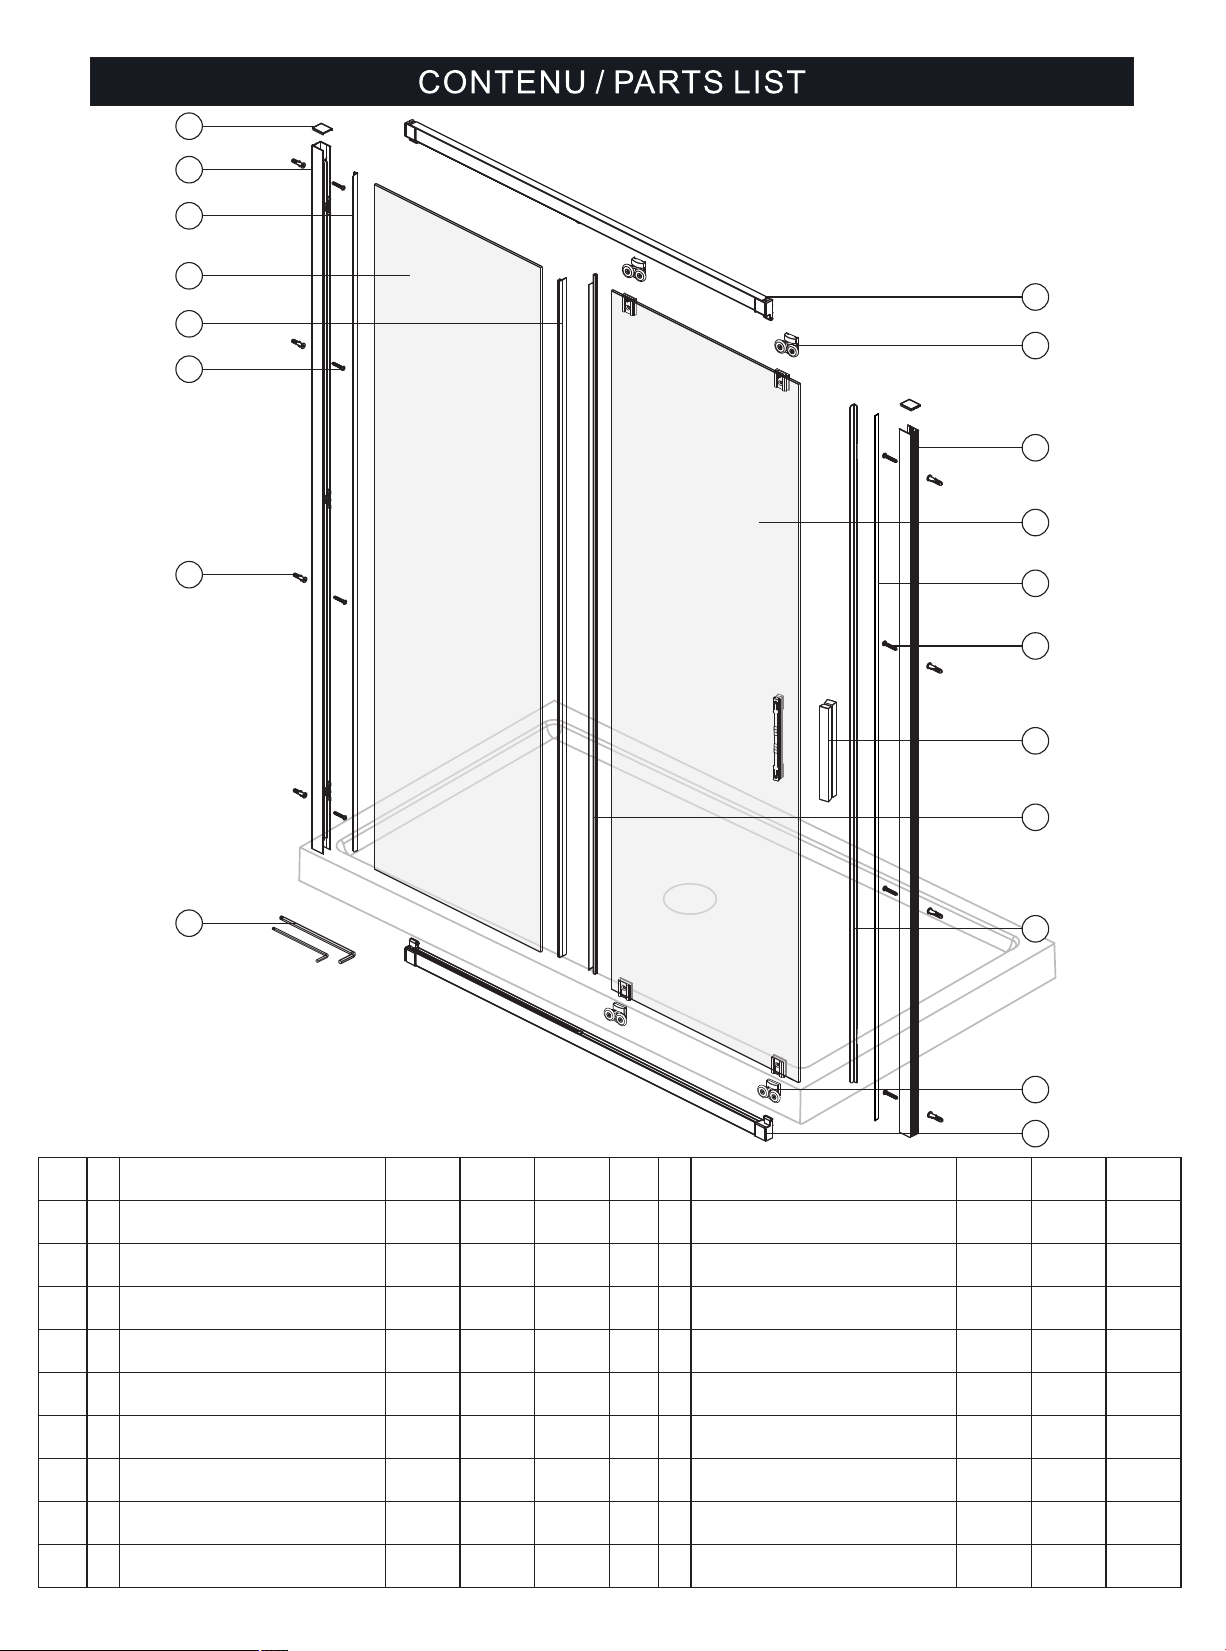
SECTION A
Alcôve / Alcove
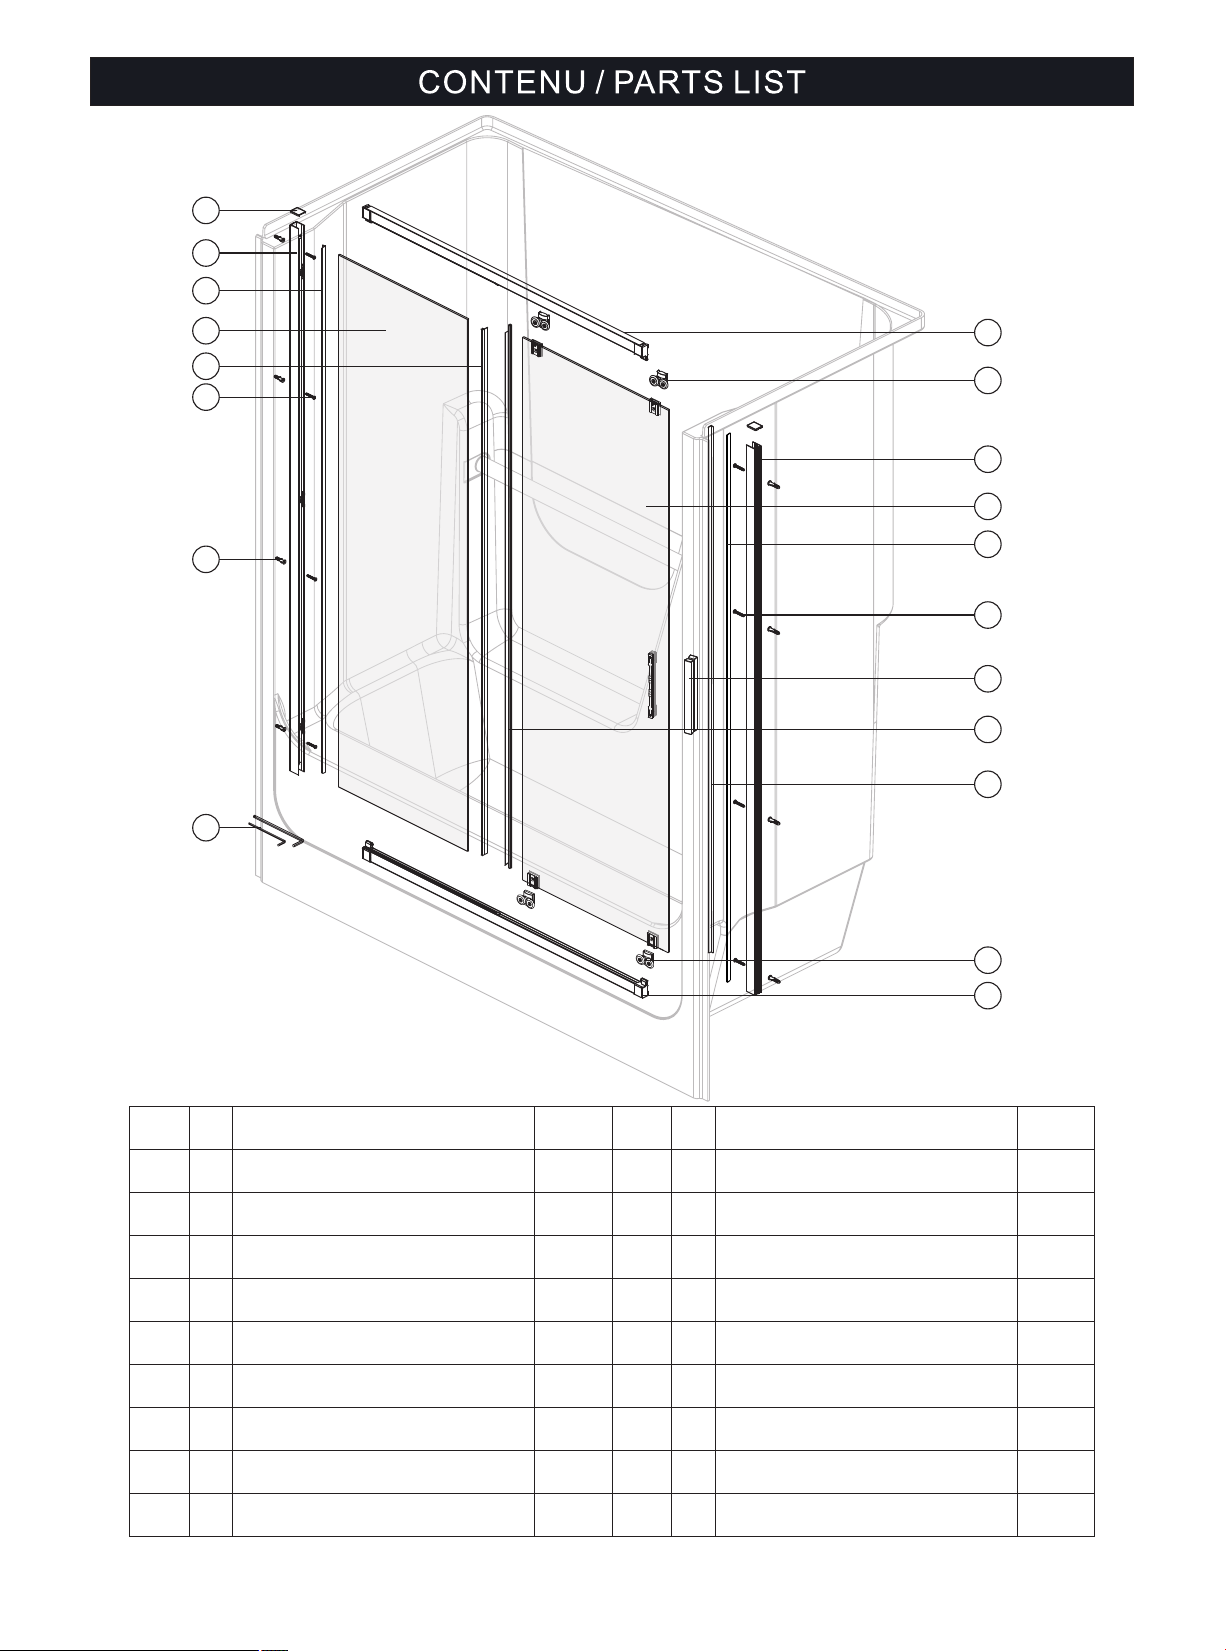
SECTION B
Coin / Corner
(74") (1880mm)
Update: 20200305
CONFIGURATIONS OPTIONNELLES
OPTIONAL CONFIGURATIONS
(74") (1880mm)
(55") (1397mm)