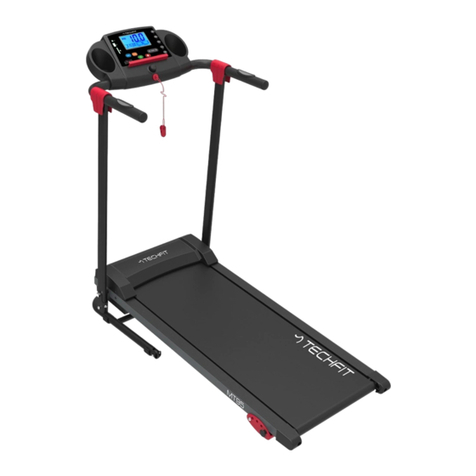
Action Fitness T4000 User manual

F000085
Treadmill T4000
OWNER’S MANUAL
Call for service 1-800-465-070 www.actionsports.com.au

Table of Contents
Exploded View _____________________
Parts List __________________________
Included Hardware____________________
Important Safety Information _____________
Specifications_ _____________________
Assembly Instruction ___________________
Lubrication_________________________
Adjustment__________________________
Fold and Transport___________________
Console___________________________
Warm Up___________________________
Monitoring Your Heart Rate ____________
Warranty / Service ___________________
Page
3
4
6
7
8
9
12
13
14
15
19
20
22
Call for service 1-800-465-070 www.actionsports.com.au
2

Exploded View
Call for service 1-800-465-070 www.actionsports.com.au
51
117
40
52-5
52-4
117
136
45
141
141
139
141
117 117
138
137
70
117
64
75
129
133
79
79
46
52-7
122
39-2
39-3
39-4
39-5
39-4
39-3
39-5
96
100
115
140
49
29
126
29
126
115
97
108
29
126
29
126
127
47
45
38
48
37
122
111
111
111
111
10
12
11
12 16
103
14
114
13 107
1393
15
28
117
128
128
128
128
128
81
81
50
130
71
102
102
32
33
99
17
18
109
94
120
120
120
120
120
120
63
62
27
31
102
73
120
110
120
110
115
140
117
23
116
116
11692
116 92
116 91
111
116
92
116
111
122
122122122
122
2
58
104
87
130
86
58
104
87
57 77
106
99
99
106
130
77 57
86
130
130
98
98
83
106
88
88
100
100
19
9
8
72
80
80
72
98
72
3
72
98
42
41
43
44
85
52-1
52-2
99
106
84
1
6
78
21
101
89
56
56
56
56
67
7
124
124
122
122
36
118
115
140
34
20
105105
113113
35
82
92
92
91
116
92
30132131
971110PM1320
90
90
22
73
116
116
76
24
66 124
25
61
125
55
55
26
61
25
54
125
66 124
67
130
26
54
117
117
117
117 117
117
117
117
117
117
117
117
117
117
117
117
117
120
120
120
53
60
120
120
60
117
69
117
68
5
4
112
112
95
74
111
111
70
117
70
117
123
123
123
123
117
70
70
117
59
59
52-3
56
56
128
117
3

Part List
Call for service 1-800-465-070 www.actionsports.com.au
NO. DESCRIPTION Q'TY
45 Connecting Wire (Black) 100×764×764mm 2
46 Connecting Wire (White) 150×764×764mm 1
47 Connecting Wire (White) 100×764×764mm 1
48 Computer Cable (Upper) 800mm 1
49 Computer Cable (Lower) 1150mm 1
50 Computer Cable (Middle) 1350mm 1
51 Sensor Rack 1
52 Console 1
52~1 Console Top Cover 1
52~2 Console Bottom Cover 1
52~3 Console Stopper 1
52~4 Rubber Key Pad(A) 1
52~5 Rubber Key Pad(B) 1
52~7 Lower Book Rack 1
53 Top Motor Cover 1
54 Speed Adjustment Switch W/Cable 300mm 1
55 Incline Adjustment Switch W/Cable 300mm 1
56 Cushion 6
57 Transportation Wheel(A) 2
58 Transportation Wheel(B) 2
59 Square End Cap 30×60 2
60 Foot Rail 2
61 Button Head Plug 2
62 Frame Base Cap (L) 1
63 Frame Base Cap (R) 1
64 Receiver, HR Assembly 1
66 Right Handgrip Side Cap 2
67 Left Handgrip Side Cap 2
68 Rear Adjustment Base (L) 1
69 Rear Adjustment Base (R ) 1
70 Motor Cover Anchor 5
71 TNylon Washer (A) Ø10×Ø24×3 2
72 Nylon Washer (B) Ø50×Ø13×3T 4
73 Adjustment Foot Pad 2
74 Motor Bracket 1
75 Safety Key 1
76 Belt Guide 2
77 Wheel Sleeve 2
78 Magnet 1
79 Computer Cable Tension Spring 2
80 Carriage Bolt 1/2"×1-1/4" 2
81 Hex Head Bolt 1/2"×1" 2
82 Socket Head Cap Bolt 3/8"×4-1/2" 1
83 Hex Head Bolt 3/8"×3-3/4" 1
84 Hex Head Bolt 3/8"×1-1/2" 1
85 Hex Head Bolt 3/8"×3/4" 4
86 Flat Head Socket Bolt 3/8"×2" 2
87 Button Head Socket Bolt 5/16"×1" 2
88 Button Head Socket Bolt 5/16"×2-3/4" 2
89 M8 × 60m/m_Hex Head Bolt 1
NO. DESCRIPTION Q'TY
1 Main Frame 1
2 Frame Base 1
3 Incline Bracket 1
4 Right Upright 1
5 Left Upright 1
6 Console Support 1
7 Deck Cross Brace 1
8 Outer Slide 1
9 Inner Slide 1
10 Link 1
11 Link Shaft 1
12 Shaft Bushing 2
13 Fastening Bracket 2
14 Clevis Pin 1
15 Fastening Bushing 1
16 Dual Torsion-Spring 1
17 Release Lever 1
18 ChenChin Torsion-Spring 1
19 Cylinder 1
20 Drive Belt 1
21 Front Roller W/Pulley 1
22 Rear Roller 1
23 Running Deck 1
24 Running Belt 1
25 Handlebar Foam Grip Ø38×225mm×3T 2
26 Foam Tube Ø38×330mm×3T 2
27 Steel Rope Tension Spring 1
28 Wire Clamp 1
29 Wire Tie Mount 6
30 Lubricant 1
31 Steel Rope 1
32 Top Frame Cover 1
33 Bottom Frame Cover 1
34 Motor 1
35 Incline Motor 1
36 Controller 1
37 Speed Cable (Upper) 800mm 1
38 Incline Cable (Upper) 800mm 1
39 Handpulse Assembly 2
39~2 Handpulse Wire, Coiled 650mm 1
39~3 Handpulse Top Cover 2
39~4 Handpulse Bottom Cover 2
39~5 Handpulse End Cap 2
40 Sensor W/Cable 1000mm 1
41 Breaker 1
42 Power Socket 1
43 On/O Switch 1
44 Power Cord 2000mm 1
4

Part List
Call for service 1-800-465-070 www.actionsports.com.au
NO. DESCRIPTION Q'TY
90 Socket Head Cap Bolt M8 × 80mm 2
91 Flat Head Countersink Bolt M8 × 50mm 2
92 Flat Head Countersink Bolt M8 × 25mm 6
93 Phillips Head Screw M3 × 10mm 1
94 Phillips Head Screw M5 × 20mm 1
95 Hex Head Bolt M8 × 12mm 2
96 Button Head Socket Bolt 5/16"×42 mm 1
97 Nylock Nut M5 1
98 Nylock Nut 1/2" 4
99 Nylock Nut 3/8" 4
100 Nylock Nut 5/16" 3
101 Nylock Nut M8 1
102 Nut 3/8" 3
103 Nut M3 1
104 Flat Washer Ø35×Ø5/16"×1.5T 2
105 Flat Washer Ø25×Ø10×1.5T 4
106 Ø19 × Ø10 × 1.5T_Flat Washer 4
107 Flat Washer Ø5×Ø10×1.0T 2
108 Flat Washer Ø5/16"×Ø18×1.5T 1
109 Flat Washer Ø5×Ø12×1.0T 1
110 Flat Washer Ø5×Ø13×1.0T 2
111 Ø6.5 × Ø25 × 1.5T_Concave Washer 8
112 Split Washer M8 2
113 Split Washer Ø10 4
114 Split Washer M3 1
115 Star Washer M5 4
116 Sheet Metal Screw 4×12mm 12
117 Tapping Screw 5×16mm 43
118 Tapping Screw 5×19mm 1
120 Tapping Screw 5×16mm 13
122 Sheet Metal Screw 3.5×12mm 16
123 Sheet Metal Screw 4×19 mm 4
124 Tapping Screw 3×12mm 12
125 Sheet Metal Screw 4×38mm 2
126 Tapping Screw 3.5×16mm 6
127 Sheet Metal Screw 3×10mm 2
128 Speed Nut Clip M5 6
129 Sheet Metal Screw 3×8mm 2
130 Button Head Socket Bolt 5/16"×1/2" 12
131 Combination M5 Allen Wrench &
Phillips Head Screw Driver 1
132 Allen Wrench M6 1
133 Controller Back Plate 130×110×25mm×1.5T 1
136 Console Ground Wire 400mm 1
137 Filter 1
138 Choke 1
139 Connecting Cable Of Motor 400mm 1
140 Phillips Head Screw M5×10mm 3
141 Split Washer M5×1.5T 3
5

Included Hardware
Call for service 1-800-465-070 www.actionsports.com.au
#130. Button Head Socket Bolt
5/16”x1/2” (12 pcs)
#75. Safety Key (1pc) #30. Lubricant (1pc)
#132. Allen Wrench M6 (1pc)
#131. Combination M5 Allen Wrench
& Phillips Head Screwdriver (1 pc)
#120. Tapping Screw 5x16mm (6 pcs)
#128. Speed Nut Clip M5 (6 pcs)
6

Important Safety Information
IMPORTANT: THIS UNIT IS INTENDED FOR HOUSEHOLD USE ONLY
Your treadmill was designed and built for optimum safety. However, certain precautions apply
whenever you use your treadmill. Be sure to read the manual before assembly and operation.
Also, please note the following safety precautions:
DANGER: To reduce the risk of electric shock, always unplug the treadmill from the electrical outlet
immediately after using and before cleaning.
1. Read OWNER’S MANUAL and all accompanying literature and follow it carefully before using
your treadmill.
2. If dizziness, nausea, chest pains, or any other abnormal symptoms are experienced while using this
equipment, STOP the workout and CONSULT A PHYSICIAN IMMEDIATELY.
3. Never leave the treadmill unattended when plugged in. Unplug from the outlet when not in use and
before removing or replacing parts.
4. Never operate the treadmill if it has a damaged cord or plug, if it is not working properly, if it has
been dropped, damaged, or exposed to water.
5. Do not pull the treadmill by the power supply cord or use cord as a handle. Keep cord away from
heated surfaces and open flames.
6. Fitness equipment must always be installed and used on a flat surface. Do not use outdoor or near
water.
7. Do not insert any objects into any openings.
8. Keep children and pets away from this equipment at all times while exercising.
9. Handicapped individuals should have medical approval and close supervision when using this
treadmill.
10.Do not place hands or feet under the treadmill. Always keep hands and legs off of the treadmill
when others are using it.
11.Never turn on treadmill while standing on treadbelt. Always return the treadmill to slow speed to
provide for safe dismount and low speed restart.
12.To disconnect, turn all controls to the off position, then remove plug from outlet.
13. Use the treadmill only for it is intended use as described in this manual.
14. Warm up 5 to 10 minutes before each workout and cool down 5 to 10 minutes afterward. This allows
your heart rate to gradually increase and decrease and will help prevent straining muscles.
15. Never hold your breath while exercising. Breathing should remain at a normal rate in conjunction
with the level of exercise being performed.
16. Start your program slowly and very gradually increase your speed and distance.
17. Always wear suitable clothing and footwear while exercising. Do not wear loose fitting clothing
that could become entangled with the moving parts of your treadmill.
18. Do not walk or jog bare foot, in stocking feet or loose fitting shoes or slippers.
19. Care must be taken when lifting or moving the equipment, so as not to injure your back. Always use
proper lifting techniques.
WARNING: Before beginning any exercise program consult your physician. This is especially
important for individuals over the age of 35 or persons with pre-existing health problems.
Read all instructions before using any fitness equipment. We assume no responsibility
from personal injury or property damage sustained by or through the use of this product.
Call for service 1-800-465-070 www.actionsports.com.au
7

Call for service 1-800-465-070 www.actionsports.com.au
Specifications
The treadmill has been designed and constructed to provide trouble free usage and enjoyable
exercise. You can greatly improve your understanding and benefits of exercising by carefully
reading the instructions given in this manual .Please familiarize yourself with the maintenance
advice provided for you.
SPECIFICATION
Horsepower Continuous / Peak: 2.25 / 4.5 hp
Speed Range: 1 – 16 Km/h
Running Surface: 510 X 1400 mm
Incline Level: 1-10 Levels / Power
MAX.USER WEIGHT 150 KGS
Handgrip Tube
Speed Keys
Running Belt
Wheel
Safety Key
Incline Keys
Console
Main Frame
Handpulse
8

Assembly Instruction
1
2
3
Call for service 1-800-465-070 www.actionsports.com.au
Take out the treadmill from the carton and lay it on the smooth surface.
#128. Speed Nut Clip M5 (6 pcs)
#120. Tapping Screw 5x16mm (6 pcs)
9

Assembly Instruction
Call for service 1-800-465-070 www.actionsports.com.au
4
5
6
Connect the Computer Cable (Lower) (49) and Computer Cable (Middle) (50).
49
50
Install the Right and Left Handrails (4,5) into the Frame Base (2).
#130. Button Head Socket Bolt
5/16”x1/2” (8 pcs)
130
130
130
10

Assembly Instruction
Call for service 1-800-465-070 www.actionsports.com.au
7
8
Connect the Speed Adjustment Switch W/Cable (54) and Speed Cable (Upper) (37).
Connect the Incline Adjustment Switch W/Cable (55) and Incline Cable (Upper) (38).
Connect the Computer Cable (Middle) (50) and Computer Cable (Upper) (48).
Install the Console (52) into the Right and Left Handrails (4,5).
#130. Button Head Socket Bolt
5/16”x1/2” (4 pcs)
130
130
11

TREADMILL LUBRICATION
Lubricating under the treadbelt will ensure superior performance and extend its life expectancy.
After the first 25 hours of use (2-3 months) apply one half bottle of lubricant.
Every 50 hours of use (5-8 months) apply one half bottle of lubricant.
HOW TO CHECK TREADBELT FOR PROPER LUBRICATION
Lift one side of the treadbelt and feel the top surface of the treadboard.
If the surface is slick to the touch, then no further lubrication is required.
If the surface is dry to the touch, apply one packet of lubricant or half of the bottle of lubricant.
HOW TO APPLY LUBRICANT
Lift one side of treadbelt.
Pour one half of the lubricant bottle under the center of the treadbelt on the top surface of the
treadboard.
Walk on the treadmill at a slow speed for 3 to 5 minutes to evenly distribute lubricant.
NOTE: DO NOT over lubricate treadboard. Any excess lubricant that comes out should be
wiped off.
IMPORTANT: ONLY USE HALF THE BOTTLE OF LUBRICANT PER APPLICATION
LUBRICATION SCHEDULE.
Lubrication
Call for service 1-800-465-070 www.actionsports.com.au
12

Adjustment
BELT ADJUSTMENT
If during use you notice that walking belt either shifts to the right or the left of center, first remove
"Safety Key" and unplug equipment from AC power source.
Using the M6 Allen wrench provided, turn left rear roller adjustment as indicated below clockwise
no more the 1/4" of a turn. Remove the M6 Allen wrench, insert "Safety Key" and insert AC power
cord into AC outlet. Turn on your treadmill and observe after running a few minutes to see if
problem has been corrected. This may take several adjustments, so repeat the above procedure.
Call for service 1-800-465-070 www.actionsports.com.au
13

Fold and Transport
Call for service 1-800-465-070 www.actionsports.com.au
Do not attempt to move the unit unless it is in the folded and locked position. Be sure the power cord
is secured to avoid possible damage. Use both handrails to maneuver the unit to the desired position.
FOLDING
Make certain the treadmill is at lowest incline. Lift the treadmill running deck until it is secured by the
locking telescoping tube assembly in center back of base.
UNFOLDING
Push the running deck forward to relieve pressure on the locking system . Pull down on the unlocking
lever and slowly lower the running deck to the oor.
TRANSPORT
The treadmill is equipped with four transport wheels which are engaged when the treadmill is folded.
14

Console
Call for service 1-800-465-070 www.actionsports.com.au
GETTING STARTED
Power the treadmill on by plugging it into an appropriate wall outlet, then turn on the power switch
located at the front of the treadmill below the motor cover. Ensure that the safety key is installed, as the
treadmill will not operate without it.
When the power is turned on, a message will scroll across the dot matrix showing the current software
version. Then the Time and Distance windows will display Odometer readings for a short time, Time
window will show how many hours the treadmill has been in use and the Distance window will show
how many miles (or Kilometers if the treadmill is set to metric readings) the treadmill has gone. The
treadmill will then enter idle mode, which is the starting point for operation.
Dot Matrix Center Display (Program Operation):
Twenty rows of dots (8 high) indicate each segment of a workout. The dots are only to show an approxi-
mate level (speed/incline). They do not necessarily indicate a specic value - only an approximate percent
to compare levels of intensity. In operation the Speed / Incline dot matrix window will build a prole
“picture” as values are changed during a workout.
When the Speed indicator - which is above dot matrix - is lit the dot matrix displays the speed prole and
when the incline indicator is lit the dot matrix displays the incline prole.
You may change the dot matrix prole view that you desired by pressing the DISPLAY button. After
scrolling through the three proles which include incline, speed and incline+ speed prole, by pressing
the DISPLAY button, the dot matrix will automatically scroll through the three displays showing each one
for ve seconds.
15

Console
______________________
Call for service 1-800-465-070 www.actionsports.com.au
0.4 KM Track
The 0.4 km track will be displayed around the dot matrix window. The ashing dot indicates your progress.
Once the 0.4 km is complete this feature will begin again. The number of completed laps is displayed in the
laps window, which is below the PULSE window.
Pulse Grip Feature
The Pulse (Heart Rate) console window will display your current heart rate in beats per minute during the
workout. You must use both stainless steel sensors on the front cross bar to display your pulse or the
optional wireless chest strap. Pulse value displays anytime the upper display is receiving a Pulse signal.
Calorie Display
Displays the cumulative calories burned at any given time during your workout.
Note: This is only a rough guide used for comparison of dierent exercise sessions, which cannot be used for
medical purposes.
To Turn Treadmill O
Display will automatically turn o (go to sleep) after 30 minutes (no key operations). The treadmill will draw
very little current in sleep mode.
Unplug the power cord.
Turn o the main switch at the front of the treadmill, below the motor cover.
OPERATION
Quick-Start Operation:
1. Attach the Safety key to enable the display (if not already on).
2. Press the Start key to begin belt movement. Then adjust to the desired speed using the Fast / Slow keys
(console or handgrip). You may also use the rapid speed keys 2 through 10 to adjust the speed.
3. To stop the tread-belt press STOP key or pull away Safety key.
Pause/Stop/Reset Feature
1. When the treadmill is running the pause feature may be utilized by pressing the red Stop key once. This
will slowly decelerate the tread-belt to a stop. The incline will go to zero percent. The Time, Distance and
Calorie readings will hold while the unit is in the pause mode. After 5 minutes the display will reset and
return to the start up screen.
2. To resume your exercise, when in Pause mode, press the START key. The speed and incline will return to
their previous settings.
Pause is executed when the Stop button is pressed once. If the Stop key is pressed a second time, the program will
end and a workout summary will be displayed. If the Stop button is pressed a third time, the console will return to
the idle mode (start up) screen. If the Stop button is held down for more than 3 seconds the console will reset.
16

Console
______________________
Call for service 1-800-465-070 www.actionsports.com.au
Incline Feature
Incline may be adjusted anytime after belt movement.
Press and hold ▲▼ keys (console or handgrip) to achieve desired level of eort. You may also choose quick
incline keys 2 through 10.
Programmable Features
Factory preset programs (P1~P5), 2 user dened programs, and one Manual program.
Each preset program has a maximum speed level that is displayed when a desired workout is chosen. The
maximum speed that the particular program will achieve will be displayed in the Speed window.
Select a Program
1. Press the PROGRAM ▲▼ keys to select desired program. Press enter to select the program. Press START
to begin the workout with default values or press ENTER to begin input values.
2. If ENTER was pressed, the Time window will display with the default value of 20 minutes. You may use
▲▼ to adjust the time. Press ENTER to in put next desired values. (You may press START at any time during
the programming to start the workout.)
User Dened Programs
1. Select User 1 or User 2 via the PROGRAM keys then press ENTER. Note that the dot matrix display portion
will have a single row of dots at the bottom (Unless there is a previously stored program).
2. Note the Time window is ashing. Use the ▲▼ keys to adjust up from 10 minutes (if desired). Press
ENTER key.
3. Enter your bodyweight, age and press ENTER.
5. The rst column (segment) will now be blinking. Using the Fast / Slow or rapid keys, adjust the speed
level to your desired eort for the rst segment then press enter. The second column will now be blinking.
Repeat the above process until all segments have been programmed. The rst column will be blinking
again. This is for the incline programming. Repeat the above process to program all segments for incline.
6. Press the START button to begin the workout. This User Dened Program is saved onto the memory.
ERROR MESSAGE
1. LS: Treadmill doesn’t receive the speed signal for 8 seconds.
2. E1: Memory of console malfunction or CPU accessing problem.
3. E2: Incline position error.
17

Console
Call for service 1-800-465-070 www.actionsports.com.au
Using a Heart Rate Transmitter (sold separately)
1. Attach the transmitter to the elastic strap using the locking parts.
2. Adjust the strap as tightly as possible as long as the strap is not too tight to remain comfortable.
3. Position the transmitter with the Polar logo centered in the middle of your body facing away from your chest
(some people must position the transmitter slightly left of center).Attach the final end of the elastic strap by
inserting the round end and, using the locking parts, secure the transmitter and strap around your chest.
4. Position the transmitter immediately below the pectoral muscles.
5. Sweat is the best conductor to measure very minute heart beat electrical signals. However, plain water
can also be used to pre-wet the electrodes (2 black square areas on the reverse side of the belt and either
side of transmitter). It’s also recommended that you wear the transmitter strap a few minutes before your
work out. Some users, because of body chemistry, have a more difficult time in achieving a strong, steady
signal at the beginning. After“warming up”, this problem lessens. As noted, wearing clothing over the
transmitter/strap doesn’t affect performance.
6.Your workout must be within range - distance between transmitter/receiver – to achieve a strong steady
signal.The length of range may vary somewhat but generally stay close enough to the console to main
tain good, strong, reliable readings.Wearing the transmitter immediately against bare skin assures you of
proper operation. If you wish, you may wear the transmitter over a shirt.To do so, moisten the areas of the
shirt that the electrodes will rest upon.
Erratic Operation
Areas to look for on interference:
(1) Treadmill not properly grounded - A must!
(2) Microwave ovens,T.V., small appliances, etc.
(3) Fluorescent lights.
(4) Some household security systems.
(5) Perimeter fence for a pet.
(6) The antenna that picks up your heart rate is very sensitive. If there is an outside noise source, turning the
whole machine 90 degrees may de-tune the interference.
(7) If you continue to experience problems contact your dealer.
WARNING!
DO NOT USE THE HEART RATE CONTROL PROGRAM IF YOUR HEART RATE IS NOT REGISTERING PROPERLY ON
THE TREADMILL’S DISPLAY!
18

Quadriceps Stretch
With one hand against a wall for balance, reach behind you and pull
your right foot up. Bring your heel as close to your buttocks as
possible. Hold for 15 counts and repeat with left foot up.
Inner Thigh Stretch
Sit with the soles of your feet together with your knees
pointing outward. Pull your feet as close into your groin as possible.
Gently push your knees towards the floor. Hold for 10 counts
Toe Touches
Slowly bend forward from your waist, letting you back and shoulders
relax as you stretch toward your toes. Reach down as far as you
can and hold for 15 counts.
Hamstring Stretches
Sit with your right leg extended. Rest the sole of your left foot
against your right inner thigh. Stretch toward your toe as far as
possible. Hold for 15 counts Relax and then repeat with left leg
extended.
Warm Up
Call for service 1-800-465-070 www.actionsports.com.au
19

Monitoring Your Heart Rate
To obtain the greatest cardiovascular benefits from your exercise workout, it is important to work
within your target heart rate zone. The American Heart Association (AHA) defines this target as
60%-75% percent of your maximum heart rate.
Your maximum heart rate may be roughly calculated by subtracting your age from 220. Your maxi-
mum heart rate and aerobic capacity naturally decreases as you age. This may vary from one
person to another, but use this number to find your approximate effective target zone. For example,
the maximum heart rate for an average 40 year-old is 180 bpm. The target heart rate zone is 60%-
75% of 180 or 108-135 bpm.
See Fitness Safety on page 17
Before beginning your workout, check your normal resting heart rate. Place your fingers lightly
against your neck, or against your wrist over the main artery. After finding your pulse, count the
number of beats in 10 seconds. Multiply the number of beats by six to determine your pulse rate per
minute. We recommend taking your heart rate at these times; at rest, after warming up, during your
workout and two minutes into your cool down, to accurately track your progress as it relates to
better fitness.
During your first several months of exercising, the AHA recommends aiming for the lower part of the
target heart rate zone-60%, then gradually progressing up to 75%. According to the AHA, exercising
above 75% of your maximum heart rate may be too strenuous unless you are in top physical condi-
tion. Exercising below 60% of your maximum will result in minimal cardiovascular conditioning.
Check your pulse recovery rate – If your pulse is over 100 bpm five minutes after you stop exercis-
ing, or if it’s higher than normal the morning after exercising, your exertion may have been too
strenuous for your current fitness level. Rest and reduce the intensity next time.
Fitness Safety The target heart rate chart indicates average rate zones for different ages. A variety
of different factors (including medication, emotional state, temperature and other conditions) can
affect the target heart rate zone that is best for you. Your physician or health care professional can
help you determine the exercise intensity that is appropriate for your age and condition
(MHR) = Maximum Heart Rate
(THR) = Target Heart Rate
220 - age = maximum heart rate (MHZ)
MHZ x .60 = 60% of your maximum heart rate.
MHZ x .75 = 75% of your maximum heart rate.
For example, if you are 30 years old, your calculations will be as follows:
220 - 30 = 190
190 x .60 = 114 (low end or 60% of MHZ)
190 x .75 = 142 (high end or 75% of MHZ)
30 year-old (THR) Target Heart Rate would be 114-142
See Heart Rate Table (on next page) for additional calculations.
Call for service 1-800-465-070 www.actionsports.com.au
20
Table of contents
Other Action Fitness Treadmill manuals


