manuals.online logo
Brands
  1. Home
  2. •
  3. Brands
  4. •
  5. ActronAir
  6. •
  7. Air Conditioner
  8. •
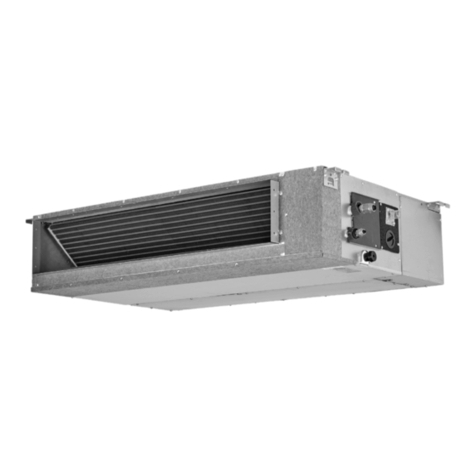
  9. ActronAir ULTRASLIM URC-071AS User manual

ActronAir ULTRASLIM URC-071AS User manual

IMPORTANT NOTE:
Please read this manual carefully before operating your new air conditioning unit and keep it available for future reference.
OWNER’S MANUAL
Low Profile Split Ducted Air Conditioner
Model Numbers:
URC-071AS / LRE-071AS
URC-100AS / LRE-100AS
URC-125AS / LRE-130AS
URC-140AS / LRE-130AS
That’s better. That’s Actron.
Safety Precautions .................................................... 04
Care and Maintenance ............................................ 07
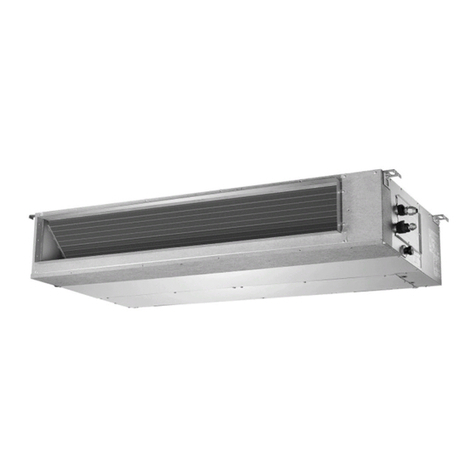
Indoor Unit Parts and Major Functions .................... 06
Table of Contents
Owner’s Manual
1
2
3
4
Page 3
This manual is a controlled document which contains confidential and proprietary information.
Distribution, modification, copying and/or reproduction are prohibited without written consent from ActronAir
Product design and specifications are subject to change without prior notice for product improvement.
Troubleshooting ...................................................... 09
READ SAFETY PRECAUTIONS BEFORE INSTALLATION
Thank you for purchasing this air conditioner. This manual will provide you with information on how to operate,
maintain, and troubleshoot your air conditioner. Following the instructions will ensure the proper function and
extended lifespan of your unit.
Please pay attention to the following signs:
WARNING
Failure to observe a warning may result in death or serious injury. The appliance must be
installed in accordance with national regulations.
This symbol indicates that ignoring instructions may cause injury, damage to your appliance
or other property.
CAUTION
MUST BE INSTALLED BY A
LICENSED ELECTRICIAN
FOR COMPLIANCE WITH
QUEENSLAND ELECTRICAL SAFETY
REGULATIONS 2013
This refers to electrical works only
Page 4
1. Safety Precautions Low Profile Split Ducted Air Conditioner
INTRODUCTION
• CONGRATULATIONS on your purchase of an ActronAir air conditioning unit! This unit has been designed and engineered
to provide optimum air conditioning and to achieve maximum energy efficiency.
• Your air conditioning system has been manufactured from the highest quality materials. Numerous “in house” and
“external” inspections and test procedures were conducted to your air conditioner to ensure satisfactory operation.
INFORMATION ABOUT THIS GUIDE
• This guide provides operation instructions specific to your split indoor unit. Read this manual thoroughly to ensure safe
operation of your air conditioning system.
PRODUCT INSPECTIONS
• Check your air conditioning unit and all other additional items against the bill of loading, upon receiving your shipment.
Inspect the unit, components and accessories for any sign of shipping damage. If there is any damage to the unit, contact
ActronAir Customer Care immediately on: 1300 522 722.
• Check the unit nameplate to verify the model, serial number, electrical rated specifications and details are correct.
CODES, REGULATIONS AND STANDARDS
• The installer assumes responsibility to ensure that unit installation complies with the relevant council, state and federal
codes, regulations and building code standards. All electrical wiring must be in accordance with current electrical authority
regulations and all wiring connections to be as per electrical diagram provided with the unit.
SAFETY INSTRUCTIONS
1. Only qualified HVAC technicians* should install and service this air conditioning equipment. Improper service or alteration
by unqualified technician could result in significant and major damage to the product or property which may render your
warranty null and void. Such unqualified service could also lead to severe physical injury or death. Follow all safety
instructions in this literature and all warning labels that are attached to the equipment.
2. Prevailing WH&S regulations must be observed and will take precedence to the safety instructions contained in this manual.
Safe work practices and environment must be of paramount importance in the performance of all service procedures.
3. Ensure that unit installation complies with relevant council regulations and building code standards.
4. All electrical wiring must be in accordance with current electrical authority regulations and all wiring connections to be as
per electrical diagram provided.
5. Secure the fans against accidental contact. Beware of pinch point and sharp edges which can cause cutting injury.
6. Always wear appropriate PPE, remove any dangling jewellery and protect long hair by wearing a cap.
7. Make sure that safety guards and panel covers are always firmly secured and not damaged.
8. This appliance is not intended for use by young children or infirm persons unless they have been adequately supervised by
a responsible person to ensure that they can use the appliance safely. Young children should be supervised to ensure that
they do not play with the appliance.
9. Installer must incorporate a means of electrical disconnection (isolator) in the sub mains fixed wiring in accordance with
the Australian wiring rule (AS3000).
10. Secure the power cords and control cables that goes in/out the unit. Use the cable ties provided in the control box.
* Qualifications required will be appropriate Electrical, Refrigeration and Refrigerant Handling License & Training, dependent on local State/Territory regulations.
Page 5
1. Safety Precautions Low Profile Split Ducted Air Conditioner
WARNING
• Ask a qualified HVAC technician to install this air conditioner. Inappropriate installation may cause water leakage, electric shock, or fire.
• The warranty will be voided if the unit is not installed by professionals.
• If abnormal situation arises (like burning smell), turn of the power supply and call your HVAC technician for instructions to avoid electric
shock, fire or injury.
• DO NOT let the indoor unit or the controller get wet. It may cause electric shock or fire.
• DO NOT insert fingers, rods or other objects into the air inlet or outlet. This may cause injury, since the fan may be rotating
at high speeds.
• DO NOT use a flammable spray such as hair spray, lacquer or paint near the unit. This may cause fire or combustion.
CAUTION
• DO NOT inspect the unit by yourself. Ask a qualified HVAC technician to perform the inspection.
• To prevent product deterioration, do not use the air conditioner for preservation purposes (storage of food, plants, animals,
works of art, etc.).
• DO NOT operate the air conditioner with wet hands. It may cause electric shock.
• DO NOT touch the evaporator coils inside the indoor unit. The evaporator coils are sharp and may cause injury.
• DO NOT place items that might be affected by moisture damage under the indoor unit. Condensation can occur at a relative
humidity of 80%.
• DO NOT expose heat-producing appliances to cold air or place them under the indoor unit. This may cause incomplete combustion
or deformation of the unit due to the heat.
• If the air conditioner is used together with other heating devices, thoroughly ventilate the room to avoid oxygen deficiency.
• DO NOT climb onto or place objects on top of the outdoor unit.
• DO NOT operate the air conditioner when using fumigant insecticides. The chemicals may become layered with the unit and endanger
those who are hypersensitive to chemicals.
• DO NOT let children play with the air conditioner.
• This system is not intended for use by young children or infirm persons unless they have been adequately supervised by
a responsible person to ensure that they can use the system safely. Young children should be supervised to ensure that
they do not play with the system.
• DO NOT operate the air conditioner in a wet room (e.g. bathroom or laundry room). This can cause electrical shock and cause the
product to deteriorate.
Page 6
Unit Parts
Features
Auto-restart
In the event of a power loss, the unit will restart automatically
in its last programmed setting once power is restored.
Compressor Protection
• Prevents the air conditioner from being activated for
approximately 3 minutes when it restarts after power
failure.
Energy Saving Tips
• Do not set the unit to excessive temperature levels.
• While cooling, close the curtains to avoid direct sunlight,
closing the curtains while heating also keeps the heat in.
• Doors and windows should be kept closed to keep cool or
warm air in the room.
• Do not place objects near the air inlet and outlet of the
unit. This will reduce the efficiency of unit.
• Regular service of the air filter is recommended, a
clogged air filter will reduce performance and efficiency.
COOL mode HEAT mode DRY mode
Indoor Temperature
17°C - 32°C
0°C - 30°C
17°C - 32°C
Outdoor Temperature -15°C - 50°C
-15°C - 24°C
0°C - 50°C
Air outlet
Air inlet
Drain hose
Electric control cabinet
Refrigerant connecting pipe
2. Indoor Unit Parts and Major Functions Low Profile Split Ducted Air Conditioner
NOTE
Lightning or any electronic interference nearby may cause
the unit to malfunction. When this happened, reset the power
mains (isolator). Press the ON/OFF button on the wired
controller to restart operation.
Achieving Optimal Performance
Optimal performance for the COOL, HEAT, and DRY modes can be achieved in the following temperature ranges. When
your air conditioner is used outside of these ranges, certain safety protection features will activate and cause the unit to
perform less than optimally.
Page 7
CAUTION
Do Not Use High Alkaline Detergent!
• When using detergent for coil cleaning, ensure that
the alkaline level is no higher than 8.5 pH level, which
can cause corrosion damage to the coils.
• Be Careful Not to Spray Water into the Electrical
Components!
DANGER
Live Electrical Connections!
It may be necessary to work with live electrical
components on certain maintenance tasks. Only qualified
technicians are allowed to perform these tasks.
DANGER
Beware of Rotating Fan Blades!
• Always make sure that all power supply, to the
Outdoor Fans are turn-off and isolated.
• Observe WH&S safety procedures, do not wear loose
clothing and any jewellery when working near the
fans.
• Wear PPE whenever performing any maintenance
procedures.
• Observe all necessary procedures when working in a
confined space.
WARNING
Hazardous Voltage!
Always make sure that all power supply, including
remote controls, are disconnected before performing
maintenance. Observe proper Lock-Out / Tag-Out
procedures to ensure that power cannot be inadvertently
energised. Failure to disconnect power before maintenance
procedures can result in serious injury and/or death.
Maintenance Procedures
This section describes the procedures that must be
performed as a part of normal maintenance program.
Regular servicing of equipment by qualified HVAC
technician is highly recommended. Always disconnect
electrical power to the unit before performing these
procedures. It is always a safe practice to observe all safety
warnings and cautions when conducting maintenance
tasks.
Annual Maintenance Checklists
• Perform general maintenance inspections.
• Perform scheduled start-up checks.
• Leak test refrigerant circuits.
• Inspect contacts of all contactors and relays. Replace
all worn contacts as required.
• Inspect, clean and tighten all electrical connections.
• Check fans for balanced operation. Make sure that
there are no loose screws / bolts, no fan blades
interference and no damage to the fans and guards.
• Inspect the air filters, clean or replace as required.
• Clean and repaint any corroded panel section.
• Ensure no blockage of airflow through variable speed
drive and drive fan is operating correctly.
Coil Cleaning Procedures
• Disconnect power to the unit by following correct tag
out procedure.
• Remove the louvered panels from the unit to gain
access to the air inlet side of the coils.
• Use a soft brush to remove loose dirt and debris from
both sides of the coils.
• Straighten bent coil fins with fin comb.
• Prepare the detergent solutions according to the
manufacturer’s instructions.
• Spray solution at a 90oangle to the coils, keeping
a minimum nozzle spray angle of 15o, with at least a
1800mm distance from the coils and 600psi pressure.
• Spray leaving air side of the coils first then the air inlet
side. Allow the solution to stand on the coils for five
minutes.
• Rinse both sides of the coils with cool clean water.
• Inspect the coils, if they are still dirty, repeat the
cleaning procedure.
• Clean and wipe dry the outer and inner sides of the
unit, the refrigerating parts and other components.
• Ensure that the condensate drain lines are not blocked.
• Reinstall all unit panels, covers and guards.
• Restore electrical power to the unit.
Cleaning The Condenser Coils
Clean the coils at least once a year or more frequently if
unit is located in a dusty and dirty environment, in order
to maintain your system’s proper operating performance.
High discharge pressures are a good indication that the
coils need cleaning. When using detergent or solvents to
clean the coils, follow the manufacturer’s instructions to
avoid potential damage to the coils and to the unit.
To clean the refrigerant coils, use a soft brush and water
spray, such as garden hose or pressure washer with low
pressure nozzle.
3. Care and Maintenance Low Profile Split Ducted Air Conditioner
Page 8
WARNING
• If the refrigerant leaks, turn off the air conditioner
and any combustible heating devices, ventilate the
room and call your HVAC technician immediately.
Refrigerant can be toxic. DO NOT use the air
conditioner until the leak is repaired.
• When the air conditioner is installed in a small room,
measures must be taken to prevent the refrigerant
concentration from exceeding the safety limit in
the event of refrigerant leakage. Concentrated
refrigerant causes a severe health and safety threat.
Repairing Refrigerant Leaks Preparation For Periods of Non-Use
1. Run the appliance on FAN mode for 12 hours in a warm
room to dry all its components. Presence of moisture
for a long period of time may lead to mould formation.
2. Turn off the appliance and turn off power via the main
power isolator.
3. Clean the air filter according to the instructions in the
previous section. Reinstall the clean, dry filter before
storing.
4. Remove the batteries from the remote control (if any).
Maintenance after Extended Non-Use
1. Remove any obstacles blocking the vents of both the
indoor and outdoor units.
2. Clean the air filter and the front grille of the indoor unit.
Reinstall the clean, dry air filter in its original position.
3. Turn on the main power isolator at least 12 hours prior
to operating the unit.
3. Care and Maintenance Low Profile Split Ducted Air Conditioner
Page 9
Problem Possible Causes
Unit does not turn on when
pressing ON/ OFF button
The unit has a 3-minute protection feature that prevents the unit from overloading. The unit
cannot be restarted within three minutes of being turned off.
Cooling and Heating Models: If the Operation light and PRE-DEF (Pre-heating/ Defrost)
indicators are lit up, the outdoor temperature is too cold and the unit’s
anti-cold wind is activated in order to defrost the unit.
The unit changes from COOL
mode to FAN mode
The unit changes its setting to prevent frost from forming on the unit. Once the temperature
increases, the unit will start operating again.
The set temperature has been reached, at which point the unit turns off the compressor. The
unit will resume operating when the temperature fluctuates again
The indoor unit emits white mist In humid regions, a large temperature difference between the room’s air and the conditioned air
can cause white mist.
Both the indoor and outdoor
units emit white mist
When the unit restarts in HEAT mode after defrosting, white mist may be emitted due to
moisture generated from the defrosting process.
The indoor unit makes noises
A squeaking sound is heard when the system is OFF or in COOL mode. The noise is also heard
when the drain pump is in operation.
A squeaking sound may occur after running the unit in HEAT mode due to expansion and
contraction of the unit’s plastic parts.
Both the indoor unit and
outdoor unit make noises
A low hissing sound may occur during operation. This is normal and is caused by refrigerant gas
flowing through both the indoor and outdoor units.
A low hissing sound may be heard when the system starts, has just stopped running or is
defrosting. This noise is normal and is caused by the refrigerant gas stopping or changing
direction.
Possible Issues
The following symptoms are not a malfunction and in most situations will not require repairs.
4. Troubleshooting Low Profile Split Ducted Air Conditioner
SAFETY PRECAUTIONS
If ANY of the following conditions occurs, turn off your unit immediately!
• The power cord is damaged or abnormally warm
• You smell a burning odour
• The unit emits loud or abnormal sounds
• A power fuse blows or the circuit breaker frequently trips
• Water or other objects fall into or out of the unit
DO NOT ATTEMPT TO FIX THESE YOURSELF! CONTACT Authorised SERVICE PROVIDER IMMEDIATELY!
Page 10
Problem Possible Causes
The outdoor unit makes noises The unit will make different sounds based on its current operating mode.
Dust is emitted from either the
indoor or outdoor unit
The unit may accumulate dust during extended periods of non-use, which will be emitted when the unit is
turned on. This can be mitigated by covering the unit during long periods of inactivity.
The unit emits a bad odour
The unit may absorb odours from the environment (such as furniture, cooking,cigarettes, etc.) which will
be emitted during operations.
The unit’s filters have become mouldy and should be cleaned.
The fan of the outdoor unit does
not operate During operation, the fan speed is controlled to optimize product operation.
NOTE: If your problem persists after performing the checks and diagnostics above, turn off your unit immediately and
contact ActronAir on 1800 119 229 for technical support or warranty.
4. Troubleshooting Low Profile Split Ducted Air Conditioner
Page 11
Troubleshooting Tips
Please check the following points before contacting a qualified service technician.
Problem Possible Causes Solution
The unit is not working
Power failure Wait for the power to be restored
The power switch is off Turn on the power
The fuse is burned out Contact a qualified service technician to
determine the cause of fuse failure.
The unit’s 3-minute protection has been
activated Wait three minutes after restarting the unit
Poor cooling performance
Temperature setting may be higher
than the ambient room temperature Lower the temperature setting
The heat exchanger on the indoor or
outdoor unit is dirty
Contact a qualified service technician to clean the
affected heat exchanger
The air filter is dirty Contact a qualified service technician to remove the
filter and clean it according to instructions
The air inlet or outlet of either unit is
blocked
Turn the unit off, remove the obstruction and turn it
back on
Doors and windows are open Make sure that all doors and windows are closed while
operating the unit
Excessive heat is generated by sunlight Close windows and curtains during periods of high
heat or bright sunshine
Low refrigerant due to leak Contact a qualified service technician to check for
leaks, repair if necessary and recharge refrigerant
The unit starts and stops
frequently
There is too much or too little
refrigerant in the system
Contact a qualified service technician to check for
leaks, repair and recharge the system with refrigerant
There is air, incompressible gas or
foreign material in the refrigeration
system.
Contact a qualified service technician to evacuate and
recharge the system with clean refrigerant
System circuit is blocked
Contact a qualified service technician to
determine which circuit is blocked and replace the
malfunctioning piece of equipment
The compressor is broken Contact a qualified service technician to replace the
compressor
The voltage is too high or too low Contact your electricity provider.
Poor heating performance
The outdoor temperature is too low Contact a qualified service technician to check for
leaks, repair and recharge the system with refrigerant
Cold air is entering through doors and
windows
Make sure that all doors and windows are closed
during use
Low refrigerant due to leak Contact a qualified service technician to check for
leaks, repair if necessary and recharge refrigerant
4. Troubleshooting Low Profile Split Ducted Air Conditioner
Page 12
4. Troubleshooting Low Profile Split Ducted Air Conditioner
Error Codes Operation Lamp Timer Lamp Causes
E0 1 time XIndoor unit EEPROM malfunction
E1 2 times XCommunication error between indoor and outdoor units
E3 4 times XIndoor fan speed has been out of control
E4 5 times XIndoor room temperature sensor open circuit or short circuit
E5 6 times XEvaporator coil temperature sensor open circuit or short circuit
EC 7 times XRefrigerant leakage detection
EE 8 times XWater level alarm malfunction
E8 9 times XCommunication error between master and slave unit (for twin system)
E9 10 times XAnother indoor unit malfunction (for twin system)
F0 1 time OOver current protection (for some units)
F1 2 times OOutdoor ambient temperature sensor open circuit or short circuit
F2 3 times OCondenser coil temperature sensor open circuit or short circuit
F3 4 times OCompressor discharge temperature sensor open circuit or short circuit
F4 5 times OOutdoor unit EEPROM malfunction (for some units)
F5 6 times OOutdoor fan speed malfunction
F6 7 times OIndoor coil outlet temperature sensor open or short circuit
P0 1 times IPM module malfunction
P1 2 times DC voltage too high/low protection
P2 3 times Top of compressor high temperature protection
P3 4 times Low ambient temperature protection
P4 5 times Inverter compressor drive protection
P6 7 times Compressor voltage protection
P7 8 times Outdoor IGBT sensor is faulty
O – ON ; X – OFF; – Flash
Error Codes
Please check the following points before contacting a qualified service technician.
Indoor Unit
Page 13
4. Troubleshooting Low Profile Split Ducted Air Conditioner
Error Codes (continued)
Outdoor Unit
Error Codes Causes
E1 Communication malfunction between indoor and outdoor units
F0 Overcurrent protection
F1 Ambient temperature sensor (T4) malfunction
F2 Outdoor heat-exchanger temperature sensor (T3) malfunction
F3 Discharge temperature sensor (T5) malfunction
F4 Outdoor EEPROM malfunction
F5 Outdoor fan speed malfunction
P0 IPM module protection
P1 DC voltage too high / too low protection
P3 Ultra-low ambient temperature protection
P4 Compressor rotor position protection
J0 Evaporator high temperature protection
J1 Condenser high temperature protection
J2 High discharge temperature protection
J3 PFC module protection
J4 Communication error between outdoor main chip and compressor driven chip
J5 High pressure protection
J6 Low pressure protection
P7 IGBT sensor malfunction
J8 AC power input voltage protection
Page 14
..............................................................................................................................................................................................................................................................................
..............................................................................................................................................................................................................................................................................
..............................................................................................................................................................................................................................................................................
..............................................................................................................................................................................................................................................................................
..............................................................................................................................................................................................................................................................................
..............................................................................................................................................................................................................................................................................
..............................................................................................................................................................................................................................................................................
..............................................................................................................................................................................................................................................................................
..............................................................................................................................................................................................................................................................................
..............................................................................................................................................................................................................................................................................
..............................................................................................................................................................................................................................................................................
..............................................................................................................................................................................................................................................................................
..............................................................................................................................................................................................................................................................................
..............................................................................................................................................................................................................................................................................
..............................................................................................................................................................................................................................................................................
..............................................................................................................................................................................................................................................................................
..............................................................................................................................................................................................................................................................................
..............................................................................................................................................................................................................................................................................
..............................................................................................................................................................................................................................................................................
..............................................................................................................................................................................................................................................................................
..............................................................................................................................................................................................................................................................................
..............................................................................................................................................................................................................................................................................
..............................................................................................................................................................................................................................................................................
..............................................................................................................................................................................................................................................................................
..............................................................................................................................................................................................................................................................................
..............................................................................................................................................................................................................................................................................
..............................................................................................................................................................................................................................................................................
..............................................................................................................................................................................................................................................................................
..............................................................................................................................................................................................................................................................................
Notes Low Profile Split Ducted Air Conditioner
Page 15
..............................................................................................................................................................................................................................................................................
..............................................................................................................................................................................................................................................................................
..............................................................................................................................................................................................................................................................................
..............................................................................................................................................................................................................................................................................
..............................................................................................................................................................................................................................................................................
..............................................................................................................................................................................................................................................................................
..............................................................................................................................................................................................................................................................................
..............................................................................................................................................................................................................................................................................
..............................................................................................................................................................................................................................................................................
..............................................................................................................................................................................................................................................................................
..............................................................................................................................................................................................................................................................................
..............................................................................................................................................................................................................................................................................
..............................................................................................................................................................................................................................................................................
..............................................................................................................................................................................................................................................................................
..............................................................................................................................................................................................................................................................................
..............................................................................................................................................................................................................................................................................
..............................................................................................................................................................................................................................................................................
..............................................................................................................................................................................................................................................................................
..............................................................................................................................................................................................................................................................................
..............................................................................................................................................................................................................................................................................
..............................................................................................................................................................................................................................................................................
..............................................................................................................................................................................................................................................................................
..............................................................................................................................................................................................................................................................................
..............................................................................................................................................................................................................................................................................
..............................................................................................................................................................................................................................................................................
..............................................................................................................................................................................................................................................................................
..............................................................................................................................................................................................................................................................................
..............................................................................................................................................................................................................................................................................
..............................................................................................................................................................................................................................................................................
Notes Low Profile Split Ducted Air Conditioner
actronair.com.au
1300 522 722
©Copyright 2016 Actron Engineering Pty Limited ABN 34 002 767 240. ® Registered Trade Marks of Actron Engineering Pty Limited
Document: 9590-4004 Ver. 5 Issue Date: 05/2020

This manual suits for next models

6

Other ActronAir Air Conditioner manuals

ActronAir SCA260C User manual

ActronAir

ActronAir SCA260C User manual

ActronAir CRV140S User manual

ActronAir

ActronAir CRV140S User manual

ActronAir MULTIELITE MRC-052AS-2 User manual

ActronAir

ActronAir MULTIELITE MRC-052AS-2 User manual

ActronAir CRV720T User manual

ActronAir

ActronAir CRV720T User manual

ActronAir AIRES EVA10AS User manual

ActronAir

ActronAir AIRES EVA10AS User manual

ActronAir EVA720T User manual

ActronAir

ActronAir EVA720T User manual

ActronAir PRV15AT-TFFT-EV Series User manual

ActronAir

ActronAir PRV15AT-TFFT-EV Series User manual

ActronAir MultiElite 2 MRC-075CS-3 User manual

ActronAir

ActronAir MultiElite 2 MRC-075CS-3 User manual

ActronAir ECOFLEX MINI VRF R-32 Series User manual

ActronAir

ActronAir ECOFLEX MINI VRF R-32 Series User manual

ActronAir Serene 2 WRC-026CS User manual

ActronAir

ActronAir Serene 2 WRC-026CS User manual

ActronAir ESP Digital SRD131C User manual

ActronAir

ActronAir ESP Digital SRD131C User manual

ActronAir Serene WRC-026AS User manual

ActronAir

ActronAir Serene WRC-026AS User manual

ActronAir ECOFLEX MINI VRF R-32 Series User manual

ActronAir

ActronAir ECOFLEX MINI VRF R-32 Series User manual

ActronAir MRE-035CS User manual

ActronAir

ActronAir MRE-035CS User manual

ActronAir WRC-026CS User manual

ActronAir

ActronAir WRC-026CS User manual

ActronAir easyconnect CRE-071AS Assembly instructions

ActronAir

ActronAir easyconnect CRE-071AS Assembly instructions

ActronAir ECOFLEX MINI VRF Series User manual

ActronAir

ActronAir ECOFLEX MINI VRF Series User manual

ActronAir PKY820T User manual

ActronAir

ActronAir PKY820T User manual

ActronAir ADVANCE EVV13AS User manual

ActronAir

ActronAir ADVANCE EVV13AS User manual

ActronAir ESP Platinum QUE User manual

ActronAir

ActronAir ESP Platinum QUE User manual

ActronAir Classic 2 CRA100S User manual

ActronAir

ActronAir Classic 2 CRA100S User manual

ActronAir ESP ULTIMA SYSTEM User manual

ActronAir

ActronAir ESP ULTIMA SYSTEM User manual

ActronAir MULTIELITE MRC-052AS-2 User manual

ActronAir

ActronAir MULTIELITE MRC-052AS-2 User manual

ActronAir Easyconnect WRE-026AS Assembly instructions

ActronAir

ActronAir Easyconnect WRE-026AS Assembly instructions

Popular Air Conditioner manuals by other brands

mundoclima CL23390 Installaton manual

mundoclima

mundoclima CL23390 Installaton manual

Mitsubishi Heavy Industries DXK05ZTLA-WF user manual

Mitsubishi Heavy Industries

Mitsubishi Heavy Industries DXK05ZTLA-WF user manual

LG I27TTC owner's manual

LG

LG I27TTC owner's manual

GE AEC14 Owner's manual and installation instructions

GE

GE AEC14 Owner's manual and installation instructions

Carrier 38CKC operating guide

Carrier

Carrier 38CKC operating guide

Mitsubishi Electric PLA-M100EA installation manual

Mitsubishi Electric

Mitsubishi Electric PLA-M100EA installation manual

Snap-On POLARTEK EEAC330B manual

Snap-On

Snap-On POLARTEK EEAC330B manual

Sanyo STB0811C1-S parts list

Sanyo

Sanyo STB0811C1-S parts list

Fujitsu ASTA30LFC Service manual

Fujitsu

Fujitsu ASTA30LFC Service manual

OMAS Air-Fi AFT7 Installer and User Instruction Manual

OMAS

OMAS Air-Fi AFT7 Installer and User Instruction Manual

LG LMU365HV Specifications

LG

LG LMU365HV Specifications

Beko BINA 090 installation manual

Beko

Beko BINA 090 installation manual

nedis ACMB1WT9 quick start guide

nedis

nedis ACMB1WT9 quick start guide

QuietCool QC18DVS owner's manual

QuietCool

QuietCool QC18DVS owner's manual

Panasonic CS-LZ9ZKA operating instructions

Panasonic

Panasonic CS-LZ9ZKA operating instructions

Sharp CVP12PX - Ha Sh 11500 Btu Portable Air... Installation and operation manual

Sharp

Sharp CVP12PX - Ha Sh 11500 Btu Portable Air... Installation and operation manual

Haier HSU-10VNJ17 Operation manual

Haier

Haier HSU-10VNJ17 Operation manual

INVT VCS Series user manual

INVT

INVT VCS Series user manual

manuals.online logo
manuals.online logoBrands
  • About & Mission
  • Contact us
  • Privacy Policy
  • Terms and Conditions

Copyright 2025 Manuals.Online. All Rights Reserved.