2
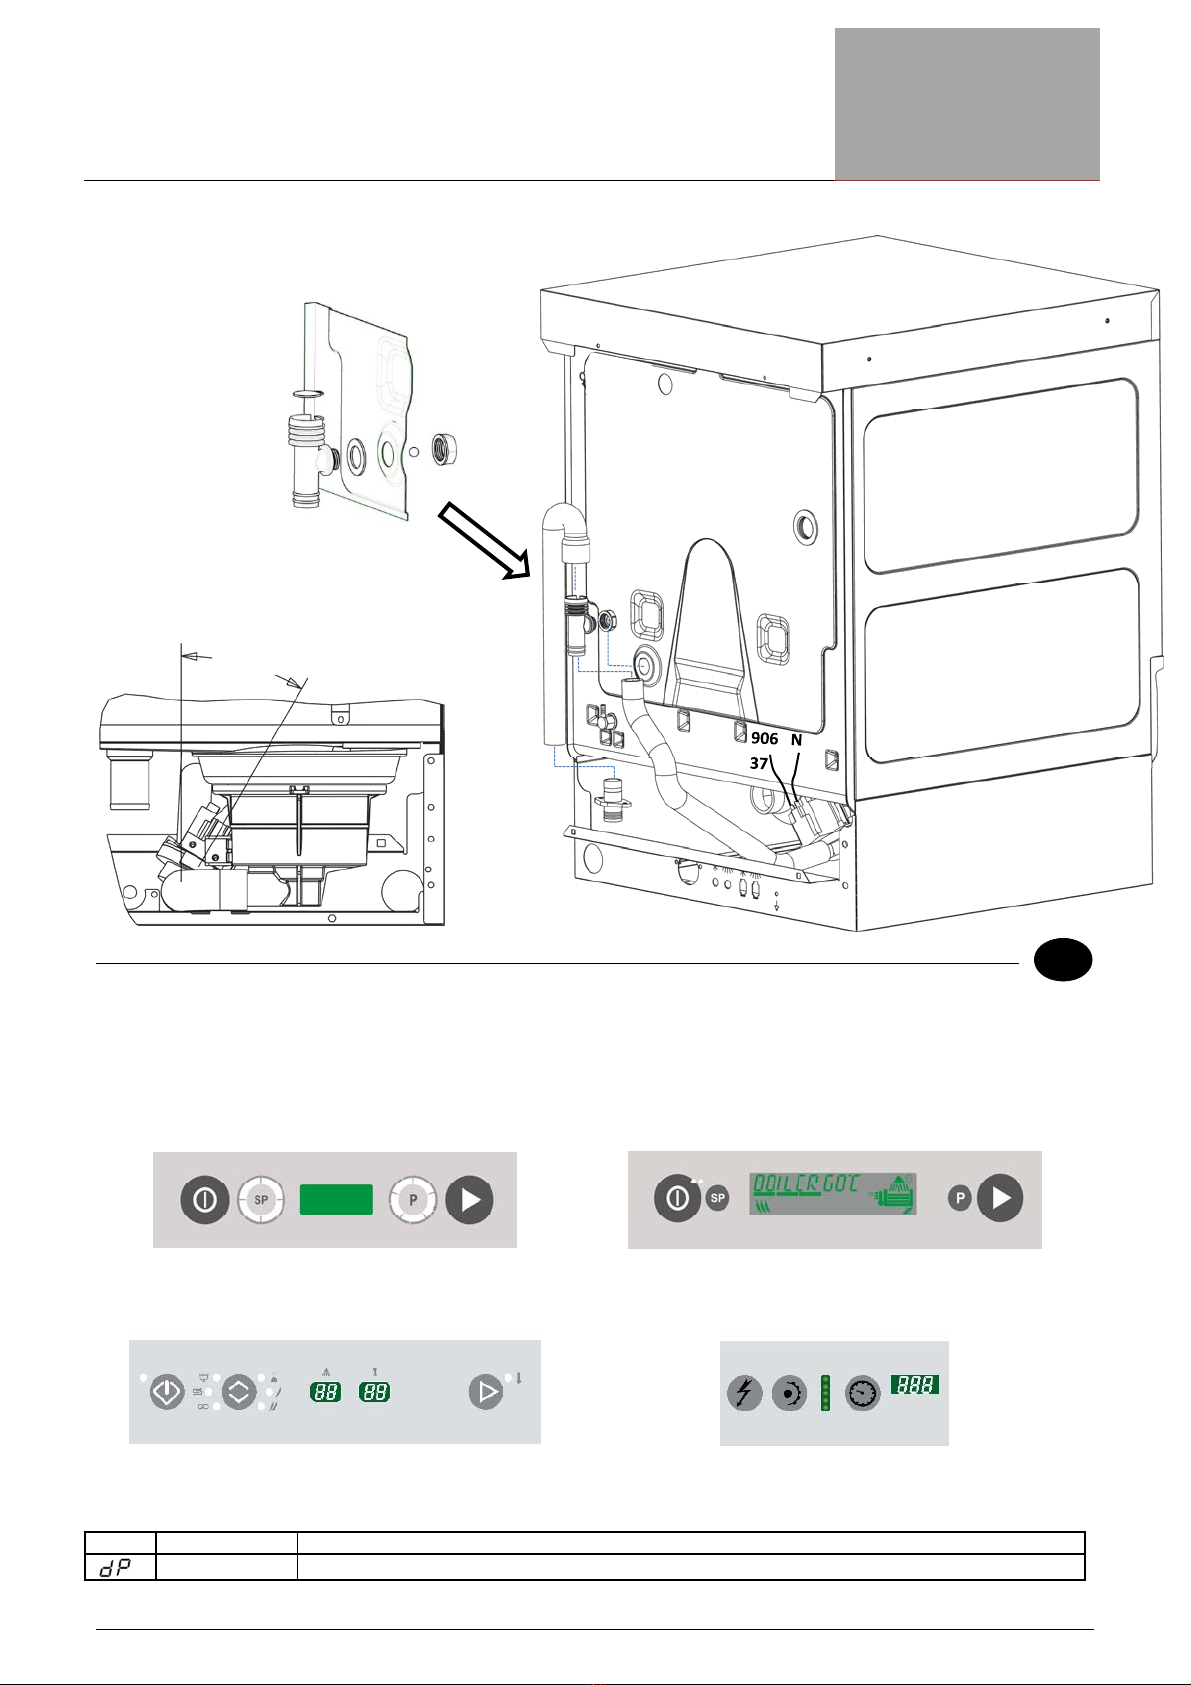
Assemble the hydraulic circuit as indicated in the figure. ( Fig.1 )
Connect the drain pump as shown in the wiring diagram.
Enable the pump as described in the "Card installation menu"
FOR MACHINES WITH MECHANICAL INTERFACE, THE PUMP WILL ALREADY BE ENABLED.
“MenùInstallazione”
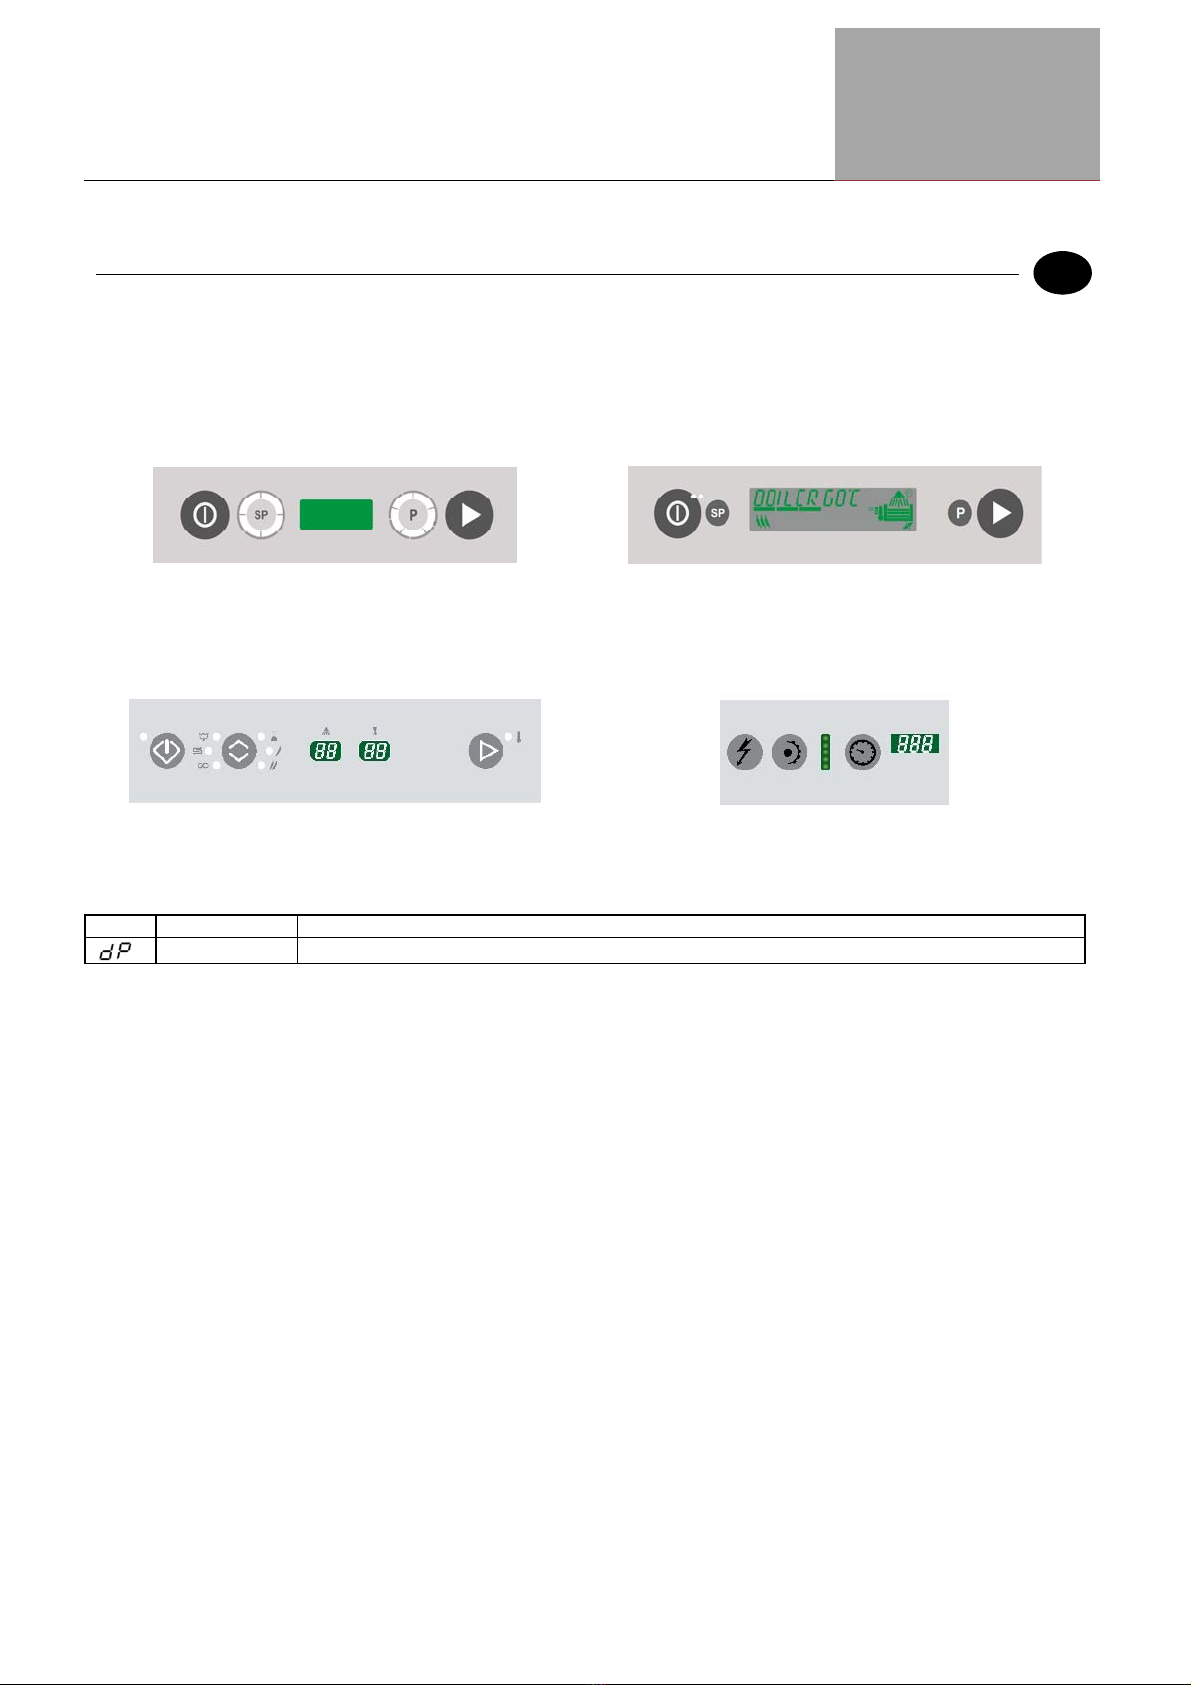
Menu access and navigation may vary according to the type of display.
Machine in standby with door open.
Press buttons 1 (ON/OFF) and 2 (SPECIAL PROGRAMME SELECTION) together for 5 seconds and enter the key CH 35
(buttons 3 and 4 PROGRAMME SELECTION and START to change the parameter, 1 to confirm).
Using button 1 (ON/OFF) scroll through the headings and enable and/or edit them using buttons 3 and 4.
The list of possible headings that can be viewed is:
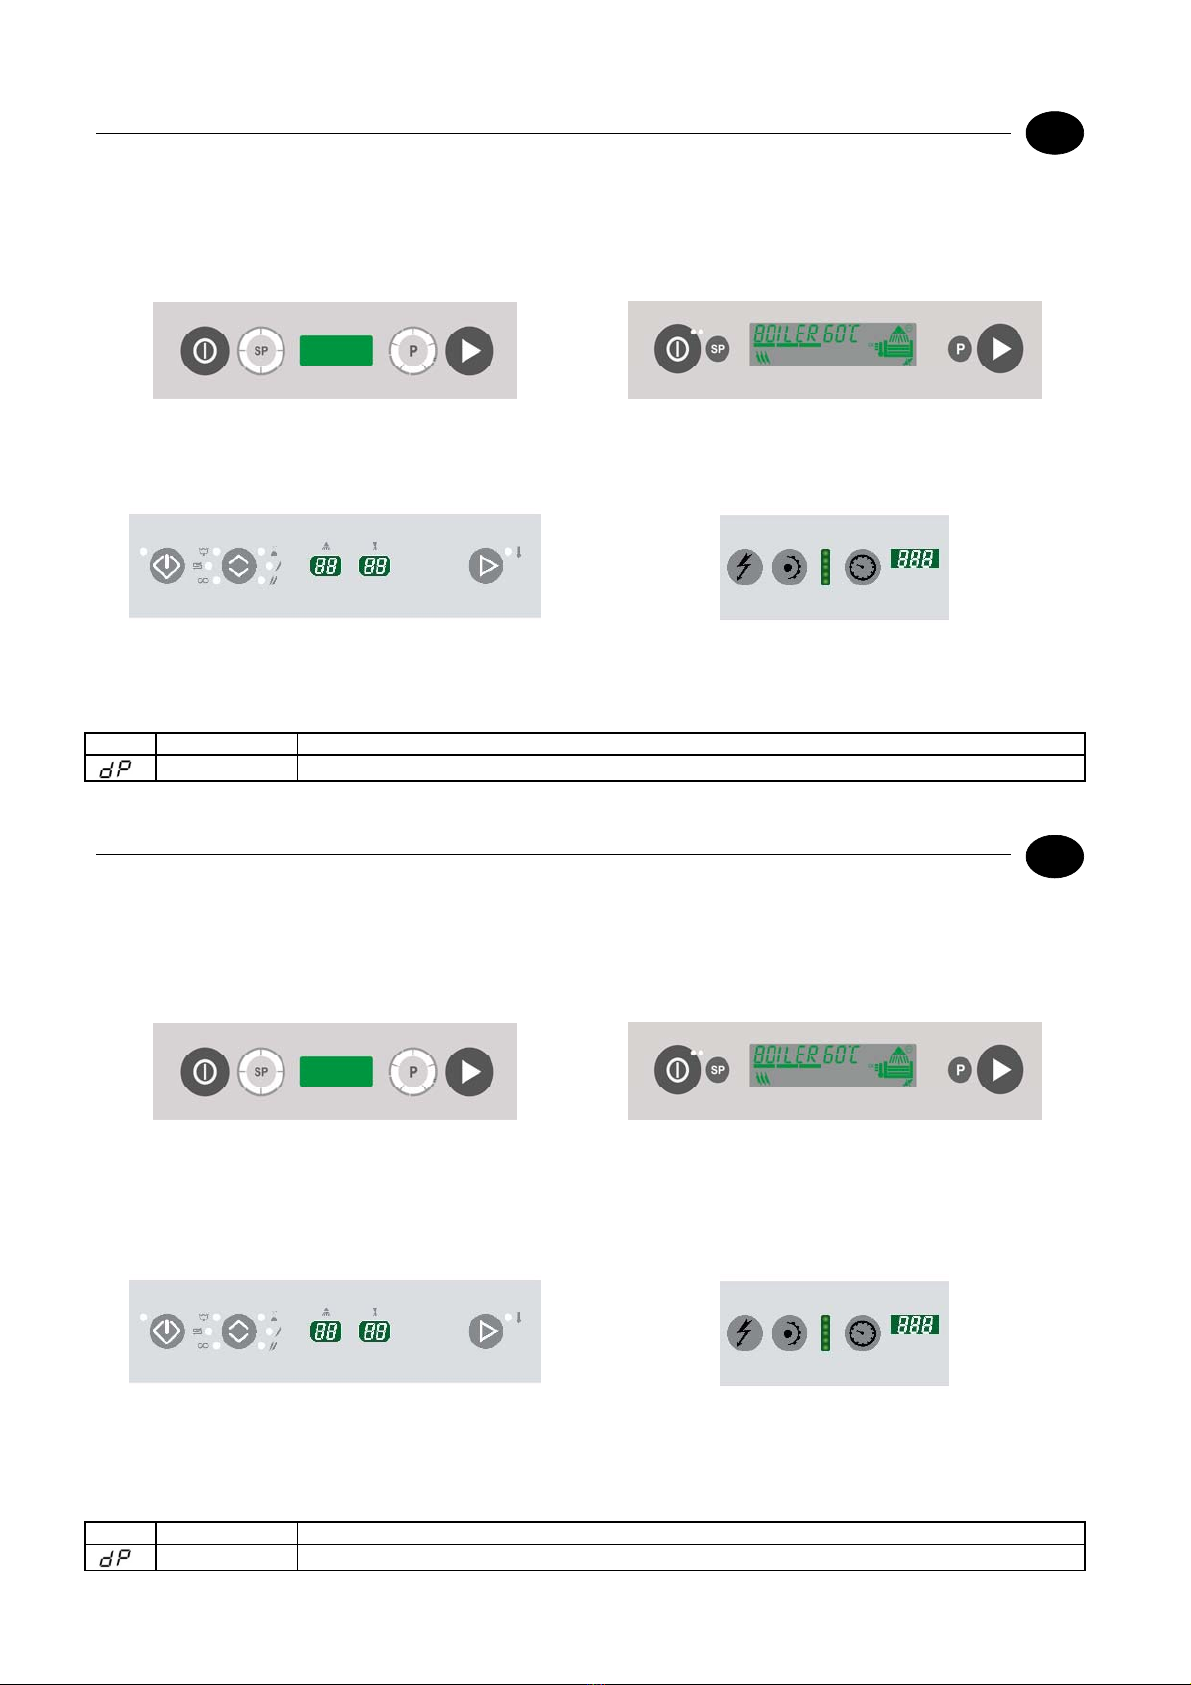
Machine in standby with door open.
Press buttons 2 and 3 (CYCLE SELECTION and START) together for 5 seconds and enter the key CH 35 (buttons 2 and
3 to change the parameter, 1 to confirm).
Using button 1 (ON/OFF) scroll through the headings and enable and/or edit them using buttons 2 and 3.
The list of possible headings that can be viewed is:
LED LCD
DRAINPUMP Enable drain pump (*optional)
To exit the menu, hold down button 1(ON/OFF) for 5 seconds.
Den Wasserkreislauf nach Plan montieren. ( Fig.1 )
Die Ablaufpumpe, wie im Schaltplan gezeigt, anschließen.
Die Pumpe gemäß Beschreibung unter "Installationsmenü der Platine" aktivieren.
BEI GERÄTEN MIT MECHANISCHER SCHNITTSTELLE IST DIE PUMPE BEREITS AKTIVIER
“MenùInstallazione”
Der Zugriff und die Navigation in den Menüs können abhängig vom Display variieren.
Gerät auf Stand-by bei geöffneter Tür.
Halten Sie die Tasten 1 (ON/OFF) und 2 (AUSWAHL SONDERPROGRAMME) gleichzeitig 5 Sekunden gedrückt und
geben Sie den Schlüssel CH 35 ein (Parameteränderungen mit Tasten 3 PROGRAMMWAHL und 4 START, Bestätigen
mit Taste 1).
Mit der Taste 1 (ON/OFF) können Sie die Menüpunkte abrollen und sie mit den Tasten 3 und 4 aktivieren und/oder
ändern.
Folgende Optionen können eingeblendet werden:
Gerät auf Stand-by bei geöffneter Tür.
Halten Sie die Tasten 2 ( PROGRAMMWAHL ) und 3 ( START ) gleichzeitig 5 Sekunden gedrückt und geben Sie den
Schlüssel CH 35 ein (Parameteränderungen mit Tasten 2 und 3, Bestätigen mit Taste 1).
Mit der Taste 1 (ON/OFF) können Sie die Menüpunkte abrollen und sie mit den Tasten 2 und 3 aktivieren und/oder
ändern.
Folgende Optionen können eingeblendet werden:
LED LCD
DRAINPUMP Aktivierung der Ablaufpumpe (* optional)
Zum Verlassen des Menüs die Taste 1 (ON/OFF) 5 Sekunden lang gedrückt halten.
UK
DE