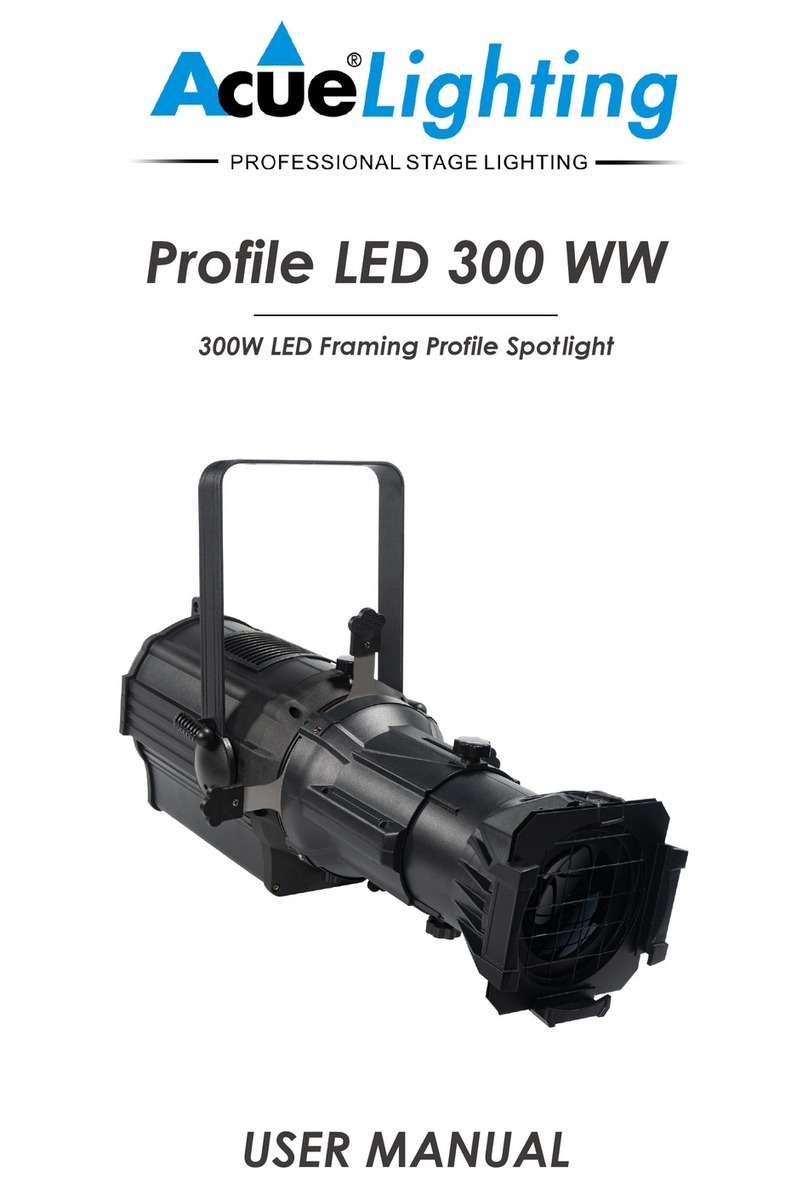
AcueLighting Extreme 650 Hybrid User manual

1
!
User Manual

2
Table of Contents
1.Product Specifications..........................................................03
2.Fixture size............................................................................04
3.Parts introduction................................................................04
4.Description of color wheel and GOBO wheel.....................05
5.Safety information.................................................................06
6.Packaging................................................................................09
7.Installation..............................................................................09
8.AC power...............................................................................10
9.LED lamp..............................................................................11
10.Warranty period..................................................................11
11.Control Panel.......................................................................12
12.Control panel operation menu...........................................12
13.DMX Channel Chart..........................................................16
14.Routine Maintenance...........................................................19

3
NOTE:
Thank you for purchasing this Acue Lighting product. This product has been tested and checked
by our quality control department before it was shipped out of the factory. All users should strictly
abide by the warnings and instructions stated in this manual, any damage caused by misuse or
neglect of the information in this user manual will exclude the product from the warranty as well
as remove the manufacturer from any responsibility of repair or damages. The information in this
manual is subject to change without prior written notice.
1. PRODUCT SPECIFICATIONS
Thank you for choosing this Acue Lighting product. This product uses standard DMX512 signal
protocol and also supports RDM protocol.
Production enforcement standard IEC 60598-1:2014,IEC60598-2-17:2017.
DMX Channel modes: 37/41CH
Light Source: 600W White LED Engine
Lamp Life:20000 hours
Light Source Luminous Flux:30,000
Power Input: AC 110-240V,50/60Hz
Total Power Draw: 800W
Display: 2.8 inch screen display, supports 180˚ display rotation when hanging
Color Wheel: 7 fixed colors + white + CRI .CT:2800-5600K
Fixed Gobo Wheel: 8 gobos + open.
Rotation Gobo Wheel: 6 replaceable gobos + open
Prism: 4-facet prism
Frost: Linear frost filter
Beam Angle : 6-50°zoom range
Dimmer: 0-100% linear dimming control
Iris: adjustable iris control
Framing: 4 flag system with 180°rotation
DMX: 3 & 5 pin XLR connectors for input and output: supports RDM and software update
Locking System: magnetic position lock system
Pan : 540°; 8Bit/16Bit
Tilt : 270°; 8Bit/16Bit
IP Rate: IP20;
Net Weight:32KG / 70.5 Lb

4
2. FIXTURE SIZE Product size:410(L)×310(W)×740(H)mm
3. PARTS INTRODUCTION
01 — Lens
02 — Body
03 — Arm
04 — Tilt Lock
05 — Pan Lock
06 — Light base
07 — Handle
03
01
02
06
05
04
07

5
4. Color, CMY, & GOBO wheels,
Color wheel: 5 fix color + white + CRI . CT:2800-5600K
01 —Control panel
02 — USB Port
03 — Button
01 — DMX In
02 — DMX Out
03 — Power switch
04 — Power in
05 — Fuse
01
03
04
02
05
01
02
03

6
Fixed GOBO Wheel : 8 GOBOs + Open
Rotating GOBO Wheel: 6 GOBOs + Open.
5. SAFETY INFORMATION
5.1.1 SAFETY WARNING MESSAGE
1. This fixture is meant for professional use and is not intended to be used bye non-qualified
individuals. After opening the packaging, please check the package for damages caused by
transportation. If there is any damage, do not use this fixture, and please contact the dealer or
manufacturer as soon as possible.
2. This product is only suitable for indoor use as it has an IP20 protection class rating. Fixture
should be kept dry to avoid damage caused by moisture. Moisture can cause overheating or
electrical fires. Do not use in dusty environments for long periods of time as the dust will clog the
cooling mechanism resulting in damage to the fixture. Prevent the fixture from coming into
contact with water or any other liquid. The user of this product should know that misuse can cause
fire, high heat, electric shock, ultraviolet radiation, damage to light source, which all can cause
serious or fatal injuries.

7
5.1.2 READ MANUAL CAREFULLY BEFORE USE OR INSTALLATION
1. Follow through this user manual section of security methods and pay attention to the warning
signs on the fixture.
2、If you have any problem or are unsure how to safely operate the equipment, please contact your
dealer.
5.1.3 OPERATION WARNINGS
The above symbol specifies that the unit in automatic mode. Manual operation is disabled. Do
not manually force the equipment or try to touch the moving parts of the fixture.
5.1.4 POINTING IS PROHIBITED
Never point the lights directly to the sun or other strong light source.
5.2 MAKE SURE TO MOUNT FIXTURE SECURELY
1. Please don’t move the package by one person only.
2. When hanging the fixture, you must verify that the structure you are hanging or securing
the fixture to is able to withstand 10 times the weight of the fixture.
3. You m u st make sure the mounting hardware is strong enough to handle the weight of the
fixture and shows no sign of any damage. Make sure to properly secure a safety cable to the
fixture before completing the installation.
5.3 UV PROTECTION
1. Avoid directly looking into the light beam to avoid UV damage to eyes
2. Do not operate the equipment without the front objective lens; The lens and the fixture
covers should be immediately replaced if any damage is present.
5.4.1 PROPER WORKING TEMPERATURE (Rated maximum ambient temperature)
Maximum working temperature is 40°C
Please don’t use the equipment if the temperature above 40℃.
5.4.2 HIGH HEAT WARNING(Maximum outer surface temperature)
tc =110°C
When the luminaire reaches the state of thermal stability, the maximum temperature on the
external surface can reach 110 degrees. Please do not touch the lamp body when the luminaire is
working.

8
5.5 IP PROTECTION
This product is certified at IP 20 levels only. Adequate additional precaution should be taken
for outdoor use. All lamps, lights and their fittings should be kept dry. Overheating, dust and
excessive humidity must be avoided.
5.6 BURST PREVENTION
1. The lens should be changed if damaged, cracked or has any other problems.
2. Only replace with original lens from manufacturer.
3. Lens size:¢168*52mm。
5.7 PREVENTION OF ELECTIC SHOCK
1. All electrical connections must be carried out by a qualified individual.
2. Before installing, make sure you use the power outlet has the proper voltage. Avoid using
long cable runs to assure proper voltage without any drops
3. Each fixture must be properly grounded
4. Disconnect power before attempting to replace a fuse.
5.8 MAINTENANCE
Before starting any maintenance work or cleaning the fixture, make sure to cut off the
power from the mains. After switching off, do not disassemble the luminaire for at least 10
minutes in order to avoid burns.
5.9 PRECAUTION TO PREVENT ELECTRICAL SHOCK OR FIRE
1. Please do not operate fixture near any flammable surfaces or materials.
2. Make sure when replacing a fuse to use the specified type of fuse.
3. The equipment must be installed away from flammable and explosive materials. The
shortest distance between the equipment and the flammable material is 3M.
4. The fixture should be projected a minimum of 15 meters away from flammable objects.
5. Fan or ventilation ports should not have any obstructions
6. Do not place any object on the lens.
7. Allow the device to cool for 20 minutes prior to touching the body or moving the fixture
after long periods of use.
8. Do not use aftermarket accessories with this fixture.
15

9
6. PACKAGING
This fixture is sold either in flight cases or carton boxes. Each fixture comes with the following:
6.1 ACCESSORIES
CONTENT
QUANTITY
User Manual
1
Power Cable
1
Safety Cable
1
Clamps
2
Omega Bracket
2
6.2 TRANSPORT PROTECTION LOCK
In order to protect the fixture, the fixture is equipped with a pan/tilt locking mechanism. During
transport in a road case, the pan must be locked in the center position, and the fixture head must be
locked in vertical state.
6.3 PACKAGING AFTER USE
1. Before packing the fixture, make sure the fixture is allowed to cool for 20 minutes before
placing in road case.
2. Before cleaning the fixture, make sure X, Y axis protection lock is disengaged.
3. Make sure to pick up the fixture using both handles. Place the product into the flight case up
side down.
4. After packing the fixture, place the accessories into the accessory compartment, then close
and lock the flight case.
5. Flight cases should only be stacked up to two layers to prevent tipping over.
6.4 UNPACKING
Note: Before unpacking check if packaging is damaged due to transportation. If you find any physical
damage please do not use this item, and contact the dealer or manufacturer as soon as possible.
7. INSTALLATION
7.1 INSTALLATION OF RIGGING
The product can be placed on the stage or mounted on any supporting frame. The quick
locking system can quickly and easily mount in 2 directions.
7.2 RIGGING EQUIPMENT
1. Before installation, it is necessary to verify that the fixture clamp brackets are not damaged
and can bear at least 10 times the weight of the equipment. Then verify if the structure being
mounted to can bear the weight of at least 10 times the total weight of the fixture. Always use

10
a safety cable to secure the fixture to the mounting surface as secondary precaution.
2. Mount the supplied hanging bracket to the base of the fixture body, inserts the fastener into
the locking holes of the base, and turn the handle of the fastener 1/4 turn clockwise to lock in
place. Inspect the bracket to make sure it is securely mounted to the fixture.
3. Install a safety cable that can withstand 10 times the weight of the equipment.
4. Before powering the fixture on make sure the locking mechanism has been disengaged.
Make sure there are no combustible materials in at least a 3-meter radius to where the fixture is
mounted.
Attention
!
Fixture must be secured with 2 clamps and a safety cable for safe operation.
7.3 FIXTURE CONNECTION
Attention!
1. One product only can accept one input one output.
2. The data input protocol is DMX via the means of a 3 pin/ 5 pin XLR socket as follows.
Pin 1: + polarity signal
Pin2; - polarity signal
Pin3: Ground
3. DMX cable being used must be shielded twisted pair cable; standard loudspeaker cable
is not reliable to control the long-range data. 24AWG cable is suitable for more than
300-meter long-distance runs. Add DMX 512 signal amplifier where needed
8. AC POWER
8.1 VOLTAGE, POWER, FUSE SPECIFICATION
Input Voltage
Total Power
Frequency
110-240V
800W
50/60HZ
Fuse voltage
Electronic current
Specification
250V
10A
5×20
8.2 POWER PROTECTION
Make sure to check if mains cables are not damaged and connectors are properly tightened before
connecting to fixture or mains. If cable is damaged you must replace it immediately.

11
ATTENTION !
Factory has included a standard 3-pin plug socket. If fixture cable is damaged, replacement cable
should be connected in the following order. Any question, please contact professionals or talk to a
qualified electrician.
Live wire (L)
Null (N)
Ground wire
White
Black
Green
9. LED LAMP SECIFICATIONS
9.1 LED LAMP
LED LAMP MODEL
POWER OF LAMP
LIFE/HOUR
Lumen
600W White LED Engine
600w
20000 HOURS
30000Lux
9.2 LED LAMP REPLACEMENT
WARNING!
9.2.1 The light source of this luminaire is NOT a user replaceable light source. If it is damaged,
please send it to the manufacturer or the closest certified service provider.
10. Warranty period
10.1 The fixture comes with a 1-year warranty manufacturers warranty, which covers only
manufacturers defects.

12
11. CONTROL PANEL
The control panel has a user-friendly touch screen to display the operation data and other
information.
There are four buttons on the right side.
Each button has a dedicated function.
Top button is for upward movement, lower button is for downward movement. The left button is
for exiting the selected function where the right button in for confirming the function or data.
12. CONTROL PANEL MENU OPERATION
Main Menu
Submenu 1
Submenu2
Function
SET
Function description
DMX
ADDRESS
<<
1-512
to address 1
<
Address +1
>
Address-1
<<
001-512
SAVE
save and back
ESC
ESC
back
FEATURES
SETTING
Run Mode:
DMX
DMX
Wire
not active
Auto
not active
Channel Mode:
37CH
37CH model
41CH
41CH model
Pan Reverse:
Off
Pan Scan Normal
On
Pan Scan Reverse
Tilt Reverse:
Off
Tilt Scan Normal
On
Tilt Scan Reverse
Opto Check:
Off
Pan/Tilt optical sensor testing
off
On
Pan/Tilt optical sensor testing on
PT Speed:
Noml
Pan/Tilt Scan Speed setting
nomal
TOUCH
SCREEN
DISPLAY
Button

13
Slow
Pan/Tilt Scan Speed setting
slow
Fast
Pan/Tilt Scan Speed setting
fast
Signal Clear:
Off
keep signal data
On
clear signal data
Full Color:
Off
half color function
On
full color function
ShortCut:
Off
Shortcust off for colors and
gobos
On
Shortcust open for colors and
gobos
ADV.
(ADVANCED FUNCTION)
RST.
Re-setting and back
SAVE
Save and back
ESC
Back
ADVANCED
FUNCTION
Redress
ZEROSETTING
Pan rotation
0-255
Adjust the begging state
Tilt rotation
Focus
Zoom
Cyan
Magenta
Yellow
Color
temperature
Color wheel
Dimming
Aperture
Fixed GOBO
Rotate GOBO
GOBO Rotation
Prism
Prism Rotation
FROST
Blade up 1
Blade up 2
Blade down 1
Blade up 2
Blade right 1
Blade right 2
Blade left 1
Blade left 2

14
Frame rotation
ESC
back
ChanlDef
No function
FactSett
For factory only
UseManage
Limit
LimitTime
No function
limitCont
No function
DefConfig
YES
Return to default
NO
back
FacConfig
SAVE
Save and back
EPRT
for factory only
ESC
back
ESC
back
UNLOCK
Verify1:
0-255
need password
Verify2:
KEY
need password
ESC
back
MANUAL
LAMP REST
ALL
MOTER
All step motor(do not adjust it )
XY
MOTER
Pan/Tilt step motor adjust(do
not adjust it )
PART
MOTER
Other step motor( except
Pan/Tilt)
YES
The chosen step motor reset
ESC
Back
TEST RUN
AUTO
Auto
SOUND
Sound
ESC
Back
SMULATE DMX
Pan:
0-255
Control Channel on display
Pan Fine:
Tilt:
Tilt Fine:
PT Speed:
Special Fun:
Colour:
Colour2:
Colour3:
Cyan Colour:
Magenta
Colour:
Yellow Colour:
Static Gobo:
Rot Gobo:
Gobo Rot:

15
Prism:
Prism Rot:
Frost:
Zoom:
Zoom Fine
Focus:
Focus Fine:
Strobe:
Dimmer:
>
Value+1
<
Value-1
ESC
Back
ESC
Back
SYSTEM
INFO
DMX VALUE
CH00-CH37
0-255
DMX value number
CH00-CH41
0-255
DMX value number
LAMP REST
ALL MOTER
Right/Erro
For factory only
XY MOTER
PART MOTER
ESC
Back
OTHER INFO
Run Time:
0-9999
Machine runing hours
Run Count:
0-9999
How many time of the Machine
power on and off
Residue T:
Most
Running time adjust(do not
adjust
Residue C:
(do not
adjust)
(do not adjust)
Type:
xxxx
Mode No.
Temp:
xxx
temperature
Fan 1:
0-9999
Fan 1 speed
Fan 2:
0-9999
Fan 2 speed
DisVersion:
Vxxx
Version of display software
XY Version:
Vxxx
Version of Pan/Tilt software
M1 Version:
Vxxx
Software Version M1
M2 Version:
Vxxx
Software Version M2
ESC
Back
ESC
Back
DISPLAY
SETTING
Light Set:
1-7Lev
Back Ground light level
Light Off:
On
Keep back ground light on
1Min
Back light turn off after 1 min
2Min
Back light turn off after 2 mins
3Min
Back light turn off after 3 mins
Menu Back:
Off
Turn off the menu and back
1Min
Menu back after 1 min

16
2Min
Menu back after 2 mins
3Min
Menu back after 3 mins
Light Flash:
Off
Back ground light flash function off
On
Back ground light flash function on
Touch Cali:
Off
Touch screen calibration on
On
Touch screen calibration off
SAVE
Save and back
ESC
Back
LAMP
SETTING
Lamp Default:
Off
Lamp off
On
Lamp on
Manual Lamp:
Off
Lamp off by manual
On
lamp on by manual
LampTime
0000-9999
Lamp time
LampState
Off
Lamp off
On
Lamp on
Lamp Off:
10M
After 10 mins no signal come in,
Lamp off
Lifh
No signal come in , lamp keep
lighting
13. DMX Channels
37
CH
Mode
41
CH
Mode
Function
DMX Value
Function description
1
1
Cyan
0-255
Linear Cyan
2
2
Magenta
0-255
Linear Magenta
3
3
Yellow
0-255
Linear Yellow
4
4
CTO
0-255
Linear CTO movement
5
5
Color wheel
0-8
White
9-17
Open/Dark Red
18-26
Dark Red
27-35
Dark Red/Magenta
36-44
Magenta
45-53
Magenta/Orange
54-62
Orange
63-71
Orange/Green
72-80
Green
81-89
Green/Blue
90-98
Blue
99-107
Blue/Open
108-109
Open
110-116
CRI

17
117-127
CRI/White
128-255
Scroll
6
6
Strobe
0-3
Strobe Close
4-103
Strobe from slow to fast
104-107
Strobe Open
108-207
Random Strobe from slow to fast
208-212
Strobe Open
213-251
Random Strobe from slow to fast
252-255
Strobe Open
7
7
Dimmer
0-255
Linear dimming
8
8
Dimmer fine
0-255
No function
9
9
Iris
0-131
Linear aperture from small to
large
132-171
lris pulsation from slow to fast
speed
172-211
lris pulsation from slow to fast
speed with fast opening
212-251
lris pulsation from slow to fast
speed with fast closing
252-255
Maximum aperture
10
10
Fixed GOBO
0-7
No function
8-15
GOBO 1
16-23
GOBO 2
24-31
GOBO 3
32-39
GOBO 4
40-47
GOBO 5
48-55
GOBO 6
56-63
GOBO 7
64-71
GOBO 8
72-113
Clockwise run from fast to slow
114-117
Stop
118-159
Anti-clockwise run from fast to slow
160-171
GOBO 1 Shake
172-183
GOBO 2 Shake
184-195
GOBO 3 Shake
196-207
GOBO 4 Shake
208-119
GOBO 5 Shake
220-231
GOBO 6 Shake
232-243
GOBO 7 Shake
244-255
GOBO 8 Shake
11
11
Rotating GOBO
0-18
No function
19-37
GOBO 1
38-56
GOBO 2

18
57-74
GOBO 3
75-92
GOBO 4
93-111
GOBO 5
112-129
GOBO 6
130-150
GOBO 1 Shake
151-171
GOBO 2 Shake
172-192
GOBO 3 Shake
193-213
GOBO 4 Shake
214-234
GOBO 5 Shake
235-255
GOBO 6 Shake
12
12
GOBO Rotation
0-127
Index
128-190
Rotation,Clockwise from fast to slow
191-192
Stop
193-255
Rotation,Anti-clockwise from
slow to fast
13
13
GOBO Rotation fine
0-255
No function
14
14
Prism
0-127
No function
128-255
Prism
15
15
Prism Rotation
0-127
Index
128-190
Anti-clockwise run from fast to slow
191-192
Stop
193-255
Clockwise run from fast to slow
16
16
Frost
0
No function
1-255
Linear frost
17
17
Blade up 1
0-255
Blade up 1
18
18
Blade up 2
0-255
Blade up 2
19
19
Blade down 1
0-255
Blade down 1
20
20
Blade down 2
0-255
Blade down 2
21
21
Blade right 1
0-255
Blade right 1
22
22
Blade right 2
0-255
Blade right 2
23
23
Blade left 1
0-255
Blade left 1
24
24
Blade left 2
0-255
Blade left 2
25
25
Frame rotation
0-255
Frame rotation
26
26
Focus
0-255
Focus
27
27
Focus fine
0-255
Focus fine
28
28
Zoom
0-255
Linear zoom
29
29
Autofocus
0-255
No function
30
30
Autofocus fine
0-255
No function
31
31
Pan rotation
0-255
0~540°
32
32
Pan Fine
0-255
Pan Fine
33
33
Tilt rotation
0-255
0~270°
34
34
Tilt Fine
0-255
Tilt Fine
35
35
XY Speed
0-255
No function

19
36
36
Reset
0-25
No function
26-76
small step motor Reset
77-127
Pan/Tilt Reset
128-255
System reset
37
37
LED Lamp
0-255
No function
*
38
P/T speed
0-255
P/T ,Adjust speed
*
39
Color wheel speed
0-255
No function
*
40
Speed of light wheel
0-255
No function
*
41
GOBO wheel speed
0-255
No function
14. ROUTINE MAINTENANCE
Cleaning and Maintenance
Warning:
1. Turn off the power before opening any cover.
2. Dust can be blown gently with a vacuum cleaner or a pressurized air blower machine.
3. In order to ensure the fixture can work normally, it should always be kept clean. It is
recommended that the fans and ventilation inlet should be cleaned every 15 days. The lens and
dichroic color filters should also be regularly cleaned to maintain an optimum light output. Do not
use any type of solvent on dichroic color filters. It will damage the color filters.
4. Recommended: The continued usage of the light should not exceed 4 hours or it will shorten the
life of the lamp.
5. Disconnect the power supply before beginning any maintenance on the fixture. Let the parts
cool down for 10 minutes then proceed to open the covers.
6. Inspect the lens and all moving parts for damage after opening covers. Avoid touching any
internal parts if there is a presence of static electricity.
7. This fixture is equipped with a powerful cooling system. It is easy for dirt to be collected on the
fans and vent ports. Clear all vent holes of dust.
8. Check the vent holes for blockages to avoid damage to the cooling system after every use.
For more information please visit www.AcueLighting.com or email us at
©Acue Lighting, inc. 2022
Table of contents
Other AcueLighting Dj Equipment manuals
