7
DEUTSCH
2.7 CROSSFADER
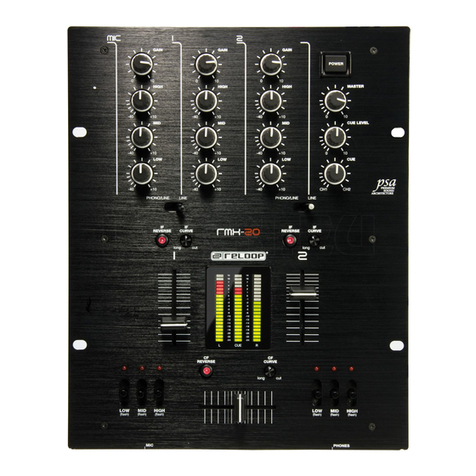
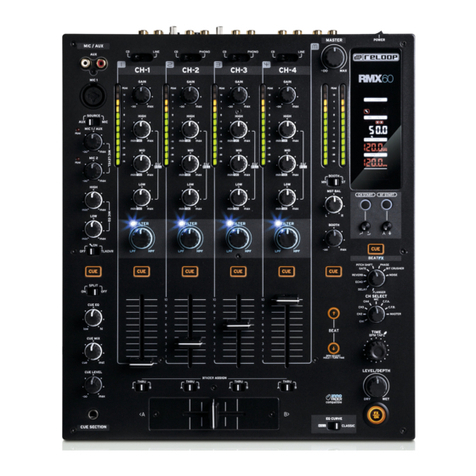
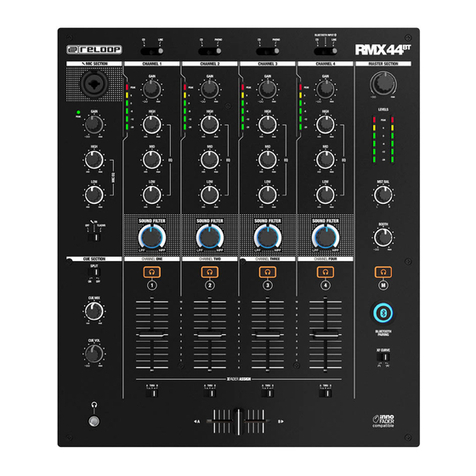
Mit dem Crossfader -9- wechselt man zwischen dem linken und dem
rechten Crossfader-Kanal. Die Verlaufskurve des Crossfaders läßt sich
über den Crossfader Curve-Regler -10- einstellen. Drehen gegen den
Uhrzeigersinn macht den Crossfader „scharf“, also gut zum Scratchen
und Cutten. Drehen im Uhrzeigersinn macht ihn „weich“, was für
langlaufende Mixe geeignet ist. Mit dem Crossfader-Zuweisungsschalter
-8- können Sie den Kanälen 1–4 den beiden Crossfader-Seiten A&B
zuweisen. Achten Sie darauf, dass sich das Signal bei Pegelspitzen
maximal im gelben Bereich der LED Anzeige bewegt -4-.
HINWEIS! In der Stellung THRU ist dem jeweiligen Kanal keine
Crossfader Seite zugewiesen.
2.8 MIKROFON
Mit dem Talkover-Schalter -20a- aktivieren den Talkover-Effekt, d.h. die
Unterdrückung der restlichen Kanäle durch das Mikrofon-Signal. In der OFF-
Stellung ist der Talkover-Effekt ausgeschaltet, ON aktiviert die Talkover-
Funktion. Mit der Mic ON-Taste -20b- schalten sie die Mikrofone ein.
2.9 VORHÖREN
Mit den Cue-Tasten -6- wählen Sie den Eingangskanal oder die
Eingangskanäle aus, die Sie im Kopfhörer vorhören möchten. Mit dem
Cue Mix -23- können Sie zwischen den/dem mit den Cue-Schaltern
ausgewählten Kanal/Kanälen und dem Master-Signal überblenden; in
der Stellung „CUE“ hören Sie nur die mit den Cue-Tasten angewählten
Vorhör-Kanäle, in der Stellung „MASTER“ hören Sie nur das Master-
Signal. Sie können die Signale stufenlos mischen. So können Sie einen
Mix vorab im Kopfhörer simulieren. Mit dem Lautstärkeregler für den
Kopfhörereingang -24- stellen Sie den Lautstärkepegel des Kopfhörers
ein. Mit dem Equalizer für den Kopfhörerausgang -22- können Sie das
Klangbild des Kopfhörersignals stufenlos regulieren; in der Stellung
„LOW“ ist das Signal bassbetont, in der Stellung „HIGH“ ist das
Signal reich an Höhen. Mit dem Split-Wahlschalter -21- können Sie den
Ausgabemodus für den Kopfhörerkanal wählen.
2.10 MASTER-SEKTION
Mit dem Master-Level -25- stellen Sie die Master-Ausgangslautstärke
ein. Achten Sie dabei darauf, dass die LED für das Master-Signal -26-
nur im gelben Bereich aktiv ist. Mit dem Booth-Level -28- stellen Sie die
Ausgangslautstärke für den Booth-Ausgang ein. Mit dem Mono/Stereo-
Schalter -27- wählen Sie den Ausgabemodus des Booth-Ausgangs.
HINWEIS! Der Rec-Ausgang -52- wird nicht von der Stellung der
Lautstärkeregler -25- und -28- beeinusst. Im Punkt ‚Setup Utility 5.2.1
MASTER‘ nden sie weitere Informationen und Einstellungsmöglichkeiten.
3. EFFEKTEINHEIT
3.1 ÜBERBLICK
Der RMX-95 verfügt über folgende hochwertige DSP-Effekte in
Studio-Qualität: Echo, Reverb, Flanger, Phaser, Vinyl Brake, Loop Roll,
Noise, Pitch Shift, Delay, Ping Pong Delay, Tap Delay, Bit Crusher and
Transformer. Weitgehende Informationen und Parameter werden im
Display -37- dargestellt.
3.2 EFFEKTAUSWAHL, ROUTING
Die Auswahl und das Routing eines Effekts erfolgt immer nach dem gleichen
Prinzip: Im FX / Param Display -38- werden die Effektnamen angezeigt.
Durch Drehen des FX-Selects -30- werden die Effekte ausgewählt. Das
Blinken der Effektnamen signalisiert, dass der jeweilige Effekt ausgewählt,
aber noch nicht aktiv ist. Wird der FX-Select -30- gedrückt, so wird der
aktuell ausgewählte Effekt aktiv. Der Name des aktiven Effekts steht
nun fest im FX / Param Display -38-. Durch Betätigung des FX-Channel-
Wahlschalters -31- kann der aktive Effekt nun jedem beliebigen Kanal
zugeordnet werden (1, 2, 3, 4, Mic, XFA, XFB, Master). Das FX-Channel-
Display -39- zeigt den selektierten Kanal als rot umrandetes Icon. Haben
Sie den gewünschten Effekt aktiviert und ihn dem gewünschten Kanal
zugeordnet, können Sie die Effekteinheit mittels der Effekt On/Off-Taste
-36- an- bzw. ausschalten. Ist die Effekteinheit angeschaltet, leuchtet die
Taste blau. Nun können Sie den Effekt mit dem Level/Depth-Regler -35-
dem Ursprungssignal zumischen. Einige Effekt-Parameter können mit dem
Time-Encoder -32- bzw. den Time-Takt-Buttons -33- manipuliert werden.
Wird ein Time-Takt-Button betätigt, so leuchtet der entsprechende Button.
Entspricht der Zeitparameter nicht genau den angegebenen Taktlängen,
blinken die beiden Taktlängen, zwischen denen der Wert liegt. Der mittels
Time Encoder -32- bzw. der Time-Takt-Buttons -33- eingestellte Wert
wird im Time/Length Display bei tempobasierten Effekten als Takt/
Millisekunden angezeigt. Zudem wird die Position der Time-Takt-Buttons
als Grak oberhalb der Werte sichtbar. Wird ein mittels Time-Takt-Button
eingestellter Wert mit dem Time Encoder manipuliert, so folgt die Position
der Time-Takt-Buttons dem aktuellen Wert. Bitte entnehmen Sie die
Details der einzelnen Effekte der folgenden Beschreibung.
3.3 EFFEKTE
3.3.1 ECHO
Der Echo-Effekt gibt mehrere verzögerte Kopien des Ursprungssignals
aus und mischt sie dem Originalsignal zu. Level Depth regelt das
Verhältnis zwischen Effektsignal und Originalsignal. Es wird im FX /
Param Display -38- als Dry & Wet angezeigt. 0% bedeutet kein Effekt.
100% bedeutet maximale Effekteinstellung. Der Time Encoder regelt
die zeitliche Verzögerung stufenlos in Millisekunden. Bei gedrücktem
Time Encoder in 10 Millisekunden Schritten (2 ms – 4.000 ms). Die
Time-Takt-Buttons regeln die zeitliche Verzögerung stufenweise. 1-4;
1-2; 3-4; 1-1; 2-1; 4-1.
3.3.2 REVERB
Der Reverb-Effekt erzeugt einen Raumklang. Das Originalsignal
scheint sich vom Hörer zu entfernen. Level Depth regelt das Verhältnis
zwischen Effektsignal und dem Originalsignal. Es wird im Effekt-Display
-38- als Dry & Wet angezeigt. 0% bedeutet kein Effekt. 100% bedeutet
maximale Effekteinstellung. Der Time Encoder Regelt die zeitliche
Verzögerung bzw. die Größe des virtuellen Raums stufenlos in 1er
Schritten. Bei gedrücktem Time Encoder in 10er Schritten (1-100). Die
Time-Takt-Buttons regeln die zeitliche Verzögerung bzw. die Größe des
virtuellen Raums stufenweise. 1; 10; 25; 50; 75; 90; 100.
3.3.3 FLANGER
Der Flanger ist ein klassischer DJ-Effekt. Das Eingangssignal wird
zunächst in zwei Signalzweige aufgeteilt, die zeitlich verzögert einer
Mischstufe zugeführt werden. Level Depth regelt das Verhältnis
zwischen Effektsignal und unbearbeitetem Signal. Es wird im Effekt-
Display -38- als Dry & Wet angezeigt. 0% bedeutet kein Effekt. 100%
bedeutet maximale Effekteinstellung. Der Time Encoder Regelt die
zeitliche Verzögerung eines Durchgangs stufenlos in Millisekunden. Bei
gedrücktem Time Encoder in 50 Millisekunden (10 ms – 32.000 ms). Die
Time-Takt-Buttons regeln die zeitliche Verzögerung eines Durchgangs
stufenweise. 1-1; 2-1; 4-1; 8-1; 16-1.
3.3.4 PHASER
Der Phaser-Effekt kombiniert das Originalsignal mit einer Kopie, die
leicht phasenverschoben zum Original ist. Dies bedeutet, dass die
Amplituden der beiden Signale ihren höchsten und niedrigsten Punkt
zu leicht unterschiedlichen Zeiten erreichen
3.3.5 VINYL BRAKE
Emuliert einen Vinyl-Stopp-Effektsound. Die Länge des Effekts kann
mit dem Level Depth-Regler eingestellt werden.
3.3.6 LOOP ROLL
Der Loop Roll-Effekt wiederholt das Originalsignal in der ausgewählten
Länge und mischt es dem Ursprungssignal bei. Level Depth regelt das
Verhältnis zwischen Effektsignal und originalem Signal. Es wird im
Effekt-Display -38- als Dry & Wet angezeigt. 0% bedeutet kein Effekt.
100% bedeutet maximale Effekteinstellung. Der Time Encoder regelt
die Größe des Loops stufenlos in 1 Millisekunde. Bei gedrücktem Time
Encoder in 10 Millisekunden. Die Time-Takt-Buttons regeln die Größe
des Loops stufenweise. 1-8; 1-4; 1-2; 1-1; 2-1; 4-1.
3.3.7 NOISE
Das ‚Zumischen‘ eines Noise/Rauschens ist ein beliebter Effekt,
um bestimmte Stellen in einem Track zu betonen. Das Noise des
RMX-90DVS kann außerdem noch per LFO moduliert werden, um
rhythmische Effekte zu kreieren. Level Depth regelt die ‚Farbe‘ des
Noise. Time Encoder Regelt die Geschwindigkeit des LFOs stufenlos in
1 Millisekunde. Bei gedrücktem Time Encoder in 10 Millisekunden. Die
Time-Takt-Buttons regeln die Geschwindigkeit des LFOs stufenweise,
durch betätigen der Taste 1-4 wird das LFO deaktiviert.
3.3.8 PITCH SHIFT
Der Pitch Shift-Effekt manipuliert die Tonhöhe vom Originalsignal. Level
Depth ist hier nicht aktiv, da der Effekt immer mit 100% arbeitet. Der
Time Encoder regelt den Pitch stufenlos. Drehungen im Uhrzeigersinn
lassen das Signal höher klingen, Drehungen gegen den Uhrzeigersinn
lassen das Signal tiefer klingen. Wird der BeatFX Select Switch -30-
gedrückt, so wird der Effekt resettet. Die Time-Takt-Buttons regeln den
Pitch stufenweise. Die Taste 1-1 bedeutet kein Pitch. Tasten mit höheren
Werten lassen das Signal höher klingen, Tasten mit niedrigeren Werten
lassen das Signal tiefer klingen.
3.3.9 DELAY
Der Delay-Effekt gibt eine verzögerte Kopie des Ursprungssignals aus
und mischt sie dem Originalsignal zu. Level Depth regelt das Verhältnis
zwischen Effektsignal und ursprünglichem Signal. Es wird im Effekt-
Display -38- als Dry & Wet angezeigt. 0% bedeutet kein Effekt. 100%
bedeutet maximale Effekteinstellung. Der Time Encoder regelt die
zeitliche Verzögerung stufenlos in Millisekunden. Bei gedrücktem Time
Encoder in 10 Millisekunden (2 ms – 4.000 ms). Die Time-Takt-Buttons
regeln die zeitliche Verzögerung stufenweise. 1-4; 1-2; 3-4; 1-1; 2-1; 4-1.
3.3.10 PING PONG
Ein Ping Pong Delay ist ein Stereo-Feedback-Delay, bei dem das Delay
zwischen dem linken und dem rechten Kanal hin und her springt.
