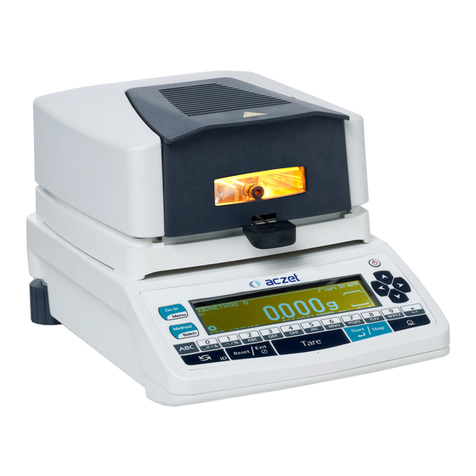
Aczet CM Series User manual

Operating manual
21 Cfr Touch Screen Microbalance
CM series

1. Introduction .
The models of the CM Series are weighing instruments of special and high accuracy designed for the
measurement of mass, covering a range from 60 kg to 500 kg.
CM Series meet the highest requirements on the accuracy and reliability of weighing results through the
following features:
–Filtering for unfavorable ambient conditions, such as vibration, drafts, etc.
–Stable and repeatable weighing results
–Excellent readability under any lighting conditions
–Rugged, durable weighing system
These weighing instruments speed up your simple routine applications through following features:
–Extremely fast response times
–Built-in applications
•Weighing
•Percent weighing
•Differential weighing
•Piece counting
•Animal weighing
•Custom Unit
•Limit check
•Peak weighing
•Statistics
•Aduit Trail Report
1.1 Warnings and Safety precautions
The balance has been constructed in accordance with the OIML as well as international regulations and
standards for operation of electrical equipment, electromagnetic compatibility, and stipulated safety
requirements. Improper use or handling, however, can result in damage and/or injury.
To prevent damage to the equipment, please read these operating instructions carefully before using your
balance.
Keep these instructions in a safe place.
Follow the instructions below to ensure safe and trouble-free operation of your balance.
Do not use this balance/scale in a hazardous area/location.
If you use electrical equipment in installations and under ambient conditions requiring higher safety
standards, you must comply with the provisions as specified in the applicable regulations for installation in
your country.
Make sure that the voltage rating printed on the AC adapter is identical to your local line voltage.
–The only way to switch the power off completely is to disconnect the AC adapter.
–Connect only Aczet accessories and options, as these are optimally designed for use with your Aczet
balances.
–Note on Installation:

The operator shall be responsible for any modifications to the equipment and for any connections of cables or
equipment not supplied by us and must check and, if necessary, correct these modifications and connections.
On request, Aczet will provide information on the minimum operating specifications
–Protect the DC adapter and the weighing instrument from contact with liquids.
–When cleaning your balance, make sure that no liquid enters the balance housing; use only a slightly
moistened cloth to clean the balance.
–Do not open the balance/scale housing. If the seal is broken, this will result in forfeiture of all claims under
the manufacturer’s warranty.
–If you have any problems with your balance contact your local Aczet Office, dealer or service center
1.2 Getting Started
Storage and Shipping Conditions Do not expose the balance/scale to extreme temperatures, blows, shocks,
vibration or moisture. Unpacking the Equipment
After unpacking the balance/scale, check it immediately for any visible damage as a result of rough handling
during shipment if you see any sign of damage: Contact your local Aczet Office, dealer or service center.
It is a good idea to save the box and all parts of the packaging until you have successfully installed your balance.
Only the original packaging provides the best protection for shipment. Before packing your balance, unplug all
connected cables to prevent damage.
Cautionary notes
Micro balances may not be operated in hazardous areas. Before attachment of the DC adapter, check whether
the imprinted voltage value matches the local supply voltage.
If it does not, contact your local ACZET dealers. Micro balance may only be used indoor in dry environment.
Accessories supplied
The equipment supplied includes the following:
1. Balance with control unit and Touch screen indicator
2. Touch screen Module Display with 2 nos serial ports for statistical printer and weighing indicator
3. Leveling feet
4. Operating Manual
5. DC adapter- 12vdc, 2 amp and 13Vdc, 1.5 amp
6. Base Plate S.S. (CM)

1.3 Layout :
Model: CM series
1. Balance with control unit.
2. Touch screen Display
3. Glass chamber
4. Weighing pan
5. Leveling feet
6. Spirit Level
Balance with Control unit
Leveling feet
Pan
Touch Screen Display
Spirit Level
Glass Chamber
2. Setting up the Balance.
2.1 Location
The optimum location
The correct location makes an important contribution to the accuracy of the weighing results of high-
resolution analytical and precision balances. Hence ensure a stable, vibration-free position as horizontal as
possible.
Avoid
• Direct sunlight
• Excessive temperature fluctuations,
• Drafts (Power ----- Air Conditioning System, Fans can also cause drafts)
The best position is an a stable bench in a corner protected against drafts as far
Possible from doors, windows, radiators or the ventilation slots of air conditioners.

2.2 Warm Up
Warm-up Time
To deliver exact results, balance must warm up to operating temperature for as lasted below before the first
weighing operation is carried out. Using Verified Balances as Legal Measuring Instruments in the Micro
balance must warm up for at least 24 hours after initial connection to DC power.

3 Operating procedure:
3.1 Power ON
Connect DC Adaptors of Touch screen module and Micro balance power plug ,then switch ON the power
–Screen we show no signal for few seconds and the display will show as below:
–It will display version number for software
3.2 Login Menu
Following login type are available :
i) Administrator- Administrator login has complete access of weigh
application, create user Id , change password, Backup & Restore etc .
Expect master login.
Can create password
ii) IT Admin- IT Administrator login has complete access of create user Id ,
change password ,Backup & Restore . Expect master login.
iii) User –Login has complete access of weigh application, calibration check,
View & print Audit trail report. Any number of users can be created.
iv) Master- Master Login is factory mode for parameter setting. To be
operated by only manufacturer.

To Login select theType and userName,enter password and click Login.
After Sucessful Login , below screen appears

4WORKING MODES –GENERAL INFORMATION
Weighing
Means of operation: weight of a load is determined through an indirect measurement.
A balance measures gravitational force which attracts the load. An obtained result is
processed to a digital format and displayed in a form of measurement result.
Percent Weighing
Means of operation: control of percent ratio of a sample in relation to a standard
(reference). Obtained data provides percent ratio on how test sample differs from the
accepted standard (reference).
Display shows Percentage weight in %
Differential Weighing
Means of operation: is one of Weighing application functions. It allows analysis of
sample weight variation occurring in the course of a technological process.
Display shows Differential weight in grams .
Limit Check
Means of operation: control of sample mass with applied thresholds. A user should
specify the value of min threshold <LO> and max threshold <HI>.
Display shows graph in 3 colors yellow for LOW, Green for accept, Red for High
Statistics
Means of operation: carried out measurements are used to calculate statistical data,
such as Min, Max, deviation, etc.
Calibration
TO perform Calibration - Internal and External calibration .
Animal Weighing
Means of operation: Mass measurement takes place with application of filters
dampening animal moves on a weighing pan, thus enabling obtaining a correct
measurement Threshold weight result.
Audit report
Can View /Print audit reports
Can filter User Type & record specify period
User Account
Can View, Add user , Modify password and disable user.
Setting
Factory setting parameter. To be operated by manufacturer or service engineer
Log off
Switches back to Login menu screen

4.1 WEIGHING
Press icon for weighing mode. Following display appears on screen
Purpose
The basic weighing function is always accessible and can be used alone or in combination with an application
program.
Features
–Tare: To clear the value to make display zero.
–ADD : To add the weights one by one
–SUB : To subtract the weight reading one by one
–Clear: To clear the added weights. Once the Clear button is press all memorized data will be cleared.
-Print: to print current weighment.
-Unit: to toggle unit.
Weighing
–Place weighing sample on the weighing platform/pan.
–Read the result.
–% Bar will glow according to weight kept on the PAN.
Tare
–Place empty container on the balance.
–The weight is displayed.
–Press <Tare> key, the balance displays zero
–Add weighing sample to container, the net weight is displayed.
–If the container is removed from the balance, the tare weight will be shown as negative value.

In case if stability is not achieved & user presses <TARE> key, display will shows “0.000000 g ” until
stability is achieved.
“Display then shows “0.000 kg”
Switching of weight units
Weighing Scale can display weight values in different weight units.
The factory setting for ( g , mg , µg ),

4.2 CALIBRATION
Calibration is one of the primary processes used to maintain instrument accuracy. Calibration is the process of
configuring an instrument to provide a result for a sample within an acceptable range. Eliminating or minimizing
factors that cause inaccurate measurements is a fundamental aspect of instrumentation design.
To obtain weighing results, the balance must be matched to the acceleration due to gravity at its location.
Calibration is necessary
–Before the balance is used for the first time.
–At regular intervals during weighing operation.
–After a change in location.
4.2.1 Procedure for Internal Auto calibration:
To obtain accurate results, the balance must be connected to the power supply and allowed to warm up to the
operating temperature as described Ensure that the weighing pan is unloaded and close the doors of the draft
shield (if used). Balance should be Zero before calibration.
–Press <Calibration> key on Main menu display, below screen will display:

For Internal Auto Calibration, press icon “Internal Cal”
–<Internal Cal> Icon glows green color .
–Display will shows “Calibration initiated”
Calibration in process..

–Once the calibration is done display will show “CAL DONE” , then press “OK “. The balance will go
into the weighing mode and ready for operation.
–
If the calibration process is terminated because of any technical issue, the display will show “Internal Cal Failed”
Press OK on screen and the balance will again into the weighing mode .
Repeat above procedure again to re-calibrate.

4.2.2. Procedure for External calibration:
For External Calibration by weight , press icon “External Cal”
–<External Cal> Icon glows green color .
–Display will shows “External Calibration initiated”
Calibration in process..

After few seconds display show “Load 5 gram” as below
Now put standard weight of 5 gram on weighing pan , Balance will perform external calibration automatically.
Once the calibration is done display will show “CAL DONE” , then press “OK “. The balance will go into the
weighing mode and ready for operation

If the calibration process is terminated because of any technical issue, the display will show “External Cal Failed
Press OK key and Repeat above procedure again to re-calibrate.

4.3 PERCENT WEIGHING
Percent weighing>is a working mode for comparison of a measured sample with the reference mass. The result
is expressed in [%].
Procedure for activation of Percent Weighing mode
Select < Percent > mode, home screen featuring percent weighing pictogram in a top bar is automatically
displayed.
PROCEDURE 1 –determining reference mass manually
• Press <KEY> button. On-screen Internal keyboard will display
• Using an on-screen keyboard of a displayed window, enter reference mass value and press <Reference>
button for confirmation.
Mass of all weighed products is compared to reference mass the weight difference is displayed in [%].
PROCEDURE 2 –accepting currently loaded mass as reference mass
• Put the sample on a weighing pan and press <Reference >Icon
• On measurement result stabilization, press < Determine reference mass (set as 100%)> button, dialog bar with
prompts is displayed at the bottom, follow the prompts. Load the part to be weighed and upon measurement
stabilization press button for confirmation,
•100.000% indication is displayed, loaded part weight is accepted as a reference mass, and it is automatically
recorded and displayed in reference mass field.
• Remove the sample form the weighing pan.
• All samples weighed afterwards are compared with the reference mass, and the display indicates the
difference, expressed in [%], for each weighed sample in relation to the reference mass.

4.4 DIFFERENTIAL WEIGHING
PROCEDURE 1 –determining reference mass manually
•Press <KEY> button. On-screen Internal keyboard will display
• Using an on-screen keyboard of a displayed window, enter reference mass value and press <> button for
confirmation.
Mass of all weighed products is compared to reference mass the weight difference is displayed in [%].
PROCEDURE 2 –accepting currently loaded mass as reference mass
• Put the sample on a weighing pan.
• On measurement result stabilization, press <Reference > button, dialog bar with prompts is displayed at the
bottom, follow the prompts. Load the part to be weighed and upon measurement stabilization press button
for confirmation,
•Reference indication is displayed, loaded part weight is accepted as a reference mass, and it is automatically
recorded and displayed in reference mass field.
• Remove the sample form the weighing pan.
• All samples weighed afterwards are compared with the reference mass, and the display indicates the
difference, expressed in [gm.], for each weighed sample in relation to the reference mass.

4.5 LIMIT CHECK
This feature is used to check whether a sample corresponds to a preset target or is with a specific
Tolerance range.
The check weighing procedure will always be carried out in unit 'g'.
•Set the Lower and Higher limit weight as required.
•Press <KEY > button. On-screen Internal keyboard will display
• Using an on-screen keyboard of a displayed window, enter Low value and High value .
Now place the sample on the weighing pan, display will show weight of the sample and percentage with color
On bar

4.6 Animal weighing
Any type of movement can prevent a scale from registering a stable weight. That’s why weighing scale
manufacturers have developed specialist weighing equipment that is well-suited for weighing all types of
animals /livestock cattle and liquid etc. For the most accurate results, it’s important to use a weighing scale
with an animal/dynamic weighing function. This means the scale has the ability to provide an average
Threshold weight based on the force exerted by the animal or liquid over an extended period of time. Once
the scale completes the internal calculation, it displays an Average Threshold weight.
PROCEDURE
Press the <Animal > key on main menu on the screen,
Put the animal on weighing pan, then Press Start key animal weighing will start as shown in below
figures
Default time for animal weighing is set to 10 seconds.
.
Once it is completed the above reading will show you the normal weighing reading and the bellow
reading will freeze animal average Threshold weight reading.
Table of contents
Other Aczet Measuring Instrument manuals
