Adapt4 XG1 User manual

Adapt4, Inc.
Installation Manual, Rev. 0.6 1.1
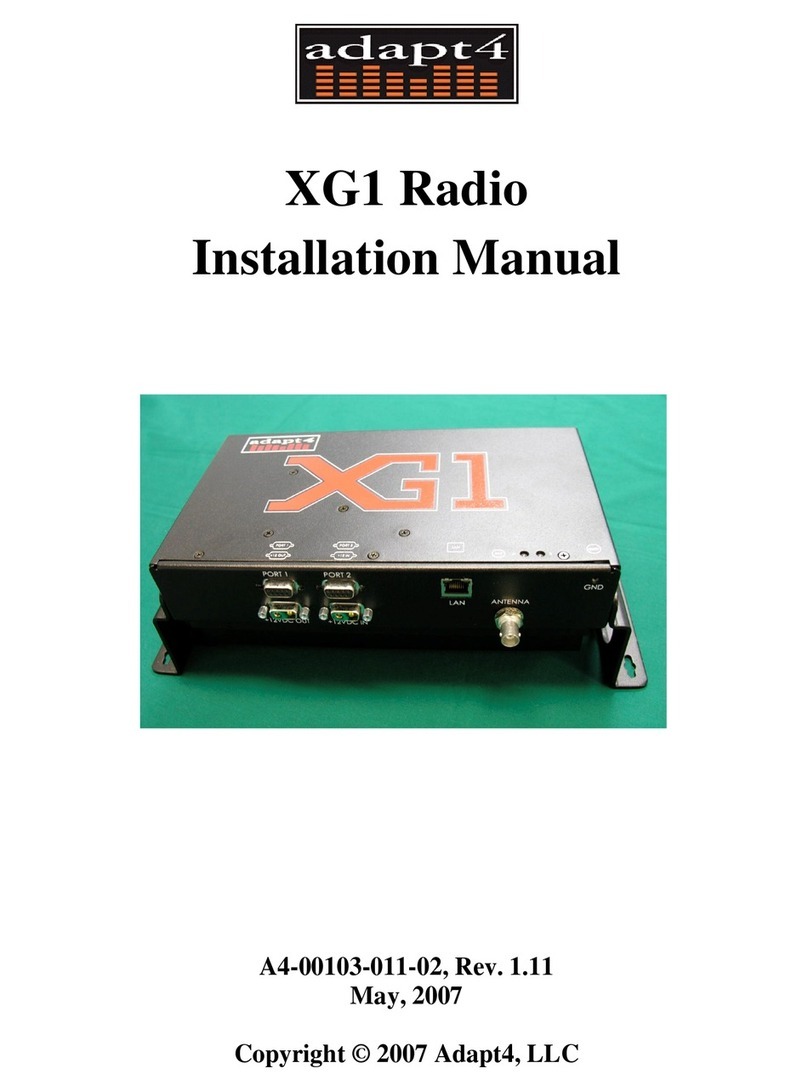
Adapt4 XG1 Radio
Installation Manual
A4-00103-011-01, Rev. 0.7b
December 2, 2005

Adapt4, Inc.
1.2 XG1 Radio Installation Manual
NOTICE
Adapt4, Inc. assumes no responsibility for any errors that may appear in this document, nor does
it make any commitment to update the information contained herein. However, questions
regarding the information contained in this document are welcomed.
Adapt4, Inc. also reserves the right to make changes to the specifications of the XG1 Series and
to the information contained in this document at any time without notice.
This manual is not all inclusive of our products and services. The software and procedures
discussed herein are continuously evolving just as are the requirements of our customers. Its
format is informal, and hopefully will stimulate as many questions as it answers. Copies of cut
sheets, engineering data, customer lists, installation guides, and test procedures are all available
for further information.
© Adapt4, Inc.
605 N. John Rodes Blvd., Melbourne, FL 32934
Phone 321-259-5009 | Fax 321-259-4006
www.adapt4.com

Adapt4, Inc.
Table of Contents
Adapt4 XG1 Radio.........................................................................................................1
Installation Manual........................................................................................................1
A4-00103-011-01, Rev. 0.7 November 22, 2005............................................................1
Table of Contents..........................................................................................................3
1.0 Overview........................................................................................................................ 4
1.1 Admin Tab ..................................................................................................................... 8
1.2 Download Tab.............................................................................................................. 10
1.3 Startup Config Tab....................................................................................................... 12
1.3.1 Network Configuration Panel.................................................................................. 13
1.3.2 Network Status Panel............................................................................................... 13
1.3.3 Antenna Pointing Tool Panel................................................................................... 13
1.4 Interfaces Config Tab................................................................................................... 16
1.5 Channels Tab ............................................................................................................... 18
1.5.1 Most Common Steps To Use................................................................................... 19
1.5.2 Advanced features: .................................................................................................. 20
1.6 Spectrum Analyzer Tab ............................................................................................... 21
1.7 Summary...................................................................................................................... 23
Glossary.......................................................................................................................24
Operational and Safety Warnings ..............................................................................25
Questions or Comments on This Manual ..................................................................26

Adapt4, Inc.
1.4 XG1 Radio Installation Manual
1.0 Overview
The XG1 Installation Software provides a tool that enables a field installer to configure an
Adapt4 XG1 radio as part of its installation in the field. The field installer “installs” the radio to
make it capable of communicating on the correct network. Subsequently, the Network Operator
will “commission” the site, possibly after the field installer has left the site. The commissioning
process includes further configuring of the site over-the-air and coordinating the start of service
with the end-user. When the site is commissioned, it may begin carrying end-user traffic.
The Installation Software normally runs on a laptop computer and has the following capabilities:
•Network configuration – Set the XG1 radio configuration so that it can join the correct
network. The network's Element Management System (EMS) will further configure the radio
after it has joined the network.
•Software updates – Download new software distributions from the laptop to the radio.
•Antenna Pointing – Point the station's antenna using the laptop software's visual and audible
indications of the signal strength received from the Base Station.
•Interface configuration – If applicable, configure the RS-232 serial ports.
•Channel Selection/Interference Blocking – Optionally, select blocks of channels to use and
block out (“notch out”) frequency channels known to have interfering radio signals.
The above list of capabilities is also a brief outline of the tasks of installing the radio. More
details will be given below.
Table 1.0-1 provides an equipment list needed to support use of the XG1 Installation Software.
Table 1.0-1: Items Needed to Connect Radio to Computer
1. Laptop with:
•Windows 98 or later
•Ethernet port
•128 MB RAM
•Correct time/date set
2. Ethernet cable
•Cross-over (if directly connected)
•Straight-through (if connected via hub)
3. RS-232 cable (for testing user ports)
•DB-9F, null cable or null adapter
•XG1 Installation software

Adapt4, Inc.
Figure 1.0-1 illustrates an XG1 radio network, which is comprised of three XG1 radio Remote
Sites and a Base Station (Hub). The Remote Sites are further comprised of an antenna, the XG1
radio and end-user equipment. The end-user equipment is attached to the radio via Ethernet
and/or RS-232 serial cables.
The Base Station comprises an antenna (typically omnidirectional), an XG1 Base Station Radio,
Ethernet and optional RS-232 serial cabling from the radio into a shelter or building. These cables
connect to user host equipment. In addition, the Ethernet cable connects to the Element
Management System (EMS) computer that manages the XG1 radio network and provides a
graphical user interface (GUI) to Network Operators.
Figure 1.0-1: XG1 Radio Network

Adapt4, Inc.
1.6 XG1 Radio Installation Manual
The Field Engineer performs the following basic steps to install a Remote Site XG1 radio:
!"
#
#
$
# #
# %
###
! &
' " &(
" & )
!
* &
+
, *- $ , ./
, *- 0
- +' &#
" # $%
&% !
+# , *- #
# # #
' $
$ !
" 1" # #
#
# 0 #
# +#
&
/
# #
2 " 3

Adapt4, Inc.
( $)*
# $ $ !
+# 0 4"5
#
+ $
%,
!
$ * #
* 6 *
& 7- #
, *- * 68 87
#
6$ 1"* #
*# * 7
-.%
$
/0 1 !
$ 0 "
#
#0
*
Et h e r ne t c r osso ver c abl e
E t he r n e t s t r a ig h t -t h r o ug h c a bl e
E t he r n e t hu b
Figure 1.0-2: Connecting XG1 Radio to a Laptop

Adapt4, Inc.
1.8 XG1 Radio Installation Manual
1.1 Admin Tab
General: Use the Admin tab (Figure 1.1-1) to log onto the XG1 radio Installation Software for
operator authentication and to test communications with the radio connected to the laptop via the
Ethernet port. In addition, the operator may save some default configuration parameters (such as
the default radio IP address) for convenience during subsequent installations.
Figure 1.1-1: Admin Tab
Login – Enter your User Name and Password (provided by Network Operator). Optionally, enter
your Operator ID, also provided by the Network Operator. Click the Login button. (Later, click
Logout to cancel your session.) A message will be sent to the EMS that an operator has logged
in. A message will appear in the Message Log area of your screen. (The User is the user login
name for all users of the software. The Operator ID is unique for the individual user.)
Test Communications with Radio – Enter the IP address and IP mask of the radio The default
values for an unconfigured radio are IP address (10.255.0.1) and mask (255.255.240.0). This
address can be used for configuring the radio only. Your laptop must be configured on this IP
subnet as well. Use the Network Connect tool on the Windows Control Panel to set the static IP
address (instructions vary with Windows version).
Click the Test Comm with Radio button to verify that you have communications with the radio
via the Ethernet port. A message will be displayed in the Message Log area when the test
message is sent to the radio. If the radio replies successfully, a “From Radio: test reply” message
will be displayed.
Save Default Configuration – To save your configuration (at any time) come to this tab, select a
directory in the directory box, and click the Save To File button. At some time later, restore this

Adapt4, Inc.
configuration by clicking the Load From File button. This stores the laptop installation
application configuration, not the radio configuration. The configuration items stored are default
IP address/mask of radio.

Adapt4, Inc.
1.10 XG1 Radio Installation Manual
1.2 Download Tab
General: Use this tab to install (download) new software onto the XG1 radio, if the Network
Operator provided a new version of software. The laptop sends this software to the radio via the
Ethernet connection.
Figure 1.2-1: Download Tab
Procedure
1. Copy the software directory to be downloaded to the radio into a folder on your laptop or
desktop computer. Only one revision of software should be placed in a directory.
IMPORTANT: Adapt4 distributes the files in a single directory, which will have a name that
indicates the software release. The directory must be kept intact; the Downloader will reject
the directory if it is not kept intact.
2. From the Select Download Directory box, select the drive and folder containing the software
release to be installed in the XG1.
3. Click Begin Downloads. The progress of the downloads will be shown via the All Files and
Current File progress indicators. The file names will be listed in the Message Log area.
To determine the current software version of every software file in the radio, click Get Value
From Radio from the Current Versions panel. Table 1.2-1 describes the download files.

Adapt4, Inc.
Table 1.2-1: Description of Download Files
EMS: Download Tab Description Type
ControllerVersion Version of Dig Microprocessor Firmware Read-only text
CoefficientsVersion Version of Coefficients File Read-only text
DSPVersion Version of DSP Firmware Read-only text
FPGAVersion Version of FPGA code Read-only text
MACVersion Version of MAC Software Read-only text
InitVersion Version of Initialization Software Read-only text

Adapt4, Inc.
1.12 XG1 Radio Installation Manual
1.3 Startup Config Tab
General: Use this tab to give the XG1 radio the minimum network configuration that it needs to
join (become part of) the network. After the radio has this information, it will receive further
configuration over-the-air from the EMS. The radio needs the proper Network ID to join the
network and needs the Radio Function to perform the correct role: Hub (Base Station), Remote,
Mobile/Remote, or Digipeater/Remote. These configuration values will be provided by the
Network Operator. The radio joins the network by looking for special transmissions (preambles)
containing the Network ID.
The installer also uses the Antenna Pointing Tool on this tab to point the Remote Site's directional
antenna towards the Base Station (Hub).
Note: The Channel Set must be set before the radio can become operational; this is described in
the Channels Tab section
Figure 1.3-1: Startup Config Tab

Adapt4, Inc.
1.3.1 Network Configuration Panel
1. Set the Network ID and Radio Function fields:
•Enter the Network ID in decimal or hexadecimal (beginning with “0x”). For example:
25238 (decimal) or 0x6296 (hexadecimal). These two example values are equivalent
(refer to the same network).
•Click the Network ID checkbox (if it is not already checked).
•Select a radio type by clicking the appropriate option (Factory Default, Hub, Remote,
Mobile, or Digipeat) in the Radio Function area.
•Click the Radio Function checkbox (if it is not already checked).
•Click the Send Config to Radio button.
2. Set the Installation Status
When the Field Installer has completed all steps and the field installation is complete, return
to this tab and set the installation status of the radio via the Installation Status field. The
Field Installer indicates that the radio is installed and ready for further configuration from the
EMS (which might not happen until after the Field Installer has left the site) by setting the
Installation Status field to the Installed value.
•Deselect the Network ID and Radio Function checkboxes by clicking them.
•Click the Installed radio button in the Installation Status area.
•Click the Send Config to Radio button.
•Click the Set Install Time/Date button to record the installation's time and date.
Note: The EMS operator will set the Installation Status field to Commissioned (over-the-
air) after the EMS has further configured the radio - possibly after the Installer has left the
location.
The present values stored in the radio can be retrieved by selecting all the checkboxes (or
clicking the Check/Uncheck All checkbox) and clicking the Get Values from Radio button.
1.3.2 Network Status Panel
Use this panel to determine if the radio has joined the network. (This can happen before being
configured by the EMS; however, user traffic will not pass over the network until the EMS
configures the site.) Click the Get Values from Radio button in this panel The network status
will be displayed, including:
•Run Status: If Run Status is in the joined state, the radio has connected with the network
•Preamble Channel (changes frequently)
•Number of Channels (1-45)
•FEC Coding Rate (none, 1/2, 3/4 or 7/8)
•Tx Power Level (changes frequently)
•Last SNR (signal/noise ratio, which changes frequently)
1.3.3 Antenna Pointing Tool Panel
Click the Start button to start the tool. The tool will begin periodically polling the attached
remote radio for its signal strength from the Base Station. The tool will show the relative strength

Adapt4, Inc.
1.14 XG1 Radio Installation Manual
in a vertical bar graph, and if SNR Beep On is selected (and the laptop sound is enabled), a beep
will sound at a rate proportional to the signal strength. This enables the Installer to adjust the
antenna without viewing the laptop screen.

Adapt4, Inc.
Table 1.3-1: Description of Startup Config Tab Fields
EMS: Startup Config Tab Description Type
Network ID A value in every multicarrier
transmission that identifies the
network; determined by the
network planner.
Read-write integer
FEC Rate Forward error-correction rate
(none, 1/2, 3/4, 7/8); used to
correct transmission errors on the
receiving side.
Read-write pick list
Number of Channels The number of 6.25 Khz channels
that all radios in the network will
use (numbered from 0 to 479).
Read-write Integer
(0-479)
Signal Strength (Antenna
pointing tool) Displays a vertical bar (and “beep”
tone rate) that is proportional to
the signal strength of the hub's
preamble channel.
Read-only visual, aural
and textual indicator
Run Status Indicates whether or not a remote
site is inactive, is trying to join the
network, or has joined the
network.
Site ID A unique site number for radio
with network. Site ID usually
equals last octet of site’s IP
address.
Read-only numeric

Adapt4, Inc.
1.16 XG1 Radio Installation Manual
1.4 Interfaces Config Tab
General: Use the Interfaces tab shown in Figure 1.4-1 to configure the RS-232 serial port(s), if
these are used in the end-user's application.
Figure 1.4-1: Interfaces Config Tab
Procedure for Serial Port Configuration
1. For each serial port being used, enter values for baud rate, protocol, line discipline, duplex,
and RTS/CTS delay. See Table 1.4-1 for more information on these variables.
2. Click Send Config to Radio when all the variables have been defined to configure serial
port.
3. A test fixture may be used to test the serial ports. For further information, contact Adapt4.

Adapt4, Inc.
Table 1.4-1: Serial Port Configuration
Option Description
Baud rate Serial port baud rate; standard rates are 1200, 2400, 9600, 19200 and 38400
baud.
Protocol Port protocol: Transparent, Data Flow Systems, Modbus, Modbus ASCII, or
DNP.3
Line Discipline 2-wire, RTS/CTS Signaling, or Full RS 232 Signaling
Duplex Half or Full Duplex
RTS/CTS delay A delay between receipt of RTS and the subsequent issue of CTS – used in
some protocols

Adapt4, Inc.
1.18 XG1 Radio Installation Manual
1.5 Channels Tab
General: The Channels tab, shown in Figure 1.5-1, provides two functions: selecting the Channel
Set(s) assigned to the network and blocking out (“notching out”) channels that have known
interference sources. The Network Operator will provide the Channel Set(s) to use and may
provide a list of channels to block.
A Channel Set is a pre-defined set of channels that a radio may use in its channel hopping
sequence; all sites in the network must have the same Channel Set. Adjacent networks should use
different Channel Sets in order to avoid co-interference. This is one reason why the Network
Operator must coordinate remote site installations.
Figure 1.5-1: Channels Tab
In the figure above, the list of channel checkboxes (the “channel list”) represents the 6.25 KHz
channels that have been blocked from use. If you click on a checkbox and put it in the checked
state, that channel is blocked (or “notched out”). This is important to understand, because when
you then select the Channel Sets to use, all other channels are checked and therefore blocked.
The channels in the Channel List can be displayed with the channel number only (you can see all
channels at once), or it can be displayed with the channel number and frequency (you must use
the scroll bar to see all channels). Select the option you want in the Display Format area. Figure
1.5-1 shows the channel number and frequency (Chans+Freqs) display format; Figure 1.5-2
shows a snippet of the Channel-only (Chans) display format.

Adapt4, Inc.
Figure 1.5-2: Channels Tab (Channel-only display format)
Note: Normally, blocking interference channels is only done at the Base Station, because that site
sends the blocked channel information automatically to all remotes. However, the Channel Set
must be selected at each remote site.
1.5.1 Most Common Steps To Use
•Clear the Channel List Table: Click the Clear Form button. This clears all checkboxes.
•Retrieve a pre-stored configuration: To use or modify a previously stored Channel List,
load it into the Channel List Table by entering the file name in the Filename box and clicking
the Load From File button. If that file is already appropriate for the site, send it to the radio
by clicking the Send to Radio button.
•Blocking out channels: If you don’t have a pre-stored file, or you want to change the present
one, then block out the channels by clicking on them. (You can block multiple channels per
click by using the advanced feature described below.)
•Select the network's Channel Set: Click one or more of the Channel Set checkboxes; the
Network Operator will determine which ones are to be used in the network. (All sites must
agree.). After selecting the Channel Sets, click the Apply to Notch List button. All channels
not in the selected Channel Sets will by blocked. (The associated checkboxes will be
checked.) If you make a mistake, clear the form by clicking the Clear Form button and begin
again.
•Send Channel List to radio: When you are satisfied with the channel list, send it to the radio
by clicking the Send to Radio button.

Adapt4, Inc.
1.20 XG1 Radio Installation Manual
•Store the channel list: Optionally, you can store your channel list on your laptop for later use
at another site by entering a file name in the Filename field and clicking the Save To File
button.
1.5.2 Advanced features:
1.5.2.1 Retrieve Blocked Channel List from Radio (Radio Panel)
If a blocked channel list has been stored in a radio, you can retrieve it, operate on it as described
above, and either write it back to the radio and/or store it on the laptop. To retrieve a Channel
Blocked list from the radio, click the Get Radio Mask button. You can further edit this list using
the methods describe in the previous section.
1.5.2.2 Blocking Multiple Channels At A Time (Chan. Selection Panel)
Select Set on the Click Function group. Enter the number of channels that you want to select per
click in the Chans-Per-Click field. When you then click on a channel in the Channel Table, that
number of channels will be selected. If the number of channels is odd, the channel you select will
be the center channel. If the number of channels that you select is even, the channel that you click
will be the upper of the two center channels and the lower channels will get one more channel
than higher channels. Figure 1.5-3 illustrates the example of blocking channels 42-45. The Chans-
per-click field is set to 4 and Chans is selected. If channel 44 is clicked, the channels 42-45 will
be blocked (checked).
Figure 1.5-3
1.5.2.3 Blocking A Frequency Range
This is similar to blocking a range of channels, except that the amount of bandwidth to block is
measured in KHz. Select Set in the Click Function area, select KHz as type of range, and enter a
value in the KHz-per-Click field. Some standard ranges are: 6.25 KHz, 12 KHz and 25 KHz, but
non-standard ranges may be used. When you click on a checkbox in the channel list after setting
these values, the equivalent number of channels is blocked.
Other manuals for XG1
1
Table of contents
Other Adapt4 Radio manuals
