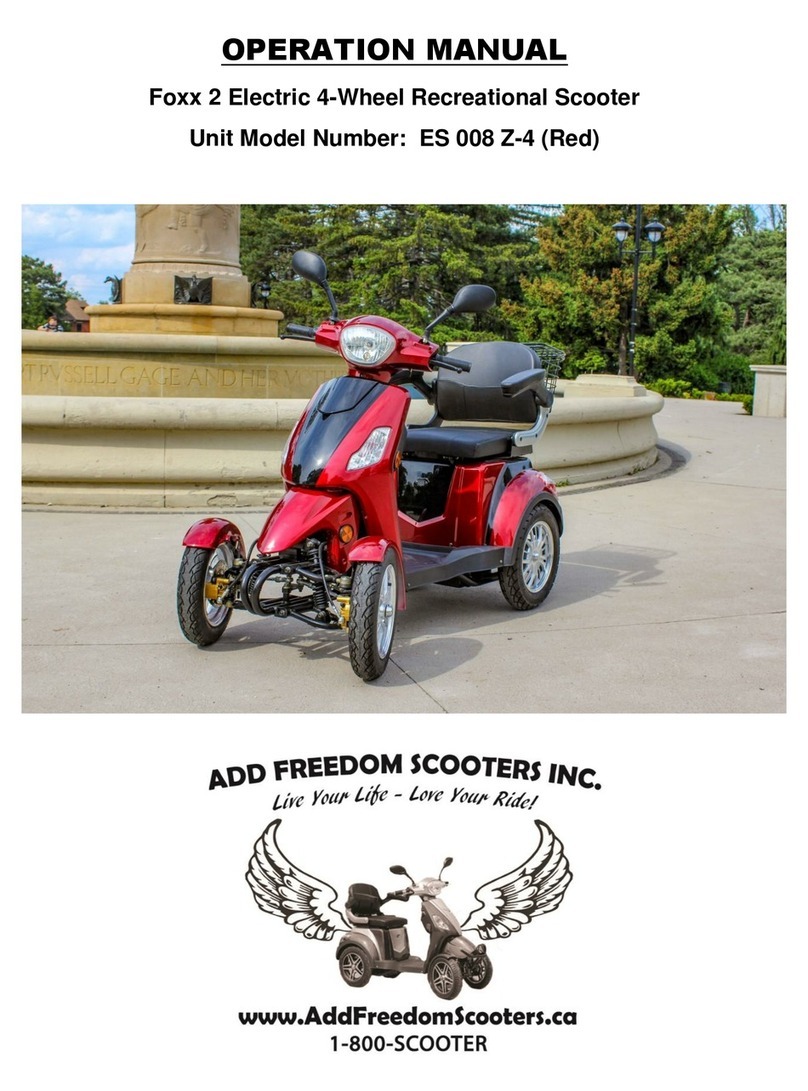
Add Freedom Scooters Foxx ES008 J-4 User manual

OPERATION MANUAL
Foxx 4-Wheel Electric Recreational Scooter
Model: Unit Model Number: ES008 J-4

Add Freedom Scooters Inc.
841 King St. East
Hamilton, ON Canada, L8M 1B3
Tel: 1-800-SCOOTER (1-800-726-6837)
Owner’s Name:
Address:
Tel:
Vehicle Identification Number (VIN):
One-Year Parts Warranty Start Date:
One-Year Parts Warranty Expiration date:
Your Sales Representative is: Geoff Warren –VP Add Freedom Scooters Inc.
Delivery Date:

USER MANUAL
Introduction
Add Freedom Scooters Inc. offers innovative mobility solutions for you and your loved ones.
This Operation Manual is for the Foxx electric recreational mobility scooter, model ES 008 J4.
This new electric scooter carries a one year warranty on all the major parts as detailed in this
manual. We offer excellent customer service and follow up care.
Our products have been tested and proven to have the highest quality according to Canadian
standards.
Electric scooters contribute significantly to green mobility and a sustainable energy model that is
growing exponentially every year.
Thank you and congratulations on your purchase of your new Foxx Scooter.
Our scooters incorporate comfort and style with the latest in technology. The large tires,
powerful motor and innovative MacPherson struts and front suspension ensure a comfortable
ride. It is also complemented with a full light set that includes front and rear lights and indicators
enabling it to be used on public roads, sidewalks, and park walkways and trails.
Your new scooter will add Freedom to your life and will allow you to go places that no other
recreational vehicle could possibly go.
If you are not happy with your product or our service, please do not hesitate to contact us. We
will be more than happy to address your concerns promptly and courteously.
Check List:
Before you operate the scooter
Locate the listed materials in rear basket or assembled on scooter:
1. Set of mirrors (pre-installed or in a box found in the under-seat storage compartment)
2. 60 Volt Battery Charger
3. Scooter Key and Remote Control Unit (2 full sets provided)
4. User Manual
Important
Please Read User Manual Before Operating Scooter

Quick Start Guide - Getting Started
1. Read User manual.
2. Adjust your seat to a comfortable position. Get on board. Put on & adjust seat belt.
3. Insert key into ignition. Release. Then turn key to the right. (Don’t force key. Should be
easy click. Remember, release the key briefly once inserted. Then turn.)
4. Set variable speed switch to speed 1 (the slowest speed –max 5 km/h).
5. Ensure that your Forward / Reverse switch is set to F (for forward drive mode).
6. Adjust mirrors to correct positions to ensure you can see objects behind you.
7. Place both hands on handle-bars.
8. Twist the right hand throttle slowly with your right hand to move forward. Get
comfortable with using the throttle and the brake levers to get the feel of movement,
braking and steering for the first time.
9. Keep your feet inside the scooter. Don’t put feet over side while driving.
Enjoy the ride! Take it SLOW at First! Get the Feel of your new Scooter!
Turn off scooter by simply turning the key one-click counter-clockwise (to the left) to centre
position and then remove key by pulling it outward. Never force the key while turning it.
NOTE: Always remove the key before dismounting the scooter –to ensure that you don’t
have any accidental “throttle acceleration moments” which could cause injury.
The throttle on your scooter is like the gas-peddle on a car. It will move this 300 lb. scooter
forward with the simple turn of a handle-grip. So BE CAREFULL when your key is in the ignition
and the unit is ON and you are moving around the unit.
Always be Aware of the power of this scooter. It is a Vehicle –just like a car or a
motorcycle. It has power and it can be dangerous to both the driver and people (and
objects) around it –if you are not careful.
Add Freedom Scooters Inc. is not responsible for any injury caused by the use of this
scooter. The Scooter owner assumes all responsibility for the safe operation of this
vehicle.
Always drive with extra caution and be aware that this vehicle can be dangerous, if you are not
very careful everywhere you drive.

General
Warning and Caution notices used in this manual apply to hazards and unsafe practices that
could result in personal injury or damage to property.
Warning
It is the responsibility of the individual user to decide which scooter is suitable for the user's
intended purpose. We supply a range of mobility scooters to meet the varying needs of
individual users.
With regard to restraints, seat positioning straps, posture correction or other positional aids and
accessories, it is the obligation of a qualified healthcare professional in conjunction with the
owner to ensure the suitability of such equipment for the safe operation of the scooter.
Serious injury can occur in the event of a fall or collision when using a mobility scooter.
It is our opinion that users of mobility scooters should use the seat-belt when driving over
bumpy terrain. Seatbelts are not required by law but they do provide added safety.
●Do not exceed weight capacity of 395 lbs.
●Do not attempt to lift or move this scooter by any of its removable parts. Personal injury and
damage to the scooter may result.
●Never try to use your scooter beyond its limitations as described in the manual.
●Do not operate your scooter if it is not functioning properly. Contact your seller.
●Do not connect any electrical or mechanical device to the scooter. Failure to obey this
instruction may result in injury and will void the warranty.
●Check with your physician if you are taking any medication that may affect your ability to
operate your powered scooter safely.
●Do not operate your scooter while you are under the influence of alcohol as this may impair
your ability to operate your power scooter in a safe manner.
●Do not drive your scooter in heavy rain or snowy conditions.
●If exposed to water, your power scooter is susceptible to damage to the electronic or
mechanical components. Water can cause electronic malfunction or promote premature
corrosion of electrical components and frame.
Ramps and Curbs/ Gradients:
We recommend that wherever possible that a suitable access point such as a drop curb or ramp
be used. The necessity to climb a curb directly should be as a last resort.
If negotiating a gradient or curb (up to 5 in.), always address the situation at a slight angle to
ensure stability of the scooter. Do not hit a curb at speed, drive slowly until you reach the curb
then gradually apply more power to travel over the obstacle.
Do not turn sharply on any slope moving forwards or backwards. Slow on the corners!

Safety Advice:
DO:
•When driving, always look forward to avoid obstacles and objects which could puncture
your tires. Keep your eyes on the path in front of you at all times.
•Turn the power off when transferring to and from the scooter.
•Drive slowly when going down steep hills or over uneven ground.
•Keep your feet inside the scooter while driving.
•Ensure the batteries are fully charged before your journey.
•Avoid rough or soft terrain (such as sand) and long grass wherever possible.
•Be aware of other road users and pedestrians. If driving on the road you MUST adhere to
the Ministry of Transportation driving rules: Mainly –stay to the right side of the road.
•Use head lights when it is dark. Use emergency flashers when on the road at night.
•Turn the scooter’s power off when not in use. Remove the key.
•Follow the maintenance guide to ensure the longest life of the scooter.
•Keep your batteries warm when the scooter is not in use. Cold can destroy batteries.
•Always remove the keys if leaving the scooter unattended. Unauthorized persons/ children
may use the scooter resulting in injury.
DO NOT:
•Do not carry passengers. If you do, make sure you have full access to the controls.
•Do not exceed inclines over 30 degrees. The scooter can handle most steep hills however.
•Do not traverse inclines that may result in overturning the scooter.
•Do not use the scooter where you cannot safely or legally walk.
•Do not attempt to climb curbs over 13cm (5") high.
•Do not use the scooter if under the influence of alcohol or any medication.
•Do not use a mobile phone while driving.
•Do not attempt to negotiate steps or stair-cases or escalators.
•Do not transport the scooter with the user onboard.
•Do not connect any other devices to the batteries as this could cause permanent damage
and will void your warranty.
•Do not travel through water or over soft terrain (mud, sand, wet grass, high-grass)
•Do not lift the scooter by the chassis covers or any plastic part.
•Do not store the scooter outdoors uncovered for long periods of time. We recommend that
your scooter is stored in a dry garage, shed or porch to prevent the possibility of any
moisture ingress. A water-proof tarp is a good option, if the scooter is outside.
Parking Brakes
To engage the parking brake, squeeze either handbrake lever with one hand, and while holding
it in, use your other hand to push the brake-lock switch and then release the brake. To release
the parking brake, simply squeeze the handbrake lever. You can then resume movement. There
is a brake lock switch on both brake handles. See illustrations to learn more.
Mirrors
During shipping, your power scooter may have been shipped partially disassembled for
protection of parts during shipping. Please check after unpacking for the 2 mirrors.

To attach the mirrors, place each mirror threaded end into the mirror post. Turn mirror clockwise
and fasten mirror to scooter. Tighten hex nut with a small crescent wrench to secure mirror in
place in the desired position. Be careful not to scratch the paint finish while tightening.
Operating Scooter:
To prevent injury to yourself or others, always ensure that the power is switched off when
getting on or off the scooter.
Always check that the variable speed switch is set to the desired speed setting. Before driving,
always check you have selected the correct forward or reverse button setting.
Always reduce your speed when making sharp turns.
Speed Switch - 3 speeds are: 1= 5 km/h 2 = 10 km/h 3= 25 km/h Reverse = 5 km/h max
Forward / Reverse Switch (F for “Forward” and R for “Reverse” on switch) Reverse speed is
approx. 5 km/h max.
Rules of The Road ~ Safety Tips:
You are allowed to drive on sidewalks. Use lowest speed, gear 1 for sidewalk driving.
Warn sidewalk pedestrians you want to get buy –use honk-horn and people will move.
You are allowed to drive in shopping malls and large stores –unless told otherwise.
When indoors –ALWAYS drive at the slowest speed. Be cautious around all people and
objects. The scooter weighs almost 300 lbs. and could cause serious injury to others.
You are allowed to drive on the street, especially where there is no sidewalk. The
rules for bicycles apply –stay to the Right Side of the Road at all times.
Use your emergency flashers (hazard lights) when you are driving on the road at night.
Do NOT drive on any highway. It is against the law to drive this scooter on any
highway. The only exception would be a country road or any road that has a paved bike
path intended for bicycles and scooters.
You are allowed to drive on all bike-paths. Follow the rules of the road on 2 lane bike-
paths –keep to the right lane. At intersections you are allowed to merge with traffic in
order to make a left turn. Consider using your flashers (hazard lights) when in traffic.
Helmet is Not required by law: Some choose to wear a helmet for added safety. We
recommend the use of a helmet especially if you are in driving on any road. You may
find people will yell “wear a helmet!” at you, if you are on a busy road. But it is not
required by law –because this scooter is classified as a “mobility device” and as such is
exempt from the helmet laws for e-bikes and motorcycles. (Some people have head
injuries which prohibit the use of a helmet, ergo the exemption.)

Controls –At a Glance:
Left-Side Controls:
High-Beam / Low Beam Switch
Turning Indicator Switch
Hazard Lights Button
Left Horn Button

Controls –At a Glance (Continued):
Right-Side Controls:
Head Lights –Running Lights Switch
The right-side light switch is allocated as follows: Switch in full right position is Lights Off;
Switch in middle position is running lights only: Switch in full left position is headlights on
full. Then use the High-Beam / Low-Beam Switch on left grip to alternate high/low beam setting.
Horn Button Throttle Grip
Speed Control Switch
Forward and Reverse Switch

Controls –At a Glance (Continued):
Console Display:
Battery Level Meter
Speedometer
Turning & Hazard Indicator
Odometer reading
The odometer is un-resettable and keeps a tally of your total travel on your scooter in Km.
3rd Speed Disable Switch
At scooter rear, under the plastic molding
you will see a little button. If you press this
switch you turn OFF the 3rd speed.
So even if you have the speed setting to
speed 3, the scooter will not exceed 10 km/h.
To turn the 3rd speed back on, simply push
switch to other position.

Controls –At a Glance (Continued):
Front Brake (Right Brake Handle)
Note: There are 2 Brake Lock Switches, one on each brake lever.
To engage the Brake Lock, simply squeeze the brake handle with one hand and then push in
the brake lock switch and release the brake lever. The button will remain locked until you
squeeze the brake handle. Same procedure for both brake handles.
Rear Brake (Left Brake Handle)

Control Panel
Speedometer (in Km units)
Battery level indicator (at left of screen, the climbing multi-colour bars)
Odometer reading (on lower-right of LCD Display)
Turning Indicators and Hazard Lights Indicators
Right Side
Speed Switch: Speeds 1, 2 and 3
Horn
Forward | Reverse Switch
Lights Off (switch full right); Running Lights (switch a middle); Headlights On (switch full left)
Left Side
High/Low beam
Left / Right turn signal
Horn
Hazard Lights (flashers) Press once to turn on. Press again to turn off. LCD display will indicate
when they are on.
Storage Compartment Key
Insert Key into lock mechanism and turn key and lift seat up. The seat will lift and tilt forward to
gain access to storage compartment and circuit breaker.
Breaker Switch –Under Seat:
The breaker switch is a blue toggle switch located
under your seat. This will turn off the power to your
scooter.
When removing batteries, turn the power off.
The breaker “off” position is when switch is towards
the right handle side. On is to the left position, where
blue text can be seen.

Remote Control Unit (on key chain)
The Remote Control Unit on the Foxx and Swift model scooters (Model ES 008 J-4) is made of
a high quality impact-resistant thermoplastic shell with easy push button operation.
You’ll note that there are 4 function buttons – as described in the image below –and 2 buttons
which are just ornamental that have no function.
Lightning bolt –Keyless Engine Start Button: Press twice to turn on key-less engine start.
Scooter can be driven without key.
To turn OFF the key-less engine start, press the “Alarm Off” button once (it’s 2 buttons over to
the right with the icon of the open-lock)
Arm Alarm (alarm “on”) Button:Beeps once, to indicate that you have “armed” the alarm on
your scooter. If touched/moved, the scooter will squeal loudly, scaring off any thieves!
Disarm Alarm Button: Beeps twice to indicate that you have “dis-armed’ the alarm on your
scooter. This button also turns off the key-less engine start, by pushing the button once.
5-Beep Finder Button: Makes the scooter beep 5 times, to help you find it in a parking lot for
example, or to ward off curious people.

Batteries and Battery Charging
For optimum battery life, always keep your batteries fully charged whenever you can. To charge
the batteries, please push the charger plug in firmly to the 3-prong port in front of the scooter
seat. Ensure you push the plug firmly into place or charge may not occur.
Next, plug the charger’s AC plug into any household A/C outlet.
ALWAYS DO IT IN THIS SEQUENCE. DO NOT PLUG THE CHARGER INTO AC OUTLET
FIRST. ALWAYS PLUG IN THE SCOOTER END FIRST –THEN THE AC OUTLET.
The reason for this is that in some cases, if the charger is already plugged into the AV unit, and
then you plug it into the scooter, a power surge or spike could blow a fuse in the battery area.
For this reason, please get in the habit of ALWAYS PLUGGING IN THE SCOOTER FIRST.
When removing the charger unit –REMOVE THE AC WALL CONNECTION FIRST and THEN
REMOVE THE PLUG FROM THE SCOOTER.
Battery Charger and Battery Care:
Batteries supplied with your scooter are specially designed for use on power chairs and
scooters and require an automatic battery charger. Keep your batteries fully charged.
These chargers have an electronic switch that terminates the charge when the batteries are full.
The charger provides a charge for 12 volt lead acid batteries. There are Five 12-volt batteries
below the seat in the battery tray, linked together to result in 60 volts.
The charger can read the level of charge in the batteries and will switch off when the batteries
are fully charged and the red light will go off. A dim green light can be seen when the batteries
are charged. This will place the charger in “trickle-charge” mode.
IMPORTANT: When your batteries are fully charged, you should un-plug the charger.
This will result in a much longer life of both the batteries and the charger. It also reduces the risk
of over-charging the batteries, which can occur if the charger gets damaged due to dropping it
or other causes, resulting in a charger that keeps charging the batteries, even once they are full.
So to be safe –and ensure many years of use of the batteries and charger, unplug and
remove your charger once your batteries are full.
To charge the batteries: first, connect the 3-hole plug into the charging socket located below
and in front of the seat, THEN plug the AC cord into a standard wall outlet/socket. The battery
charger has two lights. A constant red light will show when the battery charger is connected (this
will flash if there is a break in the connection), Green light when the charging cycle is complete.
You must still maintain the batteries even if the scooter is not to be used for a prolonged period
(2 to 3 weeks). Failure to do so could result in permanent damage and render the batteries
unusable. Wherever possible, do not interrupt the charge cycle until the batteries are fully
charged. Continual interruption can permanently damage the batteries. If the charging lead
should become damaged, discontinue use immediately and seek a replacement from your
dealer.
New chargers can be bought at most scooter / e-bike shops or online. Be sure to check
that the charger is intended for 12 v lead acid batteries only and is for 60 volt battery
group. You could ruin your batteries by using a 72 volt charger by over-charging them.

Battery Care:
You should always try to keep your batteries fully charged, even when the scooter is in storage
for the winter. During winter storage, charge your batteries every 2 months to top them off.
The batteries are lead-acid type and they like to be kept fully charged. Even if you only drive a
few km’s you should plug in your scooter to keep the batteries fully charged.
During the cold months –if your scooter is outdoors, you should cover the scooter with a
waterproof tarp, and use a heater to keep the scooter at room temperature. If your batteries are
left to sit in below-freezing temperatures, you could ruin the batteries. At the very least, the
batteries would be damaged resulting in less driving distance from diminished batteries.
If you don’t have a way to store your scooter in a warm place, we highly recommend that you
remove the batteries from the scooter and bring them indoors for the winter months. Visit our
website at www.AddFreedomScooters.ca to watch the instructional videos found on the “Our
Scooters” page for safe / proper battery removal and re-installation.
If you take your batteries indoors for the winter, keep them in a warm, dry location and place
down a mat or cardboard under them, in case there is any leakage. Normally there would not be
any leakage, as they are sealed batteries.
We sell a convenient indoor charging kit which enables you to charge the batteries using your
battery charger –when the batteries are removed. Charging kit is only $20.
Use extreme caution when working with batteries. Serious shock or injury can occur if the
positive and negative terminal posts of any battery are touched together. Follow instructions
carefully when working with 12 volt batteries. Remember, the combined power of these 5
batteries is 60 volts –and that is enough to cause injury or death, if not handled with care.
Feel free to consult with your Add Freedom Scooters Inc. representative at any time to get
proper instructions for handling of batteries or any other safety issues.
Disposing and Recycling Of Used Batteries
Batteries must always be recycled correctly. Do not dispose of them with your domestic refuge.
For further information please contact your local waste disposal authority. Most city-run waste
disposal outlets will let you dispose of the used batteries for free.
ADD FREEDOM SCFOOTERS INC. POWER SCOOTERS WARRANTY
Your warranty is valid from the day you received your mobility scooter automatically. This is to
certify that your scooter is warranted for 1-Year from the date of original purchase. This
warranty is not transferable.
Should a defect or operating fault arise within this period the Dealer or Sales Representative
from where the product was originally purchased should be notified immediately. Failure to
register the fault may invalidate the warranty.
ADD FREEDOM SCOOTERS INC. warrants that if a fault occurs within this period due to faulty
workmanship or materials that the product will be repaired (or replaced at the Company's
discretion) free of charge. Any unauthorized modifications to the scooter will invalidate the
warranty.

Parts which are subjected to normal wear and tear, accidental damage, neglect or misuse are
excluded from this warranty. Normal wear and tear parts includes tires, chassis covers, bulbs,
seat coverings, exposed wires & cables. Flat tires are not covered in this warranty, however we
will assist owners with replacing tires with recommendations of reputable dealers and necessary
specifications required for replacement tires, in the event of a flat tire due to running over a nail,
spike or broken glass. In some cases, a spray foam will suffice for tire repair.
For the period of 12 months from the date of purchase from the Authorized Dealer, in the event
of defective materials or workmanship, ADD FREEDOM SCOOTERS INC. will repair or replace
at our option any of the following components found to be defective by ADD FREEDOM
SCOOTERS INC.:
Steel Frame, Frame Welds, Steering Column, Motor, Controller, Frame, Front Forks and
Suspension System.
Note: An increase in operating noise of the transaxle DOES NOT constitute a defect or major
fault. With normal wear and tear, operating noise is expected to increase.
For the period of 12 months, (except where noted otherwise) from the date of purchase from the
Authorized Dealer, in the event of defective materials or workmanship, ADD FREEDOM
SCOOTERS INC. will repair or replace at our option any of the following components found to
be defective by an authorized representative:
●Dash Assembly
●Battery Charger (6 months)
●Motor
●Batteries (6 months –or 400 km travel distance on odometer.)
●Potentiometer Assembly & Electronic Controller
●Bearings
●Bushings
●Rubber Components, excluding tires
●Armrests if they are not broken due to mis-use.
Note: While charging batteries it is normal for the battery charger to heat up. Heat coming from
the battery charger and/or batteries DOES NOT constitute a defect.
Items not listed above are not covered for repair under this warranty
Warranty Exclusions: ADD FREEDOM SCOOTERS INC. does not provide warranty on any of
the following items which may require replacement due to the normal wear and tear of day to
day usage:
●Loss or theft of components
●Damage caused by mis-use
●Battery fluid spillage or leakage
●Abuse, misuse, accident or negligence, improper operation, maintenance or storage
●Commercial use or use other than normal recreational use
●Repairs and / or modifications made to any part without specific written consent of ADD
FREEDOM SCOOTERS INC.
●Exceeding the specified weight capacity of the unit
●Punctures to body, frame, tires or any other component of the scooter.

ADD FREEDOM SCOOTERS INC. reserves the right to replace warranted parts with
refurbished or new parts at our discretion.
Technical Specifications
1. Weight Capacity 180 Kgs | 396 lb.
2. Speed: Limited to:
Speed 1 = 5 km/h max.
Speed 2 = 10 km/h max.
Speed 3 = 24 km/h max.
3. Distance: UP to 45 miles per charge or 60 km (distance varies on terrain, rider’s weight,
road surface, etc.)
4. Front seat: Regular with back and arms (removable)
5. Power: Electric
6. Watts: 1000 Watt
7. Motor Type: differential brushless
8. Amps: 20 AH
9. Volts: 60 Volts
10. Dimensions: 60” x 27” x 42.5 in. (L x W x H)
11. Floor Clearance: 8 in.
12. Rear Basket Dimensions: 13 x 15.75 x 11 in. (L x W x H)
13. Batteries: Lead Acid 12 volt –Model 6-DZF 20 (20 Ah) or 6-DZM-20 (27 Ah)
14. Forward/Reverse switch: Yes
15. High/ Low Speed switch: (3) Speed switch
16. Front tire size: 14” tire type: 3.0 —10 Tubeless Inflate to 32 PSI (front tires only)
17. Rear tire size: 16” tire type: 3.0 — 10 Tubeless –Inflate to 36 PSI (rear tires only)
18. Charger: 60-volt Smart Charger included

19. Throttle Type: Variable Speed Control —Twist Throttle
20. Key Start: Yes (And keyless engine start using remote control button)
21. Braking System: Drum brakes on all 4 wheels
22. Drive System: 1000W Brushless Motor
23. Recommended Tire pressure: Rear tire: 36 PSI; Front tire: 32 PSI.
24. Rear lights: 12v Bulb
25. Scooter Weight: 232 lb. with batteries (combined battery weight alone is 71 lbs.)
26. Battery Indicator: Yes
27. Front Suspension: Front Shocks spring and cylinder, independent
28. Rear Suspension: Rear Shocks spring and cylinder, independent
29. Reflectors: 2 rear reflectors and 8 LED lights
30. Warranty: 1 Year Warranty on parts to commence on date of delivery / purchase

Add Freedom Scooters Inc.
841 King Street East
Hamilton, Ontario, L8M 1B3
Tel: 1-800-SCOOTER (1-800-726-6837)
Other Add Freedom Scooters Scooter manuals
