manuals.online logo
Brands
  1. Home
  2. •
  3. Brands
  4. •
  5. Addvent
  6. •
  7. Fan
  8. •
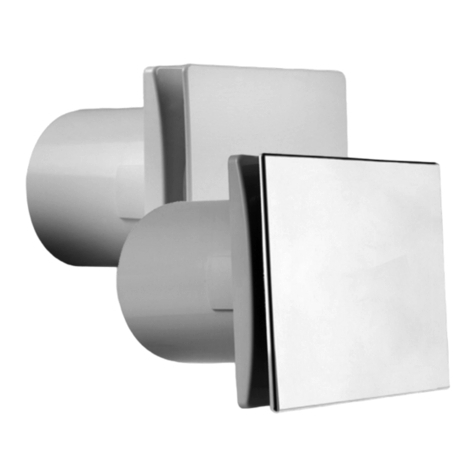
  9. Addvent AVX100QS User manual

Addvent AVX100QS User manual

8. Wiring of Humidity Model (Time Delay with Humidity Sensor Over-ride)
This version of the fan can be utilised in two ways:
1. Humidity only sensing - Requires Live and Neutral.The fan will only switch on when it detects
that the humidity level in the room is higher than the set level, it will run until the humidity level
has dropped below the set level and stop. For the fan to operate in this way connect the Live and
Neutral as Diagram 1 - Standard and Pullcord models.
2. Humidity sensing with manual activation - Requires Neutral, Switched Live and Permanent Live.
Not only will the fan activate when it detects the humidity level in the room has risen above the
set level, it can be manually switched on using the Switched Live.The Switched Live can be
connected to either a remote switch such as a ceiling mounted pullcord switch or to the lighting
circuit so the fan is switched on when the lights are switched on.
SWITCHED LIVE
NEUTRAL
PERMANENT LIVE
Setting the RUN ON time:
The length of time the fan continues to run after the Switched Live is turned off can be adjusted by the
timer adjuster on the top of the fan.
WARNING: ENSURE THE POWER TO THE FAN IS TURNED OFF BEFORE MAKING ADJUSTMENTS
Insert a small flat blade screwdriver into the adjuster and rotate clockwise to reduce the run time or
anti clockwise to increase it. Min approx 1 minute, Max approx 30 mins.
1
10
15
20
30
TIMER
MINUTES
SWITCH
LIVE
PERMANENT
LIVE
NEUTRAL
IN
1
2
3
+
-
MAX
30 min
1 min
MIN
Wiring
Humidity
Models
Setting RUN ON time and Humidity set Level:
The run on time is how long the fan continues to run for after the pullcord or remote switch is turned
off.To reduce the time turn the adjuster anti-clockwise (min approx 1 min) to increase it, turn the
adjuster clockwise (max approx 40 mins).The humidity set level is the amount of humidity present
before the fan will switch on.To raise the level before switching turn the adjuster clockwise, to lower
the level turn the adjuster anti-clockwise.
077571 08/12
70
MAX
45min 1 min
MIN RH%
40%
ON
90%
OFF
1
SWITCH
LIVE
PERMANENT
LIVE
NEUTRAL
IN
1
2
3
10
15
20
30
TIMER
MINUTES
+
-RELATIVE HUMIDITY
OFF % ON
40
50
6080
90
98
45
DDVENT
OPERATING INSTRUCTIONS FOR
AVX100QS AVX100QP
AVX100QT AVX100QH
WHISPER QUIET FANS
DDVENT
IMPORTANT SAFEGUARDS
WHEN USING ANY ELECTRICAL APPLIANCE, BASIC SAFETY
PRECAUTIONS SHOULD ALWAYS BE FOLLOWED.
PLEASE READ ALL INSTRUCTIONS CAREFULLY
AND RETAIN FOR FUTURE REFERENCE.
IF IN ANY DOUBT ABOUT THE INSTALLATION OR USE OF
THIS PRODUCT, CONSULT A COMPETENT ELECTRICIAN.
Telephone: 0117 923 5375 Fax: 0117 923 5374
Victoria Road Avonmouth Bristol BS11 9DB
NEUTRAL
SWITCHED LIVE
PERMANENT LIVE
TIMER ADJUSTER
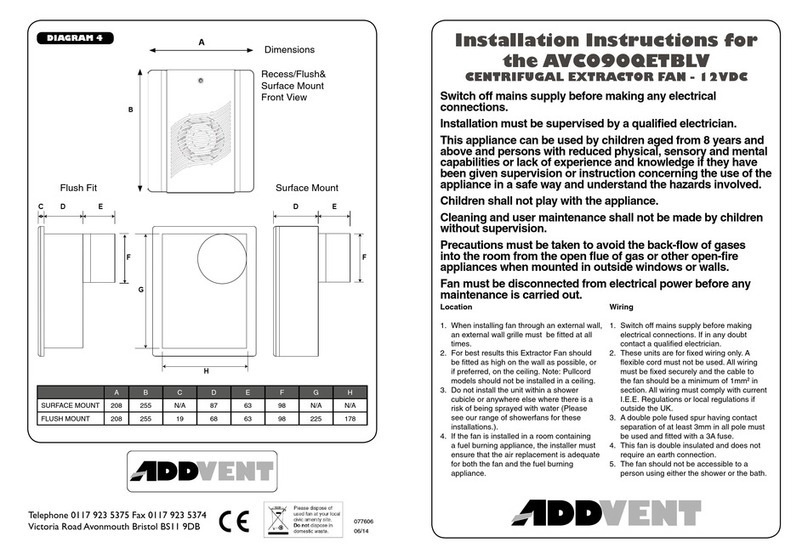
INSTALLATION:
5.Wiring of Standard Model.
Requires Live and Neutral power supply. Refer to internal wiring label for correct connection or see
diagram 1 below.The fan can be either operated from a seperate pullcord switch fitted to the ceiling
of the room or can be connected to the light switch so that the fan will start when the light is
switched on.
6.Wiring of Pullcord Models - This model is not suitable for ceiling fixing.
Requires Live and Neutral power supply.This fan has its own integral pullcord on/off switch, refer to
internal wiring label for correct connection or see diagram 1 below.
7 . W i r i n g o f T i m e r M o d e l .
Requires a Neutral, Switch Live and Permanent Live supply. Refer to internal wiring label or diagram
2 below instruction for correct connection.The fan can be either operated from a seperate pullcord
switch fitted to the ceiling of the room or can be connected to the light switch so the fan will start
when the light is switched on.
LIVE
NEUTRAL
AV X 100 Q S, AV X10 0 QP MO DEL S
AVX100QT, AVX1 0 0QH
IMPORTANT NOTES:
(i) When installing a fan through an external wall, an external wall grille must be fitted at all times.
(ii) This fan must be installed by fixed wiring only.A flexible cord should not be used.
(iii) A double pole fused spur having a contact separation of at least 3mm in all poles MUST be used
and fitted with a 3A fuse.
(iv) For best results this extractor fan should be fitted at least 1.8 metres from the floor or if prefered
in the ceiling. Pullcord models are not suitable for installation in ceilings.
(v) Do not install the unit within a shower cubicle or anywhere else where there is a risk of being
sprayed with water (see our range of shower fans). Fan must be installed in the zone appropriate
to its IP rating (stated on the rating label) and level of circuit protection present. For further
guidance please refer to the zone diagram.
(vi) Switch off mains supply before making electrical connections.All installations must be in
accordance with building and wiring regulations, if in any doubt contact a qualified electrician.
(vii) This fan is double insulated and does not require an earth.
Switch off mains supply before making any electrical connections, if you
are in any doubt about the installation consult a qualified electrician.
This appliance may be used by children aged from 8 years and above and
persons with reduced physical, sensory or mental capabilities or lack of
experience and knowledge if they have been given supervision or
instruction concerning use of the appliance in a safe way and understand
the hazards involved. Children shall not play with the appliance.
Cleaning and user maintenance shall not be made by children without
supervision.
Precautions must be taken to avoid the back-flow of gases into the room
from the open flue of gas or other open-fire appliances when mounted
in outside walls or windows.
Fan must be disconnected from electrical power before any
maintenance or adjustment is carried out.
Zone diagram for locations
with a bath or shower
1. Cut a 112mm (41/2”) hole in the wall. If the fan is to be fixed in the ceiling ensure that the hole is
between the joists. Fit ducting flush to the plaster.
2. Remove the cover from the fan by removing the two small screw caps on the front cover and remove
the two retaining Philips screws.
3. Hold the body of the fan against the wall or ceiling and mark the four screw holes and cable entry.
IMPORTANT: Ensure the fan is square on the wall or ceiling.
4. Bring power cable into position. Leave 230mm (9”) of cable protruding to facilitate connection.
TRIM
CABLE
9mm
6mm
POWER
SUPPLY
Terminal 1 - Neutral Supply
Terminal 2 - Switched Live Supply
Terminal 3 - Permanent Live Supply
TERMINAL
BLOCK
Wiring for Remote Switching
Wire Preparation for connection toTimer and Humidity fans
NEUTRAL
LIVE
REMOTE
SWITCH
3 AMP
DOUBLE POLE
FUSED SPUR
NEUTRAL
SWITCHED LIVE
PERMANENT LIVE
DIAGRAM 2
DIAGRAM 1

This manual suits for next models

3

Other Addvent Fan manuals

Addvent Elegance AVX100 User manual

Addvent

Addvent Elegance AVX100 User manual

Addvent AVX100WIDT User manual

Addvent

Addvent AVX100WIDT User manual

Addvent AVX 230 Series User manual

Addvent

Addvent AVX 230 Series User manual

Addvent Elegance AVX100ES User manual

Addvent

Addvent Elegance AVX100ES User manual

Addvent AVAC18X User manual

Addvent

Addvent AVAC18X User manual

Addvent AVIMI100 User manual

Addvent

Addvent AVIMI100 User manual

Addvent AVX100EZS Assembly instructions

Addvent

Addvent AVX100EZS Assembly instructions

Addvent AVC090QETBLV User manual

Addvent

Addvent AVC090QETBLV User manual

Addvent AVCIMF Series User manual

Addvent

Addvent AVCIMF Series User manual

Addvent AVX100WLED Instruction Manual

Addvent

Addvent AVX100WLED Instruction Manual

Addvent Whisper Silent AVX100WT Instruction Manual

Addvent

Addvent Whisper Silent AVX100WT Instruction Manual

Addvent AVDF4 User manual

Addvent

Addvent AVDF4 User manual

Addvent Elegance AVX100 User manual

Addvent

Addvent Elegance AVX100 User manual

Popular Fan manuals by other brands

S&P ECOWATT PLUS CRHB 400 N manual

S&P

S&P ECOWATT PLUS CRHB 400 N manual

Emerson BUILDER UNIPACK CF701ORB00 owner's manual

Emerson

Emerson BUILDER UNIPACK CF701ORB00 owner's manual

Home Decorators Collection AJAX 51770 Use and care guide

Home Decorators Collection

Home Decorators Collection AJAX 51770 Use and care guide

Mitsubishi Electric R12A-D Series instruction manual

Mitsubishi Electric

Mitsubishi Electric R12A-D Series instruction manual

Fantasia Elite Owners instrucitons

Fantasia

Fantasia Elite Owners instrucitons

Trane Fan user manual

Trane

Trane Fan user manual

Monte Carlo Fan Company 5WCR56XXD Series owner's manual

Monte Carlo Fan Company

Monte Carlo Fan Company 5WCR56XXD Series owner's manual

Vetronic SAV04 Service Procedure

Vetronic

Vetronic SAV04 Service Procedure

Goldair Platinum GPTF380 operating instructions

Goldair

Goldair Platinum GPTF380 operating instructions

BorMann Elite BFN6110 quick start guide

BorMann

BorMann Elite BFN6110 quick start guide

Hunter Carera Installation and operation manual

Hunter

Hunter Carera Installation and operation manual

Nextek 4-Blade Vari-Fan Installation and user manual

Nextek

Nextek 4-Blade Vari-Fan Installation and user manual

Parrot Uncle F6225 Installation & operating instructions

Parrot Uncle

Parrot Uncle F6225 Installation & operating instructions

Kruger TDA Series Installation and operating instructions

Kruger

Kruger TDA Series Installation and operating instructions

Maico Elicent Ministyle instruction manual

Maico

Maico Elicent Ministyle instruction manual

Aprilaire 8100 installation instructions

Aprilaire

Aprilaire 8100 installation instructions

El Corte Inglés VARADERO instruction manual

El Corte Inglés

El Corte Inglés VARADERO instruction manual

Bionaire BAC015X instruction manual

Bionaire

Bionaire BAC015X instruction manual

manuals.online logo
manuals.online logoBrands
  • About & Mission
  • Contact us
  • Privacy Policy
  • Terms and Conditions

Copyright 2025 Manuals.Online. All Rights Reserved.