Adec 200 User manual
A-dec 200
InstructIons for use
Dental Chair, Delivery and Support Systems,
Cuspidor, Dental Light
All manuals and user guides at all-guides.com
all-guides.com
Copyright
© 2012 A-dec Inc. All rights reserved.
A-dec Inc. makes no warranty of any kind with regard to this material,
including, but not limited to, the implied warranties of merchantability
and fitness for a particular purpose. A-dec Inc. shall not be held liable
for any errors contained herein or any consequential or other damages
concerning the furnishing, performance or use of this material. The
information in this document is subject to change without notice. If you
find any problems in the documentation, please report them to us in
writing. A-dec Inc. does not warrant that this document is error-free.
No part of this document may be copied, reproduced, altered, or
transmitted in any form or by any means, electronic or mechanical,
including photocopying, recording, or by any information storage and
retrieval system, without prior written permission from A-dec Inc.
Trademarks and Additional Intellectual Property Rights
A-dec, the A-dec logo, A-dec 500, A-dec 300, Cascade, Cascade
Master Series, Century Plus, Continental, Decade, ICX, ICV,
Performer, Preference, Preference Collection, Preference ICC, and
Radius are trademarks of A-dec Inc. and are registered in the
United States and other countries. A-dec 200, Preference Slimline, and
reliablecreativesolutions are also trademarks of A-dec Inc. None of
the trademarks or trade names in this document may be reproduced,
copied, or manipulated in any manner without the express, written
approval of the trademark owner.
Certain touchpad symbols are proprietary to A-dec Inc. Any use of
these symbols, in whole or in part, without the express written consent
of A-dec Inc., is strictly prohibited.
Regulatory Information
The Regulatory Information and Specifications document is delivered with
A-dec dental device equipment as mandated by agency requirements.
If you need this information, please go to the Document Library at
www.a-dec.com.
Product Service
For product service information, please contact your local authorized
A-dec dealer.
All manuals and user guides at all-guides.com
86.0024.00 Rev C 1
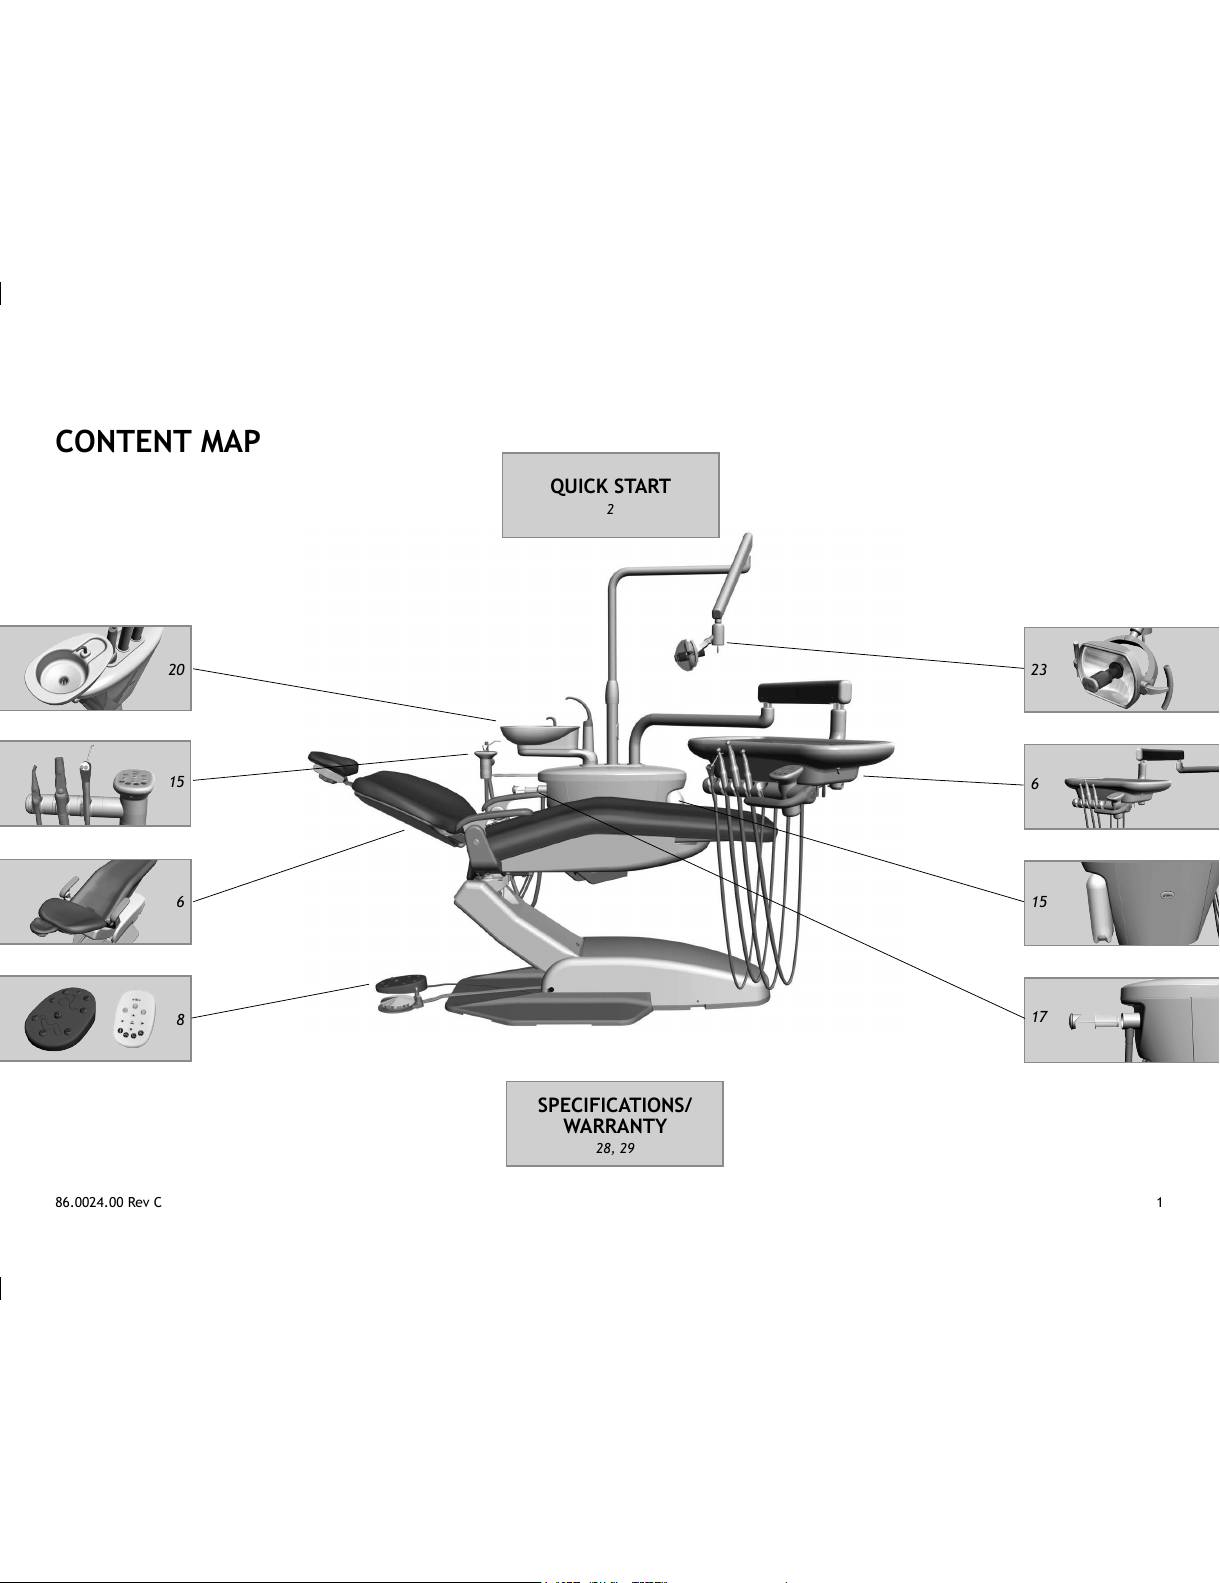
CONTENT MAP
23
6
15
17
20
6
8
SPECIFICATIONS/
WARRANTY
28, 29
QUICK START
2
15
All manuals and user guides at all-guides.com

2
A-dec 200 Instructions For Use
QUICK START
Turn the system on.
Check the water bottle and ll if near empty. Lift to activate the handpiece. Flip the foot control toggle to turn the
water coolant on or off. Step on the disc to operate.
Turn the knob counterclockwise to disengage the exarm brake and
adjust the height. Turn the knob clockwise to lock the position.
Water On/Off
Speed ±
(For more instructions on the self-contained
water system, go to page 16 and 17.)
13
2
A-dec ICX
®
Waterline
Treatment Tablets
All manuals and user guides at all-guides.com

86.0024.00 Rev C 3
Use the manual or programmable buttons to position the chair. For complete programming instructions, see page 8.
Use the touchpad to activate the dental light and cuspidor functions. For complete programming instructions, see pages 20 and 23.
Manual
Buttons
Bowl
Rinse
Cupll
Manual
Buttons
Programmable
Buttons
Programmable
Buttons
Dental Light
All manuals and user guides at all-guides.com
Table of contents
Other Adec Dental Equipment manuals


