Adonit Writer User manual

www.adonit.net

Writer for iPad 2 Instructions
Welcome
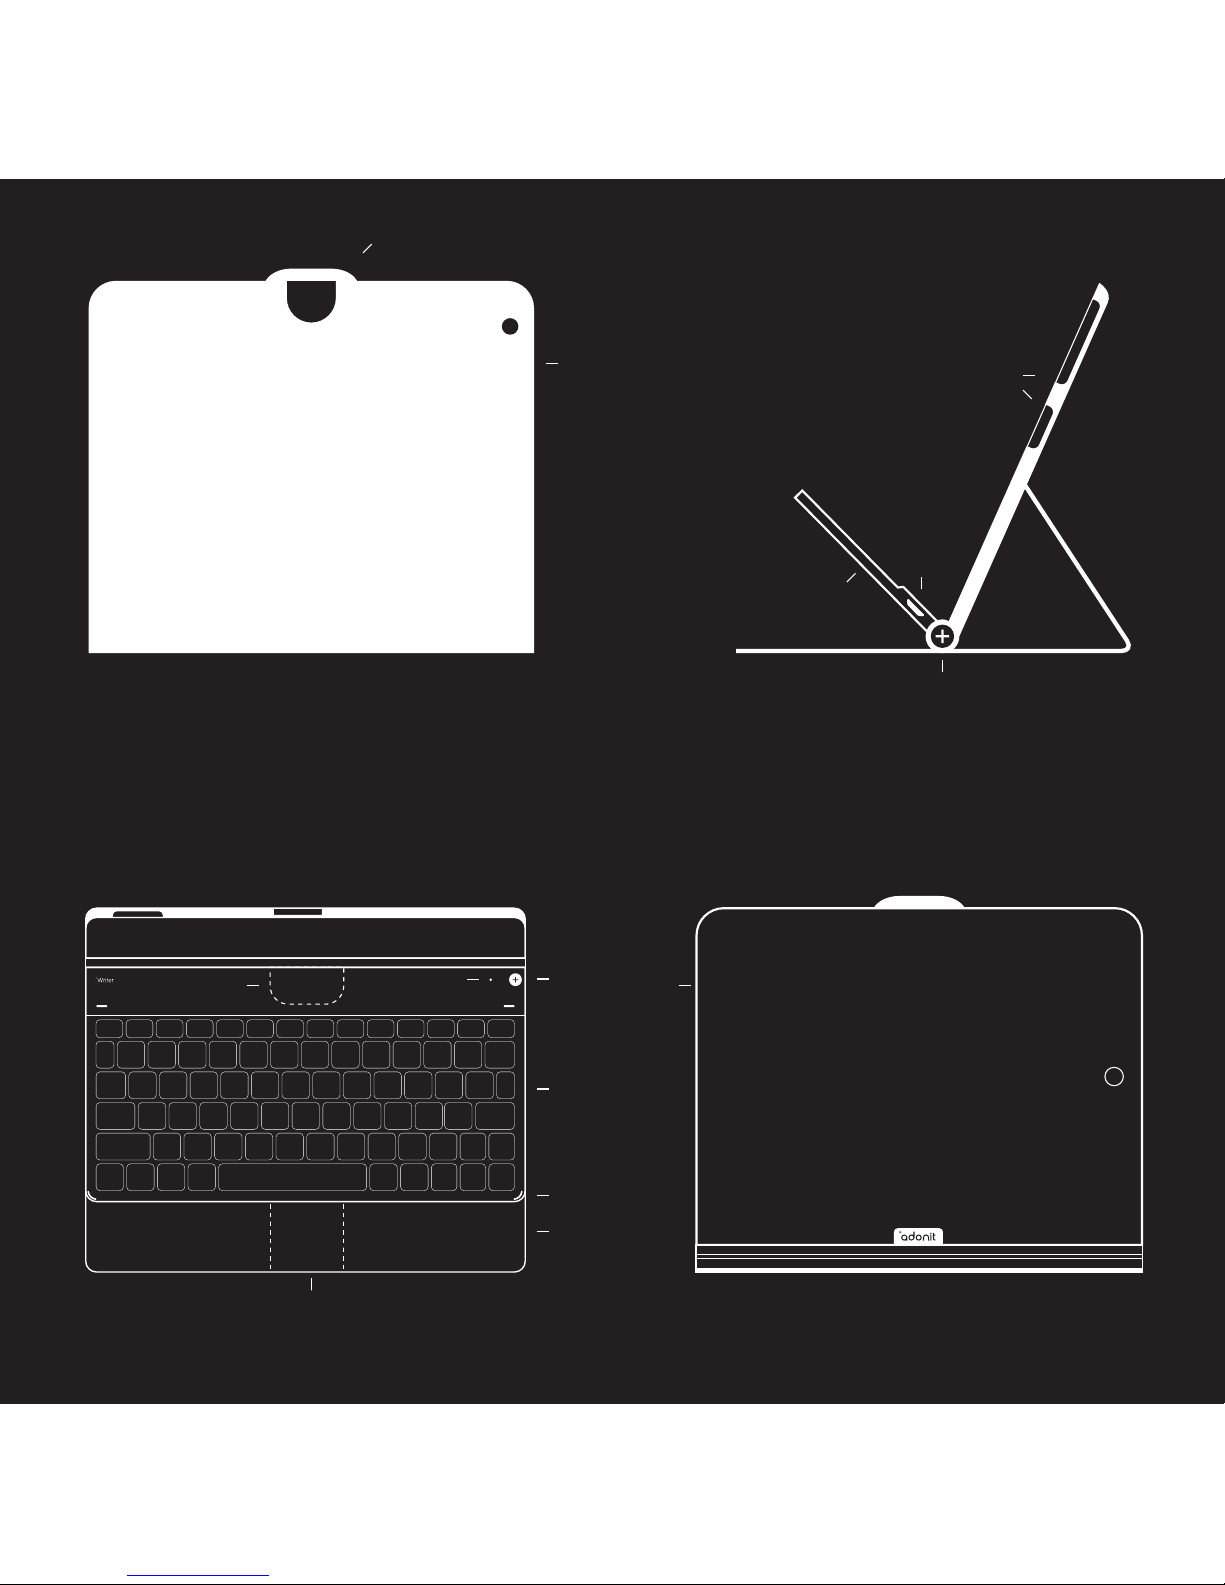
Front View
Cover Side View
23
Top View
8
13
9
10
11
12
7 14
6
4
5
1

Glossary
1. MAGNETIC CLOSURE
The closing mechanism of the
Writer
2. COVER
The external body of the Writer
3. FRAME CUTOUTS
The parts of the frame which have
been cut out to give access to the
iPad
4. MICRO-USB PORT
The micro-USB port at the top right
side of keyboard
5. UNDERSIDE
The underneath of the keyboard
6. CENTER PIECE
The center piece of the frame which
connects the keyboard to the frame
7. DOCKING TAB
The part of the keyboard into which
the center piece of the frame is
inserted
8. INDICATOR LED
The LED at the top right corner of
the keyboard
9. PAIRING BUTTON
The button at the top right corner
of the keyboard
10. KEYBOARD
The keyboard of the Writer
11. RUBBER BUMPERS
The rubber bumpers on the
keyboard which prevent screen
damage
12. PROTECTIVE FABRIC
The inner surface of the Writer
13. MAGNETIC PLATE
The magnet inside the Writer on
which the keyboard sits
14. FRAME
The frame of the Writer in which the
iPad sits
15. ON/OFF SWITCH
The on/off switch on the underside
of the keyboard
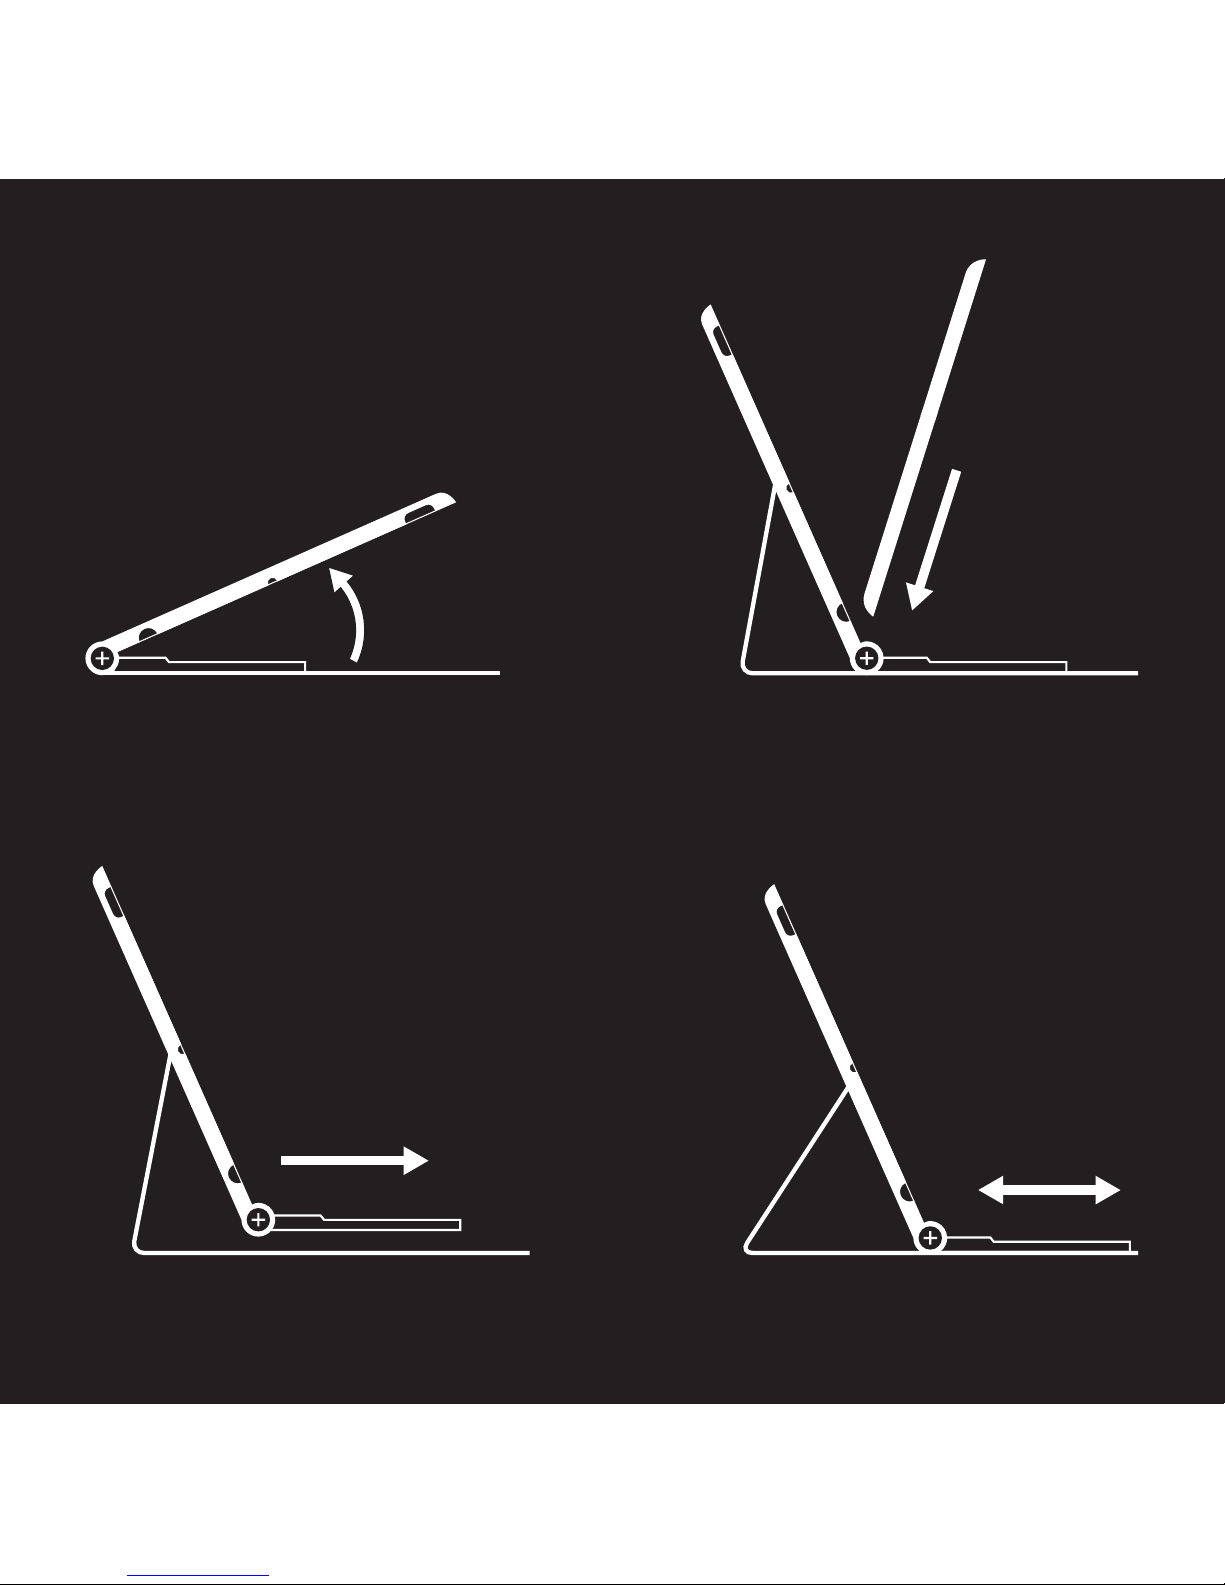
Figure 1 Figure 2
Figure 4 Figure 5

Setting Up
Follow these steps to place your iPad in your Writer.
1. Open the Writer cover, and lay it flat on a level surface. Figure 1
2. Insert your iPad into the frame. Figure 2
3. Check that the iPad is properly aligned with the frame cutouts, and sits in
the frame securely.
4. Raise the iPad to the angle at which you want to work. Figure 4
5. Holding your iPad in place with one hand, use your other hand to position
the keyboard on the magnetic plate, until it is at an angle which supports
the frame and ensures it does not move. Figure 5
The magnetic plate keeps the Writer stable when it is set up. To hold your
iPad up when typing, there are magnets in the keyboard. Pull the keyboard
towards you, along the magnetic plate. When you feel the keyboard’s
magnets holding on to the magnetic plate, you can move the keyboard back
and forth to adjust the viewing angle.
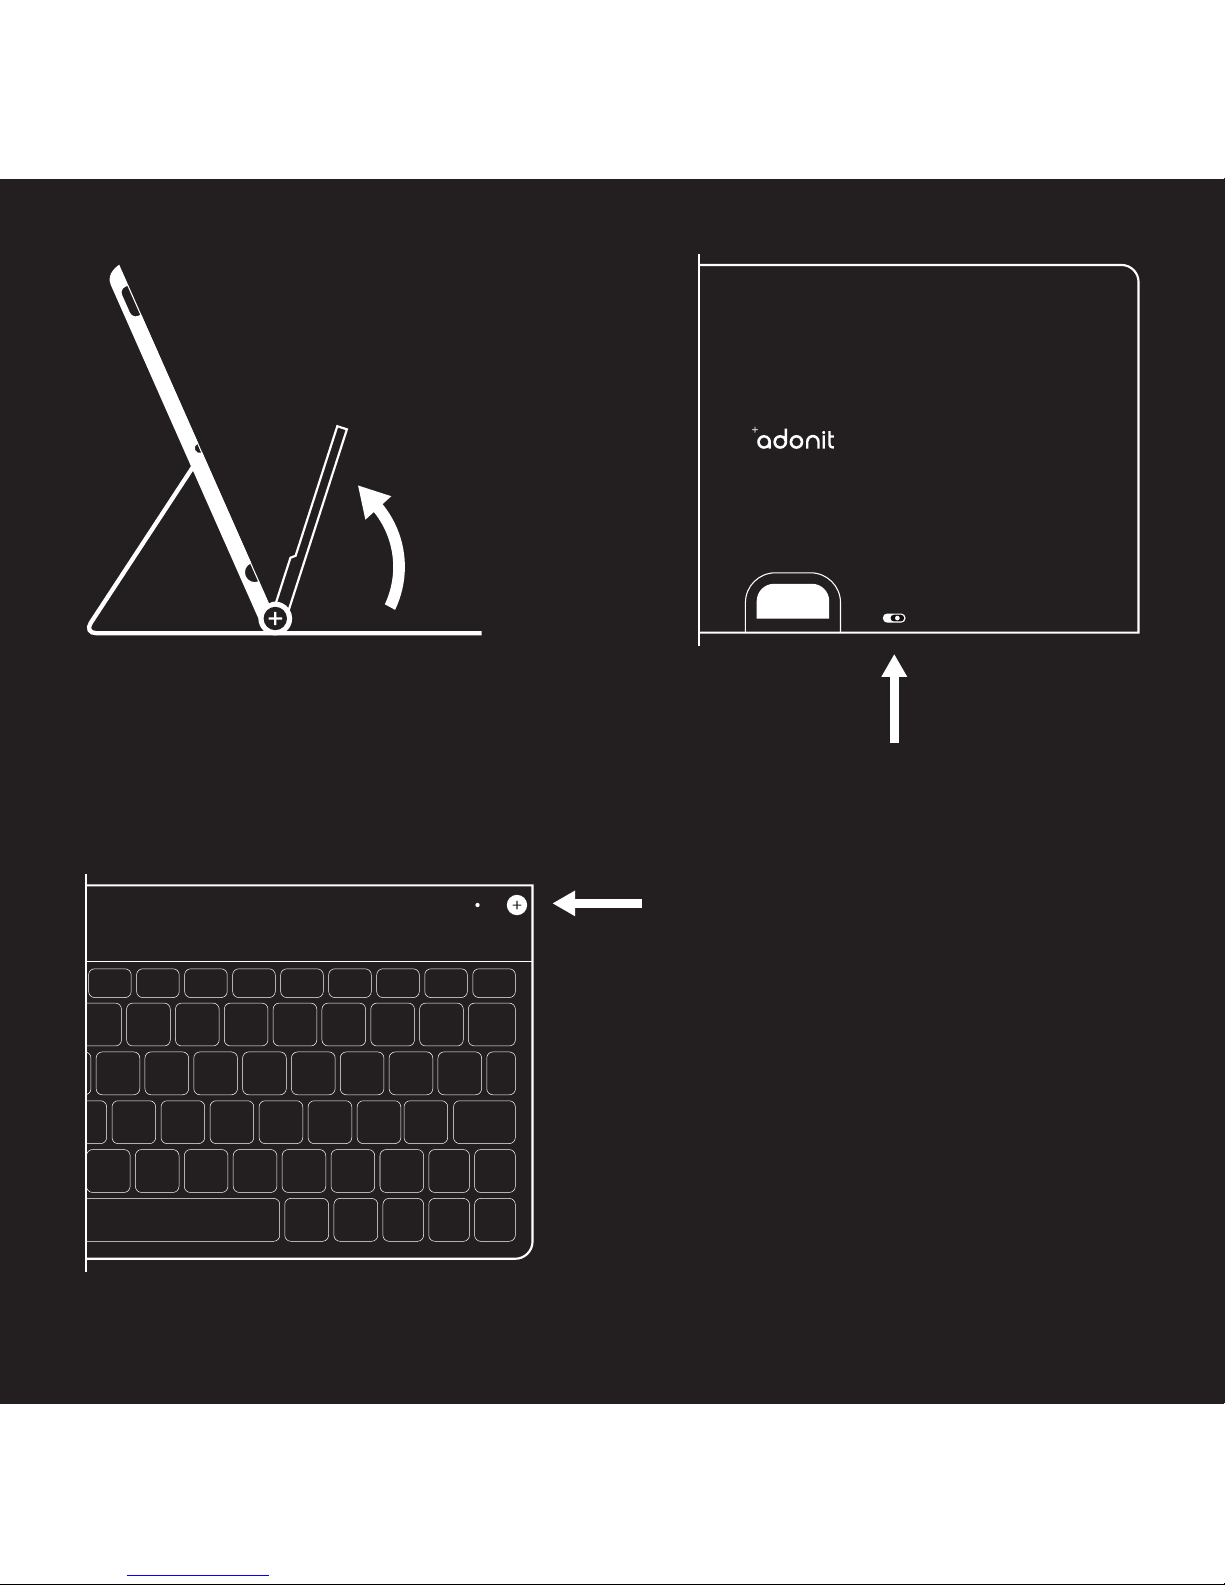
Figure 1 Figure 2
Figure 4
ONOFF

Powering Up
Follow these steps to turn on your Writer.
1. Lift the keyboard so you can see the underside. Figure 1
2. Locate the on/off switch, and slide it to the ‘on’ position. Figure 2
3. Put the keyboard down again so you can see the top.
4. Press and hold the pairing button on the top right of the keyboard, for
four seconds (count to 4). Figure 4
5. The indicator LED should show a green blinking light; your Writer has
enough power to function.
6. If the indicator LED blinks showing a red light, you need to recharge your
Writer using the USB port.

Figure 2

Getting Connected
Follow these steps to connect your Writer wirelessly to your iPad.
1. On your iPad, navigate to Settings > General > Bluetooth, then turn on
Bluetooth.
2. Press and hold the pairing button on the top right of the keyboard, for
several seconds (count to 10). The indicator LED should show a green
blinking light; your Writer 2 is ready to pair with your iPad. Figure 2
3. The iPad will recognize the Writer, but will say ‘not paired’.
4. Tap on the words ‘Adonit Writer’ on your iPad screen; the iPad will ask you
to accept the connection.
5. Using the Writer keyboard, enter the numerical code shown on your iPad,
and press return.
6. Your iPad settings will show the Writer is connected.
Once you pair the Writer successfully, you do not need to repeat these steps
each time you use it; you can just open the Writer and start typing.
Table of contents


