Aduance i-tec User manual

Instrukcje obsługi Užívateľská príručka
User´s guide Benutzerhandbuch Uživatelská příručka
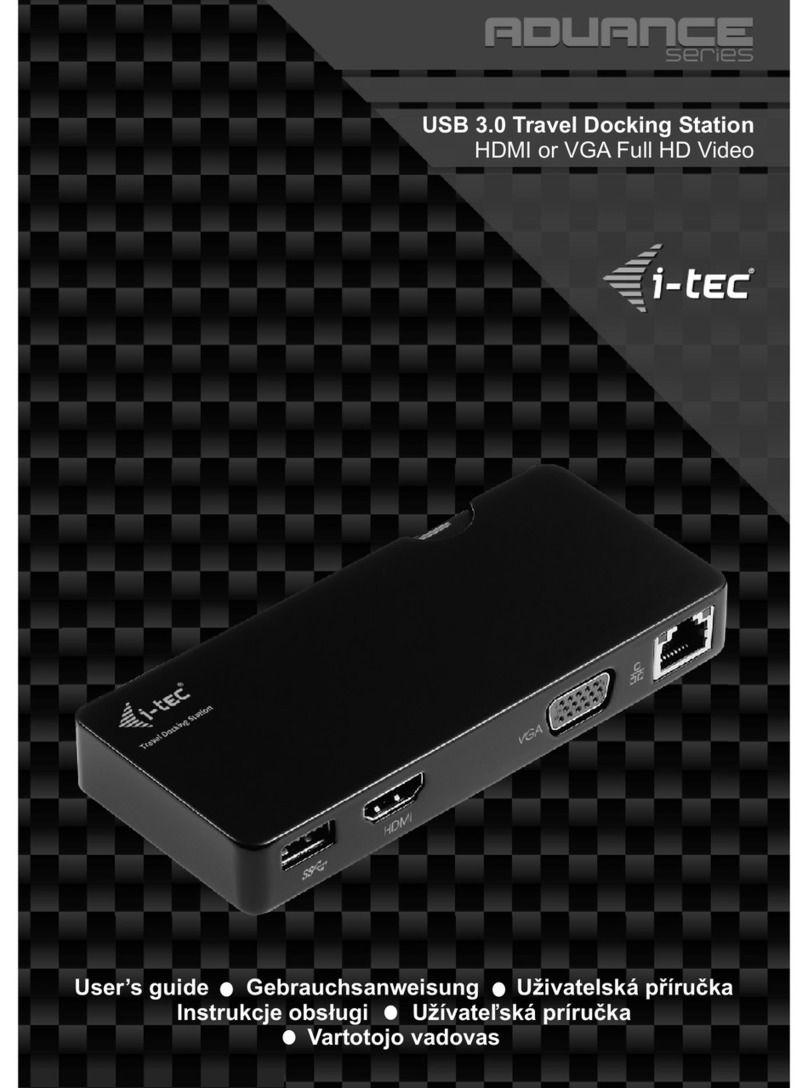
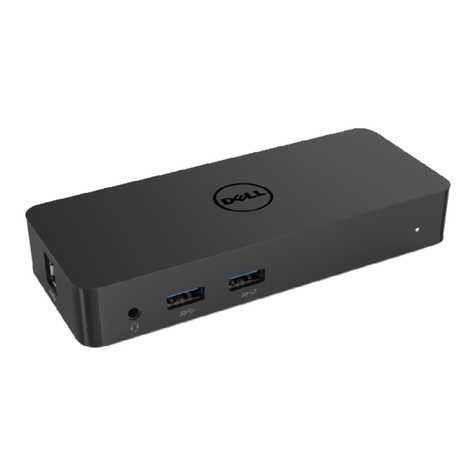
USB 3.0 Docking Station Mini

RECOMMENDED PRODUCTS:
i-tec USB 3.0 Display Adapter TRIO
- connection of one more monitor, LCD or projector
to a computer with a USB 3.0/2.0 port
- use in office (for graphic designer, financial
department etc.), for making multiple screen
presentations, on fairs or for home-use
(entertainment)
- resolution not only up to Full HD 1920x1080 px,
but also up to 2048x1152 px
- DVI-I output + reduction with VGA/HDMI (just
video, without sound)
- order code: USB3HDTRIO
i-tec 7.1.Channel Audio Adapter
- many input and output connectors (2x Micropho-
ne input, S/PDIF optical, etc.) to add a great
stereo input and output performance
- high quality recording, playback capabilities,
connection of most popular audio gear
(microphones, home audio systems, musical
instruments, and powered speakers) to USB
capable computer
- patented software C-Media for various sound
effects
- order code: USB71AA
i-tec Universal Laptop AC Adapter 90W
- ideal for the power supply of almost any notebook
or other equipment requiring the voltage in 5 –
24 V DC range
- available with 10 connectors to power most of the
equipment with USB power pack (MP3 players,
Bluetooth hands-free, digital frames, some mobile
phones, car navigation units, etc.)
- order codes: ULPA90W

TABLE OF CONTENTS:
Recommended products ........................................................................................................ 2
Table of contents ..................................................................................................................... 3
ENGLISH................................................................................................................................ 4-7
DEUTSCH ............................................................................................................................ 8-11
ČESKY................................................................................................................................12-15
POLSKI...............................................................................................................................16-19
SLOVENSKY......................................................................................................................20-23
LIETUVOS ..........................................................................................................................24-27
Declaration of Conformity .................................................................................................... 28
WEEE....................................................................................................................................... 29

i-tec USB 3.0 Docking Station Mini
Important!
We strongly recommend you to check and update USB 3.0 drivers and firmware of your
computer before Docking station Mini installation. You can encounter problems with installa-
tion or usage if your computer uses old drivers for USB interface. Installation for USB Hub ( 3x
USB 3.0 ports type A) is automatic and all driverless. This HUB will be detected automatically
after the docking station is connected to your USB port of your computer. Ethernet adapter
requires driver installation. You can install the driver from CD or you can download latest driver
from www.i-tec-europe.eu You should install driver first before you connect the docking station
to your computer.
INTRODUCTION
Thank you for purchasing “ i-tec USB 3.0 Docking station Mini”. This product lets you easily
extend your laptop with another useful devices like keyboard, mouse, Ethernet adapter, USB
display adapter for monitor, external HDD case etc. You can connect all mentioned devices to
your laptop just with single USB cable then. If you want this docking station solves monitor
connection as well you need to buy i-tec USB Display Adapter as recommended accessory.
This adapter you just connect to free USB port on the docking station mini.
See picture for possible use:
EN
04
ENGLISH

Quick Start
ENGLISH
Picture description - possible docking station extension:
1. After connecting of USB 3.0 HDMI Display Adapter* and corresponding monitor you can
display on another monitor your applications with audio output/listening.
2. After plug-in USB 3.0 hub* 3-/4-/7-port you can extend number of USB 3.0 ports.
3. Up to 128 USB powered USB devices* can be connected.
4. Ethernet GigaLAN port - connection to Intranet and Internet.
* these devices are not included in package
FEATURES
VIA VL811 chipset - Compliant with USB 3.0 Specification, Revision 1.0
USB 3.0 ports - Compatible also with USB 2.0
ASIX AX88179 USB 3.0 to Gigabit Ethernet chipset - Supports full duplex operation with
IEEE 802.3x flow control and half duplex operation with back-pressure flow control
Compatible with IEEE 802.3, IEEE 802.3u, IEEE 802.3ab
Supports IEEE 802.3az (Energy Efficient Ethernet)
Supports transfer rates USB 3.0 (max. 5Gb/s), USB 2.0 (max. 480Mb/s) a USB1.1
(max.12Mb/s)
Supports SuperSpeed devices e.g. External hard drives, card readers, HD webcams,
multichannel audio devices, BR optical drives.
Supports Charging Downstream Port (CDP) for swift charging of compatible devices
Provides following ports:
3x USB 3.0 ports type A for USB peripherals
1x USB 3.0 micro B port for computer connection
1x RJ-45 Ethernet networking port 1000/100/10Mbps with MDI/MDIX support and
Wake-On-LAN
LEDs indicate the status of Power status and Ethernet connection
Working temperature : 0 up 40°C
Storage temperature: -10 up +80°C
Humidity: up to 85%
3. PACKAGE CONTENTS
USB 3.0 Docking Station Mini
AC Power Adapter input ~100-240V/50-60Hz/0,5A ; output DC=5V/2,0A
USB 3. cable (Type A - Micro-B) 100cm long
CD – driver and manuals
Manual
SYSTEM REQUIRMENTS
Hardware requirements: PC, Notebook with free USB 3.0 port. If you connect to USB 2.0
transfer speed and some function can be limited. CPU Processor Intel Pentium 1.2GHz and
higher, 512MB RAM.
Operation System: Windows XPSP3 / Vista 32_64 bit/ Win7 32_64 bit / Win8 32_64 bit.
DESCRIPTION OF THE DOCKING STATION MINI
Front panel:
EN
05

i-tec USB 3.0 Docking Station Mini
ENGLISH
Rear panel (from left to right):
1 x power connector, 1x USB 3.0 Micro B, Power LED, Ethernet LED, 1x RJ45 Ethernet
1000/100/10Mbps
LED Indications:
: The light will be on when the USB 3.0 Docking Station is power up.
: Stead green indicates good linkage between the adapter and it its supporting
server on switching. Flashing green indicates activity (transmitting or receiving) within the
adapter.
DRIVER INSTALLATION FOR WINDOWS XPSP2/VISTA/WIN7/WIN8 (32_64BIT)
Recommended installation: Do not connect docking station to your computer unless you
install drivers for Ethernet adapter from CD. If your computer does not have CD-ROM you can
download drivers from our web site www..i-tec.europe.eu.
Drivers are needed to install only before the first using.
1. Insert the provided CD into your optical drive or download driver from web. The CD-ROM
will start automatically. If not then use file AX88179_Setup.exe from folder CD:/Drivers/
Windows
2. Follow the instructions on screen to install the driver. After connecting docking station mini
and installation of all drivers is displayed in Device manager- Network adapters item, as
“ASIX AX88179 USB 3.0 to Gigabit Ethernet Adapter”.
EN
06

Quick Start
ENGLISH
Hardware Installation – Connection of docking station to your computer
1. Plug the power adapter into the power jack of the Docking Station and connect it to USB
port of your computer.
2. The USB 3.0 Docking Station will be recognized by the computer’s operating system – we
recommend your computer is connected to Internet for Online download of latest drivers.
3. Restart PC/NB.
Driver uninstallation
Use Device manager- Add/Remove Programs (Programs)- Remove:
AX88179 for Ethernet drivers
SAFETY INSTRUCTIONS
Always read the safety instructions carefully:
Keep this equipment away from fire, high humidity and temperature.
Keep this User’s Manual for future reference.
FAQ
Question: My computer cannot detect the docking station, or the docking station function is
limited.
Answer: Check drivers of USB 3.0 interface on your computer. These drivers must be up-to-
date. For further information check our web site (section USB 3.0 PROBLEMS)
Question: Can I obtain more detailed information about problems with USB 3.0 Docking
Station Mini?
Answer: Of course, you can contact our technical support (www.i-tec-europe.eu).
EN
07

i-tec USB 3.0 Docking Station Mini
Wichtig!
Vor der eigenen Installation an den USB 3.0 Port überzeugen Sie sich, dass Sie für ihn (für
den USB 3.0 Controller im NB/PC) die neusten Treiber installiert haben. Im Falle nicht aktuell-
er USB 3.0 Treiber für Ihren Notebook könnten Sie bei der Installation oder Verwendung auf
Probleme stoßen. Der USB-HUB (für USB 3.0 Ports Typ A) wird automatisch vom System
installiert. Dieser HUB wird automatisch erkannt und gleich nach dem Anschluss an den USB
3.0 Port Ihres PCs oder die erweiternde PCIe Karte mit einem internen USB 3.0 Host Controll-
er installiert. Der LAN Port wird von der mitgelieferten CD installiert. Es ist nötig, zuerst den
Port vor dem eigenen Anschluss der Dockingstation an PC/NB von der mitgelieferten CD
(oder die Treiber sind auch unter www.i-tec-europe.eu zu finden) zu installieren und erst dann
das Gerät anzuschließen.
EINLEITUNG
Wir bedanken uns für den Kauf des Produkts „i-tec USB 3.0 Docking Station Mini“. Es handelt
sich um eine einfache Dockingstation, die es ermöglicht, Ihr Notebook oder Ultrabook um alle
Ihren Lieblingsperipherien zu erweitern, wie zum Beispiel um eine vollwertige Tastatur oder
Maus, Ethernet, USB Display Adapter für einen anderen Bildschirm oder eine externe Fest-
platte usw. Alle erwähnten Produkte können Sie dann an Ihr Notebook in einem Moment mit
Hilfe eines USB 3.0 Kabels anschließen. Wenn Sie sich wünschen, dass die Dockingstation
sowie den Bildschirmanschluss löst, empfehlen wir, einen i-tec USB Display Adapter zu
kaufen, der an einen freien USB Port der Dockingstation angeschlossen werden kann.
Verwendungsmöglichkeiten sind auf den Bildern zu sehen:
DE
08
DEUTSCH

Quick Start
DEUTSCH
Bildbeschreibung – Verwendungsmöglichkeiten:
1. Nach dem Anschluss von USB 3.0 HDMI Display Adapter und betreffendem Bildschirm
haben Sie die Möglichkeit der Abbildung an einem anderen Bildschirm (Betriebe: Extend,
Mirror) mit Audio Abhören
2. Nach dem Anschluss von USB 3.0 Hub 3-/4-/7-Port erweitern Sie die Anzahl von USB 3.0
Ports
3. Möglichkeit des Anschlusses von bis zu 128 USB-Geräten (mit Hilfe von versorgten Hubs)
4. Per Ethernet Port gewinnen Sie den Zugang zum internen Netz oder Internet
SPEZIFIKATION, EIGENSCHAFTEN
VIA VL811 Chipsatz mit 3x Downstream + 1x Upstream USB Port (geteilt mit USB-
Aufladungs-Port für Apple-Geräte)
ASIX AX88179 USB 3.0 to Gigabit Ethernet Adapter Chipsatz – unterstütz den Standard
IEEE 802.3, IEEE 802.3u, IEEE 802.3ab und IEEE 802.3az (Energy Efficient Ethernet)
Unterstützung von USB 3.0 (max. 5Gbps) , USB 2.0 (max. 480Mbps) und USB1.1
(max.12Mbps) – wir empfehlen die Verwendung von PC/NB mit USB 3.0 Ports
Arbeitet mit Hochgeschwindigkeits-USB 3.0-Geräten, wie z.B. externe Festplatten, Spei-
cherkartenleser, Webkameras mit hoher Auflösung, Digitalkameras, Mehrkanal-
Tonanlagen, Blu-Ray optische Laufwerke usw.
USB 3.0 arbeiten mit Technologien „Charging Downstream Port“ – CDP für die schnelle
Geräteversorgung
Verwendbare Ports an der USB 3.0 Dockingstation:
3x USB 3.0 Port Typ A – Anschluss von USB-Peripherien
1x Micro USB 3.0 Port – bestimmt für den Anschluss an den USB-Port von PC/NB
1x Ethernet 10/100/1000Mb/s LAN RJ-45 Port mit der Funktion MDI/MDIX und Autokor-
rektur
LED-Kontrollleuchte – Versorgung und Ethernet-Anschluss
Unterstützung von Wake-on-LAN
Betriebstemperatur: 0-40°C
Lagerungstemperatur: -10 bis zu +80°C
Umgebungsfeuchtigkeit: bis 85%
LIEFERUMFANG
i-tec USB 3.0 Dockingstation Mini
Netzteil: Eingang ~100-240V/50-60Hz/0,5A; Ausgang =5V/2,0A
USB 3.0 Kabel mit der Länge von 100 cm – ein Kabelende Konnektor Typ A, das andere
Kabelende Micro USB 3.0) – für den Anschluss an PC/NB
CD mit Treibern und Benutzerhandbuch
Benutzerhandbuch
SYSTEMANFORDERUNGEN
Hardwareanforderungen: PC, Notebook mit einem freien USB 3.0 Port. Falls Sie nur über USB
2.0/1.1 Port verfügen, wird die Datenübertragungsgeschwindigkeit beschränkt. Prozessor Intel
Pentium 1.2GHz und höher, 512MB RAM
Betriebssystem: Windows XPSP3 / Vista 32_64 bit/ Win7 32_64 bit / Win8 32_64 bit
DE
09

i-tec USB 3.0 Docking Station Mini
Treiber sind unter www.i-tec.cz zu finden) zu installieren und erst dann das Gerät anzuschlie-
ßen.
BESCHREIBUNG DER DOCKINGSTATION
Vorderpaneel:
Hinterpaneel – von links nach rechts:
1x Konnektor zur Versorgung, 1x Micro USB 3.0 Port, LED Power, LED Ethernet Anschluss,
1x RJ45 Ethernet 10/100/1000 Port
LED-Anzeige:
: LED leuchtet, wenn die Dockingstation versorgt wird
: grüne LED leuchtet bei richtigem Anschluss an das Ethernet Netz, blinzelt bei
der Datenübertragung per LAN Port
INSTALLATION IN WINDOWS XPSP2/VISTA/WIN7/WIN8 (32_64BIT VERSION)
Empfohlene Installation: Vor der ersten Benutzung schließen Sie die Dockingstation an PC/
NB nicht an, solange Sie die jeweiligen Treiber für den LAN Port von der mitgelieferten CD
nicht installiert haben (die Treiber sind sowie unter www.i-tec-europe.eu zu finden).
Die Treiber des Geräts sind vor der ersten Benutzung zu installieren.
1. Legen Sie die CD mit Treibern ins Laufwerk ein oder laden Sie die Treiber von der Websei-
te www.i-tec-europe.eu herunter, speichern Sie sie auf der Festplatte, entpacken und öffnen
DE
10
DEUTSCH

Quick Start
DEUTSCH
Sie die Datei AX88179_Setup.exe vom Verzeichnis z.B. C:\U3MINIDOCK/Drivers/Windows)
2. Nach der Installation werden die Treiber für Ethernet fertig installiert. Falls die automatische
Installation von der CD nicht gestartet wird, gehen Sie folgendermaßen vor:
für LAN – wählen Sie die Installation von der CD – Datei AX88179_Setup.exe vom Verzeich-
nis CD:/Drivers/Windows – nach dem Anschluss und der Installation aller Treiber finden Sie
„ASIX AX88179 USB3.0 to Gigabit Ethernet Adapter“ im System im Verwalter der Anlage-
Netzadapter.
Hardwareinstallation – Anschluss von USB 3.0 Mini Dockingstation an PC
Schalten Sie den PC/NB ein und schließen Sie den Netzadapter an USB 3.0 Dockingstation
an – Hinterpaneel von USB 3.0 Dockingstation
1. Schließen Sie das USB-Kabel an den Micro USB 3.0 Port an – auf dem Hinterpaneel von
USB 3.0 Dockingstation
2. Schließen Sie den Netzadapter ans Netz von 230V an
3. Schließen Sie das USB-Kabel an den freien USB 3.0 (oder USB 2.0/1.1) Ihres PCs/NBs an
Danach wird mit der automatischen Installation der Ports in einzelnen Systemen begonnen –
wir empfehlen den Internetanschluss während der Installation - für den Fall der möglichen
Herunterladung von Treibern für den USB-Kontroller in Ihrem PC/NB.
4. Starten Sie den PC/NB neu.
Deinstallation von Treibern
Standardweise verwenden Sie die Deinstallation durch Systemsteuerung-
Programminstallation oder –Deinstallation (Programme)-Entfernen:
AX88179 für Ethernet Treiber.
SICHERHEITSHINWEISE FÜR DIE BENUTZUNG VON USB 3.0 DOCKINGSTATION
keinen extremen Temperaturen und Luftfeuchtigkeit ausstellen
verwenden Sie Geräte mit flachen Unterlagen – dadurch können Sie das Abrutschen und den
Absturz auf den Boden vermeiden
bewahren Sie die Treiber und das Benutzerhandbuch für den möglichen Bedarf in der Zukunft
In der Kooperation mit Serviceabteilung:
überprüfen Sie die Funktionsfähigkeit nach dem Sturz ins Wasser
überprüfen Sie die Funktionsfähigkeit nach dem Bruch des Gehäuses
reklamieren Sie das Geriet, das nicht mehr funktionier, nach dem Benutzerhandbuch
OFT GESTELLTE FRAGEN
Frage: Wie soll die Dockingstation im Windows BS richtig installiert werden?
Antwort: Schließen Sie die Dockingstation an den USB-Port im PC/NB nicht an, solange die
Treiber nicht installiert sind. Sowie empfehlen wir vorher die neusten Treiber für den USB 3.0
Kontroller in Ihrem PC/NB zu überprüfen und ggf. zu installieren. Für den LAN Teil können die
neusten Treiber von ASIX - AX88179 unter diesem Link genutzt werden: http://
www.asix.com.tw/products.php?op=pItemdetail&PItemID=131;71;112.Die Treiber für USB 3.0
sind im Betriebssystem Windows integriert und werden nach dem Anschluss der Dockingstati-
on an den USB-Port von PC/NB automatisch installiert.
Frage: Könnte ich noch nähere Informationen über die Probleme mit der Dockingstation
bekommen?
Antwort: Natürlich, Sie können sich jederzeit auf unsere technische Abteilung wenden
(www.i-tec-europe.eu).
DE
11

i-tec USB 3.0 Docking Station Mini
ČESKY
Důležité!
Před samotnou instalací na USB 3.0 port se přesvědčte, že pro něj (pro USB 3.0 řadič v NB/
PC) máte nainstalovány poslední ovladače. V případě neaktuálních USB 3.0 ovladačů na
Vašem notebooku se můžete setkat s problémy při instalaci nebo použití. Instalace USB hubu
(pro USB 3.0 porty typ A) je automatická ze systému, Tento HUB bude automaticky detekován
a nainstaluje se ihned po připojení k USB 3.0 portu Vašeho PC nebo rozšiřující PCIe karty
sinterním USB 3.0 host řadičem. LAN port se instaluje z dodaného CD. Port je nutno poprvé
instalovat před vlastním připojením dokovací stanice k PC/NB z přiloženého CD (nebo ovlada-
če naleznete na www.i-tec.cz) a pak až připojit zařízení.
ÚVOD
Děkujeme za zakoupení „i-tec USB 3.0 Docking Station Mini“. Jde o jednoduchou dokovací
stanici s možností rozšířit Váš notebook, ultrabook o všechny Vaše oblíbené periferie, jako
např. plnohodnotnou klávesnici nebo myš, Ethernet, USB displej adapter pro další monitor
nebo externí HDD apod.. Všechny zmíněné produkty pak připojíte k Vašemu notebooku
vokamžiku jediným USB 3.0 kabelem. Pokud budete chtít aby dokovací stanice řešila i
připojení monitoru, pak doporučujeme zakoupit i-tec USB Display Adapter, který lze zapojit na
volný USB port Docking Station Mini.
Způsob použití lze vidět na obrázku:
CZ
12

Quick Start
ČESKY
SPECIFIKACE, VLASTNOSTI
VIA VL811 chipset splňující USB 3.0 Specifikaci, revize 1.0
USB 3.0 porty zpětně kompatibilní s USB 2.0
ASIX AX88179 USB 3.0 to Gigabit Ethernet Adapter chipset – podporuje standard IEEE
802.3, IEEE 802.3u, IEEE 802.3ab a IEEE 802.3az (Energy Efficient Ethernet)
Podpora USB 3.0 (max. 5Gb/s) , USB 2.0 (max. 480Mb/s) a USB1.1 (max.12Mb/s)
Pracuje s vysokorychlostními USB 3.0 zařízeními jako jsou externí harddisky, čtečky pamě-
ťových karet, webkamery s vysokým rozlišením, digitální videokamery, multikanálová
zvuková zařízení, BR optické mechaniky atd.
USB 3.0 pracují s technologií „Charging Downstream Port“ – CDP pro rychlé napájení
zařízení
Využitelné porty na USB 3.0 Docking Station:
3x USB 3.0 port typ A – připojení USB periférií
1x Micro USB 3.0 port - určen pro připojení k USB portu PC/NB
1x Ethernet 10/100/1000Mb/s LAN RJ-45 port s funkcí MDI/MDIX a autokorekce
LED indikace – Napájení a Ethernet připojení
Podpora Wake-on-LAN
Pracovní teplota: 0-40°C
Skladovací teplota: -10 až +80°C
Vlhkost prostředí: do 85 %
OBSAH BALENÍ
i-tec USB 3.0 Docking station Mini
Napájecí zdroj: vstup ~100-240V/50-60Hz/0,5A ; výstup =5V/2,0A
USB 3.0 kabel 100 cm jeden konec konektor typ A, druhý konec Micro USB 3.0) – pro
připojení k PC/NB
CD s ovladači a manuálem
Manuál
SYSTÉMOVÉ POŽADAVKY
Hardwarové požadavky: PC, Notebook s volným portem USB 3.0. Pokud máte USB 2.0 bude
rychlost přenosů omezena. Procesor Intel Pentium 1.2 GHz a vyšší, 512 MB RAM
Operační systém: Windows XPSP3 / Vista 32_64 bit/ Win7 32_64 bit / Win8 32_64 bit
POPIS DOKOVACÍ STANICE
Přední panel:
CZ
13

i-tec USB 3.0 Docking Station Mini
ČESKY
Zadní panel – zleva doprava:
1 x konektor pro napájení, 1 x Micro USB 3.0 port, LED Power, LED Ethernet připojení, 1 x
RJ45 Ethernet 1000/100/10 Mbps port
LED indikace:
: LED svítí, jestliže je dokovací stanice napájena
: Zelena LED svítí při správném připojení do Ethernet sítě, bliká při přenosu dat
před LAN port
INSTALACE VE WINDOWS XPSP2/VISTA/WIN7/WIN8 (32_64BIT VERZE)
Doporučená instalace: Nepřipojujte dokovací stanici před prvním použitím k PC/NB, dokud
nenainstalujete příslušné ovladače pro LAN port z přiloženého CD (nebo ovladače naleznete
na www.i-tec.cz ).
Ovladače zařízení je třeba nainstalovat pouze při prvním použití.
1. Vložte CD s ovladači do mechaniky nebo si CD stáhněte z webu www.i-tec.cz, uložte na
HDD, rozbalte a spusťte soubor AX88179_Setup.exe z adresáře např. C:\Drivers/
Windows).
2. Sledujte a potvrďte instalaci na obrazovce počítače.
Po připojení a instalaci všech ovladačů je v systému ve Správci zařízení-Síťové adaptéry
zobrazen jako „ASIX AX88179 USB3.0 to Gigabit Ethernet Adapter“.
CZ
14

Quick Start
ČESKY
Hardwarová instalace–připojení USB 3.0 Mini Docking stanice K PC
1. Připojte dodaný napaječ k dokovací stanici a tu připojte dodaným USB kabelem k USB
portu Vašeho počítače
2. Následně se zahájí automatická instalace portů v jednotlivých systémech – doporučujeme
být připojeni k Internetu pro případné Online stažení novější verze ovladačů
3. Restartujte PC/NB.
Odinstalování ovladačů
Standardně používejte přes Ovládací panely-Přidat nebo odebrat programy (Programy)-
Odebrat :
AX88179 pro Ethernet ovladače
BEZPEČNOSTNÍ POKYNY:
nevystavujte ohni, extrémním teplotám a vlhkosti vzduchu
uschovejte ovladače i manuál pro pozdější možné použití
ČASTO KLADENÉ OTÁZKY
Otázka: Počítač nedetekuje dokovací stanici, popř. dokovací stanice se nechová správně.
Odpověď: Zkontrolujte, jestli máte ve Vašem počítači nainstalovány aktuální ovladače pro jeho
USB 3.0 rozhraní. Pro detailnější informace se podívejte na náš web (odkaz PROBLÉMY USB
3.0).
Otázka: Mohu získat podrobnější informace o problémech s dokovací stanicí?
Odpověď: Jistě, lze se obrátit na naši podporu (www.i-tec.cz).
CZ
15

i-tec USB 3.0 Docking Station Mini
POLSKI
Ważne!
Zalecamy sprawdzenie i zaktualizowanie sterowników USB 3.0. oraz firmware komputera
przed instalacją Docking station Mini
W przeciwnym razie można napotkać trudności z prawidłowym zainstalowaniem sterowników
lub funkcjonalnością urządzenia, wynikającą z potencjalną możliwością wystąpienia
niezgodności ze starszymi wersjami sterowników USB 3.0 jakie mogą być zainstalowane w
Twoim komputerze.
Instalowanie Huba USB ( 3x USB 3.0 porty typu A) przebiega automatycznie i nie wymaga
sterowników, HUB będzie rozpoznany automatycznie po podłączeniu Docking station Mini do
portu USB komputera. Ethernet Adapter (karta sieciowa) wymaga zainstalowania
sterowników.
Sterowniki można pobrać ze strony www.i-tec.pl/ i bezwzględnie zainstalować je przez
podłączeniem Docking station Mini do komputera.
WSTĘP
Dziękujemy za wybór urządzenia „ i-tec USB 3.0 Docking station Mini “. Stacja dokująca
pozwala w prosty sposób, za pomocą jednego przewodu USB, podłączyć do laptopa
większość potrzebnych urządzeń peryferyjnych, jak na przykład dodatkową klawiaturę,
Ethernet - przewód stałego łącza internetowego lub przenośny dysk twardy itp. Dodatkowo
przy użyciu podłączeniu do Docking Station Mini rekomendowanego urządzenia i-tec USB
Display Adapter (sprzedawany osobno) można podłączyć zewnętrzny monitor.
Zobacz zdjęcia ewentualnego wykorzystania:
PL
16

Quick Start
POLSKI
CECHY
VIA VL811 chipset - zgodny ze specyfikacją USB 3.0, Revision 1.0
Porty USB 3.0 - zgodne z USB 2.0
ASIX AX88179 USB 3.0 Gigabit Ethernet chipset – Obsługa full duplex wraz z IEEE 802.3x
kompatybilna z IEEE 802.3, IEEE 802.3u, IEEE 802.3ab
Obsługa IEEE 802.3az (Energy Efficient Ethernet)
Obsługa transferu USB 3.0 (max. 5Gb/s) , USB 2.0 (max. 480Mb/s) i USB1.1 (max.12Mb/s)
Obsługa urządzeń SuperSpeed np. zewnętrzne dyski twarde, czytniki kart, kamery HD,
wielokanałowe urządzenia audio, czytniki BlueRay.
Obsługa Charging Downstream Port (CDP) umożliwia ładowanie urządzeń przez USB
Wyjścia zewnętrzne:
3x porty USB 3.0 typ A dla zewnętrznych urządzeń USB
1x port USB 3.0 micro B do podłączenia do komputera
1x port RJ-45 Ethernet 1000/100/10Mbps z obsługą MDI/MDIX oraz Wake-On-LAN
Dioda LED sygnalizująca status urządzenia oraz status połączenia LAN
Temperatura pracy: 0 do 40°C
Temperatura przechowywania: -10 do +80°C
Wilgotność: do to 85 %
ZAWARTOŚĆ OPAKOWANIA
USB 3.0 Docking Station Mini
AC Zasilacz sieciowy wejście: ~100-240V/50-60Hz/0,5A ; wyjście: DC = 5V/2,0A
Kabel USB 3.0(Typ A - Micro-B) 100cm długości
CD ze sterownikami i instrukcją
Instrukcje obsługi
WYMAGANIA SYSTEMOWE
Wymagania sprzętowe: Komputer PC lub Notebook z wolnym portem USB 3.0 port. Przy
podłączeniu do portu USB 2.0 niektóre możliwości mogą być ograniczone. Procesor CPU Intel
Pentium 1.2GHz lub wyższy, 512MB RAM
System operacyjny: Windows XPSP3 / Vista 32_64 bit/ Win7 32_64 bit / Win8 32_64 bit
OPIS DOCKING STATION MINI
Przedni panel:
PL
17

i-tec USB 3.0 Docking Station Mini
POLSKI
Tylny panel (od lewej do prawej):
1 x konektor zasilania, 1x USB 3.0 Micro B, Dioda LED Power, Dioda LED Ethernet, 1x port
RJ45 Ethernet 1000/100/10Mbps
Wskazania diody LED:
: Sygnalizacja pracy urządzenia.
: Światło zielone ciągłe – sygnalizacja połączenia z serwerem. Światło zielone
przerywane – sygnalizacja transmisji danych
INSTALACJA STEROWNIKÓW W SYSTEMIE WINDOWS XPSP2/VISTA/WIN7/WIN8
(32_64BIT)
Ważna informacja: Nie podłączać Stacji Dokującej do komputera przed zainstalowaniem
sterowników karty sieciowej z płyty CD. Jeżeli Twój komputer nie posiada CD można pobrać
sterownik ze strony www.i-tec.pl/ Sterowniki wymagają instalacji tylko przed pierwszym
podłączeniem.
1. Włóż dołączony CD do napędu optycznego lub pobierz sterownik ze strony WWW. CD-
ROM wystartuje automatycznie, w przeciwnym razie uruchom plik AX88179_Setup.exe
znajdujący się w folderze CD:/Drivers/Windows.
2. Postępując zgodnie z instrukcjami na ekranie sterownik zostanie zainstalowany.
Po podłączeniu Docking Station Mini i zainstalowaniu sterowników w Menedżerze Urządzeń
w części Karty sieciowe pojawi się urządzenie “ASIX AX88179 USB 3.0 to Gigabit
PL
18

Quick Start
Ethernet Adapter”
Instalacja sprzętowa – podłączenie Docking Station do komputera
1. Podłącz zasilacz do gniazda zasilania w stacji dokującej a następnie podłącz kabel USB do
komputera.
2. USB 3.0 Docking Station zostanie rozpoznana przez system operacyjny komputera,
zalecamy aby komputer był w tym czasie podłączony do Internetu, umożliwiając tym samym
systemowi automatyczne pobranie najnowszych sterowników systemowych.
3. Uruchom ponownie komputer PC/NB.
Deinstalacja sterowników
Użyj Menedżera Programów – Dodaj/Usuń Programy – Usuń
AX88179 for Ethernet drivers
INSTRUKCJE BEZPIECZEŃSTWA
Zawsze dokładnie zapoznaj się instrukcjami bezpieczeństwa:
Trzymać z dala od ognia, wilgoci i wysokiej temperatury
Zachowaj niniejszą instrukcję na przyszłość
FAQ – CZĘSTO ZADAWANE PYTANIA
Pytanie: Mój komputer nie wykrywa Stacji Dokującej/ Funkcjonalność Stacji Dokującej jest
ograniczona.
Odpowiedź: Sprawdź sterowniki USB 3.0. swojego komputera. Wymagane zainstalowanie
najaktualniejszych sterowników. Bliższe informacje na naszej stronie WWW (USB 3.0
Problemy).
Pytanie: Gdzie mogę uzyskać dodatkowych informacji na temat rozwiązywania problemów z
USB 3.0 Docking Station Mini?
Odpowiedź: Prosimy o kontakt z naszym Działem Technicznym (www.i-tec.pl).
PL
19
POLSKI

i-tec USB 3.0 Docking Station Mini
SLOVENSKY
Dôležité!
Pred samotnou inštaláciou na USB 3.0 port sa presvedčte, že pre neho (pre USB 3.0 radič
vNB/PC) máte nainštalované posledné ovládače. V prípade neaktuálnych USB 3.0 ovládačov
na Vašom notebooku sa môžete stretnúť s problémami pri inštalácii alebo použití. Inštalácia
USB hubu (pre USB 3.0 porty typ A) je automatická zo systému, Tento HUB bude automaticky
detekovaný a nainštaluje sa ihneď po pripojení k USB 3.0 portu Vášho PC alebo rozširujúcej
PCIe karty s interným USB 3.0 host radičom. LAN port sa inštaluje z dodaného CD. Port je
nutné prvýkrát inštalovať pred vlastným pripojením dokovacej stanice k PC/NB z priloženého
CD (alebo ovládače nájdete na www.i-tec.cz) a potom až pripojiť zariadenie.
ÚVOD
Ďakujeme za zakúpenie „i-tec USB 3.0 Docking Station Mini“. Ide o jednoduchú dokovaciu
stanicu s možnosťou rozšíriť Váš notebook, ultrabook o všetky Vaše obľúbené periférie, ako
napr. plnohodnotnú klávesnicu alebo myš, Ethernet, USB displej adaptér pre ďalší monitor
alebo externý HDD apod.. Všetky spomínané produkty potom pripojíte k Vášmu notebooku
vokamžiku jediným USB 3.0 káblom. Pokiaľ budete chcieť, aby dokovacia stanice riešila i
pripojenie monitora, potom doporučujeme zakúpiť i-tec USB Display Adaptér, ktorý môžete
zapojiť na voľný USB port Docking Station Mini.
Spôsob použitia môžete vidieť na obrázku:
SK
20
Other manuals for i-tec
4
Table of contents
Languages:
Other Aduance Docking Station manuals
