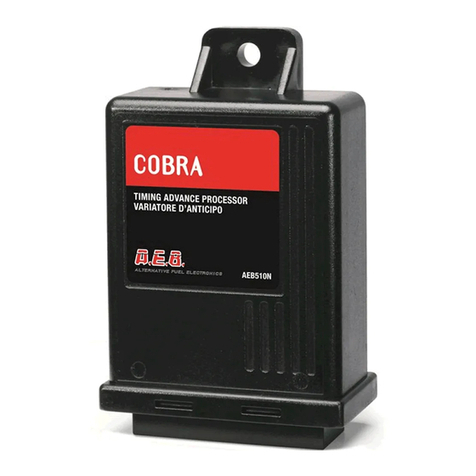
AEB AEB511N User manual

“SPIDER”
Cod. AEB511N
TIMING ADVANCE PROCESSOR
Manuale Istruzioni di Montaggio e Garanzia
Fitting Instructions and Warranty Workbook
Manuel de mode d'Emploi et de Garantie
Manual Instructiones de Montaje y Garantia
Manual de Instruções de Montagem e Garantia

Indice - Index - Table - Indice
ITALIANO
- Avvertenze generali ........................................................................................................ 3
- Schema per la programmazione del Variatore .............................................................. 4
- Programmazione ............................................................................................................ 5
- Funzione Emergenza e Caratteristiche Tecniche .......................................................... 6
- Regolazione dell'Anticipo ............................................................................................... 7
- Schema per la programmazione dei microinterruttori ................................................... 7
- Come e quando disinserire l'anticipo in decelerazione ................................................. 8
- Taratura inserimento anticipo ......................................................................................... 8
- Schema generale per l'installazione del Variatore ........................................................ 9
- Certificato di Garanzia ...................................................................................................... 10
ENGLISH
- Generalinformations ......................................................................................................... 12
- DiagramfortheTimingAdvanceProcessorprogramming ................................................... 13
- Programming ..................................................................................................................... 14
- EmergencyFunctionand TechicalSpecifications ............................................................... 15
- Advanceadjustment .......................................................................................................... 16
- Diagramforthemicroswitchesprogramming ...................................................................... 16
- Howandwhen disconnecttheadvance indeceleration ...................................................... 17
- Connectingadvancesetting .............................................................................................. 17
- Generaldiagramfor installingtheTiming AdvanceProcessor ............................................ 18
- WarrantyCertificate ......................................................................................................... 19
FRANÇAIS
- Avertissementsgénéraux .................................................................................................. 21
- SchémapourlaprogrammationduVariateur ....................................................................... 22
- Programmation .................................................................................................................. 23
- Fonction de Secourset CaractéristiquesTechniques ......................................................... 24
- Réglagedel'Avance ......................................................................................................... 25
- Schémapourlaprogrammationdesmicrointerrupteurs ....................................................... 25
- Commentetquanddesactiverl'avance endécélération ...................................................... 26
- Etalonnagedel'activation del'avance ............................................................................... 26
- Schéma generalpourl'installation duVariateur .................................................................. 27
- CertificatdeGarantie ....................................................................................................... 28
ESPANOL
- Advertenciasgenerales .................................................................................................... 30
- Esquemaporlaprogramacióndel Variador ........................................................................ 31
- Programación ................................................................................................................... 32
- FunciónEmergenciay Caracterìsticas Técnicas ............................................................... 33
- RegulacióndelAnticipo .................................................................................................... 34
- Esquemaporla programaciónde losmicrointerruptores ..................................................... 34
- Cómoycuándo desinserirelanticipo endeceleración ....................................................... 35
- Taradoinserciónanticipo .................................................................................................. 35
- Esquemageneralpara lainstalacióndel Variador .............................................................. 36
- Certificado deGarantía ..................................................................................................... 37
PORTUGUÊS
- Advertências gerais .......................................................................................................... 39
- EsquemaparaaprogramaçãodoVariador ......................................................................... 40
- Programação .................................................................................................................... 41
- FunçãodeEmergência eCaracterìsticasTécnicas ........................................................... 42
- Regulaçãodoavanço ....................................................................................................... 43
- Esquema paraaprogramação dosmicrointerruptores ......................................................... 43
- Deque maneiraequandoinseriro avanço......................................................................... 44
- Ajusteintroduçãoavanço .................................................................................................. 44
- Esquemageralpara ainstalaçãodoVariador .................................................................... 45
- Certificado deGarantía ..................................................................................................... 46

3IS511N REV. 120406 - 1
Installare in posizione verticale lontano da possibili
infiltrazionid'acqua.
Installarelontanoda eccessive fonti di calore (es. collettori di
scarico).
Installare lontano dalla bobina d'accensione e passare il
cablaggiolontanodai cavi dell'altatensione.
Realizzaredellebuoneconnessionielettricheevitandol'uso
dei“rubacorrente”.
Si tenga presente che la migliore connessione è la
saldatura debitamente isolata.
Non aprire per nessun motivo la scatola del Variatore,
soprattuttoconil motore in moto oil quadro inserito.
L'A.E.B. declina ogni responsabilità per danni a cose e
persone derivati dalla manomissione del proprio
dispositivo da parte di personale non autorizzato.
Avvertenze generali
Italiano

IS511N REV. 120406 - 1
4
Schema per la programmazione del Variatore Spider Codice AEB511N
Italiano
ALIMENTATORE
COMPUTER CLIENTE
CONINSTALLATO
APPOSITO
SOFTWARE PER
PROGRAMMAZIONE
VARIATORE PICK -UP
COLLEGARE ALLA PRESA
SERIALE DEL COMPUTER
PRESA
220 V A.C.
CHIAVE
HARDWARE
COLLEGARE ALLA
PORTA PARALLELA
(LPT1) DEL COMPUTER
INTERFACCIA
SERIALE

5IS511N REV. 120406 - 1
Italiano
Programmazione
Il Variatore SPIDER è riprogrammabile, quindi un solo
modello di Variatore si potrà adattare a diversi modelli di
vetture, aggiornando semplicemente il software al suo interno,
tramite il kit di programmazione AEB011 finora utilizzato per
la riprogrammazione degli Emulatori OBD2.
Sitengapresenteche,infase di collaudo,ilVariatoreSPIDER
è programmato con il software 511N, quindi verificare
sempre se questo è adatto alla vettura su cui dovrà essere
installato.
Il Variatore SPIDER Codice AEB511N, sostituisce il
precedente modello MOUSE in tutte le sue versioni.
Allegato a questa istruzione, troverete un elenco delle vetture
sucui installareil Variatore SPIDER, conlerelative indicazioni
sul software da utilizzare.
Gli schemi elettrici d'installazione di ogni singola vettura
invece, saranno disponibili nel nostro programma AEB
On - Line; per chi ne fosse sprovvisto si dovrà rivolgere al
suo rivenditore di fiducia.

6
IS511N REV. 120406 - 1
Avvisare il cliente chein caso d'avariailVariatoreè dotato di
connettore d'emergenza che lo esclude e ripristina il
collegamentooriginale.
PER ESCLUDERLO OPERARE COME SEGUE
FUNZIONAMENTO NORMALE
La spina del cablaggio è inserita nel
connettoredelVariatore.
FUNZIONE EMERGENZA
Togliere il cablaggio dal connettore di
funzionamento normale ed inserirlo nel
connettore d'EMERGENZA come da
schemaquiafianco riportato.
Tensioned'alimentazione 10 ÷ 14 Vdc
Regolazioneanticipo 6° - 9° - 12° - 15°
IngombriscatolaVariatore altezza 105 mm
profondità 35 mm
larghezza 80 mm
Ø foro di fissaggio 6 mm
Italiano
Funzione Emergenza
Caratteristiche Tecniche

7IS511N REV. 120406 - 1
Parte inferiore del Variatore
MICROINTERRUTTORI PER LA PROGRAMMAZIONE GRADI D'ANTICIPO
CONNETTORE PER IL COLLEGAMENTO E RIPROGRAMMAZIONE
LED ACCESO = ANTICIPO INSERITO
REGISTRO INTERVENTOANTICIPO
Italiano
Regolazione dell'Anticipo
Schema per la programmazione dei microinterruttori
PROGRAMMAZIONE GRADI D'ANTICIPO
15° d'anticipo 12° d'anticipo
9° d'anticipo 6° d'anticipo

8
IS511N REV. 120406 - 1
Ilsegnaledel potenziometro farfallanonèsempreugualepertantoèprevistauna
taraturadelpuntod'intervento.Laregolazionesieffettuaduranteilfunzionamento
aGASagendosulregistro intervento anticipo nel seguente modo:
1)verificareche il registro siaruotatotutto in senso orario;
2)conla vettura al minimoiniziarea ruotare il registro in sensoantiorario finché
non si spegne il LED ROSSO (anticipo disinserito);
3) così regolato, accelerando, il LED ROSSO sul Variatore si riaccende per poi
spegnersiquandosirilascial'acceleratore.
Come e quando disinserire l'anticipo
in decelerazione e al minimo
Sualcunevettureèconvenientetogliere l'anticipo in decelerazione e al minimo,
per evitare saltellii o funzionamenti irregolari. D'altra parte l'anticipo serve
immediatamenteinfase d'accelerazione, per migliorareprestazioni,consumie
ridurrealminimoilpericolo di ritorni di fiamma. ConilVariatoreSPIDER l'anticipo
sipuòinserireo disinserire automaticamente collegandoilfiloBLU -GIALLOdel
Variatore al potenziometro farfalla. Per il collegamento seguire lo schema
specificoallegatodiognivettura.
NOTA: tralasciare l'operazione taratura inserimento anticipo nel caso non si
colleghi il filo BLU - GIALLO.
Taratura inserimento anticipo
REGISTRO INTERVENTO ANTICIPO
Italiano
LED ACCESO = ANTICIPO INSERITO

IS511N REV. 120406 - 1
9
FILO
SEGNALE
+ 12 VOLT
SOTTO CHIAVE POSIZIONE GAS
DEL COMMUTATORE MASSA POTENZIOMETRO
FARFALLA
Schema generale per l'installazione del Variatore Spider Codice AEB511N
AL CONNETTORE DEL
SENSORE DI PUNTO
MORTO SUPERIORE
Italiano
ROSA - NERO (USCITASEGNALE)
ROSA(INGRESSOSEGNALE)
VERDE - NERO
VERDE AL CONNETTORE DEL
SENSORE DI FASE
DA COLLEGARE SOLO
SU ALCUNE VETTURE
ROSSO BLU NERO BLU - GIALLO

10
IS511N REV. 120406 - 1 Italiano
Certificato di Garanzia
Gentile Cliente,
grazie per la fiducia accordata all’A.E.B. acquistando questo prodotto.
L’A.E.B. sottopone tutti i suoi prodotti a severi test di qualità; se nono-
stante i controlli il prodotto dovesse presentare dei malfunzionamenti, Le
raccomandiamo di rivolgersi subito all’installatore per i controlli o gli
interventi del caso.
- Norme generali di garanzia
A.E.B. garantisce il buon funzionamento di questo prodotto e la sua immu-
nità da vizi e difetti costruttivi.
Se durante il periodo di garanzia il prodotto risultasse difettoso, A.E.B. si
farà carico delle riparazioni o sostituzioni del caso, affidandone l’esecu-
zione preferibilmente all’originario installatore, altrimenti a chi designato
di comune accordo.
Le sostituzioni dei pezzi difettosi avverranno franco stabilimento A.E.B. e
con spese di spedizione a carico del destinatario.
Per gli accessori od i componenti non costruiti da A.E.B. valgono soltanto
le garanzie riconosciute dai terzi produttori.
La presente garanzia è l’unica prestata da A.E.B., restandone pertanto
esclusa ogni altra.
Nessuna responsabilità, se non in caso di dolo o colpa grave, potrà far
carico ad A.E.B. per danni a persone o cose a chiunque derivati da malfun-
zionamenti del prodotto.
La presente garanzia è operativa soltanto per chi è in regola con i paga-
menti.
- Condizioni
La garanzia verrà riconosciuta per un periodo di 24 mesi dalla data stam-
pata sul prodotto con vernice indelebile.
La garanzia varrà soltanto se al momento dell’acquisto il prodotto risulta
ben conservato ed integro nel suo imballaggio e confezionamento predi-
sposti da A.E.B., che sono gli unici ad assicurarne provenienza ed un’ade-
guata protezione.
- Esclusioni della garanzia
Questa garanzia non copre:
a) Controlli periodici, manutenzioni, riparazioni o sostituzione di pezzi
dovuti al normale deterioramento.
b) Malfunzionamenti dovuti a incuria, cattiva installazione, uso improprio
o non conforme alle istruzioni tecniche impartite ed in genere ogni
malfunzionamento non riconducibile a vizi e difetti costruttivi del prodotto
e dunque a responsabilità di A.E.B..
c) Prodotti da chiunque modificati, riparati, sostituiti, montati e comunque
manomessi senza la preventiva autorizzazione scritta di A.E.B..
d) Incidenti, originati da cause di forza maggiore od altre cause (ad es.
acqua, fuoco, fulmine, cattiva aereazione, ecc.) non dipendenti dalla vo-
lontà di A.E.B..
Chiunque dovrà astenersi dal rivendere od installare prodotti affetti da
vizi o difetti costruttivi riconoscibili con la normale diligenza.
Il Foro competente per eventuali controversie in ordine all’interpretazio-
ne ed esecuzione di questa garanzia è unicamente quello di Reggio Emilia.


12
IS511N REV. 120406 - 1
Install in an upright position far from any possible infiltration
ofwater.
Install far from any sources of excessive heat (eg. exhaust
manifold).
Install far from the ignition coil and pass the wiring far from
thehighvoltagecables.
Make good electrical connections without using a “current
tap”.
Bear in mind that the best connection is duly insulated
welding.
Never open the processor box for any reason whatsoever,
especiallywiththeengine running or the panelswitchedon.
A.E.B. disclaims all liability for any damage or injury
derivingfromunauthorizedpersonneltamperingwith its
device.
General informations
English

IS511N REV. 120406 - 1
13
Diagram for the Timing Advance Processor Spider programming Code AEB511N
English
POWER UNIT
CUSTOMER COMPUTER
WITH SUITABLE
SOFTWARE INSTALLED TO
PGROGRAMTIMING
ADVANCE PROCESSOR
PICK - UP
CONNECT TO THE SERIAL
PLUG OF THE COMPUTER
220 V A.C.
PLUG
HARDWARE
KEY
CONNECTTO THE
PARALLEL PORT (LPT1)
OF THE COMPUTER
SERIAL
INTERFACE

14
IS511N REV. 120406 - 1 English
Programming
The SPIDER Timing Advance Processor can be
reprogrammed, therefore only one Timing Advance Processor
model can be adapted to different car models, simply updating
the software inside it by means of the AEB011 programming
kit that has been used until now to reprogram the OBD2
Emulators.
Please,takeintoaccount the factthat during thetestingphase
the SPIDER Timing Advance Processor is programmed with
the 511N software, therefore you must always check if it is
suitable for the car on which it must be installed.
The SPIDER Timing Advance Processor Code AEB511N
replaces the previous model MOUSE in all its versions.
Enclosed to these instructions, you will find a list of the cars
on which you can install the SPIDER Timing Advance
Processor with the relevant indications on the software to be
used.
The installation wiring diagrams of every single car instead
are available in our AEB On - Line range; if you do not have
it, please apply to your local dealer.

15 IS511N REV. 120406 - 1
FeedingTension 10 ÷ 14 Vdc
AdvanceRegulationField 6° - 9° - 12° - 15°
Overaldimensionsofthe height 105 mm
ElectronicAdvanceVariator depth 35 mm
Box width 80 mm
Ø fixing hole 6 mm
S.O.S. Warn the customer that in the event of failure, the
processor is equipped with an emergency connector that
excludesitandrestoresthe original connection.
TO EXCLUDE IT PROCEEDAS FOLLOWS
NORMALOPERATION
Thewiringplugisinserted intheconnector
oftheVariator’s.
EMERGENCY OPERATION
Remove wiring from the connector for
normal operation and insert it into the
EMERGENCYconnectorasshowninthe
diagramalongside.
Emergency Fuction
Technical Specifications
English

16
IS511N REV. 120406 - 1
TimingAdvance Processor lower side
Advance Adjustment
Diagram for the microswitches programming
ADVANCE DEGREES PROGRAMMING
advance of 15° advance of 12°
advance of 9° advance of 6°
English
ADVANCE DEGREES PROGRAMMING MICROSWITCHES
CONNECTION AND REPROGRAMMING CONNECTOR
LED LIGHTED UP = ADVANCE INSERTED
ADVANCE INTERVENTION REGISTER

17 IS511N REV. 120406 - 1
Thesignalofthethrottlepotentiometerisnotalwaysthesame,soit'sforeseena
settingfortheinterventionpoint.The adjustmentismadeoperating ontheregister
oftheadvanceintervention,asfollows:
1)verifythat the register isclockwise turned;
2) begin to turn anti - clockwise the register in idling car position, until the RED
LEDwilllight off(advance disconnected);
3) in this way, while accelerating, the RED LED placed on the Timing Advance
Processor, lights again and itlightsoffwhenyou leave offthe accelerator.
How and when disconnect the advance in
deceleration and in idling position
ItisbesttoCut-Offtheadvanceindecelerationandinidlingposition over some
cars,soas to avoidcontinuousbouncesorirregularworkings.On the otherhand,
the advance is immediately necessary in acceleration, to improve the
performances,consumersand to reduce to aminimumthe danger of backfires.
WiththeTimingAdvanceProcessor, theadvancecanautomaticallybeconnected
or disconnected cabling the BLUE - YELLOW wire of the Timing Advance
Processortothesignalwire of the throttle potentiometer.Fortheconnection,see
the specific drawing supplied for each car.
NOTE: omit the connecting advance setting in the case the BLUE - YELLOW
wiredoesn'tconnect itself.
Connecting advance setting
ADVANCE INTERVENTION REGISTER
LED LIGHTED = ADVANCE CONNECTED
English

IS511N REV. 120406 - 1
18
SIGNAL WIRE
+ 12 VOLT
IGNITION GAS POSITION
OF THE SWITCH GROUND THROTTLE POSITION
SENSOR
General diagram for installing the Timing Advance Processor Spider Code AEB511N
TO CONNECTOR
OF THE CRANKSHAFT
POSITION SENSOR
English
PINK - BLACK (SIGNAL OUTPUT)
PINK (SIGNAL INPUT)
GREEN - BLACK
GREEN TO CONNECTOR OF THE
CAMSHAFT POSITION
SENSOR
TO CONNECT ONLY FOR
SOME TYPE OF CARS
RED BLUE BLACK BLUE - YELLOW

19 IS511N REV. 120406 - 1
English
Warranty Certificate
Dear Customer,
Thank you for the trust you have shown in A.E.B. by purchasing this
product. A.E.B. puts all its products through severe quality tests; if in
spite of these checks the product malfunctions, please call the installer
immediately for the necessary checks or work.
- General rules of warranty
A.E.B. guarantees the good operation of this product and its immunity
from manufacturing defects and flaws.
If during the warranty period the product should turn out to be defective,
A.E.B. will take upon itself the necessary repairs or replacements, entrusting
the work preferably to the original installer, otherwise a person designated
by common agreement.
Replacements of defective parts shall be made ex works A.E.B. with freight
to be paid by the consignee. For the accessories or components not of
A.E.B. manufacture, only the warranties acknowledged by the third-party
manufacturers hold.
This warranty is the only one given by A.E.B., all others therefore being
excluded. No liability, except in the case of fraud or grave offence, may be
charged to A.E.B. for damage or injury to anything or anyonderiving from
the product malfunctioning.
This warranty is only operative for those who are up-to-date with their
payments.
- Terms
Warranty shall be acknowledged for a period of 24 months from the date
printed on the product with indelible paint.
Warranty shall only hold if at the time of purchase the product is well
conserved and integral in its packing and packaging prepared
by A.E.B. which are the only ones assuring its origin and adequate
protection.
- Exclusions from warranty
This warranty does not cover:
a) Periodical checks, maintenance, repairs or replacement of parts due to
normal deterioration.
b) Malfunctioning due to negligence, bad installation, improper use or use
that is not in conformity with the technical instructions provided and in
general any malfunctioning that cannot be traced to manufacturing defects
and flaws in the product and therefore to the responsibility of A.E.B..
c) Products modified, repaired, replaced, fitted and anyhow tampered with
by anyone without prior written authorization from A.E.B..
d) Accidents originating in causes of force majeure or other causes (eg.
water, fire, lightning, bad ventilation, etc.) beyond the control
of A.E.B..
No one may resell or install products with manufacturing defects or flaws
that are identifiable with normal conscientiousness.
The competent Court for any disputes regarding the interpretation and
execution of this warranty is solely the Court of Reggio Emilia.

This manual suits for next models
1
Table of contents
Languages:
Other AEB Computer Hardware manuals
Popular Computer Hardware manuals by other brands

Simplex
Simplex XPS installation instructions
IEI Technology
IEI Technology HPE-4S2 Quick installation guide
Ventair
Ventair Zephyr ZEP40PC/R Important Installation and Instruction Manual
IBASE Technology
IBASE Technology IB995 user manual
Panasonic
Panasonic A210 Brochure & specs
ADLINK Technology
ADLINK Technology NuDAQ PCI-9111DG user manual
