AEEZO JW10 User manual

USER MANUAL
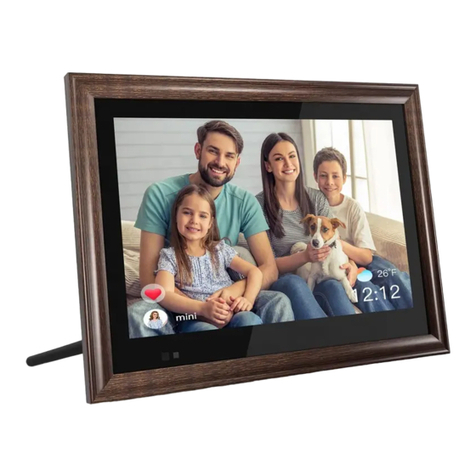
10.1 inch Wifi Cloud Photo Frame JW10

1
2
Wifi Cloud
Photo Frame
Stand
Power Adapter with
Power Cable
Warranty card
Wi fi Cl oud P hot o F r am e 15.6 inc h
Warranty card
USER MANUAL
Wifi Cloud Photo Frame 15.6 inch
User Manual
10.1 inch IPS touch screen
① Wall-mounted hole ②Power on/off button ③④
⑤
FRAME FEATURES
CONTENTS OF BOX
②
①
③
④
⑤
Mini USB
DC
TF Card

3
4
1. Screw in the stand
2. Connect the power cable
Thank you for purchasing your very own Uhale Photo.
● Set up your frame according to the "Quick start guide" when you first
start the frame.
If you are new user of Uhale Photo App, please start by following the quick set
up on user manual or follow the on-screen guide when power on the frame at
the first time.
●
Once you have set up your frame. start connecting it to your friends
and family.
Download the Uhale Photo App
Please download and install the Uhale Photo App in your smartphone by searching
"Uhale Photo" or scan QR code in the App Store or Google Play.
INSTALL PHOTO FRAME
GETTING STARTED
Uhale Photo APP

5
6
Uhale Photo quick setup
When starting your frame for the first time, you will need to setup the frame.
●
Select a language which will be used on the frame.
●
Connect your frame to 2.4GHz Wi-Fi and hidden Wi-Fi (not support 5GHz).
●
Set time zone, date and time if they are not correct.
● U
hale Photo may ask you to update to the latest version. It is
recommended to update your frame before continuing if asked to.
●
Enter your name, and the location where you have placed your frame e.g.
“Living room”, “Bedroom” or “Workspace”.
Start using Uhale Photo
●
Start by connecting with your friends and family by providing them with a
unique code from your frame.
●
If you want to be able to send photos to the frame yourself, start by
downloading the app for iOS or Android on App Store or Google Play.
Then use the code to connect your frame and app as described below.
Connecting a new friend
●
Make sure that your friend has downloaded and installed the Uhale Photo
app.
●
Click the add friend icon on your frame . A dialog will appear showing
both QR code and SN code (update every 12 hours.)
●
Now share this QR code or SN code through your preferred way E.g. SMS,
E-Mail, IM, phone call, to your friend.
Once the frame is connected to your friend’s Uhale Photo App, you will be able
to find them on the sharing list on the frame.
Share Photos
You can share photos/videos in three ways.
● U
hale Photo App
You can download "Uhale Photo" app through Google Play and Appstore.
Before sharing, please bind the photo frame, and then you can share the
photo/video to the frame through the app.
Sharing photos is divided into picture share and video share.
Photo share: select pictures (up to 50 pictures at a time) - select photo frames
- edit pictures (adjust focus areas and name photos) - send.
Video share: select video (only one video can be selected, 30 seconds length
video) - select photo frame - edit video (video length and video naming) - send.
You can check the status of photo sending tasks and perform some quick
actions on the sending history side.
Delete: Deletes local history data (does not delete framed photos).
Clear: clears the history data (does not delete the task in the sent state).
Resend: you can resend this photo to other frames.
Withdraw: Deletes local history data and frame photos.

7 8
● U
hale Photo web
Visit the website to get access to Uhale Photo Web:
https://uhalephoto.zeasn.tv
Download, install and open the "Uhale Photo" APP on your mobile devices,
and find the QR code under [Scan] to log in.
NOTE:When successfully logged in, the web will automatically
synchronize the information from the APP (eg. profile picture, nickname,
connected device).
●
External Devices
You can copy photos to Micro SD card, then insert the Micro SD card
into the frame, and import photos to the frame through Frame -
Settings - Manage Photos - Import Photos. Micro SD card does not
support video import yet.
Through settings, you can personalize your frame to your needs.
1. My frame
●
Set/Change the name of the frame. The frame name is also displayed in
connected mobile devices, under the list of connected photo frames in the
App.
●
Frame location: Set/Change the location of the photo frame. This location
is displayed in the list of connected photo frames of your friends and
family, helping to identify multiple frames.
●
Set language: Sets the language throughout your frame.
●
Set time zone: Sets the time zone that should be used on your frame.
●
Automatic Date and Time: Use network-provided time.
●
Set date/time:The date and time can be manually adjusted after the
automatic date & time is turned off.
●
Enable and disable the 24-hour clock.
●
Power: you can choose from three options: power off, restart, and sleep.
2. Manage photos
●
Memory usage
The Manage Photo section shows you the number of photos stored in the
frame and the storage space occupied/remained.
●
Show/Hide photos
Select the photo you want to hide by tapping the photo. Hidden photos will
Not be deleted from the frame and can be re-displayed at any time.
-You can view only the hidden photos or the displayed photos.
●
Favorite photos
Click to enter the favorite photos album
●
Delete photos
Select the photo you want to permanently delete from the frame by
tapping the photo.
●
Import photos
Allows you to import photos from an external storage device (E.g. a
microSD card).
To import photos:
Insert an external storage device (E.g. a microSD card) into the device
with the photos to be imported.
Select the photos to be imported into the photo frame.
Tap the import button to start.
Settings

9
10
●
Export photos
Allows you to export photos from the photo frame to an external storage device
(E.g.
a microSD card).
To export photos:
Select to the photos to be exported from the photo frame. Tap the export button
to start.
3. Manage account
●
Add a new account
To add a new authorized account, tap the device share button, and then share
the displayed SN code and QR code in a way you prefer.
●
Remove an account
Once an account is removed from the list, it will not be able to share photos to
the photo frame.
You can delete all photos associated with an account.
You can delete the account (only delete the account, not the shared photos);
You can delete the account and its shared photos.
4. Display settings
●
Brightness level
Adjust the screen brightness level.
●
Ambient clock
Once enabled, a clock will be displayed when the photo frame is on sleeping
mode.
●
Sleep mode
When the sleep mode is on, the screen is turned off during a specific time to
reduce energy consumption. The default setting is to turn off the screen at
20:00 and to turn it back on at 08:00AM. This can be changed by setting your
preferred sleep mode start/end time.
Photos can still be received when the sleep mode is on.
●
Show weather & Time
Enable and disable the weather and time. When enabled, the weather and time
are displayed on the home page, and when disabled, they are not displayed.
●
Set weather
View weather specific information and search to switch to other cities.
●
Temperature unit
Enable and disable the temperature unit. When enabled, the weather and time
are displayed on the home page, and when disabled, they are not displayed.
5. Photo settings
●
Timer
Set the photo display time interval.
●
Show caption
Set whether to display the photo description sent by the friend with the photo.
Select todisplay the photo description. When unchecked, the photo description
is hidden.
●
Fill frame
Set the default photo frame settings. When checked, the photo will fill the device
screen; When unchecked, the photo will fit to the device screen (blur bands will
fill the edges).
●
Slideshow
Provide above 4 slideshow effects. You can set your preferred photo
display mode.
●
Photo display order
Set the order of photo display.
➢By date: Photos are displayed in chronological order.
➢According to user: display by preference.
➢Random: The photos are displayed randomly.
●
Video autoplay
Video related settings: When turned on, video will be automatically played; when
turned off, video will be paused.
Playback audio: When turned on, the video will be muted; when turned off, the
video will be played with preset volume.
Video volume setting: Adjust the video volume of the photo frame.
●
Playback mode: you can choose repeat all mode or single repeat mode.
6. Notifications: Adjust the notification volume of the photo frame.
7. Backup and restore:
●
Backup frame to Micro SD card: Tap to make a backup of your photos,
friends and settings. The time of latest successful backup will be displayed.
( Any existing backup on the SD card will be overridden! )
●
Restore from backup: Before you attempt to restore your frame, start by
confirming that your backup is up-to-date. If you wish to restore a backup
on a frame that has already been setup, then you must first reset the
frame. This is done by pressing the “Reset frame” button. This will delete
all data on the frame and reset the frame to its setup screen.
On the setup screen you can select the “Restore from backup” button
which will restore your frame from the backup.
If the “Restore from backup” button isn’t visible, then confirm that the SD
card is correctly mounted

12
●
Reset frame: Removes all data from your frame. This will permanently
remove all your photos, friends/connections and settings.
8.
Wi-Fi: Set the Wi-Fi connection.
Wi-Fi details: Display Wi-Fi details, such as Wi-Fi name, Wi-Fi strength,
Wi-Fi status, etc.
Add a hidden Wi-Fi manually.
9. Help
●
Guide: Check the quick setup that pops up when you start the photo frame
for the first time.
●FAQ
: Provide answers to common questions to solve problems quickly.
●
Privacy agreement: Display the content of the privacy agreement.
10. About
Software version update: Check the photo frame software version update.
System version update: Display Android system version information.
Mac address: Display the Mac address of the photo frame.
FAQ
1. Do I have to keep this photo frame plugged all the time?
Yes, you have to keep it plugged in to keep the frame on as it has no built-in battery.
2. Does this frame have to be Wifi connected to work or just in the setup process?
This frame needs to connect to a Wifi network for receiving new photos / videos and
software updates. Other than that, the frame can only play the photos/videos without
Wifi connection.
3. Why this frame cannot connect to Wifi?
It supports only 2.4GHz Wifi network, select the Wifi network you would like to
connect and enter the password correctly if required. If your Wifi network is NOT on
the list, move your frame closer to your router or restart your frame, wait for seconds
and check it again. Also you could try to share your smartphone's hotspot to check.
4. Can this frame be hanged on the wall?
You can hang it on the wall by the wall-mountable hole on the back.
5. Can I place the frame in portrait or landscape position?
It can be positioned landscape or portrait.
6. How do I unbind a user?
If you would like to unbind a user, please go to the settings >manage accounts
and click the bound user you want to delete.
7. Can this frame automatically turn on/off at a specific time?
You can set a time period for the frame to sleep regularly under sleep mode in the
frame settings.
8. Can I adjust the speed the photos changes?
You can choose your Timer of your slideshow from 1 s to 30 minutes in the frame
settings.
9. Will it start displaying photos automatically after insert a SD card?
Yes, after insert the TF card to the frame, you will see a pop-up window, tap [View]
and it will start to play photos automatically.
10. Why I got my photos cropped on the frame?
Please turn off the fill frame feature in the Photo settings.
FAQ
11

1314
11. Can I cycle pictures and videos together?
Yes, you could cycle play the pictures and videos together.
12. Why does it say "not in the range" or "Disable" after I enter the correct Wi-Fi
password?
Please check the Wi-Fi strength on the frame , if it's not strong , connect to
another Wi-Fi with stronger signal strength or connect to your smartphone's
hotspot to try.
13. Can I link multiple frames to one account and send same photos to all the
frame at the same time?
Yes, currently one client account can be bound to unlimited photo
frames , and one photo frame can be bound to unlimited client accounts.
14. Can you delete the photos in the internal storage?
Yes, you can delete one or multiple photos under [Settings]>>>[Manage photos]
on the frame, after delete ,it will release memory space from your frame.
15. Do I need to register a new account on Uhale Photo App for binding to the
frame?
You can register a new account with your email when first use Uhale Photo, you
can also log in as a visitor, after you enter the code, it will bind the app to the
frame automatically.
16. Do I need to be connected to the same Wifi when I upload pictures to the
frame by app?
No, after pair the app with the frame, you could upload pictures and videos
from smartphones to the frame anywhere and at any time. Just make sure the
frame is connected to 2.4GHz Wi-Fi during upload.
17. Can you send multiple pictures or videos at one time?
You can't send pictures and videos at one time. It supports uploading 50 photos
or one video each time, please cut the video to 30 seconds before uploading.
18. Can it play ground music during the picture slideshow?
This frame does not support playing background music during slideshow.
For any inquiries with products, please feel free to contact us, we will
respond within 24 hours.
Official website: www.jenoteck.com
CONTACT US

Table of contents
Other AEEZO Digital Photo Frame manuals
