manuals.online logo
Brands
  1. Home
  2. •
  3. Brands
  4. •
  5. AEG
  6. •
  7. Cooker
  8. •
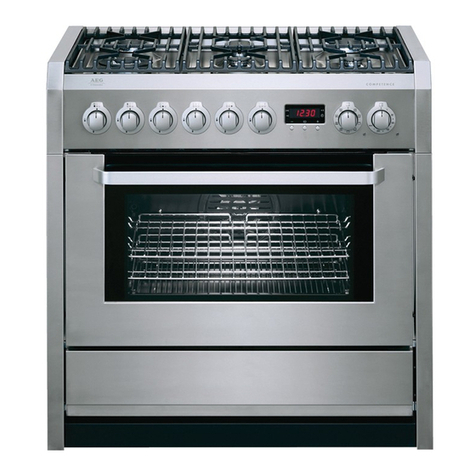
  9. AEG 47009GO-MN User manual

AEG 47009GO-MN User manual

47009GO-MN EN COOKER USER MANUAL
CONTENTS
The following sy bol are used
in the text:
Warning - I portant Safety infor ation.
General infor ation and tips.
Environ ental infor ation.
Subject to change without notice
2
SERVICE
When contacting Service, ensure that
you have the following data available.
The infor ation can be found on the
rating plate.
Model
PNC
Serial Nu ber
4 Safety infor ation
7 Product description
9 Before first use
10 Hob - daily use
11 Hob - helpful hints and tips
11 Hob - care and cleaning
11 Oven - daily use
14 Using the accessories
14 Oven - helpful hints and tips
15 Cooking table
17 Oven - care and cleaning
19 What to do if...
20 Installation instructions
27 Environ ent concerns
3ENGLISH
Visit the webshop at:
www.aeg-electrolux.co /shop
Thank you for choosing this AEG product. We have created it to give you
i peccable perfor ance for any years, with innovative technologies that
help ake life si pler  features you ight not find on ordinary appliances.
Please spend a few inutes reading to get the very best fro it.
FOR PERFECT RESULTS
ACCESSORIES AND CONSUMABLES
In the AEG webshop, youll find everything you need to keep all your AEG
appliances looking spotless and working perfectly. Along with a wide range of
accessories designed and built to the high quality standards you would expect,
fro specialist cookware to cutlery baskets, fro bottle holders to delicate
laundry bags
VISIT OUR WEBSITE FOR:
- Products
- Brochures
- User anuals
- Service infor ation
www.aeg.co
 This appliance can be used by children
aged fro 8 years and above and
persons with reduced physical,
sensory or ental capabilities or lack
of experience and knowledge if they
have been given supervision or
instruction concerning use of the
appliance in safe way and understand
the hazards involved. Children shall
not play with the appliance.
 Keep all packaging away fro children.
There is the risk of suffocation or
physical injury.
 Keep children and ani als away fro
the appliance when the door is open
or the appliance is in operation. There
is the risk of injury or other per anent
disability.
 In order to avoid any unintentional fall
down, pan handles should be turned
to the back the cooker, not out to the
roo or over adjacent burners.
 If the appliance has Child Lock or Key
Lock (Control Lock) function, use it.
It prevents children and ani als fro
accidental operation of the appliance.
4
Only an approved electrician can
install and connect the appliance.
Contact an approved service centre.
This is to prevent the risks of structural
da age or physical injury.
Make sure that the appliance is not
da aged because of transport.
Do not connect a da aged appliance.
If necessary, contact the supplier.
Re ove all packaging, stickers and
layers fro the appliance before first
use. Do not re ove the rating plate.
It can invalidate the guarantee.
Fully obey the laws, ordinances,
directives and standards in force in
the country where you use the applian-
ce (safety regulations, recycling
regulations, electrical or gas safety
rules etc.).
Make sure that the appliance is
disconnected fro the power supply
during the installation.
Be careful when you ove the
appliance. The appliance is heavy.
Always use safety gloves. Do not lift
the appliance by the handle.
You ust have correct isolation
devices: line protecting cut-outs, fuses
(screw type fuses re oved fro the
holder), earth leakage trips and con-
tactors.
Keep the ini u distances to the
other appliances and units.
The appliance cannot be positioned
on a base.
Installation








 Do not change the specifications of
this appliance. There is the risk of
injury and da age to the appliance.
 Do not let the appliance stay
unattended during operation.
 Switch off the appliance after each
use.
General safety
Safety infor ation
Before the installation and use, read this
anual carefully:
 For your personal safety and the
safety of your property
 For the respect of the environ ent
 For the correct operation of the
appliance.
Always keep these instructions with the
appliance also if you ove or sell it.
The anufacturer is not responsible if
incorrect installation or use results in
da age.
Children and vulnerable
people safety
SAFETY INFORMATION
5ENGLISH
Electrical connection














Use






Gas connection




Only an approved electrician can install
and connect the appliance. Contact
an approved service centre. This is to
prevent the risks of structural da age
or physical injury.
The appliance ust be earthed.
Make sure that the electrical data on
the rating plate agree with your
do estic power supply.
Infor ation on the voltage is on the
rating plate.
You ust have the correct isolation
devices: line protecting cut-outs, fuses
(screw type fuses re oved fro the
holder), earth leakage trips and
contactors.
The electrical installation ust have
an isolation device which lets you
disconnect the appliance fro the
Only use the appliance for do estic
cooking tasks. Do not use the applian-
ce for co ercial and industrial use.
This is to prevent physical injury to
persons or prevent da age to property.
Always onitor the appliance during
operation.
Always stay away fro the appliance
when you open the door while the
appliance is in operation. Hot stea
can release. There is a risk of burns.
Do not use this appliance if it is in
contact with water. Do not operate the
appliance with wet hands.
Do not use the appliance as a work
surface or storage surface.
The cooking surface of the appliance
beco es hot during use. There is a
risk of burns. Do not put etallic
objects, for exa ple cutlery or
saucepans lids, on the surface, as they
Make sure that airflow around the
appliance is good. A defective air
supply can cause lack of oxygen.
Infor ation about the gas supply is on
the rating plate.
This appliance is not connected to a
co bustion products evacuation
device. It ust be installed and con-
nected in accordance with current
installation regulations.
Particular attention ust be given
to the relevant require ents regarding
ventilation.
The use of a gas cooking appliance
cause heat and oisture in the roo
in which it is installed. Make sure that
ventilation in the kitchen is good: keep
natural ventilation holes open or install
a echanical ventilation device
( echanical extractor hood).
More ventilation (for exa ple opening
of a window or increasing the level of
echanical ventilation where present)
is necessary when you operate the
appliance intensively for a long ti e .
ains at all poles. The isolation device
ust have a contact opening with of
ini u 3 .
The shock protection parts ust be
fixed in such a way that they cannot
be undone without tools.
Always use a correctly installed
shockproof socket.
When you connect electrical applian-
ces to ains sockets, do not let cables
touch or co e near the hot appliance
door.
Do not use ulti-way plugs, connectors
and extension cables. There is a risk
of fire.
Make sure not to squash or cause
da age to the ains plug (if applica-
ble) and cable behind the appliance.
Make sure that the ains connection
is accessible after the installation.
Do not pull the ains cable to
disconnect the appliance. Always pull
the ains plug (if applicable).
Do not replace or change the ains
cable. Contact the service centre.
6
Care and cleaning



























can beco e hot.
The interior of the appliance beco es
hot during use. There is a risk of burns.
Use gloves when you insert or re ove
the accessories or pots.
Open the door carefully. The use of
ingredients with alcohol can cause a
ixture of alcohol and air. There is the
risk of fire.
Do not let sparks or open fla es co e
near the appliance when you open the
door.
Do not put fla able products or ite s
that are wet with fla able products,
and/or fusible objects ( ade of plastic
or alu iniu ) in, near or on the
appliance. There is a risk of explosion
or fire.
Set the cooking zones to "off" after
each use.
Do not use the cooking zones with
e pty cookware or without cookware
Do not let cookware boil dry. This can
cause da age to the cookware and
hob surface.
If an object or cookware falls on the
hob surface, the surface can be
da aged.
Do not put hot cookware near to the
control panel because the heat can
cause a da age to the appliance.
Be careful when you re ove or install
the accessories to prevent da age to
the appliance ena el.
Cookware ade of cast iron, cast
alu iniu or with da aged botto s
can scratch the hob surface if you
ove the on the surface.
Discoloration of the ena el has no
effect on the perfor ance of the
appliance.
To prevent da age or discoloration to
the ena el:
 do not put any objects directly on
the appliance floor and do not cover
it with alu iniu foil;
 do not put hot water directly into the
appliance;
 do not keep oist dishes and food
Before aintenance, ake sure that
the appliance is cold. There is a risk
of burns. There is a risk that the glass
panels can break.
Keep the appliance clean at all ti es.
A build-up of fats or other foodstuff
can result in a fire.
Regular cleaning prevents the surface
aterial fro deteriorating.
For your personal safety and the safety
of your property, only clean the
appliance with water and soap. Do
not use fla able products or
products that can cause corrosion.
Do not clean the appliance with stea
cleaners, high-pressure cleaners,
sharp objects, abrasive cleaning
agents, abrasive sponges and stain
re overs.
If you use an oven spray, follow the
instructions fro the anufacturer.
Do not spray anything on the heating
ele ents and the ther ostat sensor
(if applicable).
in the appliance after you finish the
cooking.
Do not apply pressure on the open
door.
Do not put fla able aterials in the
co part ent below the oven. Keep
there only heat-resistant accessories
(if applicable).
Do not cover oven stea outlets. They
are at the rear side of the top surface
(if applicable).
If there is a crack on the surface,
disconnect the power supply. There
is a risk of electric shock.
Do not put heat-conducting aterials
(e.g. thin etal esh or etal-plated
heat conductors) under the cookware.
Excessive heat reflection can da age
the cooking surface.
Do not use the appliance during a
power cut.
Never cook food on the lower wall of
the oven.
7ENGLISH
Open the door carefully. The use of
ingredients with alcohol can cause a
ixture of alcohol and air. There is the
risk of fire.
Risk of fire
Disconnect the appliance fro the
power supply before the replace ent
of the oven la p. There is the risk of
electrical shock!
Oven la p
Only an approved engineer can repair
or work on the appliance.
Contact an approved service centre.
Use only original spare parts.
Service centre
To prevent the risk of physical injury
or da age
 Disconnect the appliance fro the
power supply.
 Cut off the ains cable and discard
it.
 Discard the door catch. This prevents
children or s all ani als fro being
closed inside of the appliance. There
is the risk of suffocation.
Disposal of the appliance














Do not let sparks or open fla es co e
near the appliance when you open the
door.
Do not put fla able products or ite s
that are wet with fla able products,
and/or fusible objects ( ade of plastic
or alu iniu ) in, near or on the
appliance.
1Electronic progra er
2
3
4
Ther ostat knob
Ther ostat indicator la p
Functions selector knob
Gas hob knob
5
2 541 3
Control panel
PRODUCT DESCRIPTION
Do not clean the glass door with
abrasive cleaning agents or etal
scraper. Heat resistant
surface of the inner glass can break
and shatter.
When the door glass panels are
da aged they beco e weak and can
break. You ust replace the . Contact
the service centre.
Be careful when you re ove the door
fro the appliance. The door is heavy.
Bulb la ps used in this appliance are
special la ps selected for household
appliances use only. They cannot be
used for the full or partial illu ination
of a household roo .
If it beco es necessary to replace the
la p use one of the sa e power and
specifically designed for household
appliances only.
Disconnect the appliance fro the
power supply before the replace ent
of the oven la p.
There is the risk of electrical shock.
Cool down the appliance. There is a
risk of burns.
Do not clean catalytic ena el.
8
Dripping tray
FIG. 1
For baking and roasting or as a pan
for collecting fat (FIG. 1).
For dishes, cake tins, ite s for roasting
and grilling (FIG. 2).
Oven shelves
FIG. 2


Cooking urface layout
Se i rapid burner
Auxiliary burner
Se i rapid burner
Rapid burner
6
Lateral guides
8
9
Oven la p
Botto heating ele ent
7
Grill heating ele ent
Fan and heating ele ent
Shelf positions
10
11
12
13
14
15
Se i rapid burner
16
Triple crown burner
17
10
13
12 13 14
17 16 15
Cooking urface layout
Oven
6
7
8
9
10
11
OVEN ACCESSORIES
1
2
3
4
5
9ENGLISH
Baking tray handle (A)
Insert for the grill pan set for grilling
s aller a ounts of food (FIG. 3).
Grill pan set
FIG. 3
FIG. 4
Mode
Cook time
End Time Clock
Timer


The oven works only with the
ti e set.


When the oven is first connected to the
power supply, the display shows 12.00
and the led indicator (L4) flashes. Press
the touch control buttons and to
set the ti e of day: after five seconds
the ti e is stored and L4 switches off.
To change the ti e at a later stage, press
the ode selector button until L4 flashes.
To re ove or insert the baking tray
fro the oven particularly when hot
(FIG. 4).
Setting the ti e
BEFORE FIRST USE
A
A
Re ove all packaging, both
inside and outside the oven,
before using the appliance.
Do not re ove the rating plate.
Caution! To open the oven door,
always hold the handle in the
centre.
Preheating
Set an oven to axi u te perature
and run an e pty oven for 1 hour, to
burn off any residue fro the cavity
surface. Accessories can beco e hotter
than in nor al use. During this period
an odour can be e itted. This is nor al.
Make sure the roo is well ventilated.
Initial Cleaning
Re ove all parts fro the appliance.
Clean the appliance before first use.
Caution! Do not use abrasive
cleaning agents! This can da a-
ge the surface.
Refer to chapter "Care and
Cleaning".
10
1Burner cap
2
3
4
Burner crown
Ignition candle
Ther ocouple
HOB - DAILY USE
Warning! Be very careful when
you use open fire in kitchen
environ ent. Manufacturer decli-
ne any responsibility in case
isuse of the fla e
Always light the burner before
you put cookware.
Ignition of the burner
1. Turn the control knob counterclockwise
to the axi u position ( ) and push
it down.
2. Keep the control knob pushed for
approxi ately 10 seconds; this will let
ther ocouple to war up. If not, the gas
supply will be interrupted.
3. Adjust the fla e after it is regular.
If after so e tries the burner does not
light, check if the crown and its cap are
in correct positions.
To light the burner:
If after so e tries the burner does
not light, check if the crown and
its cap are in correct positions.
3
4
2
1
1
2
3
4
Turning the burner off
To put the fla e out, turn the knob to the
sy bol 0 (Off ).
Warning! Do not keep control
knob pressed for ore than 15
seconds. If the burner does not
light after 15 seconds, release the
control knob, turn it into off position
and wait for at least 1 inute
before trying to light the burner
again.
Warning! Always turn the fla e
down or switch it off before you
re ove the pans of the burner.
Warning! Always use the control
knob to switch off a burner.
11ENGLISH
Warning
Accessible parts will beco e
hot when in use. To avoid burns
and scalds children should be
kept away.
Do not touch the heated
ele ents inside the oven.









HOB - CARE AND CLEANING
OVEN - DAILY USE
HOB - HELPFUL HINTS AND TIPS
If possible, always put the lids on the
pans.
When the liquid starts to boil, turn down
the fla e to barely si er the liquid.
Energy savings
Use pots and pans with botto
applicable to the di ension of
burner.
Do not use cooking vessels on
the hotplate that overlap its
edges.
Use cookware with the botto as thick
and flat as possible.
Burner Diameter of cookware
Rapide 180 - 220
Se irapide 120 - 200
Auxiliary 80 - 160
Triple crown 220 - 260
Warning! Switch the appliance
off and let it cool down before
you clean it.
Warning! For safety reasons, do
not clean the appliance with
stea cleaners or high-pressure
cleaners.
Warning! Do not use abrasive
cleaners, steel wool pads or
acids, they can cause da age
to the appliance.
To clean the ena elled parts, cap and
crown, wash it with war soapy water.
Stainless steel parts wash with water,
and then dry with a soft cloth.
The pan supports are not dishwasher
proof; they ust be washed by hand.
Make sure you position the pan
supports correctly after cleaning.
To ake burners work correctly, ake
sure that the ar s of the pan supports
are in the centre of the burner.
Be very careful when you replace
the pan upport to prevent the hob
top from damage.
After cleaning, dry the appliance with
a soft cloth.
Cooling fan
When the appliance operates, the cooling
fan switches on auto atically to keep
the surfaces of the appliance cool. If you
switch off the appliance, the cooling fan
continues to operate until the appliance
cools down.
12
It is possible to select one of the following
functions turning the selector knob
clockwise (FIG. 6).
Always set the te perature on the
ther ostat knob before selecting any of
the functions.
All the functions entioned above, switch
the oven light on. A warning light on the
control panel will stay lit until the selected
te perature is reached; after it will light up
inter ittently.
The oven i fitted with:
a lower heating ele ent;
an upper heating ele ent;
a circular heating ele ent surrounding
the fan.
To obtain an oven te perature between
60°C and MAX°C, turn the knob
clockwise (FIG. 5).
Oven thermo tat knob
Oven elector knob
FIG. 5
FIG. 6
Oven lamp
When you turn the control knob to this
position, the light will be on for all the
following operations.
Defro ting with fan
The air at a bient te perature is
distributed inside the oven for defrosting
food faster.
Natural convection
Both the lower and upper heating
ele ents operate together.
This is the traditional cooking, very good
for roasting joints, ideal for biscuits, baked
apples and crisping food.
You obtain very good results when
cooking on a shelf adjusting the
te perature between 60 and MAX°C.
Fan oven
Both the fan and the circular heating
ele ent operate together. The hot air is
adjustable between 60 and MAX°C and
is evenly distributed inside the oven. This
is ideal for cooking several types of food
( eat, fish etc) at the sa e ti e without
affecting taste and s ell. It is ideal for
delicate pastries.
The appliance ust be used with
the oven door closed.
Medium grill
It is ideal for grilling and gratinating s all
quantities of traditional food. The
ther ostat knob ust be placed on the
axi u position.
Full grill
It is ideal for grilling and gratinating
traditional food. Set the ther ostat control
knob to the 200°C position.
Thermal grilling
The air which is heated by the grill
ele ent is circulated by the fan which




60
100
150
200
ax
distributes the heat on the food. The fan
assisted grill function can replace the
need to use the rotisserie. You can obtain
very good results also with large quantities
of poultry, sausage, red eat. Set the
ther ostat control knob to the 200°C
position.
Air forced lower heating element
The air which is heated by the lower
heating ele ent is circulated by the fan
which distributes the heat on the food .
This function can be used between 60°
and MAX°C.
13ENGLISH
Minute minder
Press the ode button until L3 flashes,
then set the desired cooking ti e using
the and buttons. The setting
range is fro 0.01 to 2.30 h. The display
will show the set ti e and L3 will re ain
lit. At the end of the set ti e, an acoustic
signal sounds (two signals every two
seconds) and L3 flashes. Press any
button to stop the acoustic signal and
switch off L3.
Cooking time
Press the ode button until L1 flashes.
Set the desired cooking ti e using the
and buttons (the setting range is
fro 0.01 to 10.00h): after five seconds
the cooking ti e is stored and L1 re ains
Cooking time and cooking end time
Press the ode button until L1 flashes.
Set the desired cooking ti e as described
at Cooking time. Press the ode
button until L2 flashes then set the
desired cooking end ti e as described
in the paragraph cooking time.
The oven will begin cooking based on
the calculation of cooking end ti e inus
cooking ti e. For exa ple, if cooking
end ti e is set at 12.00 and a cooking
ti e of 1.30h is set, the oven will begin
cooking at 10.30 and will switch off at
12.00.
Cancelling programmer
Progra es can be cancelled at any
ti e by re-selecting the previously
selected functions and resetting the ti e
to zero using button .
The ti e of day cannot be set while an
auto atic progra e is in progress.
lit. After the set ti e has elapsed the
oven switches off auto atically, an
acoustic signal sounds (four signals every
two seconds) and L1 flashes. Press any
button to stop the acoustic signal and
switch off L1.
Cooking and timer
Press the ode button until L2 flashes.
Set the desired cooking end ti e ( ax.
23.59) using buttons and : after
five seconds the ti e is stored and L2
re ains lit. At the set ti e the oven
switches off auto atically, an acoustic
signal sounds (four signals every two
seconds) and L2 flashes. Press any
button to stop the acoustic signal and
switch off L2.
Set the clock functions
L1-L2-L3-L4 led indicators
Mode
Cook time
End Time Clock
Timer
L1 L2
L3 L4
14
USING THE ACCESSORIES
In erting the drip-tray
Insert the drip-tray between the side
guides, on one of the oven levels
(FIG. 7).
In erting the helf
Insert the shelf between the side gui
des, on one of the oven levels.
There are two indentations on the side
edges of the shelf. This shape prevents
the grill fro overturning.
To re ove the shelf fro the oven,
pull it outward, tilting it up.
4
3
2
1
FIG. 7
FIG. 8
I portant! According to the newest
scientific knowledge, if you brown food
(specially the one which contains
starch), acryla ides can pose a health
risk. Thus, we reco end that you
cook at the lowest te peratures and
do not brown food too uch.
Information on acrylamide
HELPFUL HINTS AND TIPS
5









WARNING!
Refer to "Safety infor ation"
chapter.
General in truction
The new oven can cook/roast
differently with respect to the oven
previously used.
Therefore, it is advisable to adapt the
basic settings nor ally use (te pera
ture, cooking ti es, etc.) and the
activation levels according to that given
in the tables.
In case of prolonged cooking ti es,
the oven ay be switched off about
10 inutes beforehand, in order to
exploit the residual heat.
With frozen foods, the plates used
can beco e buckled during cooking.
The buckling should disappear once
the plates have cooled. Using the
cooking tables
It is advisable to set the lowest
te perature value the first ti e.
For personal recipes not entioned
a ong those in the tables, use the
values given for si ilar recipes.
For baking cakes on several levels,
the ti e required ay increase by 10-
15 inutes.
Food and cakes of different heights
ay show different a ounts of
browning at the start of
baking / cooking. If so, do not change
the te perature setting. These
differences are reduced during
baking/cooking.
15ENGLISH
Conventional cooking table
Di h Temp. °C. Minute
Fi h 180-240 acc. to size
Meat
Roast beef 250 30 per kg.
Roast veal 200-220 30 per kg.
Chicken 200-240 50 about
Duck and goose 220 acc. to weight
Leg of utton 250 30 per kg.
Roast pork 250 60 per kg.
Soufflés 200 60 per kg.
Sweet (pa trie )
Tea-cake 160 50-60
Sponge finger 160 30-50
Shortcrust pastry 200 15
Puff pastry 250 15
Fruit flan 200-220 30
Meringues 100 60
Quiches, etc. 220 30
Quick sponge 120-140 60
Buns 160-180 45
16
Fan oven cooking table
Di h Temp. °C. Minute Weight kg.
Fir t cour e
Lasagne 200-220 20-25 0,5
Oven-baked pasta 200-220 25-30 0,5
Creole rice 200-230 20-25 0,5
Pizza 210-230 30-45 0,5
Meat
Roast veal 160-180 65-90 1-1,2
Roast pork 160-170 70-100 1-1,2
Roast beef 170-190 40-60 1-1,2
Roast beef joint 170-180 65-90 1-1,2
Roast fillet beef (rare) 180-190 40-45 1-1,5
Roast la b 140-160 100-130 1,5
1-1,2
1,5-2
3-3,5
5 approx.
2 approx.
2 approx.
Roast chicken
Roast duck
Roast goose
Roast turkey
Roast rabbit
Roast hare
Fish
Sweet (pa trie )
Fruit flan
Plain sandwich cake
Sponge sandwich cake
Sponge cake
Currant cake
Buns
Strûdel
Crea slices
Apple fritters
Sponge finger pudding
Sponge finder biscuits
Toasted sandwiches
Bread
180
170-180
160-180
160-170
160-170
170-180 .
160-180
180-200
160-180
200-220
200-230
230-250
170-180
160
180-200
180-200
170-180
150-180
230-250
200-220
70-90
100-160
120-160
160-240
80-100
30-50 .
acc. to weight
40-50
35-45
40-45
25-35
30-40
40-60
25-35
20-30
18-25
30-40
50-60
7
40
17ENGLISH
OVEN - CARE AND CLEANING
The interior gla of the oven
The interior glass of the oven door can
be re oved: with the door in a se i-
open position, re ove the screws A and
B and the profi e C as shown in fig. 9
Use both hands to re ove the glass as
shown in figures 9A.
After cleaning, refit the glass by
proceeding in reverse order.
FIG. 9
FIG. 9A






B
A
C
Warning! Before you clean the
appliance, switch it off. Make
sure that the appliance is cold.
Warning! Do not clean the
appliance with stea cleaners
or high-pressure cleaners.
Caution! Do not use corrosive
or scouring cleaning agents,
sharp objects, stain re overs or
abrasive sponges.
Warning! Do not clean the glass
door with abrasive cleaning
agents or etal scraper. Heat
resistant surface of the inner
glass can da age.
Caution! If you use an oven
spray, follow the instructions fro
the anufacturer.
Clean the front of the appliance with
a soft cloth with war water and
cleaning agent.
To clean etal surfaces use a usual
cleaning agent
Clean the oven interior after each use.
Thus you can re ove dirt ore easily
and it does not burn on.
Clean stubborn dirt with a special oven
cleaner.
Clean all oven accessories (with a soft
cloth with war water and cleaning
agent) after each use and let the dry.
If you have nonstick accessories, do
not clean the using an aggressive
agents, sharp edged objects or
dishwasher. It can destroy nonstick
coating!
Stainle teel or aluminium
appliance :
Clean the oven door with a wet
sponge only. Dry it with a soft
cloth. Do not use steel wool,
acids or abrasive aterials as
they can da age the oven
surface. Clean the oven control
panel with the sa e precautions
Removal of oven door
In-depth cleaning of the oven beco es
ore convenient if the door is re oved
following the instructions below:
1 open the oven door co pletely.
2 flip the hinge hooks "A" outwards (see
FIG. 9B).
3 shut the oven door slowly until it
reaches hooks "A", aking sure these
are locked into slots "B" of the oven
door, as shown in FIG. 9C. Re ove
the glass FIG. 9A (only for odels
where present).
4 Using both hands, push the oven door
lightly inwards, toenable the door
hinges "C" to co e away fro the
slots "D" (see FIG. 9D) and pull the
door towards you until it is released
fro the oven.
After cleaning it, reposition it correctly
following the abovesteps in the reverse
order and flipping hooks "A"
inwardsbefore you shut the oven door
(FIG. 9E).
18
AA
A
B
C
D
FIG. 9B
FIG. 9C
FIG. 9D
FIG. 9E
A
A
FIG. 9F
The oven shelf carriers can be re oved
for easier cleaning. To do this, re ove
all the shelves and spring off the side
carriers by applying pressure downwards
to unhook the top (FIG. 9F).
Replace in a si ilar anner.
19ENGLISH
WHAT TO DO IF
Do not leave the dishes in
the oven for longer than 15-
20 inutes after the cooking
process ends.
The appliance does not
operate.
The fuse in the fuse box is re-
leased.
Control the fuse. If the fuse
is released ore than one
ti e, refer to a qualified
electrician.
The appliance does not
operate.
The appliance is too hot. Cool down the appliance for
so e hours
The grill, burners, ovens
and ti er do not work.
There is no electrical supply. Make sure that the unit is
connected and the electrical
supply is switched on.
The grill, burners, ovens
and ti er do not work.
There is no electrical supply. Exa ine the house
electrical installation fuse.
The oven does not work. Ti e is not set. Set the ti e
There is no spark when
lighting the gas.
Burner cap and crown are
placed uneven.
Make sure that the burner
cap and crown are in correct
positions.
The fla e is blow out
i ediately after ignition
Ther ocouple is not heated
sufficient.
After lightning the fla e,
keep the knob pushed for
approxi ately 5 seconds.
The gas ring burns
unevenly.
Burner crown is blocked with
food residue.
Make sure that the injector
is not blocked and the
burner crown is clear of food
particles or cleaning fluids.
Dry the with a cloth and
clean stubborn arks away
with a dry nylon brush (for
exa ple an old toothbrush).
The oven does not heat
up.
The oven is not switched on. Switch on the oven.
The oven does not heat
up.
The necessary settings are not
set.
Control the settings.
The oven does not cook
evenly.
Check that the appliance is
correctly installed and
levelled, and that you use
the reco ended te pe-
ratures and shelf positions.
The oven la p does not
operate.
The oven la p is defective. Replace the oven la p.
The display shows
'12.00 and "LED".
A power cut. Reset the clock.
Stea and condensation
settle on the food and in
the oven cavity.
You left the dish in the oven for
too long.
Problem Po ible cau e Remedy
20
INSTALLATION
Warning !
Do not use the oven door handle
to ove the appliance, such as
to re ove it fro the
packaging.The appliance is in
class 1 or class 2 subclass 1.
Warning !
The cooker ust not be placed
on a pedestal.
Dimen ion
Height 900
Width 895
Depth 600
The appliance akes
noises or popping sounds.
When the gas is drawn
through the burner, it can
co press as they heat up.
So e etal parts of the
appliance expand and
contract when they heat up
or cool down. The noises
are nor al.
The fla e colour is orange
or yellow.
The fla e can look orange
or yellow (fla e disturban-
ce) in so e areas of the
burner because of how the
burner is ade. This is
nor al.
Problem Po ible cau e Remedy
If you cannot find a solution to the
proble yourself, contact your dealer
or the service centre.
We reco end that you write the
data here:
Model (MOD.)
Product nu ber (PNC)
Serial nu ber (S.N.)
The necessary data for the service centre
is on the rating plate. The rating plate is
on the front fra e of the oven cavity.
.........................................
.........................................
.........................................
Important! First read "Safety
infor ation" chapter carefully.
Technical Data

Other manuals for 47009GO-MN

1

Other AEG Cooker manuals

AEG E 640 TG User manual

AEG

AEG E 640 TG User manual

AEG COMPETENCE 30006VE User manual

AEG

AEG COMPETENCE 30006VE User manual

AEG UH 6.30 User manual

AEG

AEG UH 6.30 User manual

AEG Competence 765 E User manual

AEG

AEG Competence 765 E User manual

AEG EHC 60 DU User manual

AEG

AEG EHC 60 DU User manual

AEG BX 8.31 User manual

AEG

AEG BX 8.31 User manual

AEG DBE5970MM User manual

AEG

AEG DBE5970MM User manual

AEG 30006VL User manual

AEG

AEG 30006VL User manual

AEG FN 6.19 E User manual

AEG

AEG FN 6.19 E User manual

AEG EH 64 DG User manual

AEG

AEG EH 64 DG User manual

AEG FH 64.1GD User manual

AEG

AEG FH 64.1GD User manual

AEG COMPETENCE 3201 F User manual

AEG

AEG COMPETENCE 3201 F User manual

AEG HK604200IB User manual

AEG

AEG HK604200IB User manual

AEG Competence 3180 V User manual

AEG

AEG Competence 3180 V User manual

AEG 49002VMN User manual

AEG

AEG 49002VMN User manual

AEG E 64.1 KLF User manual

AEG

AEG E 64.1 KLF User manual

AEG COMPETENCE 5210V User manual

AEG

AEG COMPETENCE 5210V User manual

AEG E 64 D User manual

AEG

AEG E 64 D User manual

AEG COMPETENCE 5210V User manual

AEG

AEG COMPETENCE 5210V User manual

AEG Competence 5211 V User manual

AEG

AEG Competence 5211 V User manual

AEG CGB6130ACM User manual

AEG

AEG CGB6130ACM User manual

AEG EBUV 880 H User manual

AEG

AEG EBUV 880 H User manual

AEG Competence 5730 V User manual

AEG

AEG Competence 5730 V User manual

AEG 17166GM-MN User manual

AEG

AEG 17166GM-MN User manual

Popular Cooker manuals by other brands

Hotpoint DSC60S S Instructions for installation and use

Hotpoint

Hotpoint DSC60S S Instructions for installation and use

Bosch HGW3FSV5 S Series User manual and installation instructions

Bosch

Bosch HGW3FSV5 S Series User manual and installation instructions

Parkinson Cowan Lyric L55GSWN Operating and installation instructions

Parkinson Cowan

Parkinson Cowan Lyric L55GSWN Operating and installation instructions

Dacor DOP36 86G Series installation manual

Dacor

Dacor DOP36 86G Series installation manual

STOVES EC600EMDOa User & installation instructions

STOVES

STOVES EC600EMDOa User & installation instructions

Bosch PKE611BA2E installation instructions

Bosch

Bosch PKE611BA2E installation instructions

Blanco BFS95W Instructions for the use and care and installation

Blanco

Blanco BFS95W Instructions for the use and care and installation

Whirlpool ACMT 6332/IX/1 operating instructions

Whirlpool

Whirlpool ACMT 6332/IX/1 operating instructions

Bosch HGA233120I instruction manual

Bosch

Bosch HGA233120I instruction manual

Indesit I5GSH0G/UA operating instructions

Indesit

Indesit I5GSH0G/UA operating instructions

privileg 5010CE2.313eETaDJXv user manual

privileg

privileg 5010CE2.313eETaDJXv user manual

Bosch Fornuis HGD7251 0N Series instruction manual

Bosch

Bosch Fornuis HGD7251 0N Series instruction manual

Linea 2000 DOMO DO328IP Instruction booklet

Linea 2000

Linea 2000 DOMO DO328IP Instruction booklet

Baumatic BCG600SS instruction manual

Baumatic

Baumatic BCG600SS instruction manual

Bartscher 105927 manual

Bartscher

Bartscher 105927 manual

KBS Ready 700 Series manual

KBS

KBS Ready 700 Series manual

Modena BV 3435 User manual book

Modena

Modena BV 3435 User manual book

Glen EasyCook user guide

Glen

Glen EasyCook user guide

manuals.online logo
manuals.online logoBrands
  • About & Mission
  • Contact us
  • Privacy Policy
  • Terms and Conditions

Copyright 2025 Manuals.Online. All Rights Reserved.