2 | P a g e
INTRODUCTION
Congratulations on your purchase of Aeroflow Performance universal transmission oil cooler. Aeroflow Performance products
cannot and will not be responsible for any damage, or other conditions resulting from misapplication of the parts described
herein. However, it is our intention to provide the best possible products for our customer, products that perform properly and
satisfy your expectations. Should you have any questions? Please call technical support at +61 2 8825 1900 and have the product
part number on hand when calling.
The Aeroflow Performance transmission oil cooler is designed to cool the automatic transmission oil during sustained high-speed driving,
pulling heavy loads, racing or any other torque converter stress. The cooler will guard against excessive overheating, but will not overcool the
transmission in winter weather.
This product is designed for universal applications. It is anodised in a black finish. Both inlet and outlet ports are male 3/8” ( 9.52mm ) barbs.
The dimensions of this oil cooler are:
Length - 278mm (10.94”)
Depth - 40mm (1.57”)
Height - 182mm (7.16”).
This oil cooler is a stack plate cooler and features 22 rows that are fully brazed on all contact surfaces inside and outside. Furthermore, they
have also had a brazed seam that can withstand vibrations and pulsations in all types of applications. This Aeroflow Performance cooler will
help protect your transmission and transmission oil from overheating but it cannot correct a faulty or worn transmission.
When mounting this product ensure to clean out inside of the cooler and that it is free of any aluminium chips or burrs that could become
dislodged in operation. We recommend the use of the mounting kit that is included when using any transmission cooler. This will provide a
solid and stable mounting platform to secure the cooler in place when in use.
When selecting the best location for the oil cooler.
I. Make sure the oil cooler has sufficient ground clearance to avoid anything that could piece the oil cooler from road debris
or road surface contact.
II. This cooler relies on air flow for heat transfer and requires a location which will receive maximum air flow.
III. If mounting in front of radiator or condenser care should be taken to mount the cooler at least ¼”, the mounting should be
rigid and should never allow the cooler to contact either the radiator or condenser.
IV. Ensure the transmission cooler has a clear path for air to flow through cooler itself to allow the cooler to correctly
function. If this is not possible add a fan to do the job or purchase the Aeroflow Performance competition oil cooler (AF72-
6000, AF72-6001)
V. The oil cooler can be mounted vertically and horizontally for your convenience. Also, oil may flow in and out in either of
the ports.
VI. Always utilizing all mounting points when mounting this oil cooler to ensure it does not dislodge during use.
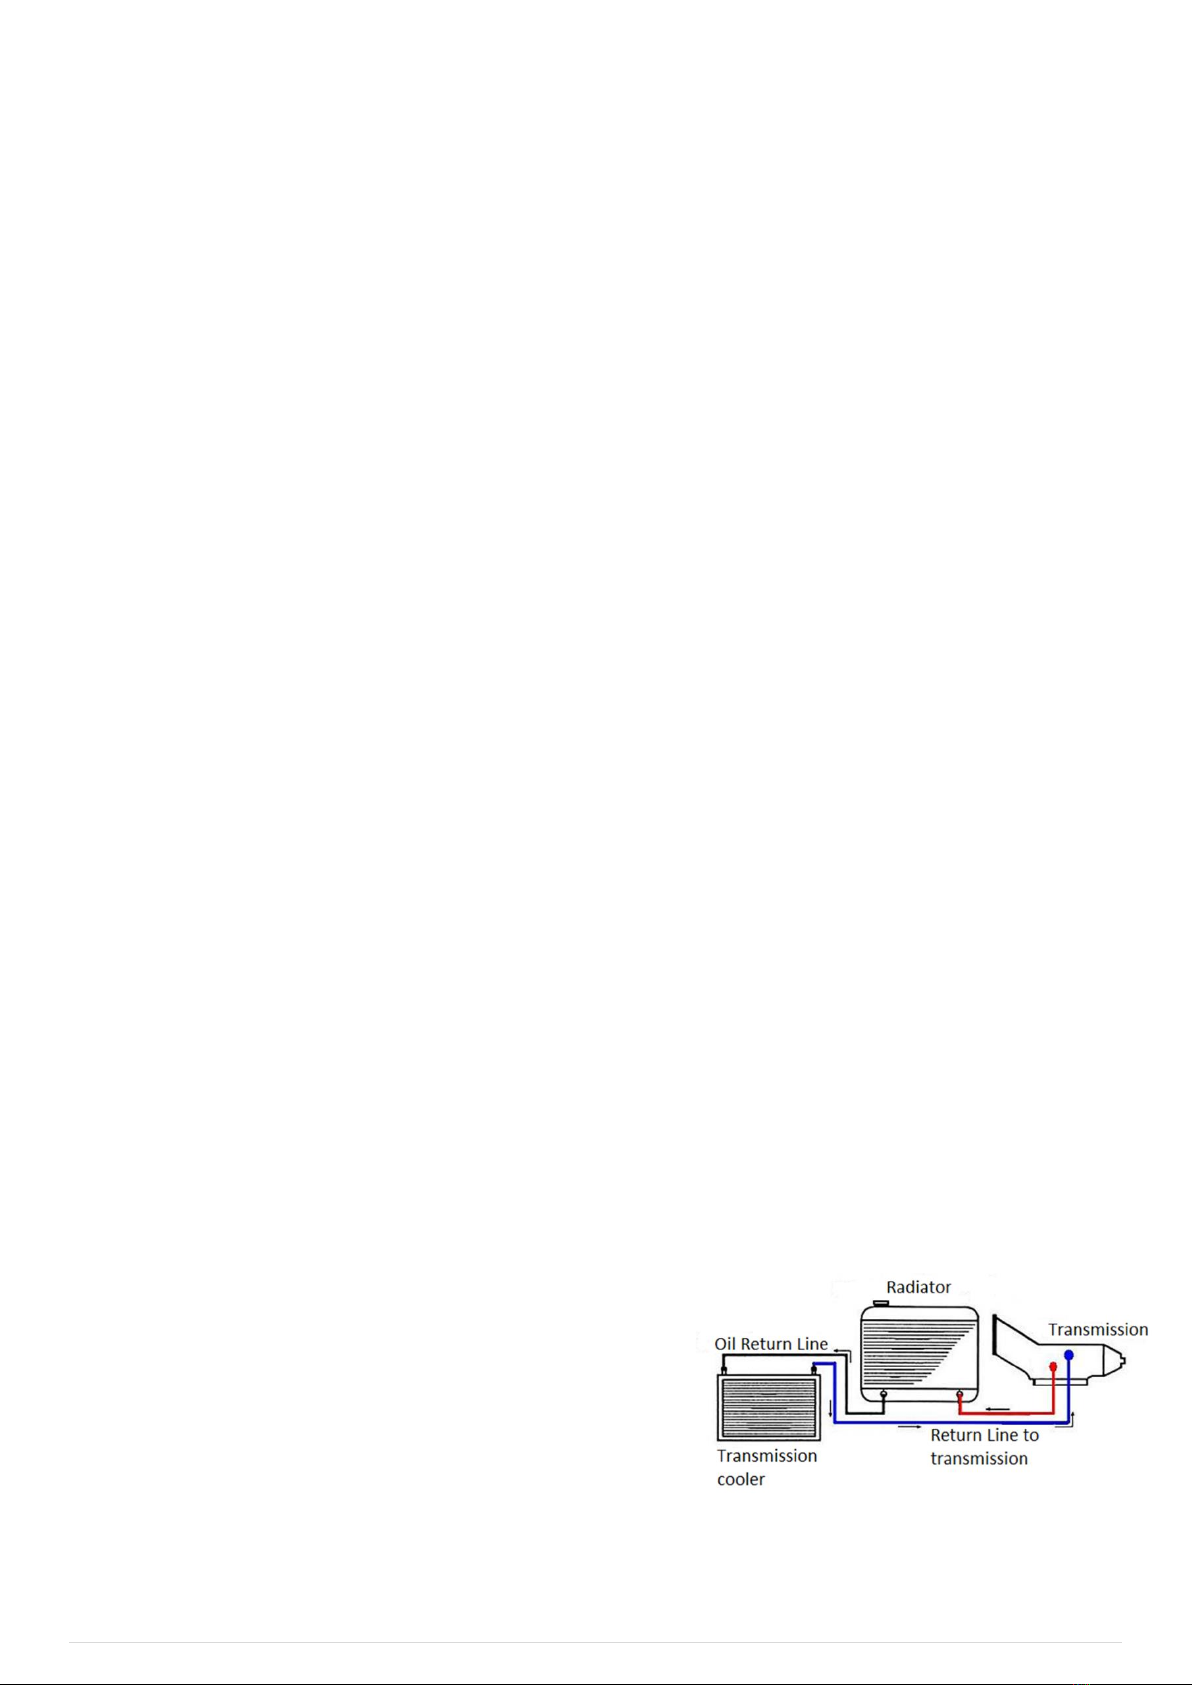
Before Installation of this transmission cooler is done it is recommended to identify the transmission oil flow direction from OEM to allow the
system to operate at maximum efficiency.
One method is outlined below:
1. Place a container under the transmission oil line and
disconnect the oil line at the radiator.
2. Place a short piece of rubber hose over the top of the
radiator hose barb or fitting.
3. Place this rubber hose into the container and start the engine
and let it run at idle.
4. Determine which line the oil is coming from.
5. Stop the engine immediately.
6. If the oil came from the radiator during the test, the line is
disconnected is the return line.