Io with Volume Controls
One Phono Input & One Line Input
Rev 1.20 2019-11-27
1
Important Note One: Never change inputs between line and phono with the volume controls
up. Always ensure the volume controls are at their minimum (fully counter-clockwise) setting
before changing inputs. Unless the volume controls are at their minimum setting, a loud
discharge will occur that can potentially damage speakers.
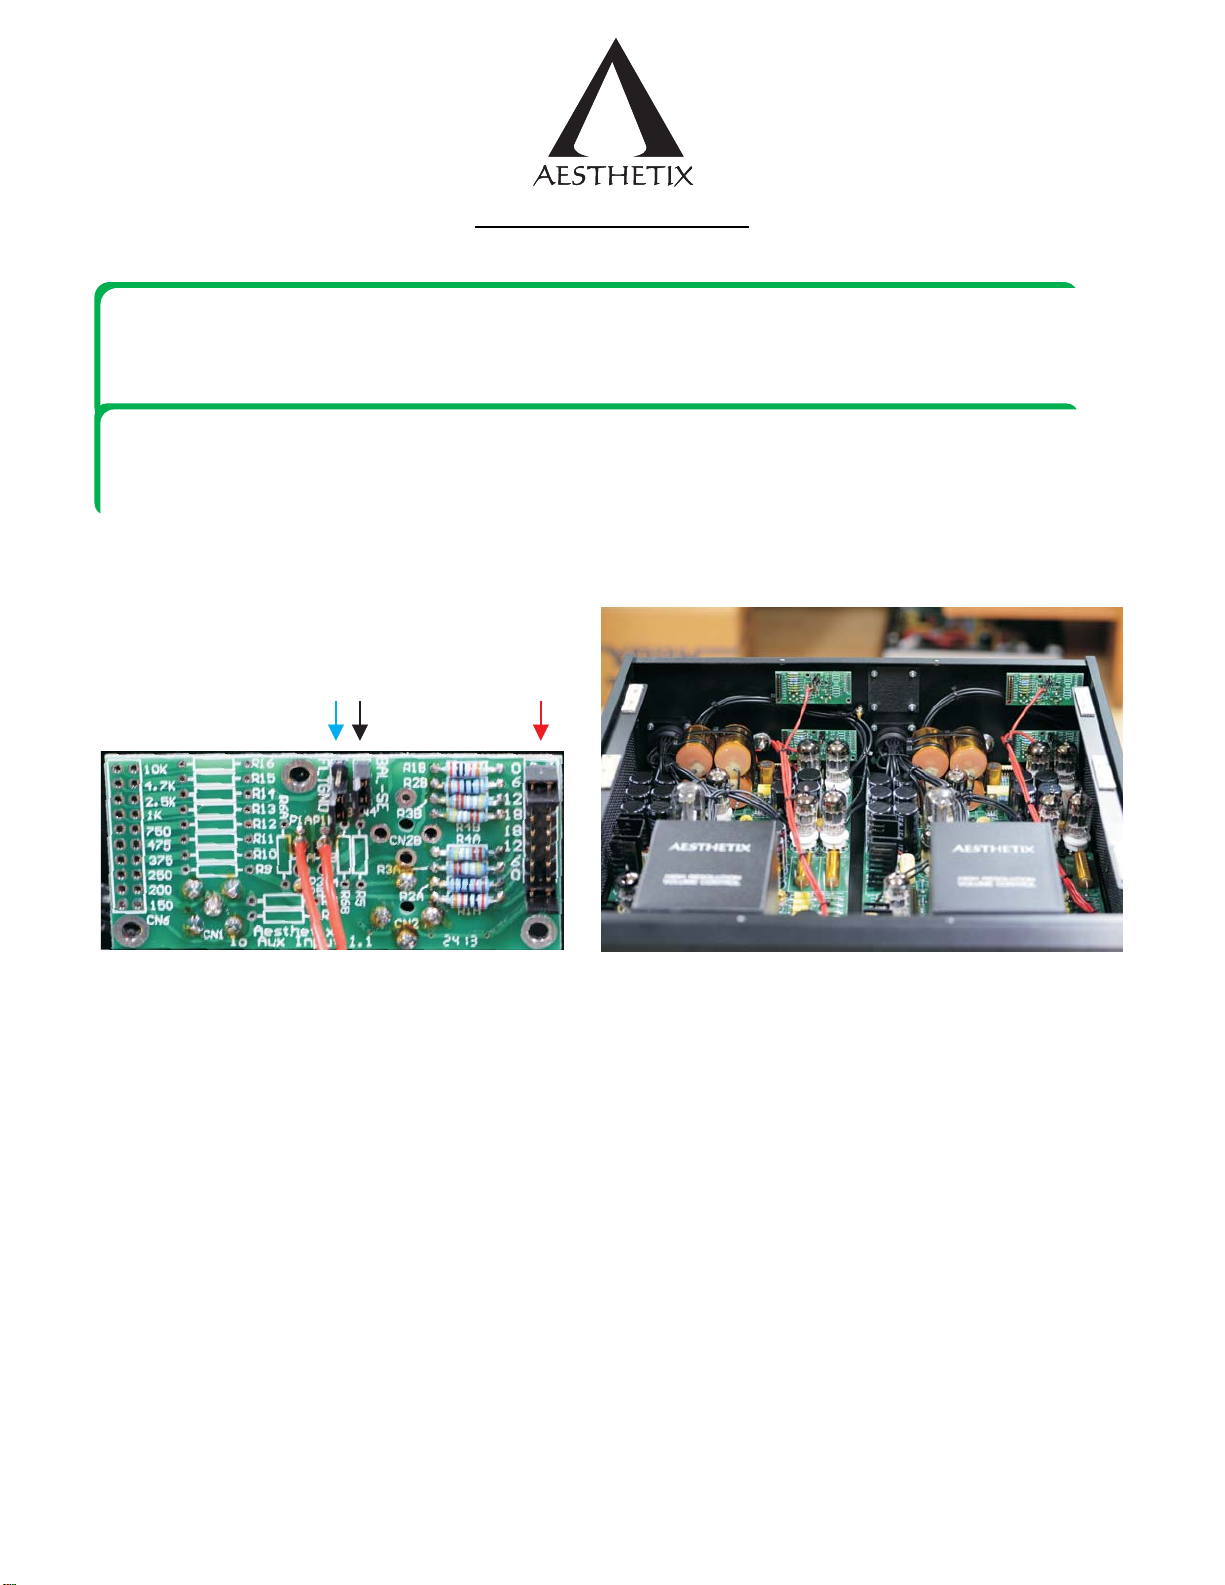
An Io with volume controls configured with one phono input and one line input can have two Aux Input
boards (one for left, one for right) shown at the rear of the unit in the below photo (right).
The picture below shows a close-up of the Aux
Input board.
A traditional line section has the following structure:
Volume control – gain stage – output stage
It is nearly impossible to overload the gain stage with the above structure. However, the noise level
remains constant regardless of volume setting.
The gain structure of the line input section of Io is:
Gain stage – volume control – output stage
The gain stage can be overloaded with this structure, leading to high levels of distortion. However, the
noise level of the gain section is attenuated by the volume control, leading to extremely high signal to
noise ratios (low noise). The Aux Input board provides attenuation tailored to the connected source
component (CD player, etc) to prevent overloading the gain stage. When properly configured, this
structure leads to extremely high levels of performance from the line section.
Important Note Two: Never change the below settings with the Io on. Always turn off the Io
and wait 20 minutes before altering internal settings. This allows the power supplies to fully
discharge. If in doubt, refer to your qualified Aesthetix dealer or the factory.