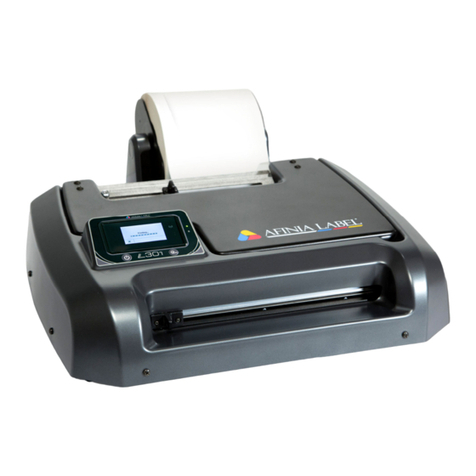
Afinia L301 User manual

Afinia L301
Label Printer
User Manual
Version 1.0.2

Afinia Label
Copyright © 2016 Afinia. All rights reserved.
No part of this docu ent ay be photocopied, reproduced, or translated to another language without the prior written
per ission of Afinia.
Trademarks
Firefox is a trade ark of the Mozilla Foundation.
Intel and Intel Core are trade arks of Intel Corporation in the U.S. and/or other countries.
Java and Oracle are registered trade arks of Oracle and/or its affiliates.
Microsoft, Windows, Windows Vista, and Windows Server are registered trade arks of Microsoft Corporation in the U.S.A.
and/or other countries.
Edition
L301 Printer User Guide Edition 1.0. Dece ber 2016.
FCC
This device co plies with Part 15 of the FCC rules. Operation is subject to the following two conditions: (1) this device ay not
cause har ful interference, and (2) this device ust accept any interference received, including interference that ay cause
undesired operation.

L301 Label Printer
3
Table of Contents
Setting up the Printer .................................................................................................................................... 5
In the Box .................................................................................................................................................. 5
Parts of the Printer .................................................................................................................................... 6
The Control Panel ...................................................................................................................................... 7
Unpacking, Setup, and Installation ........................................................................................................... 8
Re ove Tape and Foa ........................................................................................................................ 8
Connect Power ...................................................................................................................................... 8
Install Ink Cartridges ............................................................................................................................. 9
Install Standard Unwinder .................................................................................................................... 9
Install Printer Driver ............................................................................................................................ 10
Connect USB ........................................................................................................................................ 10
Using the Printer ......................................................................................................................................... 11
Choosing Label Media ............................................................................................................................. 11
Using the Unwinder ................................................................................................................................ 13
Loading Media ......................................................................................................................................... 14
Unloading Media ................................................................................................................................. 14
Ho e Screen ....................................................................................................................................... 15
Using the Control Panel .......................................................................................................................... 15
Check Ink Levels .................................................................................................................................. 15
Printing Labels ......................................................................................................................................... 15
Help Screen ......................................................................................................................................... 15
Setup Screen ....................................................................................................................................... 15
Printer Preferences ............................................................................................................................. 16
Adjusting Align ent for Printing ........................................................................................................ 17
Selecting Media Size ........................................................................................................................... 18
Creating Custo Media Sizes .............................................................................................................. 19
Selecting Media Type .......................................................................................................................... 19
Change Default Settings in Printer Driver ........................................................................................... 19
Using the Manual Cutter ......................................................................................................................... 20
Canceling a Print ..................................................................................................................................... 20
Out of Paper ............................................................................................................................................ 21
Wrong Media .......................................................................................................................................... 21
End of Roll ............................................................................................................................................... 21
Shutting Down the Printer ...................................................................................................................... 22
Software Tools ........................................................................................................................................ 23
Afinia Toolbox ..................................................................................................................................... 23
Printer Maintenance ................................................................................................................................... 25
Guidelines for Preventative Maintenance .............................................................................................. 25
General dust and debris re oval ........................................................................................................ 25
Cutter Maintenance ............................................................................................................................ 25
Media Path Roller Maintenance ......................................................................................................... 26
Sensor Maintenance ........................................................................................................................... 27
Pinch Roller Maintenance ................................................................................................................... 27
Replacing an Ink Cartridge ...................................................................................................................... 28
(continued…)

4 | Setting up the Printer
Troubleshooting .......................................................................................................................................... 29
Control Panel LEDs .................................................................................................................................. 29
Poor Print Quality or Incorrect Printout ................................................................................................. 30
Clearing a Media Ja .............................................................................................................................. 32
Technical Support ................................................................................................................................... 33

Afinia Label
5
Chapter 1
Setting up the Printer
In the Box
Power Supply and Cord
USB Cable
Installation Disc
Afinia L301 Label Printer
Standard Unwinder
(includes 2 thu bscrews)
Ink Cartridges
(Tricolor 26548,
Black 26562)
Quick Setup Guide

Afinia Label
6 | Setting up the Printer
Parts of the Printer
Standard
Unwinder
(shown not
installed)
Ink Cartridge
Access Door
Control Panel
and Touchpad
Label Cutter
Label
utput
Front view
Label Guide
Power Connection
USB Connection
Rear view
Unwinder
Mounts
Paper Path
Release
Label Input

L301 Label Printer
Setting up the Printer | 7
Power Button
Touch Panel
Status LEDs
Unload Media
The Control Panel
The control panel includes the Power button, the Unload Media button, the two Status
LEDs, and the Touch Panel including various controls and functions. For exa ple:
• Press Help on the Touch Panel.
• Press Printer Information to view the printer na e, odel, serial nu ber, and
fir ware version.
• Press to go back
one level, or
• Press to return to the
Ho e screen.
• Full list of touchpad
functions on page 15

Afinia Label
8 | Setting up the Printer
Unpacking, Setup, and Installation
Re ove Tape and Foa
• Lift Printer and foa endcaps fro the box
• Re ove the foa endcaps fro the printer and unwinder
• Re ove the packaging tape fro the printer cover (x2), label guide (rear), and
cutter (front)
• Re ove the packaging tape fro the unwinder
Connect Power
Connect
the Power Supply to
the Printer
Rear of Printer, right side
Press Power button
on Control Panel

L301 Label Printer
Setting up the Printer | 9
Install Ink Cartridges
• Open the Ink Cartridge Access Door
o Carriage will ove left to expose
both cartridges
• Re ove plastic tape fro cartridges using pull tab
• Lift the two cartridge latches after the carriage
oves to the left
• Insert the two cartridges into the carriage
o Tricolor: # 6548
o Black: # 656
o Must be Afinia ink cartridges!
Lower the cartridge latches until they click
• Close the Ink Cartridge Access Door
Install Standard Unwinder
Connect the Standard Unwinder to the ounts on the rear of the printer using the two
supplied thu bscrews.
Unwinder
Mounts

Afinia Label
10 | Setting up the Printer
Install Printer Driver
Run Setup.exe fro the included software CD to install the drivers
and the Toolbox.
This should be done before connecting the printer to a PC.
During installation, three windows
ay appear asking for confir ation
before installing drivers. Click Install
on each.
You can avoid the last two windows by
checking the option to Always trust
software from Microboards
Technology LLC in the first window.
Connect USB
Connect the USB to the
Printer
and co puter
Rear of Printer, right side
Install the Print Drivers and Toolbox
BEFORE
connecting to the computer

L301 Label Printer
11
Chapter
Using the Printer
Choosing Label Media
Ensure that the label edia eets the require ents for the printer:
Table 1: Media Specifications
Media Type and Dimensions
Media type Inkjet-printable coating req ired
Gloss, se i-gloss, and atte
Label width Standard Unwinder: 2.0” to 6” (50.8 to 152.4 )
Powered Unwinder*: 2.0” to 8.5” (50.8 to 215.9 )
Label length Mini u 2” (50.8 )
Maxi u 48” (1.016 )
Label thickness Maxi u 0.01” (0.3 , including liner)
Mini u 0.005” (0.13 )
Media Handling
Print ode Roll to cut ( anual cutter)
Roll to roll
Roll Specifications
Figure 1 Minimum Maximum
I
Requires 3.0” (76.0 ) cardboard core
J
N/A Standard Unwinder: Maxi u 6” (152.4 )
Powered Unwinder: See your unwinder specs
*
Powered unwinder is an optional feature and is not included in the Standard package
Figure 1: Media Roll
Coating on the
outside
I
J

Afinia Label
1 | Using the Printer
Figure : Gap (Trans issive) Media
Figure 3: Black Mark (Reflective) Media
Minimum Maximum
A
0.125” (3.0 ) 0.3” (8.0 )
B
0.0 0.5” (12.7 )
C
0.0 N/A
D
2.0” (50.8 ) 6” (152.4 )*
E
2.0” (50.8 ) 48.0” (1.219 )
Minimum Maximum
D
2.0” (50.8 ) 6” (152.4 )*
E
2.0” (50.8 ) 48.0” (1.219 )
H
1.25” (31.75 ) 8.5” (216.0 )
G
0.125” (3 ) 0.3” (8.0 )
Direction of travel through printer
as seen fro above
A
E
B
C
D
Direction of travel through printer
as seen fro below
E
G
H
D
*
With a powered unwinder, axi u is 8.5” (216 )
*
With a powered unwinder, axi u is 8.5” (216 )
E

L301 Label Printer
Using the Printer | 13
Adjustable Core Holder
Fixed Core Holder
Using the Unwinder
Use the Standard Unwinder (included with L301 Label Printer) for rolls of stock that are
6” or less in outer dia eter.
For rolls with an outer dia eter greater than 6”, you will need to use a powered
unwinder (not included).
1. Connect Standard
Unwinder to
back of the
L301 Label
Printer using
the two
supplied
thu bscrews.
2. Lift lever to
release
adjustable core
holder.
3. Slide adjustable core holder away fro fixed holder.
4. Place roll onto fixed core holder with end of stock over the top towards the
printer, stock tight against holder plate.
5. Slide adjustable core holder so core fits on holder and stock is tight against holder
plate.
6. Press lever down to secure adjustable core holder.
Thumb screws
(1 each side)

Afinia Label
14 | Using the Printer
Label Guide
Loading Media
The printer can only be loaded when the green LED is slowly blinking and the red LED is
off.
1. Cut a clean leading edge on edia being loaded
a. No partially peeled labels
b. No folded edges
2. Slide label guide away fro fixed core holder
3. With printer on, feed the stock into input slot
a. Stock should be as far towards the fixed core holder side as possible
4. Once stock is in a few inches, printer will advance the stock
5. When stock starts
loading, adjust label
guide so it is against
edge of stock.
Unloading Media
Cut off printed labels before unloading edia. Unload will not occur if a
cut is required (red LED on).
Press the Unload button to roll edia back to the rear of the printer.

L301 Label Printer
Using the Printer | 15
Using the Control Panel
Go to
Help
screen
Go to
Setup
screen
Check
ink Levels
Ho e Screen
Printer
Information
:
Displays Printer Na e,
Product Nu ber, Serial
Nu ber, Service ID, and
Fir ware Version
Go to
Home
screen
Help Screen
Check Ink Levels
Displays esti ated ink levels for
Tri-color Cartridge (left) and
Black Cartridge (right)
Go to
Home
screen
Go to
Help
screen
OK
Setup Screen
Touch
Tools
to show options
Clean Cartridges
:
Cleans cartridges
Print Quality Report
:
Prints a page to show if
cartridges need cleaning or
replacing. Requires 4” or
wider labels
Go to
Home
screen

Afinia Label
16 | Using the Printer
Printing Labels
The printer is ready to print when the Green status LED is solidly lit and the Red status
LED is off.
If the red LED is flashing, move the cutter all the way right, then back left.
If the red LED is on, move the cutter all the way to the left.
1. Select the Print co and fro your application.
2. Select the L301 printer and click the Setup, Properties or si ilar button.
3. The print settings displayed are the defaults that were set in the printer driver.
4. Change the print settings if needed.
NOTE: Ensure the edia settings (e.g. label size, type) atch the edia loaded in
the printer.
5. Print the docu ent.
Any changes to the settings only apply to the current print job. Make the changes in the
printer driver to set the default for all print jobs.
Printer Preferences
There are three ain tabs in the Printer Preferences
Layout
Select Orientation as Portrait or
Landscape.
For ulti-page docu ents, print order
can be selected using Page Order.
Paper/Quality
Select
Media
type
Select
Quality
Select
Black & White
or
Color
Select
Media
size
(see page 17)

L301 Label Printer
Using the Printer | 17
Left
Offset
Top Offset
+
+
Settings
Set
Top
and
Left
print offsets
(see below)
Select Units of easure ent
Select Media Type
Set
Continuous Gap Size Adjustment
Adds space between continuous labels
Set
Cutter Adjustment
Shifts cutting stop position up or down
Increase offset to ove stop position down,
decrease offset to ove stop position up
• Die Cut
• Black Mark
•
Continuous
Top Offset:
Increase to ove i age down
Decrease to ove i age up
Left Offset:
Increase to ove i age right
Decrease to ove i age left
• Inches
•
Milli eters
Adjusting Align ent for Printing

Afinia Label
18 | Using the Printer
Selecting Media Size
Change the Media Size by going into the Printer Preferences.
1.
Click
Advanced
on the
Layo t or Paper/Q ality
tab
2.
Select the correct entry
fro the Paper Size list
and click
OK

L301 Label Printer
Using the Printer | 19
Creating Custo Media Sizes
Fro Advanced Options:
Selecting Media Type
Select the type of edia accordingly fro the Settings
Printer Preferences tab.
Change Default Settings in Printer Driver
Make changes in the printer driver to set the default for all print jobs.
To select the default print settings that will be used for all print jobs:
1. Fro the Windows Start enu, select Devices and Printers.
2. Right-click the printer and select Printing Preferences.
3. The printing preferences contain three tabs as shown on page 17.
4. Make the changes and click OK to save.
It is reco ended that any adjust ents needed for individual print jobs be ade
during printing rather than changing the defaults.
1.
Click
Manage Custom Sizes
and then Properties
2. Check Create a new form
3. Enter the new Form name
4. Enter the Width and Height
5. Click Save Form, then Close
NOTE: The new size will not be
available until you close the
printer preferences. Open the
preferences again to select the
new size.
1
3
4
5

Afinia Label
0 | Using the Printer
1.
Display reads “Printing…”
. Press cancel (X)
3. Display reads “Canceling…”
4. Wait for labels to eject and stop
Using the Manual Cutter
Canceling a Print
When the print job is co plete
and the labels have stopped
oving, slide the cutter all the
way right, then back to the left.
Tip: Change the Cutter
Adjustment in the Printer
Properties to ove the
cutting position up or
down.
The cutter must be all the way to the left side for
labels to print.
The red LED will be on if the cutter is out of position.
Other manuals for L301
1
Table of contents
Other Afinia Label Maker manuals


