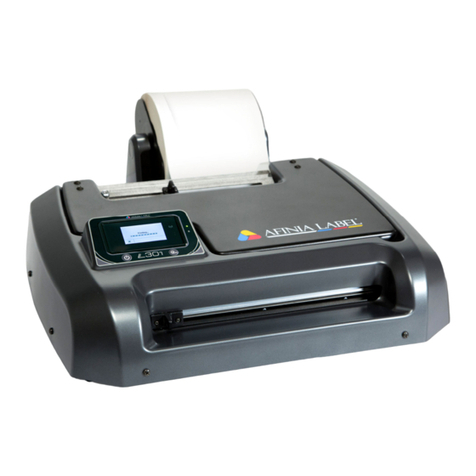
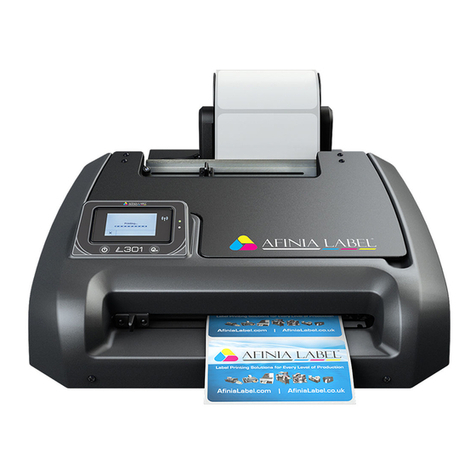
Afinia L901 User manual

Afinia
User Manual
Label Printer
Version1.0
L801 / L801 Plus

2
Copyright©2018AfiniaLabel.Allrightsreserved.
Nopartofthisdocumentmaybephotocopied,reproduced,ortranslatedtoanotherlanguagewithoutthe
priorwrittenpermissionofAfinia.
Trademarks
FirefoxisatrademarkoftheMozillaFoundation.
IntelandIntelCorearetrademarksofIntelCorporationintheU.S.and/orothercountries.
JavaandOracleareregisteredtrademarksofOracleand/oritsaffiliates.
Microsoft,Windows,WindowsVista,andWindowsServerareregisteredtrademarksofMicrosoft
CorporationintheU.S.A.and/orothercountries.
Edition
L801/L801PlusPrinterUserGuideEdition1.0.August2018.
FCC
ThisdevicecomplieswithPart15oftheFCCrules.Operationissubjecttothefollowingtwoconditions:
(1)thisdevicemaynotcauseharmfulinterference,and(2)thisdevicemustacceptanyinterference
received,includinginterferencethatmaycauseundesiredoperation.

3
SafetyPrecautions
ElectricalShockHazard
Donotdisassembleanypartofyourprinter.Therearenouser‐repairablepartsinside
theprinter.Disassemblyofanypartoftheprinterwillvoidallwarranties.
FireHazard
Keeptheprinterwellawayfromallheatsourcesandflammablesubstances.
Switchyourprinteroffimmediatelyandunplugthepowercordfromthewallsocketif
younoticeanyofthefollowing:
•Smokerisingfromtheprinter.
•Anacridsmellcomingfromtheprinter.
•Sparksbeingemittedfromprinter.
Contactyoursupplierassoonaspossible.
WARNING:HazardousMovingParts
Keepfingersandotherbodypartsawayfromtheprinter.
Installation
•Installtheprinteronaflat,levelsurface.
Theprintermustremainlevelatalltimes.Tiltingtheprintermaycauseundue
leakageofinkandmaydamagetheprinter.
•Avoidwidetemperaturevariations.
Installtheprinterinaprotectedlocationawayfromdirectsunlight,openwindows
oranyotherplacessubjecttotemperatureextremes.
PowerSupply
InputRating 100–240VAC,50/60Hz,3.6A
OperatingTemperature 15°Cto35°C
• AlwaysusethePowerbuttononthecontrolpaneltoturntheprinteroff.Removing
powertotheprinterinanyothermannermaydamagetheprinter.
•Useonlythesuppliedpoweradapterandcord.
Useofanyotherpowersuppliesorcordsmaydamagetheprinterandvoidyour
warranty.

4
PrinterUsage
• Ensureadequateventilationtotheprinter.
Blockingventilationopeningsaroundtheprintermaycauseittooverheatand
becomedamaged.
• Keepliquidsandheavyobjectsawayfromtheprinter.
Heavyobjectsmaywarptheoutershell,damagingtheprinter.Liquidsmaydiscolor
ordamagetheskinand,iftheypenetrateit,maydamagetheprinterbeyondrepair.
•Useonlyauthorizedconsumables.
UseofanyprintheadotherthanauthorizedAfiniatechnologyprintheadswill
damagetheprinterandvoidyourwarranty.Useofunauthorizedinksorink
cartridgesmaydamagetheprinterandwillvoidyourwarranty.
•Clearmediajamspromptly.
Toavoidfurtherproblems,promptlyattendtoallmediajams,aswellasanyother
causeofprinterfailure.
•Ifyouaremovingtheprinter,allowsufficienttimeafterinstallationforthe
temperatureandhumidityoftheinternalsoftheprintertoarriveatequilibrium
withthesurroundings.

5
Contents
Safety Precautions . . . . . . . . . . . . . . . . . . . . . . . . . . . . . . . . . . . . . . . . . . . . . . . . . . . . . . . . . 3
Contents. . . . . . . . . . . . . . . . . . . . . . . . . . . . . . . . . . . . . . . . . . . . . . . . . . . . . . . . . . . . . . . . . . .5
Setting Up the Printer . . . . . . . . . . . . . . . . . . . . . . . . . . . . . . . . . . . . . 7
Start. . . . . . . . . . . . . . . . . . . . . . . . . . . . . . . . . . . . . . . . . . . . . . . . . . . . . . . . . . . . . . . . . . . . . . .8
Parts of the Printer . . . . . . . . . . . . . . . . . . . . . . . . . . . . . . . . . . . . . . . . . . . . . . . . . . . . . . . . 9
The Control Panel. . . . . . . . . . . . . . . . . . . . . . . . . . . . . . . . . . . . . . . . . . . . . . . . . . . . . . . . 10
Remove tape and packing materials . . . . . . . . . . . . . . . . . . . . . . . . . . . . . . . . . . . . . . 13
Unpacking, Setup, and Installation . . . . . . . . . . . . . . . . . . . . . . . . . . . . . . . . . . . . . . . 13
Connect power . . . . . . . . . . . . . . . . . . . . . . . . . . . . . . . . . . . . . . . . . . . . . . . . . . . . . . . . . . 14
Install ink cartridges . . . . . . . . . . . . . . . . . . . . . . . . . . . . . . . . . . . . . . . . . . . . . . . . . . . . . 15
Install printhead . . . . . . . . . . . . . . . . . . . . . . . . . . . . . . . . . . . . . . . . . . . . . . . . . . . . . . . . . 15
Load sample media . . . . . . . . . . . . . . . . . . . . . . . . . . . . . . . . . . . . . . . . . . . . . . . . . . . . . . 17
Print test label . . . . . . . . . . . . . . . . . . . . . . . . . . . . . . . . . . . . . . . . . . . . . . . . . . . . . . . . . . . 18
Install printer driver . . . . . . . . . . . . . . . . . . . . . . . . . . . . . . . . . . . . . . . . . . . . . . . . . . . . . 18
Troubleshooting Printer Setup . . . . . . . . . . . . . . . . . . . . . . . . . . . . . . . . . . . . . . . . . . . 20
Change Security Passwords (Administrator) . . . . . . . . . . . . . . . . . . . . . . . . . . . . . 21
Using the Printer. . . . . . . . . . . . . . . . . . . . . . . . . . . . . . . . . . . . . . . . .23
Choosing Label Media. . . . . . . . . . . . . . . . . . . . . . . . . . . . . . . . . . . . . . . . . . . . . . . . . . . . 24
Printing Labels . . . . . . . . . . . . . . . . . . . . . . . . . . . . . . . . . . . . . . . . . . . . . . . . . . . . . . . . . . 27
Selecting the Media Type. . . . . . . . . . . . . . . . . . . . . . . . . . . . . . . . . . . . . . . . . . . . . . . . . 29
Adjusting Alignment for Printing. . . . . . . . . . . . . . . . . . . . . . . . . . . . . . . . . . . . . . . . . 30
Printing Borderless (Full-Bleed) Labels . . . . . . . . . . . . . . . . . . . . . . . . . . . . . . . . . . 32
Color Adjustment Settings . . . . . . . . . . . . . . . . . . . . . . . . . . . . . . . . . . . . . . . . . . . . . . . 33
Import/Export Custom Media Size Settings. . . . . . . . . . . . . . . . . . . . . . . . . . . . . . . 34
Turning Off the Printer. . . . . . . . . . . . . . . . . . . . . . . . . . . . . . . . . . . . . . . . . . . . . . . . . . . 35
Software Tools . . . . . . . . . . . . . . . . . . . . . . . . . . . . . . . . . . . . . . . . . . . . . . . . . . . . . . . . . . 36
Embedded Web Server (EWS). . . . . . . . . . . . . . . . . . . . . . . . . . . . . . . . . . . . . . . . 36
EWS Printer Status. . . . . . . . . . . . . . . . . . . . . . . . . . . . . . . . . . . . . . . . . . . . . . . . . . . 44
EWS Security Setup . . . . . . . . . . . . . . . . . . . . . . . . . . . . . . . . . . . . . . . . . . . . . . . . . . 44
EWS Network Setup . . . . . . . . . . . . . . . . . . . . . . . . . . . . . . . . . . . . . . . . . . . . . . . . . 46
EWS Diagnostics . . . . . . . . . . . . . . . . . . . . . . . . . . . . . . . . . . . . . . . . . . . . . . . . . . . . . 46
Interpreting the Gap/Mark Sensor Readings. . . . . . . . . . . . . . . . . . . . . . . . . . 46
Support Tools. . . . . . . . . . . . . . . . . . . . . . . . . . . . . . . . . . . . . . . . . . . . . . . . . . . . . . . . 47
Printer Maintenance . . . . . . . . . . . . . . . . . . . . . . . . . . . . . . . . . . . . .49
Guidelines for Preventive Maintenance. . . . . . . . . . . . . . . . . . . . . . . . . . . . . . . . . . . 50
Replacing an Ink Cartridge . . . . . . . . . . . . . . . . . . . . . . . . . . . . . . . . . . . . . . . . . . . . . . . 51
Cleaning the Printhead. . . . . . . . . . . . . . . . . . . . . . . . . . . . . . . . . . . . . . . . . . . . . . . . . . . 52
Replacing the Printhead . . . . . . . . . . . . . . . . . . . . . . . . . . . . . . . . . . . . . . . . . . . . . . . . . 53
Opening/Closing the Clamshell. . . . . . . . . . . . . . . . . . . . . . . . . . . . . . . . . . . . . . . . . . . 56
Cleaning Debris from the Cutting Zone . . . . . . . . . . . . . . . . . . . . . . . . . . . . . . . . . . . 57
Cleaning the Sensors. . . . . . . . . . . . . . . . . . . . . . . . . . . . . . . . . . . . . . . . . . . . . . . . . . . . . 58
Cleaning the Media Guide . . . . . . . . . . . . . . . . . . . . . . . . . . . . . . . . . . . . . . . . . . . . . . . . 60

6
Replacing the Service Station . . . . . . . . . . . . . . . . . . . . . . . . . . . . . . . . . . . . . . . . . . . . 61
Replacing the Aerosol Fan Filter . . . . . . . . . . . . . . . . . . . . . . . . . . . . . . . . . . . . . . . . . 64
Replacing the Waste Ink Absorber . . . . . . . . . . . . . . . . . . . . . . . . . . . . . . . . . . . . . . . 65
Troubleshooting . . . . . . . . . . . . . . . . . . . . . . . . . . . . . . . . . . . . . . . . .67
If Error Messages Appear . . . . . . . . . . . . . . . . . . . . . . . . . . . . . . . . . . . . . . . . . . . . . . . . 68
Poor Print Quality or Incorrect Printout . . . . . . . . . . . . . . . . . . . . . . . . . . . . . . . . . . 70
Other Printing Problems . . . . . . . . . . . . . . . . . . . . . . . . . . . . . . . . . . . . . . . . . . . . . . . . . 73
Clearing a Media Jam. . . . . . . . . . . . . . . . . . . . . . . . . . . . . . . . . . . . . . . . . . . . . . . . . . . . . 74
Clearing Clogged Ink Nozzles. . . . . . . . . . . . . . . . . . . . . . . . . . . . . . . . . . . . . . . . . . . . . 74
Color Mixing Recovery . . . . . . . . . . . . . . . . . . . . . . . . . . . . . . . . . . . . . . . . . . . . . . . . . . . 76
Adjusting Sensor Sensitivity . . . . . . . . . . . . . . . . . . . . . . . . . . . . . . . . . . . . . . . . . . . . . 77
Appendix . . . . . . . . . . . . . . . . . . . . . . . . . . . . . . . . . . . . . . . . . . . . . . . .79
System Requirements. . . . . . . . . . . . . . . . . . . . . . . . . . . . . . . . . . . . . . . . . . . . . . . . . . . . 80
Config Options on the Control Panel. . . . . . . . . . . . . . . . . . . . . . . . . . . . . . . . . . . . . . 82
Printer Interface (GPIO) Specifications . . . . . . . . . . . . . . . . . . . . . . . . . . . . . . . . . . . 86
Regulatory Information . . . . . . . . . . . . . . . . . . . . . . . . . . . . . . . . . . . . . . . . . . . . . . . . . . 88
FCC Statement . . . . . . . . . . . . . . . . . . . . . . . . . . . . . . . . . . . . . . . . . . . . . . . . . . . . . . . 88
CE Conformity . . . . . . . . . . . . . . . . . . . . . . . . . . . . . . . . . . . . . . . . . . . . . . . . . . . . . . . 88

Setting Up the Printer 7
Chapter1
SettingUpthePrinter
Start8
IntheBox8
PartsofthePrinter9
TheControlPanel10
UsingtheControlPanel11
SelectingtheSecurityLevel12
Unpacking,Setup,andInstallation13
Removetapeandpackingmaterials13
Connectpower14
Installinkcartridges15
Installprinthead15
Loadsamplemedia17
Printtestlabel18
Installprinterdriver18
TroubleshootingPrinterSetup20
ChangeSecurityPasswords(Administrator)21

8Setting Up the Printer
Afinia
Start
Setuptheprinteronaflat,levelsurfaceawayfromdirectsunlight(seeSafety
Precautionsonpage3).Ensurethatthereis:
•Apoweroutletnearby.
•Sufficientspacetoworkwiththeprinter.Themediacoverandtopcoveropen
upwards,andmedialoadingisfromtheleftsideoftheprinter.
IntheBox
AfiniaL801/L801PlusLabelPrinter
InkCartridges
Printhead
USBCable
PowerCable
InstallationDisc
SampleLabelRoll

L801LabelPrinter
Setting Up the Printer 9
PartsofthePrinter
ControlPanel
TopCover
FrontCover
OutputSlot
MediaCover
GPIOPort
USBPort
EthernetPort
PowerSocket
PowerSwitch

10 Setting Up the Printer
Afinia
TheControlPanel
Theprinterisreadytoprintwhenthecontrolpaneldisplays
PrinterOnline
.TheDataand
StatusLEDstogetherwithmessagesindicatetheprinterstatusandanypotential
problems(Table1).
Thecontrolpanelalsoshowstheestimatedlevelsoftheinkcartridges.Intheexample
below,theyellowinkcartridgelevelisbetween25to50%.
Theiconsabovetheprinterbuttonsindicatetheirfunctions,whichchangedepending
onthecurrentoperation(seeTable2).
Table1PrinterLEDs
Printerisreceivingdatafromthecomputer.
Thereareprintjobsintheprintermemory.
Printer Online
PowerLED
PowerButton
PrinterButtons
DataLED
StatusLED
InkStatus
LED Description
DataLED
Blinking
On
StatusLED
Blinking •Printheadisbeingserviced,or
• Attentionneeded;amessagewillbedisplayed.(SeeIfError
MessagesAppearonpage68.)
On •Anerrorhasoccurred;amessagewillbedisplayed.(SeeIf
ErrorMessagesAppearonpage68.)

L801LabelPrinter
Setting Up the Printer 11
UsingtheControlPanel
Theiconsabovetheprinterbuttonsindicatetheirfunctions(Table2).
•Whentheprinterisonline,press (
Config
)toaccesstheconfigurationmenus.The
optionsaredescribedinConfigOptionsontheControlPanelonpage82.
•Pressand toscrollthroughthemenus.
•Press(
Select
)toselectanoptionorsetting.
•Press(
Return
)toreturntothepreviousmenu.
Printer Online
CONFIGURATION
1. Setup
Table2PrinterButtons
Config AccesstheConfigurationmenus.
Up, Down Movethroughthemenuoptions.
Select Selectamenuoptionorconfirmasetting.
Return Returntopreviousmenu.
UnloadMedia Unloadthelabels.
Pause, Resume Pauseorresumeprinting.
Ifprintingrolltoroll,theprinterpausesfor10seconds,
thenprintsthenextpageandpausesagain.Itwill
continuetoprintandpause.
Cancel Cancelprinting.
Function Description

12 Setting Up the Printer
Afinia
SelectingtheSecurityLevel
Bydefault,theprinterpowersupinsecurityLevel0(operator),whichdoesnotallowchangesto
someprintersettings.FortheinitialPrinterSetup,itisrecommendedthatyouchangethe
SecurityLevelto2(Administrator)beforechangingthosesettings.
Printer Online
CONFIGURATION
1. SETUP
SETUP
2. SECURITY
SECURITY
2. Level 2
(Config)
(Select)
ENTER PASSWORD
Enterthefirstpassworddigitusing
the+or
‐
button,thenpress
Select.Repeatfornexttwodigits.
Authenticatedmessagewill
appearwiththerightpassword
NOTE: DuringinitialSetup,SecuritymayalreadybepresettoLevel2.Thedisplaywill
immediatelygototheLanguagesettingifitis.
1. Onthecontrolpanel,select(
Config
)>
Setup
>
Security
>
Level2
.
2. Enterthe3‐digitpassword(defaultis123).
3. Presstoreturntothemainmenu.
Table3SecurityRestrictions
SecurityLevel RestrictedSettings
Operator(Level0) Language,Reset,LCDContrast,LCDBrightness,
Date/Time,Unit,ServiceStation,Sensor,ExtSignal
Print,AdjustOffset,DHCPSetting,IPSettings
Supervisor(Level1) Reset,Day/Time,DHCPSetting,IPSettings
Administrator(Level2) Norestrictions
Itemsinboldindicatenoaccesstoanentiremenu;othersarespecificfunctions.

Setting Up the Printer 13
Removetapeandpackingmaterials
Removetapes.
bRemovetapesandfoamfrominside
Foam
Foam
a
Removecardboard.
Squeezelatchesto
openclamshell
Pulltabs
Liftoutcardboard
c
1
theprinter.
Keepallfoam
andcardboard
packingmaterials!
Unpacking, Setup, and Installation

14 Setting Up the Printer
Connectpower
Choosedisplaylanguage(optional)
d
e
f
c
b
a
2
Missing Printhead
LANGUAGE
1. English
(Config)
(Select)
(Return)
Forotherlanguages,
press,
LANGUAGE
1. English
Afterconnectingpowerforthefirsttime,press
Configtosetthedisplaylanguageforthecontrol
panelifyouwanttochangefromthedefault
settingofEnglish.
PresstheConfigbutton
PresstheSelectbuttonwhenthecorrect
languageisdisplayed
PresstheReturnbutton
PressthePowerbuttononthecontrolpanel
aPlugpowercableintoprinterandoutlet
bTurnonpowerswitch

Setting Up the Printer 15
Installinkcartridges Installprinthead
a
b
c
3
Missing Printhead
CONFIGURATION
3. PRINTHEAD
PRINTHEAD
2. REPLACE
Waitforprintheadlatchtobereleased.
(Select)
(Select)
Removenozzlecaps.
a
b
cOpenprintheadlatchfully.
d
d
c
4
Donotdiscardthecaps!
Theyshouldbereplaced
iftheprintheadisremoved
fromtheprinter.
Openfrontofprinterandreleasecartridgelatch
Insertinkcartridgeandclosecartridgelatch
Closefrontofprinter
PresstheConfigbutton
Press
untildisplayreads
Printhead,thenpress
Select
Pressuntildisplay
readsReplace,then
pressSelect
OpenTopCover
Donotopenlatchbeforeitisreleased!

16 Setting Up the Printer
Donottouchtheinkcouplings,
electricalcontacts,ornozzles.
inkcouplings
electricalcontacts
nozzles
Nolessthan45°
Removeprintheadfrompackaging.
ef
g
Checkthatinkisflowingthroughthetubes
onbothsidesoftheprinthead(circledabove).
Insertprinthead
Closeprintheadlatch
hCloseprintercover
Slowlyremovetapefromnozzles
Slowlyremovetapefromelectricalcontacts
Removecoverfrominkcouplings
Donotdiscardthecover!
Itshouldbereplacediftheprintheadis
removedfromtheprinter.
Initializationmaytakeseveralminutes.
ThecontrolpanelwilldisplayPrinterOnline
wheninitializationiscomplete.
NOTE:Ifinkisnotflowing,removeprinthead
andwetnozzleswithdeionized/distilledwater.

Setting Up the Printer 17
Loadsamplemedia
5
b
a
c
d
f
g
Slidelabelguidetoedgeoflabel.
Tightenknobfully
e
Flatsideagainstmediaroll.
OpenMediacover
Loosen
tensionknob
RemoveMediastop
InstallMediaroll
Threadmediaarounddancerandintoprinter
CloseMediacover
Waitforprintertoloadmedia.
Insertmediauntilitstops.
Pushmediaroll
againstinnerguide

18 Setting Up the Printer
Printtestlabel
6
Printer Online
(Config)
SamplePQPlot6x4
Requiresinter‐labelgaporcontinuousmedia.
Pressuntildisplay
readsMaintenance,
thenpressSelect
Pressuntildisplay
readsPQPlot,then
pressSelect
Pressuntildisplay
readsPrintTestPage,
thenpressSelect
CONFIGURATION
2. MAINTENANCE
MAINTENANCE
1. PRINT TEST PAGE
PRINT TEST PAGE
2. PQ PLOT
(Select)
Printer Computer
c
d
USB
ConnectUSBcablewhenprompted.
SelectConfiguretoprintusingUSB
andclickNext
Installprinterdriver
7
Beforeinstallingprinterdriver,ensurethatcomputer
meetsminimumsystemrequirements(seeSystem
Requirementsonpage80).
ToconnectprintertocomputerusingUSB
b
aInsertInstallationdiscintocomputer
SelectInstallDriverfromtheInstallationwindow
TopSection:
•Linesaredefinedwithnomissingnozzles
•Linesareprintedinorder:Yellow,Black,Cyan,Black,
Magenta
•Verticaldashedlinesarestraight
MiddleSection:
•Allyellow,black,cyan,black,magentalinesareprinted
•Nocolormixingonthecolorbars
•Numbers1,3,5arevisible
BottomSection:
•Linesaredefinedwithnomissingnozzles
•Linesareprintedinorder:Yellow,Black,Cyan,Black,
Magenta
Overall:
•Nostreakingorsmearing

Setting Up the Printer 19
NETWORK
2. MANUAL
Toconnectprintertonetwork
h
i
j
a
Printer Network
Network
ConnectprintertonetworkusingEthernet
b
cSetDHCPSettingstoManual
NETWORK
2. DHCP SETTINGS
Pressuntildisplayreads
Network,thenpressSelect
Pressuntildisplayreads
DHCPSettings,thenpress
Select.
CONFIGURATION
8. NETWORK
PressuntildisplayreadsManual,
thenpressSelect.PressReturntogo
backtotheNetworkmenu
dSettheStaticIPAddress
STATIC IP
00 0.
0 0 0.0 0 0.0 0 0
EnterthefirstStaticIPdigitusing
the+or
‐
button,thenpress
Select.Repeatfornexteleven
digits.PressReturnoncewhen
complete
NETWORK
3. IP SETTINGS
PressuntildisplayreadsIP
Settings,thenpressSelectthree
times
ePressuntildisplayreadsSubnetMask,
thenpressSelecttwotimes.
EntertheSubnetMaskusingthesame
stepsaswhensettingtheStaticIPaddress
fPressuntildisplayreadsDefault
Gateway,thenpressSelecttwotimes.
EntertheDefaultGatewayusingthesame
stepsaswhensettingtheStaticIPaddress
gPressuntildisplayreadsWinsServer,
thenpressSelecttwotimes.
EntertheWinsServerusingthesamesteps
aswhensettingtheStaticIPaddress
SelectInstallDriverfromtheInstallationwindow
InsertInstallationdiscintocomputer
SelectConfiguretoprintovertheNetwork
andclickNext
IfyouwillbeusingDHCPtosettheIP
Address,skiptosteph.
ToassigntheprinteraStaticIPaddress,the
SecurityLevelmustbesetto2.Pleasesee
SelectingtheSecurityLevelonpage12.

20 Setting Up the Printer
Afinia
IForwardtoejectI
TroubleshootingPrinterSetup
IfMechError2orMechError3appearsonthecontrolpanelduringinstallation,check
thefollowing.
Servicestationisjammed. Ensurethatthecardboardisremovedfrominsidethe
printer.
Servicestationwastilted
duringshipment.
PossibleCause Solution
1. Manuallyopentheclamshelltoitshighestposition.
2. Onthecontrolpanel,select(
Config
) >
Service
Station
>
Eject
. Waitfortheprintertoejecttheservice
station.
3. Turnofftheprinter,beginningwiththepower
buttononthecontrolpanel.Whenthedisplayturns
off,turnoffthepowerswitchonthebackofthe
printer.
4. VerifythattheServiceStationisfreeandcanbe
manuallypulledforwardtothefrontbracket.Ifyes,
proceedtoStep5.Ifnot,contactTechnicalSupport.
5. Aligntheservicestationwiththeguiderailsand
slideitbackintotheprinter.
6. Checkthealignment:thecapontheservicestation
mustbeparalleltotheedgeoftheplaten.
7. Continuepushingtheservicestationwhileyou
manuallyrotatethepositioninggearbackwardsto
movethestationallthewayintotheprintengine.
8. Closetheclamshell.
9. Turnontheprinter.
PositioningGear
Platen
Cap
IBackwardtoinstallI
This manual suits for next models
1
Table of contents
Other Afinia Label Maker manuals

