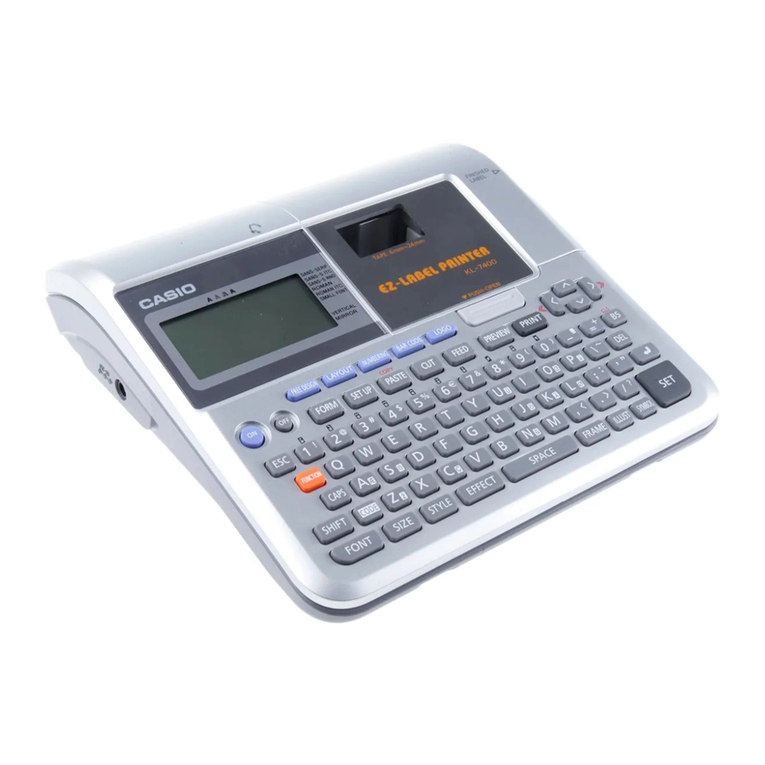
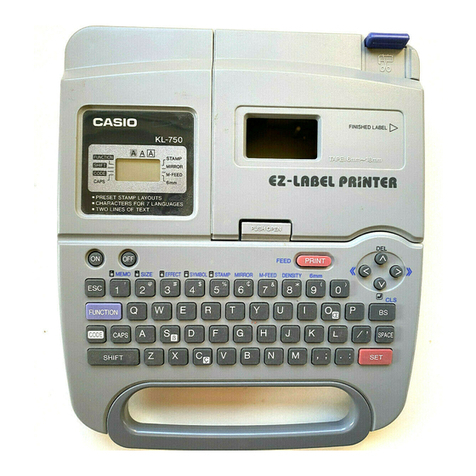
Casio MEP-K10 User manual

User’s Guide
EN
RJA527802-002V02
MEP-K10

Important!
Be sure to keep all user documentation handy for future reference.

E-1
Safety Precautions
Thank you for purchasing this quality CASIO product.
Before using it, be sure to read the following Safety Precautions. Keep the
manual in a convenient location for future reference when necessary.
Danger
This symbol indicates information that, if ignored or applied
incorrectly, creates the danger of death or serious personal injury.
Warning
This symbol indicates information that, if ignored or applied
incorrectly, creates the possibility of death or serious personal injury.
Caution
This symbol indicates information that, if ignored or applied
incorrectly, creates the possibility of personal injury or material
damage.
Examples of graphic markings
indicates something you should not do. The symbol shown here
indicates you should not try to take the unit apart.
indicates something you should do.
Danger
Batteries
Perform the following steps immediately if fluid leaking from
batteries ever gets into your eyes.
1. Do not rub your eyes! Rinse them with water.
2. Contact your physician immediately.
Leaving alkaline battery fluid in your eyes can lead to loss of sight.
Read This First!
x CASIO COMPUTER CO., LTD. shall not be held liable for any loss or
claims by you or any other person or entity that may arise through the use
of this printer.
x Reproduction of this manual in any form, either in part or its entirety, is
forbidden without the express permission of CASIO COMPUTER CO.,
LTD.
x The contents of the manual are subject to change without notice.
x The software is continually being revised and updated. Because of this,
the software supplied to you and the contents of the displays it produces
may be different from those described in this manual, or some items
described in this manual may no longer be available.
© 2013 CASIO COMPUTER CO., LTD. All rights reserved.
x Be sure to read this manual carefully before attempting to use the product
for the first time.
English

E-2
Warning
Smoke, abnormal odor, overheating, and other
abnormalities
Continued use of the product while it is emitting smoke or
strange odor, or overheating creates the risk of fire and electric
shock. Immediately perform the following steps whenever any
of the above symptoms are present.
1. Turn off power.
2. Contact your original retailer.
Batteries
Misuse of batteries can cause them to leak, resulting in
damage to nearby objects, or to explode, creating the risk of
fire and personal injury. Always make sure you observe the
following precautions.
xNever try to take batteries apart or allow them to become
shorted.
xNever expose batteries to heat or dispose of them by
incineration.
xNever mix old batteries with new ones.
xNever mix batteries of different types.
xDo not charge the batteries.
xMake sure the positive (+) and negative (–) ends of the
batteries are facing correctly.
Dropping and rough treatment
Continued use of the product after it has been damaged due to
dropping or other rough treatment creates the risk of fire and
electric shock. Immediately perform the following steps if the
product should ever become damaged.
1. Turn off power.
2. Contact your original retailer.
Warning
Do not disassemble or modify the product.
Never try to take the product apart or modify it in any way.
Doing so creates the risk of electric shock, burn injury, or other
personal injury.
Leave all internal inspection, maintenance, and repair up to
your original retailer.
Water and foreign objects
Water, liquids, or foreign objects (especially metal) getting
inside the product creates the risk of fire and electric shock.
Immediately perform the following steps if liquid or a foreign
object should ever get inside the product.
1. Turn off power.
2. Contact your original retailer.
Do not incinerate.
Never dispose of the product by incineration. Doing so creates
the risk of fire and personal injury due to explosion.
Plastic bag precaution
Never place the plastic bags in which the product comes packed
over your head. Doing so creates the risk of suffocation.
Particular care is required in households where young children
are present.
Do not affix labels to a container to be used in
a microwave oven.
Do not affix labels to any container you plan to use in a
microwave oven. The label material contains metal, which
creates the risk of fire and burn injury when heated in a
microwave oven. It can also cause deformation of the container
to which the label is affixed.

E-3
Caution
Batteries
Misuse of batteries can cause them to leak, resulting in
damage to nearby objects, or to explode, creating the risk of
fire and personal injury. Always make sure you observe the
following precautions.
xUse only batteries that are specified for use with this
product.
xRemove batteries from the product if you do not plan to use
it for a long time.
Keep backup copies of all important data.
Be sure to keep separate copies of important data in a
notebook or some other location. Malfunction of the product,
repairs, and dead batteries can cause data stored memory to
be lost.
Keep heavy objects off of the product.
Never place a heavy object on top of the product. Doing so can
cause the object to lose balance and fall, creating the risk of
personal injury.
Avoid unstable surfaces.
Never place the product on an unstable table, desk, etc. Doing
so can cause the product to fall, creating the risk of personal
injury.
Location
Avoid the locations listed below for the product. Such locations
create the risk of fire and electric shock.
xAreas subject to high humidity and large amounts of dust
xFood preparation areas or other locations subjected to oil
steam
xNear heaters, on a heated carpet, in direct sunlight, in a
closed vehicle parked in the sun, and other areas subjected
to high heat
Caution
Loading and replacing batteries
The springs inside of the battery compartment have sharp
edges. Take care that you do not touch the springs with your
fingers when loading or replacing batteries. Doing so creates
the risk of personal injury.
Tape Loading and Tape Replacement Precautions
The cutter has sharp edges. Do not touch the cutter. Touching
the cutter can cause finger cuts.
Display Screen
xNever push on the display screen’s LCD panel or subject it
to strong impact. Doing so can cause the LCD panel’s glass
to crack, creating the risk of personal injury.
x
Should the LCD panel ever crack or break, never touch the
liquid inside of the panel. LCD panel liquid can cause skin
irritation.
xShould LCD panel liquid ever get inside your mouth,
immediately wash out your mouth with water and contact
your physician.
xShould LCD panel liquid ever get into your eyes or onto
your skin, rinse with clear water for at least 15 minutes, and
then contact a physician.
High temperature precaution
Never touch the print head or other metal objects near the
head. These items become very hot, and touching them
creates the risk of burn injury.
Cutter Precautions
Do not insert your fingers into the cutter at the tape outlet.
Doing so creates the risk of finger cuts and personal injury.
E-4
Important!
xContact a nearby dealer whenever you require servicing.
xNote that the manufacturer shall not be held liable for any loss
or claims by third parties, which may arise out of the use of this
product.
xNote that the manufacturer shall not be held liable for any damages
incurred as a result of data loss caused by malfunctions, repairs, or
interruption of power supply.
xIt is up to the user to keep backup records of important data.
Operating Precautions
Observe the following precautions to ensure that the printer provides you with
the years of trouble-free operation for which it is designed.
xAvoid using the printer in areas exposed to direct sunlight, and in areas
subjected to high humidity, electrostatic charge, sudden temperature
changes, and temperature extremes. Operating Temperature Range: 10°C
to 35°C (50°F to 95°F)
xBattery capacity becomes lower at temperatures of 10°C (50°F) and colder.
This can cause the low battery icon ( ) to appear sooner than normal.
If this happens, move the printer to a location that is within the operating
temperature range (10°C to 35°C (50°F to 95°F)).
xNever subject the printer to strong impact or shock.
xNever allow paper clips, pins, or other similar objects to get inside the
printer mechanism.
xDo not pull on the tape with undue force or try to push it back into the
printer.
xPlace the printer on a level surface when printing. A tilted surface can make
normal printing impossible.
xUnclear printing can indicate a dirty print head. If printing becomes unclear,
use the procedures on page E-14 to clean the print head and rubber roller.
Contents
Safety Precautions ...................................................................... E-1
Operating Precautions ................................................................ E-4
Part 1 Getting Ready................................................................ E-5
Part 2 Inputting Characters and Symbols.............................. E-9
Part 3 Deleting and Inserting Characters............................. E-10
Part 4 Character Size, Text Effects and Character Styles .. E-11
Part 5 Printing......................................................................... E-12
Part 6 Configuring Form Settings......................................... E-13
Part 7 Configuring the Printer Setup.................................... E-14
Part 8 Reference..................................................................... E-14
Appendix ................................................................................. APP-1

E-5
Part 1 Getting Ready
Important!
xBe sure to read this section before attempting to use the printer.
Power Supply
The printer can run on six AA-size alkaline batteries. Be sure to use
alkaline batteries only.
Replacing Batteries
A handy low battery power indicator lets you know when battery power is
getting too low for proper operation. The low battery icon ( ) appears on the
display for about one second if battery power is low when you perform any of
the following operations.
xTurn on the printer
xExecute a print operation
Important!
Batteries can burst or leak and damage your printer if you do not use them
correctly. Note the following important points.
xMake sure that the plus (+) and minus (–) sides of each battery are facing
correctly.
xNever mix batteries of different types.
xNever leave dead batteries in the printer.
xRemove the batteries if you do not plan to use the printer for a long time.
Warning!
xNever use recharged batteries with the printer.
xDo not expose batteries to direct heat, do not short circuit them, and do not
try to take them apart.
xKeep batteries out of the reach of small children. If swallowed, consult
with a physician immediately.
General Guide
Display (LCD)
Tape compartment
Power Key
Turns printer on or off.
Letter keys
Tape compartment cover
release lever
Tape outlet
Battery cover

E-6
To load batteries
Caution
xThe springs inside of the battery compartment
have sharp edges. Take care that you do not
touch the springs with your fingers when
loading or replacing batteries. Doing so
creates the risk of personal injury.
1. Turn off the printer.
2. While pressing at the point on the battery
cover shown in the illustration, slide the cover
in the direction indicated by the arrow and
remove it.
3. Load batteries into the battery compartment.
xBe sure to use alkaline batteries.
xMake sure the positive (+) and negative (–)
ends of the batteries are facing correctly when
you load them.
4. Replace the battery cover.
Turning the Printer On or Off
Press to turn the printer on or off.
x
When you turn on the printer, the tape width selection screen will appear.
Use and to highlight the tape width setting you want and then press .
Auto Power Off Function
If you do not perform any key operation for about six minutes, the printer will
turn off automatically. To restore power, press .
xThe printer will remember any text you input before power turned off.
Loading and Removing Tape
Tape must be loaded in the printer in order to print labels.
Use the tape that comes with the printer or commercially available tape.
To load tape
1. Slide the tape compartment cover release lever in the direction of arrow “a”
in the illustration, and then open the tape compartment cover. At this time,
take care to avoid catching your fingers on the cutter.
Cutter
a
Important!
Do not try to force the tape compartment cover past its normal range of
movement.
Excessive force creates the risk of printer malfunction and damage.

E-7
2. Check the condition of the tape.
xMake sure the tip of the tape is not bent. If it is, use scissors to cut off the
bent part.
Tape
Pull out approximately 11 cm, measured
from the center of the roll to the tip of the
tape.
3. Place the tape into the printer.
Run the tape over the rubber roller (see figure below). Make sure the tape
is seated securely on the bearing.
xWhen loading tape, take care not to touch the cutter. Touching the cutter
can cause finger cuts.
xThe printer head becomes hot during printing. Do not touch the printer head
when loading tape.
Important!
xNever try to push tape back in.
xDo not pull on the tape with excessive force. Doing so will lead to
malfunction of the printer.
xNote that normal printing may not be possible at the leading edge of a new
roll of tape.
xIncorrectly loading the tape can cause malfunction of the printer.
Bearing
Rubber roller
Cutter
Tape
Printer head
xFor 18 mm wide tape, pass the tape between the tape guides as shown in
the figure below.
Tape
Tape guides
xFor 12 mm and 9 mm wide tape, pass the tape inside the tape guides as
shown in the figure below.
Tape
9 mm wide tape
12 mm wide tape

E-8
4. Close the tape compartment cover.
xPress down on the cover until is clicks securely into place.
xDo not pull on the tape or try to push it back after loading it in the printer.
To remove tape from the printer
1. Perform step 1 on page E-6 to open the tape compartment cover.
2. Grasp the tape with your fingers and lift straight up.
xWhen removing tape, take care not to touch the cutter. Touching the cutter
can cause finger cuts.
xThe printer head becomes hot during printing. Do not touch the printer head
when removing tape.
Printer head
Tape Precautions
xLeaving the tape in the printer for long periods can cause unwanted
marks on the tape and deterioration of adhesion, and it can even make
proper printing impossible. Be sure to remove the tape and properly
store it if you do not plan to print on it for a long time.
xThis tape uses thermal paper. Use in the following types of locations
can cause discoloration of the tape, and so should be avoided.
xNear a window, outdoors, or in any other locations exposed to direct
sunlight
xLocations where tape is exposed to high temperatures, rain, or
splashing water
xDo not scrape the printing surface of the tape with your finger nail, metal
objects, etc.
xThis tape uses a re-adherable type adhesive. Depending on the surface
or object to which it is affixed, the tape may detach from the surface or
leave glue residue when removed.
xNote that long term display of this tape can result in discoloration.
xWhen not using tape, store it in a plastic bag or its original box.
xAvoid locations exposed to high temperature, high humidity, and direct
sunlight when storing tape.
xDo not leave tape in a motor vehicle parked in sunlight.
xThe tape is subject to discoloration so use it as soon as possible after
unpacking it.

E-9
Part 2 Inputting Characters and Symbols
Important!
xYou can input up to 80 characters per label. Further input becomes
impossible after you input the 80th character.
Key Name
Tape length
Character size
Character style
Text effect
Shift
Esc
Caps
Space
Accent
Enter/Return
Symbol
Backspace
Setup
Print (Feed)
Print preview
Text orientation
Display Symbols and Indicators
Before getting into actual input, you should first become acquainted with the
symbols and indicators used on the printer display.
CAS OITUPMOCER
••••••••
Shift indicator
(page E-9)
Cursor
Caps indicator
(page E-9)
Accent indicator
(page E-10)
Effect indicators
(page E-11)
Character position marks
Style indicators
(page E-11)
Character size indicators
(page E-11)
Tape length indicators
(page E-13)
Tape width
indicators
(page E-6)
Vertical text
indicator
(page E-13)
Basic Alpha-Numeric Input
Note
xIf you hold down any key, it will repeat its operation or input at high speed
until you release it.
To input alpha-numeric characters
1. Turn on the printer (page E-6).
2. Input the first line of characters.
xTo input upper-case letters, you can use either or . With you must
shift the keyboard for each character. With the keyboard stays shifted
until you press again.
xIf you input a wrong character, press to delete it and input again. See
page E-10 for other details on editing text.
3. When you reach the end of a line of text, press to input a newline
mark.
xA newline operation is indicated on the display by the symbol. This
shows where you changed lines.
xThe maximum number of lines that can be input is one line when the tape
width is 9 mm, two lines when the width is 12 mm, and three lines when the
width is 18 mm.
4. Input the characters in the second line.
5. To print the text that you input, press . For details on printing, see page E-12.

E-10
To input accented characters
1. Press .
2. Press the key that corresponds to the accented character you want to
input.
xThis will display a menu of accented characters.
3. Use and to select the accented character you want and then press
.
Special Symbols
You can also access a menu of special symbols by pressing .
To input special symbols
1. Press the key.
xThis will display a menu of symbols.
2. Use , , and cursor keys to select the symbol you want and then
press .
Part 3 Deleting and Inserting Characters
To move the cursor
xPress to move the cursor to the left, and to move the cursor to the right.
xPress to move the cursor to the up, and to move the cursor to the
down.
xPress and then to make the cursor jump to the beginning (far left) of
the characters on the display.
xPress and then to make the cursor jump to the end (far right) of the
characters on the display.
xHolding down the , , or cursor key moves the cursor at high speed.
To delete characters
1. Use and to move the cursor to the right of the character you want to
delete.
2. Press to delete the character to the left of the cursor position.
To insert characters
1. Use and to move the cursor to the location where you want to insert
the characters.
2. Input the new characters.
xThis inserts the characters at the current cursor position.

E-11
Part 4
Character Size, Text Effects and Character Styles
Character Size
You can select from among four character sizes: extra large, large, medium,
and small.
The following shows examples of each.
Extra large
Large
Medium
Small
Character size changes are applied to printed text only. The size of displayed
text does not change.
Important!
xThe maximum printable character size depends on the size of the tape
loaded in the printer and the number of lines of text to be printed.
To specify a character size
Press .
xEach press cycles to the next available character size.
Text Effects
There are three text effects that you can assign: boxed text, shaded and
boxed text, underlining. The following shows examples of each.
Text Effect Indicator Sample
Boxed text
Shaded and boxed text
Underlining
Text effect changes are applied to printed text only. The appearance of the
displayed text does not change, but the text effect indicators will show you
when a text effect is being used.
To specify a text effect
Press .
xEach press cycles to the next available text effect.
Character Styles
There are three character styles that you can assign: normal, bold, and
outline. The following shows examples of each.
Style Indicator Sample
Normal None
Bold
Outline
Character style changes are applied to printed text only. The appearance
of the displayed text does not change, but the character style indicators will
show you when a character style is being used.
To specify a character style
Press .
xEach press cycles to the next available character style.

E-12
Part 5 Printing
Printing a Label
Printing a label is quick and simple. You also can feed the tape any time you
need to insert a blank space due to a partially printed label, etc.
Printing Precautions
Keep the following points in mind when printing.
Important!
xNever remove the batteries while printing is in progress.
xNever open the printer’s tape compartment cover while printing is in
progress.
xDo not touch the tape coming out of the printer until printing is stopped.
xBefore printing, check to make sure there is enough tape loaded in the
printer so it does not run out during printing. If the printer runs out of tape
while printing, press to stop printing.
xMake sure that nothing is blocking the printer’s tape outlet. Blocking the
tape outlet can cause tape jams and malfunction of the printer.
To display the print preview
1. Press .
xThe print image that appears scrolls on the display for easy viewing.
2. To stop the scrolling, press . Press again to restart scrolling.
3. Print preview will be exited automatically after you reach the end.
xTo exit print preview part way through, press .
To print a Label
Important!
Before printing, load tape into the printer and check to make sure nothing
is blocking the tape outlet (page E-5). Also, be sure to read the information
under “Printing Precautions”, to the left.
While the text input screen is displayed, press .
This starts the print operation.
xTo stop printing of a label part way through, press .
To cut the tape
Holding the tape between your fingers as shown in the illustration, pull it up
against the printer’s tape cutter to cut it.
Important!
Check to make sure that printing is completely stopped before cutting the
tape. Cutting the tape while printing is in progress can cause tape jams and
damage to the printer.
To affix a label to a surface
1. Use scissors or some other implement to trim the label to the required
size, if necessary.
2. Affix the label to the desired surface.
xAffixing a label to a surface may cause adhesive to remain on the surface
when the label is removed.

E-13
Important!
Do not affix labels to the types of surfaces listed below.
xSurfaces exposed to direct sunlight or rain
xHuman or animal skin
xWalls, utility poles, and other surfaces located on other people’s property
xContainers used for heating in a microwave oven
Unsuitable Surfaces (Label may not stick.)
xRough surfaces
xSurfaces that are wet, oily, dusty, or covered with other matter
xSpecial plastic materials (silicon, polypropylene, etc.)
To feed the Tape
Press and then (feed).
This will feed the tape approximately 12 mm.
Part 6 Configuring Form Settings
Specifying the Text Orientation
Use the procedure below to select printing of either vertical or horizontal text.
Text Orientation Indicator Sample
Vertical
Horizontal None
To specify the text orientation
Press .
xEach press toggles between vertical and horizontal text printing.
Specifying the Tape Length
You can specify the tape length for printing, which will also cause the length
of the printed text to change. Available settings are 100% (normal tape
length), 75%, or 50%.
Tape Length Indicator Sample
100%
75%
50%
To specify the tape length
Press .
Each press cycles the setting in the sequence; 100% ➝75% ➝50%.

E-14
Part 7 Configuring the Printer Setup
The printer has a SET UP screen that you can use to configure the display
contrast and the print density setting.
To configure the printer setup
1. Press .
2. Use and to select (display contrast) or (print density), and
then press .
3. Use the cursor keys to change the setting of the currently selected setup
item.
When this setup
item is selected:
Use these cursor keys
to change the setting:
Display contrast and
Print density and
4. After the settings are the way you want, press to apply them.
Part 8 Reference
User Maintenance
Print quality will suffer if the printer head and/or rubber roller become dirty. A
dirty tape cutter will result in poor cutting performance. Periodically perform
the user maintenance steps below to clean the printer head, rubber roller, and
tape cutter.
Important!
Use a cotton swab or some other similar soft object to clean the printer head,
rubber roller, and tape cutter. Use of an ultra thin swab is recommended.
To clean printer components
1. Perform step 1 on page E-6 to open the tape compartment cover.
xIf there is tape loaded in the printer, remove it.
Important!
The printer head is hot during and immediately after printing. Be sure to allow
enough time for it to cool before removing the tape.
2. Moisten the swab with alcohol and then use it to wipe the printer head,
rubber roller, and tape cutter surfaces. At this time, do not directly touch
the tape cutter. Touching the cutter can cause finger cuts.
Take particular care when wiping the
contact areas of the roller and printer
head.
Tape cutter
Printer head
Rubber roller

E-15
xRotate the rubber roller by pressing and then (feed). (page E-13)
xYou can also use a commercially available cassette tape recorder head
cleaning kit for cleaning.
Cleaning the Exterior of the Printer
Moisten a soft cloth with water, completely wring out any excess, and then
wipe the exterior of the printer. Do not use benzene, alcohol, thinner, or
any other volatile agent, which can damage the printer.
Troubleshooting
Should you experience any problem with printer operation, take the actions
described in the table below.
Symptom Cause and Required Action
● Nothing appears on
the display.
• There is a problem with screen brightness.
➜ Adjust screen brightness. (page E-14)
• Batteries are low, or you are using non-
specified batteries.
➜ Use specified batteries, or replace batteries
with new ones. (page E-5)
• Batteries are not loaded correctly.
➜ Correctly reload batteries. (page E-5)
● Nothing is printed. • Your label input contains only spaces.
➜ Input the text you want to print.
• The printer head is overheated.
➜ Wait for a while and try printing again later.
● Printing is unclear.
● Cannot produce good-
quality printing.
● Printing is dim.
• Dirt, debris, or other foreign matter on the
printer head and/or rubber roller.
➜ Clean the printer head and rubber roller.
(page E-14)
• Tape is not loaded correctly.
➜ Correctly reload the tape. (page E-6)
• Batteries are low.
➜ Use specified batteries, or replace batteries
with new ones. (page E-5)
• The print density setting is not correct.
➜ Adjust the print density setting. (page E-14)
● Printer turns off during
printing.
• Batteries are low, or you are using non-
specified batteries.
➜ Use specified batteries, or replace batteries
with new ones. (page E-5)

E-16
Symptom Cause and Required Action
● Tape does not come
out of printer when
is pressed.
• The tape compartment cover is not closed
securely.
➜ Securely close the cover. (page E-8)
• The printer is out of tape.
➜ Replace the tape with new tape (available
separately). (page E-6)
• Tape is jammed.
➜ Remove the tape from the printer, and then
pull out the jammed tape with your fingers.
Cut the pulled out tape with scissors, etc.
After that, reload the tape. (page E-6)
Important!
Do not do any of the following while printing is
in progress.
xBlock the tape outlet
xTouch tape coming out of the printer
xOpen the tape compartment cover
xRemove the printer batteries
• Batteries are low.
➜ Use specified batteries, or replace batteries
with new ones. (page E-5)
● Tape will not cut. • You are not performing the tape cut procedure
correctly.
➜ Cut the tape (page E-12).
• The tape cutter is dirty.
➜ Clean the tape cutter (page E-14).
• The tape cutter is dull.
➜ Have the tape cutter replaced by your retailer
or your local CASIO service center.
• Tape is jammed in the tape outlet.
➜ Remove the tape from the printer and remove
the jammed tape. (page E-6)
Symptom Cause and Required Action
● Label does not adhere
properly.
• The location or object where you are affixing
the label is not suitable.
➜ Choose a surface that is smooth, free of
water and/or oil, clean, etc. (page E-12)
● Blank label margins are
too large.
The printer is designed to always print labels
with a blank margin.
Error Icons
Error Icons Cause and Required Action Page
• You are attempting to input text that
exceeds the maximum input limit for a
text label.
➜ Re-input the text, keeping it within the
maximum limit.
E-9
• You are attempting to print more lines
than the number allowed for the tape you
are using.
➜ Reduce the number of lines or change
to a different tape width.
E-10
E-6
• You are attempting to print to a tape that
exceeds the maximum allowable length
of approximately 30 cm.
➜ Make the tape length shorter.
E-13
• You are attempting to advance to the
next operation when there is no text
input.
➜ Input text before performing the next
operation.
E-9
• The printer cover is not closed securely.
➜ Securely close the printer cover.
E-8
If the steps described above do not clear
the error icon, contact your retailer or your
nearest CASIO service center.
—

E-17
Error Icons Cause and Required Action Page
• Consecutive print operations caused the
printer to overheat.
➜ Wait for a while and try printing again
later.
—
If the steps described above do not clear
the error icon, contact your retailer or your
nearest CASIO service center.
—
• Batteries are low.
➜ Replace batteries with new ones
(commercially available).
• You are using the printer in an area where
temperature is below 10°C (50°F).
➜ Use the printer within the allowable
operating temperature range of 10°C to
35°C (50°F to 95°F).
E-5

E-18
Specifications
Model: MEP-K10
Input
Keyboard Layout: Typewriter (QWERTY)
Number of characters: 80
Character Types
Alpha (English and other languages): 151
Numbers: 10
Symbols: 99
Display
Type: Liquid crystal display
Character matrix: 96 u16 dots, 16 columns u2 lines
Printing
Type: Thermal
Resolution: 96 dots/200 dpi
Width: Approximately 12 mm maximum
x6.5 mm for 9 mm wide tape
x9.5 mm for 12 mm wide tape
x12 mm for 18 mm wide tape
Length: Approximately 30 cm maximum
Speed: Approximately 12.5 mm/second
Print Character configuration: 48 u48-dot bitmap font
Character font: Sans-serif
Character spacing: 0 dots (fixed)
Print Functions:
x
Printing: Auto fit, horizontal, vertical
x
Number of print lines: 1 with 9mm wide tape
2 with 12mm wide tape
3 with 18mm wide tape
x
Character styles: Normal, bold, outline
x
Text effects: Box, shading, underline
General
Power supply: Six AA-size alkaline batteries
Power consumption: 9W
Auto Power Off: Approximately six minutes after last key operation.
Dimensions: 59(H) u118(W) u184(D) mm (2
5/16"H u4
5/8"W u7
1/4"D)
Weight: Approximately 365 g (12.9 oz) excluding batteries
Ambient Temperature: 10°C to 35°C (50°F to 95°F)
Battery Life
Under normal conditions, new batteries should be able to print
approximately two rolls of 18 mm tape.
• Battery life is shortened by printing text or images that contain a lot of
black areas, printing in cold environments, and storing the printer for
long periods with the batteries left inside.
Table of contents
Other Casio Label Maker manuals

Casio
Casio KL-2000 User manual

Casio
Casio KL-7200 User manual

Casio
Casio KL-P350W User manual

Casio
Casio KL-750E User manual

Casio
Casio KL-120TH User manual

Casio
Casio MEP-PC10 User manual

Casio
Casio KL-120 User manual

Casio
Casio KL-780 User manual

Casio
Casio KL-100 User manual

Casio
Casio LABEL IT! KL-BT User manual

Casio
Casio KL-8100 User manual

Casio
Casio KL-8200 User manual

Casio
Casio KL-7000 User manual

Casio
Casio KL-100E User manual

Casio
Casio LPCW-100 User manual

Casio
Casio KL-7400 User manual

Casio
Casio KL-8200 User manual

Casio
Casio KL-8700 User manual

Casio
Casio CW-L300 - Disc Title Printer B/W Thermal... User manual

Casio
Casio KL-70E User manual