Agrident APR500 User manual

APR500
With
from

Contents
Controlling the APR500
Function Menu
Operation
Speed Mode
Task Mode
Setup
DB Lookup View
DB VID (Visual ID) View
Speed Mode
Task Mode
Task Mode (Advanced)
APR Tasks
Lists of Tasks Available
1. Add/Re-Tag/Move (Death/Purchase/Sale)
2. Birth or Abortion
3. Comments
4. Fostering
5. Groups (Batch/Feed)
6. Medicine
7. Temporary Movement
8. Tupping/Scanning
9. Weight/Muscle Depth
Alerts
Synchronising with Select Sheepware on PC
AWR/APR Link Software
Download Task Lists
Task Mode
Database Mode

Controlling the APR500
EID Read Head
Attach Extension Wand Here
(optional)
Battery Status
Time
Date
Button A Corresponds Button B Corresponds
To DB Lookup View To DB Visual ID View
Arrow Pad/Enter Key
On/Off Function Key
Back Key
Number Pad
Operation
Speed Mode
Task Mode
Setup

Function Menu
Operation –used to set the function of the Hotkeys
1. Hotkey Configuration
a. Hotkey A
i. Hotkey Mode
ii. Action code list
iii. DB Lookup item
b. Hotkey B (as above)
Speed Mode –allows the reader to behave as a wand type reader to record a list of
tag numbers or a group of animals with an Action code:
1. Start Speed Mode
2. New Group
3. Action Code
a. Purchase
b. Sale
c. Reconcile
d. Tick
Task Mode –allows the user to record a series of common tasks:
10. Add/Re-Tag/Move (Death/Purchase/Sale)
11. Birth or Abortion
12. Comments
13. Fostering
14. Groups (Batch/Feed)
15. Medicine
16. Temporary Movement
17. Tupping/Scanning
18. Weight/Muscle Depth
Setup –allows the user to customize the reader’s settings:
1. Display
a. Switch off time
b. Illumination
i. Backlight off time
ii. External Power options
c. Contrast
2. Volume
3. Printer Setup
a. Printer Type
b. Interface
c. Search Bluetooth printer
4. Battery Info
5. Advanced Setup
a. RFID Settings
i. Double Read

DB Lookup View
Database (DB) Lookup View is a trimmed down version of the full animal record card,
containing some of the most critical information about a particular animal.
To use this feature, simply press Hotkey A, when close to an animals EID tag and the
information is instantly displayed. Scroll through the various details using down and
up arrows. The information displayed is as follows:
1. ALERT: (if an animal has an active alert, this will be displayed when the record is shown, together with an
audible beep)
2. EID/Farm Tag
3. Visual ID farm tag (if used or last 5 characters of Dept Tag if no farm tag used)
4. Alert (if one has been set)
5. Flock (if more than one flock on system)
6. Breed/Type/Sex
7. Batch
8. Lambing Details (Lamb Crop, Lambing Date, Number Alive, Number Dead)
9. Lamb 1 & Lamb 2 Details (last 5 characters of tag number, plus SOLD if lamb has been sold)
10. Lamb 3 & Lamb 4 Details (last 5 characters of tag number, plus SOLD if lamb has been sold)
11. Due to Lamb From & Due To Lamb to (sheep may have a service range entered, so the due
dates are shown as from and to)
12. Dam of animal (Mother)
13. Sire of animal (Father)
14. Comment (Shows the last comment entered for an animal)
15. Last weight, Days (between 2 dates shown), Previous weight
16. Last treatment date and illness
2. Use the
Down/Up
Arrows
To scroll
through the
various
information
1. Press
Hotkey A
when close
to an
animals
EID tag

DB Visual ID (VID) View
DB VID View allows you to look up/search for an animal by its Visual ID.
Press Hotkey B, then either use the down/up arrows or type in a number/part of a
number using the number pad to find the animal you are looking for.
Once you find it, press the enter key. You can then use the down/up arrows to scroll
through the animal record card. The information displayed is as follows:
1. ALERT: (if an animal has an active alert, this will be displayed when the record is shown, together with an
audible beep)
2. EID/Farm Tag
3. Visual ID farm tag (if used or last 5 characters of Dept Tag if no farm tag used)
4. Alert (if one has been set)
5. Flock (if more than one flock on system)
6. Breed/Type/Sex
7. Batch
8. Lambing Details (Lamb Crop, Lambing Date, Number Alive, Number Dead)
9. Lamb 1 & Lamb 2 Details (last 5 characters of tag number, plus SOLD if lamb has been sold)
10. Lamb 3 & Lamb 4 Details (last 5 characters of tag number, plus SOLD if lamb has been sold)
11. Due to Lamb From & Due To Lamb to (sheep may have a service range entered, so the due
dates are shown as from and to)
12. Dam of animal (Mother)
13. Sire of animal (Father)
14. Comment (Shows the last comment entered for an animal)
15. Last weight, Days (between 2 dates shown), Previous weight
16. Last treatment date and illness
1. Press
Hotkey B, and
then search for
an animal, by
scrolling down
/up or typing in
a number with
the number pad
2. Use the
Down/Up
Arrows
To scroll
through the
various
information

Speed Mode
Speed Mode allows the APR500 to behave as a wand/stick type reader for rapid
reading of tags.
To use Speed Mode: Press the ‘Function’Key, Choose ‘Speed Mode’, and then ‘New
Group’.
You will be asked to enter a group name: Default is Group 1, then increasing in
sequential order for each subsequent group. You may enter your own name if you
wish. To enter letters, press the number key more than once to cycle through the
available letters e.g. for a ‘G’, press the number ‘4’ twice.
You are now ready to use Speed Mode. Select ‘Start Speed Mode’ from the menu.
Simply hold the reader within range of the ear tags and the reader will read them
(giving an audible 4 beeps if successful). You don’t have to press any buttons. The ID
count increases with each tag read and the last tag read is displayed on screen.

Task Mode
Task Mode allows the user to record a series of common tasks about an animal.
To use Task Mode, press the ‘Function’ key, choose ‘Task Mode’ and then choose the
type of task you want to record. You can choose between:
1. Add/Retag/Move (Death/Purchase/Sale)
2. Birth or Abortion
3. Comments
4. Fostering
5. Groups (Batch/Feed)
6. Medicine
7. Temporary Movement
8. Tupping/Scanning
9. Weight/Muscle Depth
Once you choose the type of task, you will be presented with 4 more options:
1. New Record –Begins recording of
chosen task
2. Show Capacity –shows number of
records stored and number of records
free
3. Select Task –returns to task selection
screen
4. Browse Datasets –allows you to view
any saved recordings and edit them if need be.
Example –to Add a single animal.
Choose Task 1 >
New Record >
Choose Add Animal >
Choose Single >
You can check to see if you have already entered a particular animal by Selecting ‘Yes’ for
‘Lookup Database’ >
Enter a Farm Tag >
Press Enter key to read an EID Tag >
Choose animal Type (Lamb/Ewe/Ram/Hogget) >
Choose animal Sex (Ewe/Ram/Wether) >
Enter Date of Birth using the number pad >
Example –to record a Weight.
Choose Task 9 >
New Record >
Enter a Farm Tag or skip and Press Enter key to read an EID Tag (or both) >
Use number pad to enter a weight in kilograms >
Use number pad to enter muscle depth in millimetres >
Use number pad to enter fat depth in millimetres >
Use number pad to enter condition score >
Use number/letter pad to enter comment >
Press Enter key to confirm.

Task Mode (Advanced)
APR Tasks
The following lists from the PC software are used as selection lists in the APR. It is
best if they are set up first before synchronising
Breeds
Customers (used for both sales and as record of death disposal place)
Death Reasons
Illnesses
Locations (for temporary movements)
Medicine Administrators
Medicine administration methods
Medicine Batch Numbers (these get entered in the PC software when medicines are
purchased)
Medicines
Suppliers
List of Tasks available:
1. Add/Retag/Move
a. Add Animal
i. Single / Multiple
Single - allows individual animals to be added
Option is given for database lookup to enable user to check if animal already
exists
User can enter a farm tag (short) and / or EID
Selection for animal type, sex. Date of birth
Multiple –fields for farm tag and EID are hidden. Other fields are displayed.
Program will go into Speed Mode and multiple sheep may be entered, each a
clone of the first, apart from the EID
b. Retags
i. Both tags lost / Correlate
Both tags lost - will create a new animal –much the same as add animal, except
the Department of Agriculture flock records will indicate entry as ‘Retag, both
tags lost’
Both tags lost will allow Single or Multiple selection. Single allowing animals to
be entered as individuals, multiple will trigger Speed Mode which will make each
animal a clone of the first, apart from the EID
Correlate –will allow user to enter a new farm tag and / or a new EID. Then
user can enter old farm tag / or old EID –if old farm tag is left blank, EID field
will be displayed, otherwise it will be hidden
Correlate does not have a Multiple option as each animal must be linked back to
an existing animal, either by farm tag or by EID
c. Death
i. Single / Multiple. Single will allow each animal to have a different reason for
death (selection list) and different disposal place (selection list)
Multiple will trigger Speed Mode and all animals recorded will be allocated the
same reason for death and disposal place
d. Purchase
i. Single / Multiple. Single will allow each animal to have a different type, sex, date
of birth, supplier (selection list).

Multiple will allow user to enter type, sex, date of birth, supplier and then Speed
Mode will be triggered where all the animals scanned will be allocated the same
details automatically. Each will be a clone of the first apart from EID
e. Sale
i. Single / Multiple. Single will allow each animal to be entered with different
customer (selection list).
Multiple will trigger Speed Mode and sell all animals to the same customer
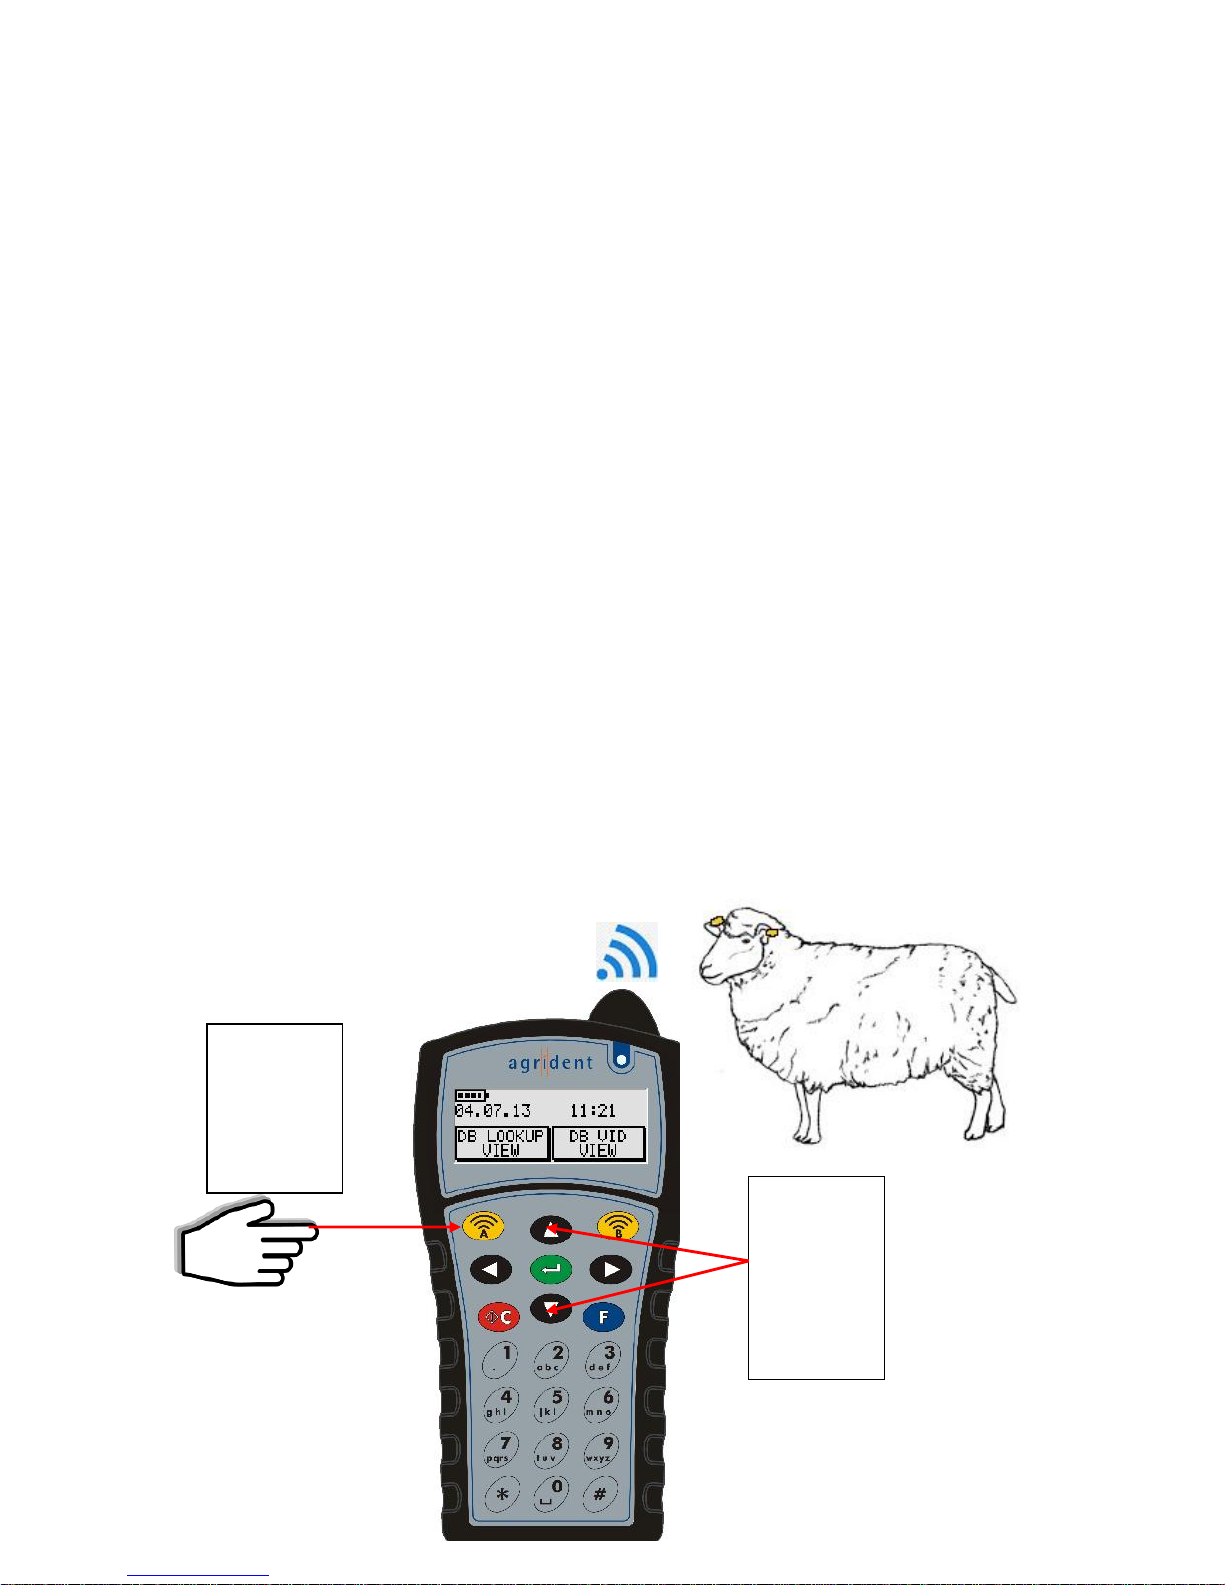
2. Birth or Abort
User can select Dam by either Farm Tag or EID. EID is only shown if farm tag is left empty.
User enters lamb details, including date of birth, Breed (selection list), Lambing Difficulty
(selection list), Birth Type (selection list). **Selection has 5 options, single, twin, triplet,
quad, or aborted **. Aborted will be picked up during synchronisation and trigger sheep
lamb crop to be increased with the event recorded as an abortion.
Any other choice for Birth type will allow for each lamb, sex (selection list), Lamb size
(selection with 3 options, small, medium, large which will be converted to 2.5, 4 and 5.5 kg
respectively during sync), Lamb Farm Tag, Lamb EID, Sire (selection list of possible fathers –
rams must be set to ‘Used for breeding’ in their record card to be in this list in the PC
software) , Eye problems, Comment
3. Comments
a. Single / Multiple. Single allows user to enter a comment for each animal. Animals
identified by Farm Tag or EID –EID is not shown if Farm tag is entered. Comments
may be 20 characters long. Press key repeatedly to get the alphabetic letters
Multiple –user enters a comment, then Speed Mode is triggered which will allow many
animals to have the same comment entered with automatic EID scanning
4. Fostering
Lamb may be identified by either Farm tag or EID
Foster mother may be identified by either Farm tag or EID
synchronisation will find the original mother and record the lamb as having been fostered off
Comment may be entered which will become part of the general comments report in the PC
program
5. Groups
a. Single / Multiple
i. Batch / Feed. Sheep may be added or removed from batch or Feed groups.
Both are selection lists which must be set up in the PC before using the APR for
group changes. Single will allow sheep to be added to different groups. Multiple
will trigger Speed Mode and allow a batch of sheep to be added to or removed
from the same Batch or Feed group
6. Medicine
a. Single / Multiple. Data to be entered can be Farm Tag (in single mode), EID,
Administrator (selection list), Drug used (selection list), Batch number for drug
(selection list), Illness (selection list), Quantity, the number of days drug is to be given,
Method of treatment (selection list).
Up to 3 drugs may be recorded. At the end of drug 1, entry, user is prompted for
another drug (2) and at end of drug 2 entry details, user is prompted for another drug
(3)

7. Temporary Move
a. Single / Multiple. Allows user to record temporary movement of sheep to a new location
(selection list)
8. Tupping / Scan
a. Single / Multiple
i. Pregnancy Scan / Service
Pregnancy scan allows user to record pregnancy scanned number of lambs
ii. Tupping will allow user to record up to 3 rams used simultaneously. These are
not in a selection list. User must enter either farm tag or scan the EID of the
ram. User must ensure the ram is set up in the PC software with a useful farm
tag code if this is the preferred method for identification and the correct farm
tag code must be entered for this event to be linked to the correct ram
9. Weight / Muscle
This will allow weight, muscle depth, fat cover, condition score and a comment to be entered
for each animal. Items may be left blank. If events occur on different days, for example
animal is weighed on 1st September and scanned for muscle and fat on 2nd September, the
synchronisation to PC combines these into one record –weights recorded within 7 days of
muscle and / or fat scan will be combined in the one record on the PC.
Alerts
Most of the above tasks will show ALERT if an alert has been set in the PC.

Setting up Select Sheepware to work with the APR500.
Normally, TGM technical support will do this part for you by internet connection, using
Teamviewer.
Once this has been set up, it’s unlikely you will need to change these settings.
Open Select Sheepware on your PC.
Click on ‘System’, then ‘Default Settings/Flock Names’ then ‘Default Settings’.
Choose the ‘Electronic ID Tags’ Tab.
Change setting as shown below

To Synchronise the APR after recording:
Click on the ‘EID’ Tab in Select Sheepware and choose ‘Sync Handheld’
The synchronisation will begin and each task will be transferred one at a time.
click EID, -> Sync handheld -> Agrident
You’ll get this
Then this
Click to Save and exit

You’ll get this
When finished. You’ll get this – Click Yes to erase all taskmode data.
Then this
Then this –click on Yes –Speedmode allows reader to behave like a wand to get a list of eid
numbers read in quickly. Having processed the downloaded speedmode data the reader speedmode
memory needs to be cleared.
Normally after a successful sync, this clears the reader ready for the next batch of recording. It also
copies back the lists of breeds, rams, medicines etc.

AWR/APR Link Software
AWR Link for wand readers will also work for handheld readers such as
the APR500. Connect the reader to the computer via the cable.
-Download Tag Lists
-Open AWR Link
-Click on Download Tag Lists to download a list of tag numbers.
-Then click on Download Data from Wand

-The AWR Link program will automatically connect to the reader,
provided it is switched on at this stage.
-If connected, there will be a green indicator shown.
-You will be prompted to save the file of EID numbers downloaded from
the reader. Please choose a suitable location to save the data. In the
example below, a folder named AWRLink has been selected (a sub folder
in My Documents)
-The file name will be AWR + Date + Time.txt
e.g. AWR 04_12_15_21_09.csv
-Click on Save to save the file. You may choose where to save it.

-It is possible to choose from 3 different lists:
1. All tags
2. Last group of tags read
3. A selected group of tags
** All tags are shown in UK or IE format IE04…. Or UK…. **
1. All Tags sorted within group by tag –lists all tags read. Sorted in
0rder of tag number within each group

2. Tags in last group
3. Tags in selected group
-To print the currently selected list, click Print Selected List

-To open a previously saved file, click on Open a saved file
-To delete all data from the reader click on Delete All Data from Wand
**This is not reversible and once the data has been erased it is
completely gone. The downloaded file will still be in the location it
was saved in, but the reader will be empty of all data.**
-You will be prompted ‘Do you want to delete all data from the wand’
-Click Yes or No as appropriate

-Two other items of note
-If you do not want the date and the time shown, then remove the tick in
the checkbox for include date
-If you do not want the file saved in spreadsheet format, then remove the
tick from the checkbox Save as csv. File will then be saved in .txt Notepad
format.
-Click on Close to exit from Tag Lists mode
Other manuals for APR500
4
Table of contents
Other Agrident Scanner manuals