•Make sure your paint is suitable for spraying. (Refer to paint manufacturer specifications)
•Keep all the air tools disconnected from the air supply when not in use.
4. GETTING STARTED
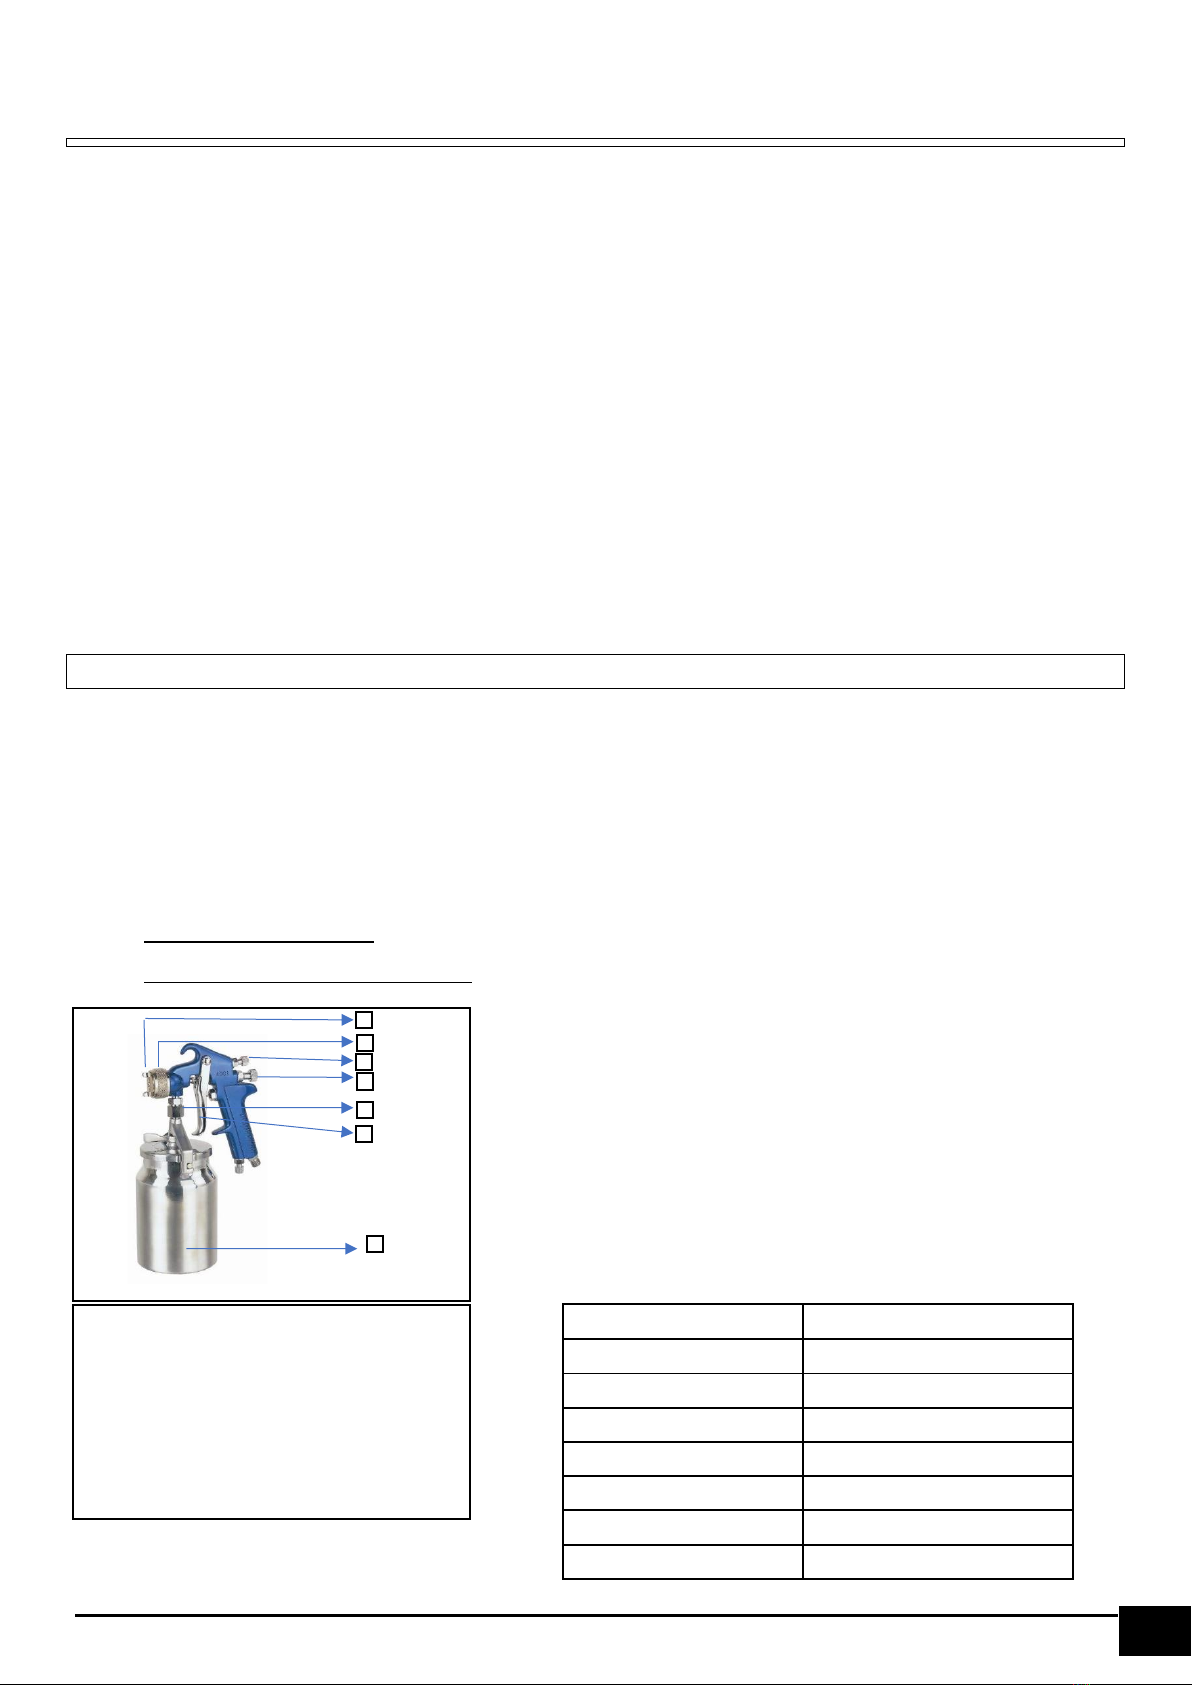
4.1 ASSEMBLY
•The position of the Air Cap Horns (1) will determine the spray pattern. To rotate the Air Horns, loosen the Air
Cap, rotate the horns to the desired pattern and tighten
•Check to see that all nuts & bolts are tight.
•To ensure there are no unwanted particles entering the spray gun, blow out some of the air from the air
hose before connecting it to the spray gun.
•The spray gun has been treated with an anti-corrosive agent, before leaving the factory and must therefore
be flushed out with thinners, before use
•Important: Ensure that the Air Volume Control Knob (7), is open by turning it counter clockwise. Whilst
depressing the trigger partially, open (7) above, until desired airflow is obtained
Note: When using an Inline Air regulator, fully open the Air Volume Control Knob (7) and adjust the desired air
flow on the regulator’s adjustment knob.
4.2 GENERAL
•Pressurized air can be dangerous. Ensure you fully understand all the precautions relating to the use of your
air compressor and a compressed air system.
•Inspect the condition of your equipment. Check your air tools and air compressor regularly for damaged
parts.
•Carefully note when dusting your work area. This can create airborne particles that will put you and others at
risk of injury.
•Avoid trying to stop a whipping hose. The force of the hose can cause injury or damage. Shut the air at the
main valve and wait for hose to settle.
•Do not create trip hazards with air hoses. Suspend or guard hoses with boards.
•Isolate and bleed all air-lines and hoses before disconnecting. To disconnect air-lines under pressure is
hazardous.
4.3 OPERATING INSTRUCTIONS SUCTION CUP SPRAY GUN
4.3.1 GENERAL INFORMATION
•This spray gun is suitable for most types of paints (ensure that your paint is suitable for spraying, check paint
supplier details for thinning paint)
•The spray gun is suction fed with paint from the paint container.
•The air that flows through the air cap draws paint into the nozzle chamber, where it is atomized and pushed
forward to create a spray.
•An air compressor with 100L tank with motor power of min 2.5 HP (1.8kW) that can deliver a minimum flow
rate of 85 - 113L/min (3-4 CFM) is recommended.
4.3.2 BEFORE PAINTING
•Thin the paint to the specified viscosity for spraying according to the paint manufacturer’s instructions. The
gun is already equipped with a gravity filter.
•Recommended to fill the paint cup no more than ¾ full. Cover the cup with the lid and keep clean and free
from dried paint flakes.
•Always keep the container vent clear to avoid an air lock restricting paint flow.